Category: HOME

  • 4 Design Tips To Ensure Thermal Comfort In Homes

    4 Design Tips To Ensure Thermal Comfort In Homes

    These days, do you keep waking up in the middle of the night shivering?

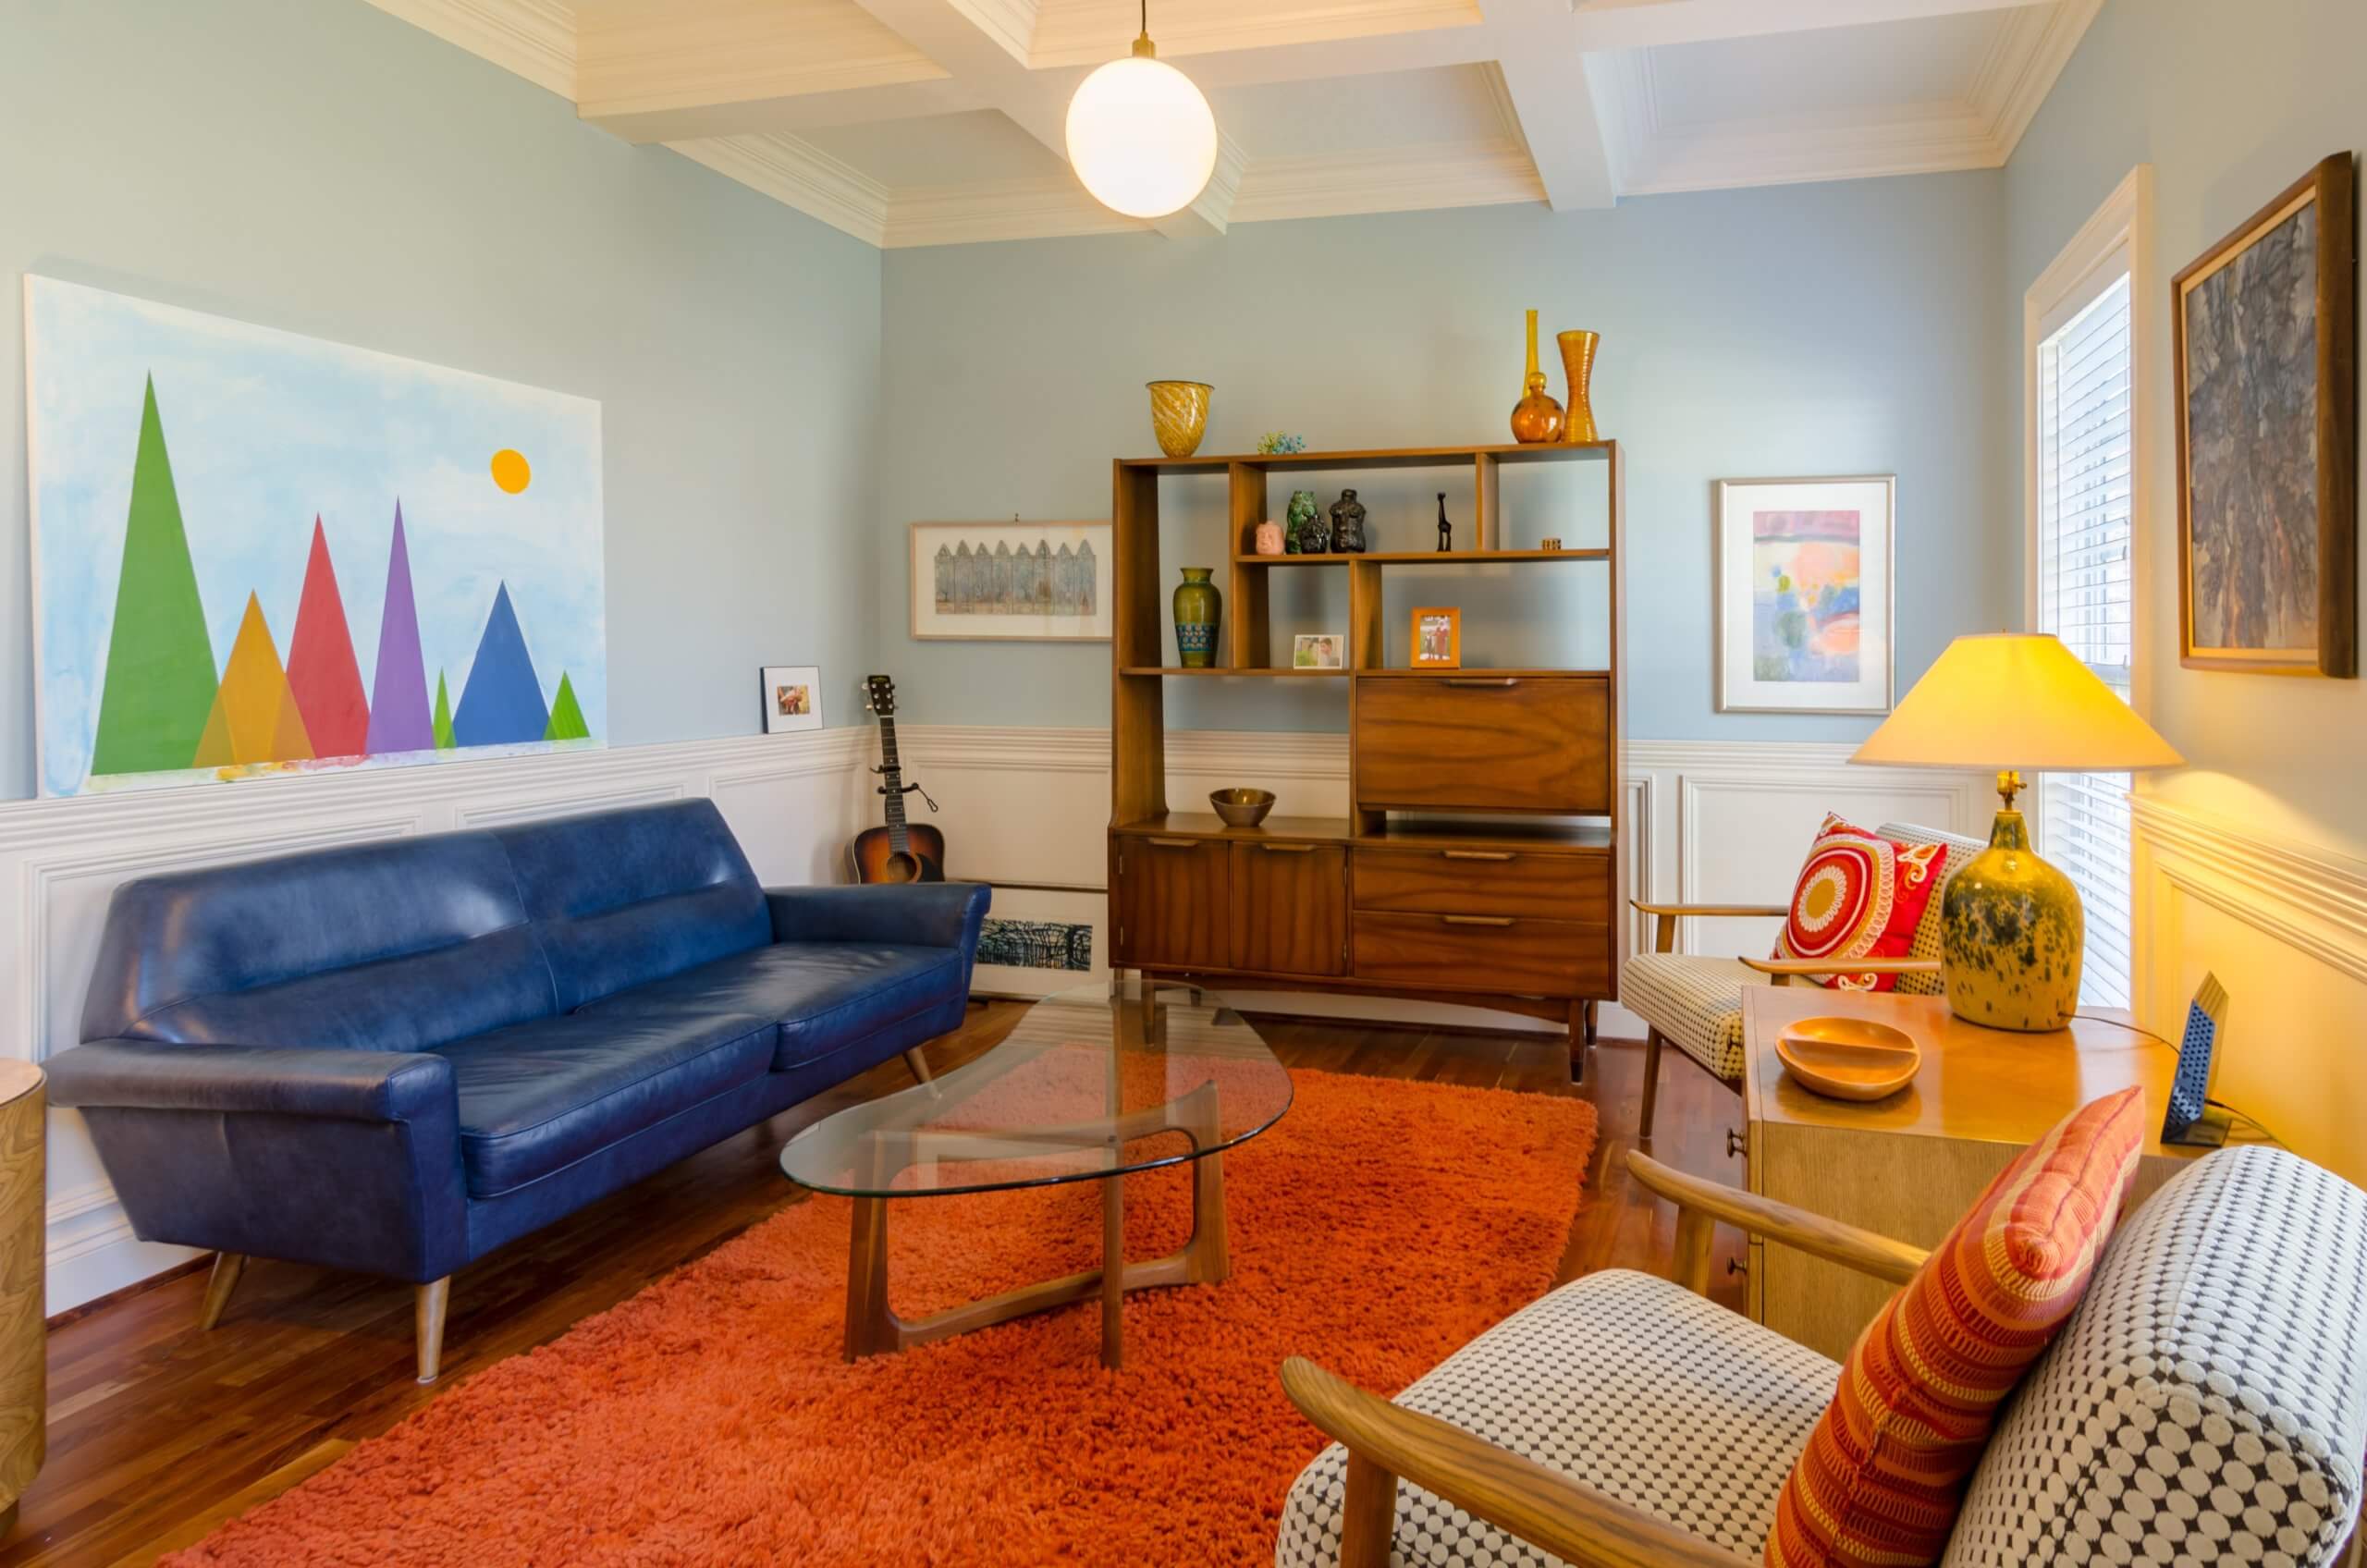
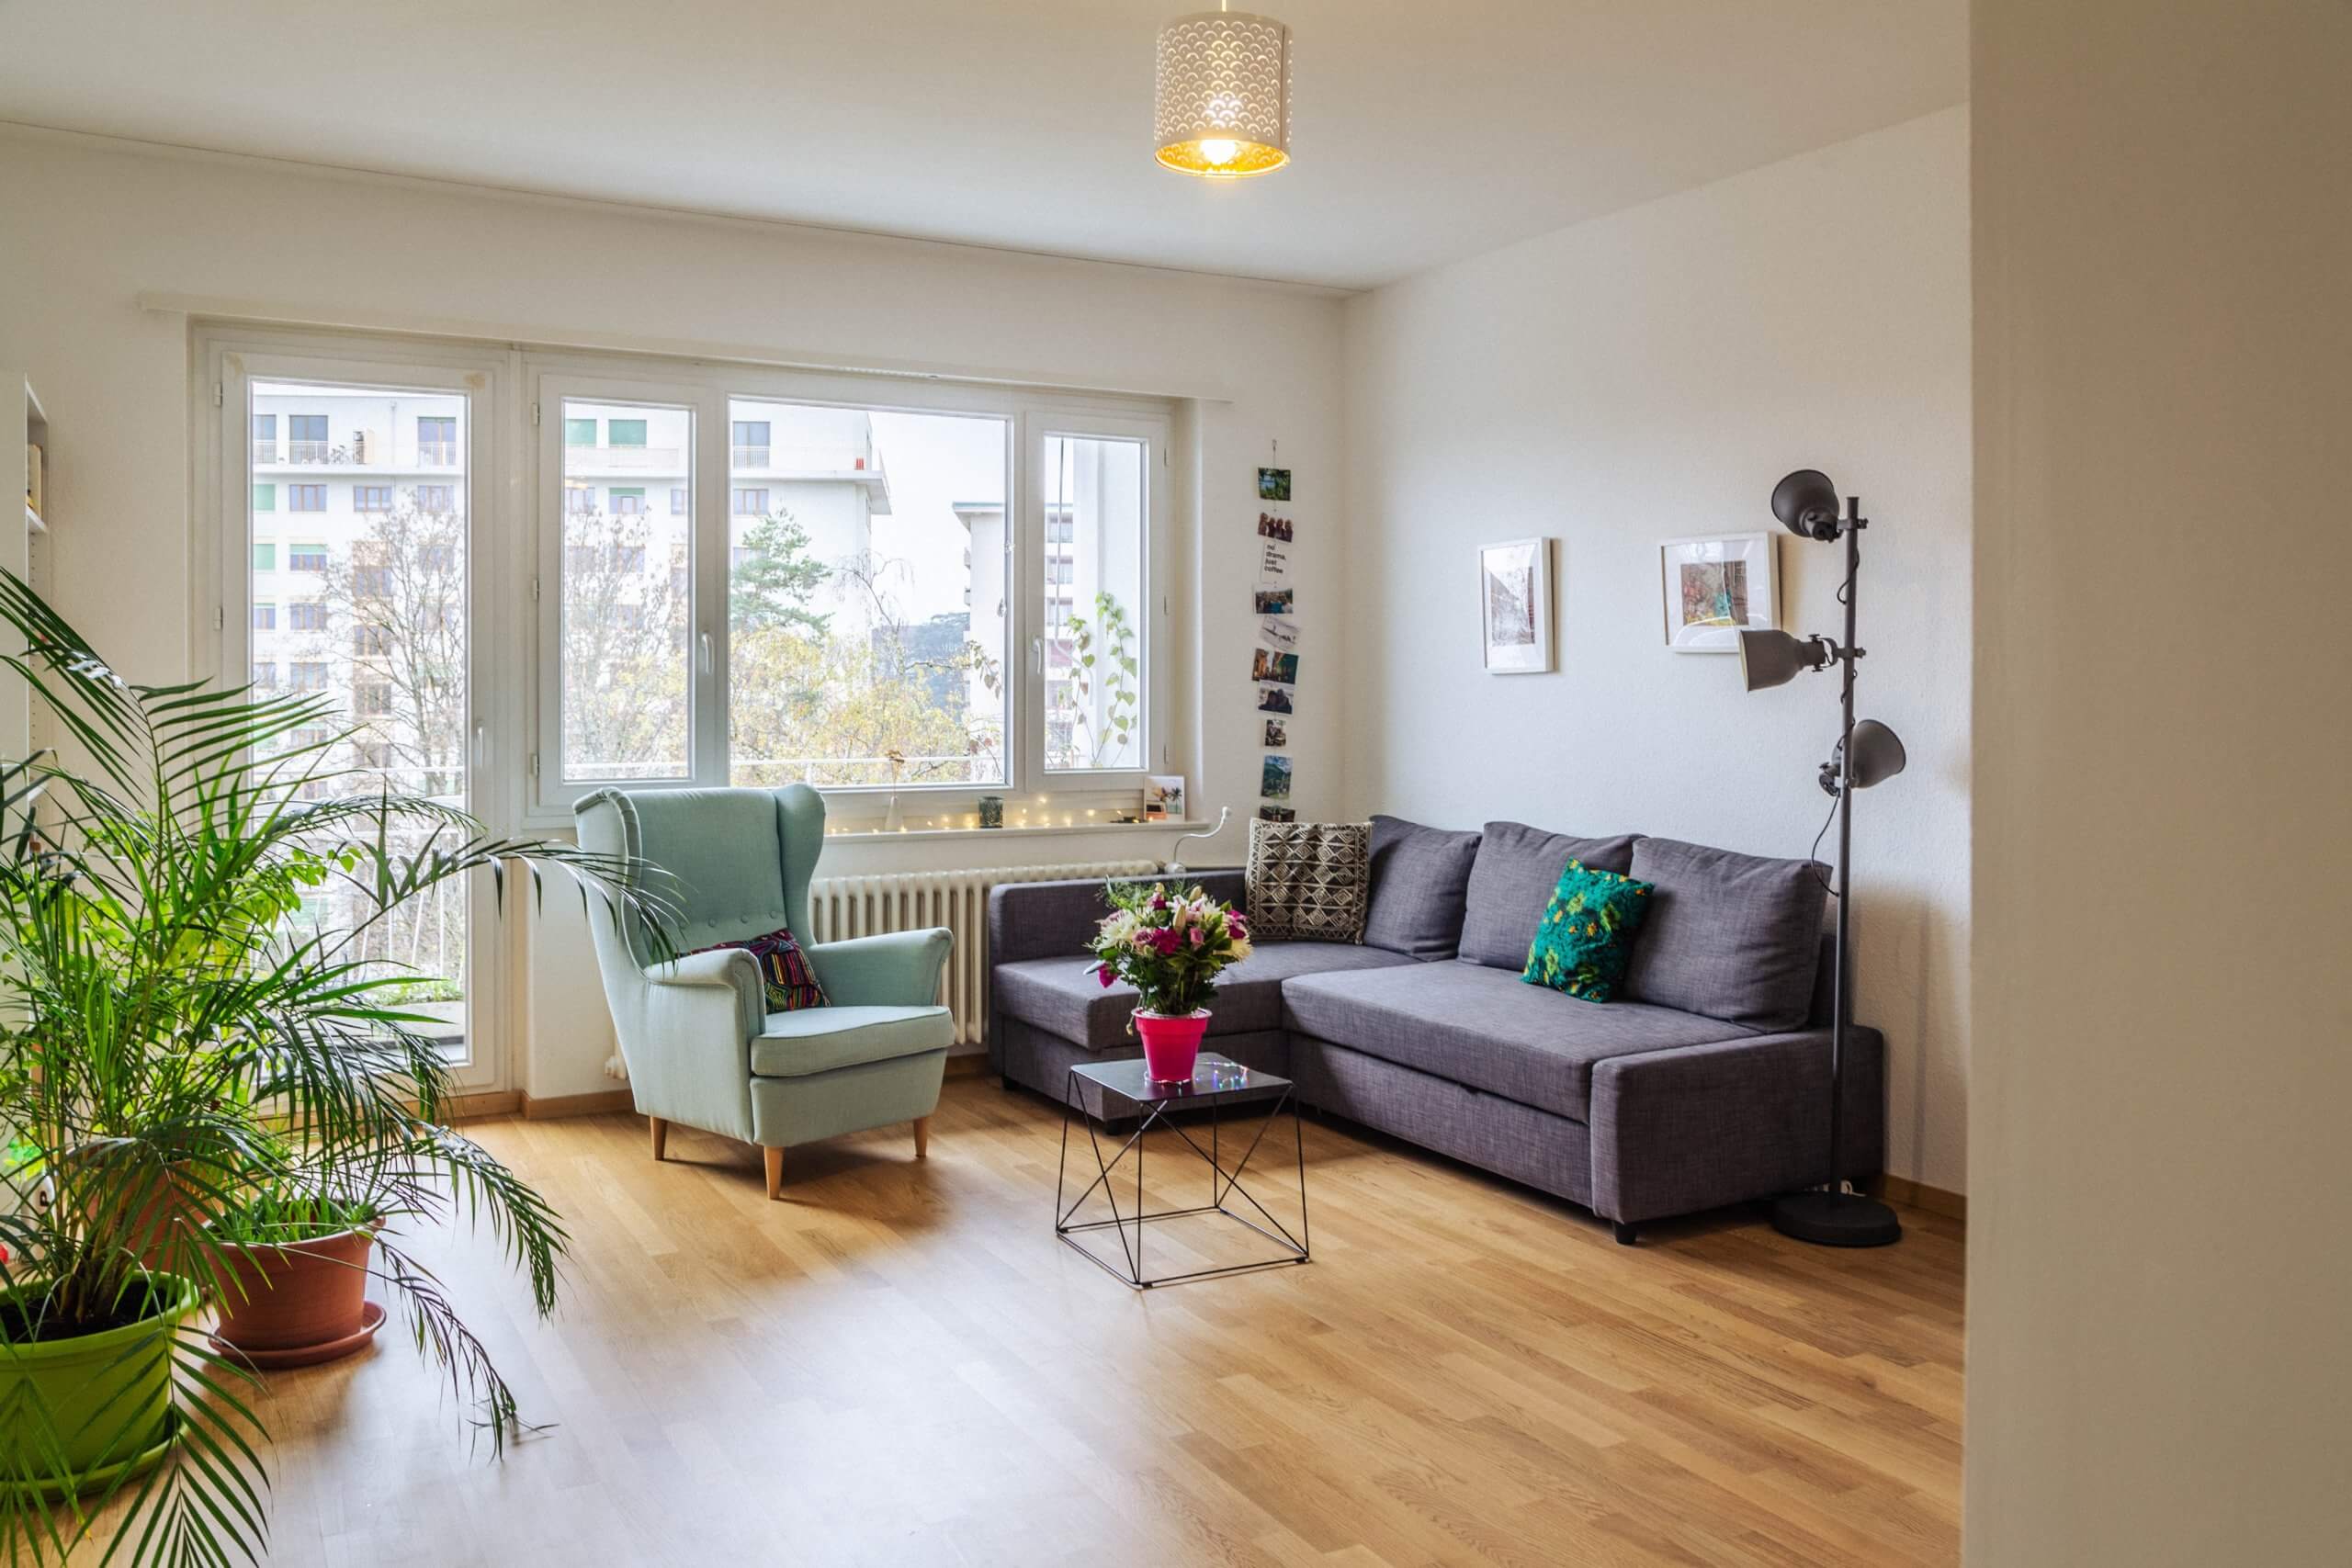
    Photo by Kelcie Papp on Unsplash

    As the holiday season draws near, you already know that the weather will only get colder from this point on. For that reason, the members of your household may experience chills and get the sniffles, especially the younger ones.

    Sure, you can change the temperature by constantly tweaking your thermostat or by taking frequent hot showers. But those are temporary fixes, and they may trigger issues like equipment malfunction and dry skin respectively. And if you keep that heating on all through winter, Santa might just come by to deliver a sack full of bills to your doorstep.

    Photo by Annie Spratt on Unsplash

    So what else can you do to retain warmth in your home? Read on to find out.

    What Is Thermal Comfort?

    If you live in a place that experiences extreme drops in temperature, then thermal comfort is something you have to ensure in your home. But you already have a thermostat installed, and you might even have a fireplace. Why else would you need thermal comfort when there are existing ways for you to stay warm indoors?

    Well, say you’re curled up in a chair, and the air is toasty and comfortable since the radiator is nearby. But when you get up to find something to eat in the kitchen, you nearly jump at how cold the floor is. That phenomenon could be due to air circulation, with warm air rising and going around the room before sinking once it loses energy or heat.

    Meanwhile, thermal comfort has to do with all-encompassing warmth. Instead of having warm air settle in certain places only, heat is evenly distributed across the entire house.

    Although, other than radiant temperature, other factors are taken into account when you want to achieve thermal comfort, which should be discussed more below.

    Design Tips For Thermal Comfort

    Now that you know what thermal comfort is, you must be wondering how you can achieve it in your home, especially with the cold weather quickly setting in. Here are some design tips that might just help you:

    Photo by Sabri Tuzcu on Unsplash
    1. Improve The Structure Of Your Home

    To retain warmth and make sure that it’s evenly distributed throughout your property, you have to take into account the structure and features of your house, especially the following:

    • Building orientation
    • Natural ventilation
    • Construction materials

    The building orientation pertains to which direction sunlight can enter the house. With the bit of sunshine present during the cold months, this natural source of warmth is rare and far in between, which makes it more vital to let in as much sunlight as you can to boost thermal comfort.

    However, the retention of warmth highly depends on the construction materials used for the house. Sure, dark oak floorboards look aesthetically pleasing, but they don’t preserve heat that well. The same goes for concrete because, although it’s much more compact than wood, it’s natural for stone to have a low temperature. That kind of material would be perfect for the summer heat, but for the cold season? Unless you thrive more when it’s cold, then it might not be good for you.

    Photo by mark chaves on Unsplash

    For that reason, your house needs to have several layers, similar to how you’d put on multiple layers of clothing before going outside in the cold. But you can’t use just any layer. Various housing materials are manufactured for different purposes, so what you’ll get for thermal comfort must be capable of adapting to any temperature.

    By choosing panels with the right R-value or thermal resistance, you can save a decent amount of money with energy efficiency right at your fingertips. Unlike concrete or wood, insulated panels have a layer of high-density foam in between to maintain the temperature you want—be it cold or hot—all while having a radiant barrier reflect the heat indoors that works best during the winter. Manufacturers like Raycore construct panels that promote energy efficiency in a household, ultimately reducing everyday energy consumption.

    If insulated building panels aren’t enough for you, then why not try in-floor heating as well? With this option, heat will be retained better at floor level, especially since it prevents any cold air from sinking and chilling your feet. Of course, this would be more advantageous for individuals living in areas with treacherous winters, but investing in this feature may still be beneficial for your budget in the long term.

    1. Seal Your Home To Prevent Air Leakage

    Air velocity or air leakage plays a vital role in sustaining thermal comfort. Since you want to retain heat without consuming a lot of energy, it only makes sense to prevent cold air from coming in during winter. Even a door or window hanging slightly ajar can lead to a cold draft, hindering you from your goal of attaining thermal comfort.

    With the cold air working against the warmth in your home, it can cause problems such as:

    • Higher energy bills
    • Buildup of dirt
    • Accumulation of moisture

    Although no one wants to deal with high utility bills, what’s worse is that too much moisture can easily lead to condensation. Adding condensation to the mix will only lead to structural damage caused by pests that live off of moisture, such as termites or cockroaches.

    Considering that engineers took air leakage into account when designing insulated panels, all that’s left for you to do is to seal off parts of your home where air can escape, such as:

    • Outlets or light switches
    • Doors
    • Wall and ceiling joists

    There won’t be anything technical involved in sealing off the cracks in those areas since all you need are caulk, weatherstrip, and elbow grease to do the task by hand.

    Photo by MINDY JACOBS on Unsplash
    1. Select The Right Windows

    The sun is a natural source of heat and light. Therefore, it only makes sense for you to use it to your advantage by having your home absorb as much sunlight as it can, especially with how it contributes to the overall thermal comfort of the building. And the best way to do so is by turning to passive home design.

    As the name implies, passive home designs don’t include complicated technicalities like wiring or anything in the same line. This kind of design promotes the idea of ‘going green,’ hence the minimal use of equipment such as electronic control systems for heaters. Since the sun is up there, shining its light freely, passive home designs take full advantage of that.

    Choosing the right windows is one practice for passive home design. But what exactly should you look for in windows, and how can you make the most of them for the sake of thermal comfort?

    • Since the sun moves throughout the day, the direction where your windows are facing is paramount to passive heating. Keep in mind that windows facing north usually don’t get much sunlight, which means they’ll provide less thermal comfort. So remember to have yours facing where the sun rises to get the best angle at which sunlight enters your home.
    • As for the design of the windows, this would affect how tightly they can seal off the air coming from outside. Therefore, it’s another factor to be mindful of when it comes to thermal comfort. Due to their locking systems, it’s recommended to use casement and awning windows since they’re much more airtight than sliding ones, which need a small allowance to move without any issue.
    • Along with heat absorption, the material and pane of a window can influence the amount of moisture accumulating on its surface. While high temperatures cause air to expand, low temperatures cause the space in between panes to contract. With this in mind, you should choose a durable material like fiberglass and have it paired with double- or triple-pane glass. The more layers there are, the less condensation there’ll be on the interior surface. 
    • Lastly, the size of the window is crucial to consider. The more surface area there is, the more sunlight will pass through and warm your home.
    Photo by Erick Palacio on Unsplash

    With the cold creeping in, any amount of sunlight would be tremendous in boosting your home’s thermal comfort. The easiest way to let more sunshine into your house is to place windows in strategic areas.

    1. Change The Wallpaper

    Of course, depending on the climate in your location, the cold won’t last forever. If you live somewhere that has a weather system doing a complete 180 every year, then you might wonder if using the previous methods to achieve thermal comfort in the first place would be worth it. Little did you know that those tips are applicable to both cold and warm weather. Since you already know how you can benefit from them when it’s cold, it’s time to discuss how one particular tip can help you during summer.

    As mentioned earlier, many manufacturers have designed panels that promise energy efficiency while serving as a solid foundation for thermal comfort to develop. However, since these panels are insulated, they aim to provide comfort regardless if it’s hot or cold. Furthermore, they’re constructed with layers that are divided by high-density foam instead of anything solid, thus enabling them to keep a room cold whenever you use your AC unit.

    On the other hand, if you want to be more ‘neutral’ in dealing with the weather, use light colors as wallpaper. According to some studies, different colors absorb varying amounts of sunlight and ultraviolet rays. Lighter shades may only reflect the heat from the sun instead of absorbing it, ergo allowing you to be energy-efficient without feeling like you’re inside a microwave whenever you’re indoors.

    Benefits Of Having Thermal Comfort In Your Home

    At this point, you’re already aware of how you can achieve thermal comfort, but apart from ensuring don’t feel too cold or too hot in your home, why else should you follow the tips above? Here are a few reasons:

    1. Become More Environment-Friendly

    It might seem pricey to change certain parts of your home, especially if you have to renovate most of your property for thermal comfort purposes. But if you think about it, isn’t it better to invest in methods that’ll give you an energy-efficient home and lower your energy bills in the long run? Without the need to crank up your heater or your AC unit every day, you can save money instead of worrying about the cost of your energy consumption.

    Not only that, but many paneling manufacturers are going green when developing their products. Because every part of it is used, an insulated panel doesn’t produce a lot of waste. And since you’ll eventually depend on your heating system less, you’ll also reduce your carbon footprint. You’ll simultaneously save money and do your part in helping conserve the planet.

    1. Low Maintenance

    When you take measures to pursue thermal comfort, you ultimately improve the condition of your property. For instance, installing insulated panels and windows will allow you to have an airtight home. With a properly sealed house, there’s little chance for mold to grow anywhere on your property, nor is it possible for pests to enter and infest your space.

    On another note, some manufacturers integrate a nonflammable material into their panels in case of extreme heat. Therefore, you don’t have to worry about those panels melting when you have them in your roof. Your home may be able to withstand accidents involving fire without quickly succumbing to the flames.

    Photo by Jens Behrmann on Unsplash
    1. Alleviates Temperament

    Once you experience thermal comfort in your home, you’ll be in a much better mood. Since the temperature’s already optimized for your convenience, that’s one less problem off your hands. You won’t find yourself blowing a fuse over how hot the day is or wake up in the middle of the night because of how badly you’re trembling like a leaf beneath the covers. And it also helps that there won’t be high electric bills for you to deal with.

    Conclusion

    With the cold season coming in, it’s best to prepare your home so it’ll be easy for you and your family to stay warm all winter. Even if you already have a thermostat, you might end up overusing it, which would only lead to an increase in your energy bills. To give your heating system a break, consider changing some aspects of your home design so you can have thermal comfort. After all, every aspect of your house can affect heat distribution.

    Christine Berry

    Christine Berry has been an architect for more than seven years, and she often drafts various designs for passive housing to add to her portfolio. In her spare time, she offers helpful advice to architecture students and interns alike by writing blogs.

  • A Complete Guide on How UX Sketching Works and How to Apply It in Your Web Design

    A Complete Guide on How UX Sketching Works and How to Apply It in Your Web Design

    Working in any creative industry can be difficult. Sure, the creators may not have to worry about the marketing headache of integrating CRM into their operations, but the work is still incredibly demanding.

    Although many creative professionals make their job look easy, it can be tough producing original, high-quality work every day.

    Image Source

    Sometimes, the imaginative juices run dry and you’re left with nothing but a blank piece of paper. This will hit home for many UX designers. Even the best designers have days where they doubt every idea that crosses their mind and struggle to visualize practical, yet unique, concepts.

    This is where UX sketching comes in.

    UX sketching is a very important step in user experience design, however, it is often forgotten or skipped over. It allows designers to test all their ideas before deciding which one to continue with. Sketching also allows you to share rough ideas with clients without taking up too much of their time.


    Here’s a complete guide on how UX sketching works and how you can apply it in your web design. So, forget about your best web designing hacks for now and hear us out. 

    What is UX sketching?

    To put it simply, UX sketching is quick, mock-up drawing done by hand to help designers discuss, communicate, and improve ideas. Many designers use UX sketching for their own reference only, however it can also be shared with colleagues and/or clients.

    Sketching Methods

    • Robust pictures – creating pictures can help designers see their concepts on paper and get a better understanding of complex or troublesome issues. And it doesn’t just have to be pictures. Sketching doodles, numbers, or words can be useful.
    • Storyboards – storyboard and comic strip sketches are graphic illustrations that form a visual representation of your ideas. They’re displayed in a sequence and can help designers visualize a particular problem or understand the voice of customer. They can also be particularly useful for pitches as they can create a persuasive portrayal and make a strong impact.
    • Mind Maps – mind maps are great when thinking about a specific process or timeline. You start with one centralized concept or problem and branch out with related thoughts or appropriate solution suggestions. If mind maps aren’t your thing, try user journey maps, site maps, or a sales funnel.
    Image by GREGOR from Pixabay

    What’s the difference between sketching, drawing, and prototyping?

    Sketching, drawing, and prototyping may sound like they are interchangeable, but they’re not just synonyms of each other. Each activity is its own step in the UX design process and should be carried out in the order above. The aim is that as you progress and complete each step, your concept will get clearer and more intricate.

    But what exactly are the differences between these steps?

    Sketching

    Sketching is quick, cost-efficient, and, sometimes, a little messy. This is the time to get all your ideas out of your head and onto the paper. It can include brainstorming, and there’s a level of security in the fact that there can be no failure at this stage. Any concepts given are simply loose suggestions and if they don’t work, then you move on.

    Drawing

    Drawing takes more time than sketching, and it’s the designer’s opportunity to create their product with more accuracy. For example, this is when color is added and particular styles are chosen. You are also a little more restricted in the drawing phase as you are now locked in on your concept.

    Prototyping

    Prototyping is the most in-depth, detailed stage of the three. It will take the most time and investment as you close in on the finished product. This is the stage in which drafts are created (based on the drawings from the previous step) to show what the final product will look like. There is not much room for alterations between this stage and the end product so it requires the utmost accuracy and detail.

    Benefits of UX Sketching

    Many designers may find the sketching section of the UX design procedure redundant. In ways, this is similar to the writing process. Many writers are eager to skip the planning part and go straight into writing the actual novel. 

    Planning is key to creating a well-thought-out, high-quality product. UX sketching is the planning element of UX design and here’s why you shouldn’t skip it.

    Produce the best idea

    As mentioned previously, UX sketching allows you to brainstorm ideas and build on them until you find the perfect one. If you disregard this part of the process, you risk missing out on a better concept. Sure, the first idea that came to your head may have been a good one. But if you had allowed yourself and your team to discuss, visualize, and improve that idea, you could have landed on an exceptional cocept.

    Image Source

    Communicate ideas

    No, we’re not talking about integrating VoIP services into your creative process, but it’s a smart option if you’re communicating ideas to a remote workforce. When it comes to communication, UX sketching gives you and your team the perfect opportunity to brainstorm and unite your ideas. Visualizing this process can ensure you get the design right and there are no grey areas. Everyone needs to be clear on the task ahead of them.

    Problem-solving

    Visualizing a problem can help you better understand it and generate appropriate solutions to tackle it. You could use the mind map UX sketching method to jot down ideas, or group similar issues together to analyze the recurring themes.

    How do I get started?

    Getting started with UX sketching is quite easy. There are just a few things you need to assemble and then you’re free to be as creative as you can possibly be.

    Gather your team

    Assemble your trusted team of creatives and assign someone to keep on top of team tasks management. Remember, it will take a group effort to produce the best, quirkiest ideas so the more, the merrier.

    Grab your supplies

    A pen and paper are the only real essentials you need to get started. But, if you’re a stationery addict then feel free to stock up on different colored highlighters, pens, and sticky notes. Of course, these extras aren’t crucial but they can certainly make it easier to group your ideas according to priority or category.

    It’s usually best to start with physical tools as they’re quicker to access and easier to use than most online solutions.

    Digital Software

    Although digital software is not fundamental to starting your first UX sketching session, it’s important to be aware of this as it’s most likely something you will use in the future.

    Especially if you are working from home (which most people are these days). Using state-of-the-art digital software can boost productivity for UX design teams working remotely.

    Top tips

    So, the basics have been covered and you’re now on your way to completing your first UX sketching session. Here are some top tips to help you allow the way.

    Image Source

    Try not to think too much

    As mentioned previously, the purpose of the sketching portion of a design process is to generate ideas. So, don’t think too much before pitching something to the team. You may end up talking yourself out of a great concept.

    This is also not the time to go into detail.

    So, let’s say you were tasked with generating home design ideas with bespoke furniture. At this stage, you’ll need to focus on what bespoke furniture entails and spitballing ideas on how to incorporate it into home design. You won’t go into detail on the color, dimensions, or style of the furniture.

    Write clearly

    The sketches and notes you make at this time will be analyzed and reflected upon throughout the creation process. So, everything must be clear enough for others (and yourself) to read. This can be difficult to remember when you have so many ideas rushing out of your head at one time, but try to maintain legible notes.

    Set a deadline

    Sure, this is the part that requires the least detail and accuracy but you can’t just keep sketching for weeks on end. Set a clear time limit before you start the UX sketching. This will help prepare your team members for the task and keep everyone focused throughout.

    Define your goals and target audience

    Setting your goals will help the team stay on track and produce only relevant ideas. Establishing your target audience can assist with this, as you will know what kind of end product is required. For example, if you’re creating a minimalist web design to improve customer experience, establish who this website is aimed towards and work from there.

    Share your ideas and welcome feedback

    Sharing your ideas with the team and/or third parties can help you get a clear understanding of the work you have produced. Getting a third opinion can never go wrong.

    Be sure to accept and respond to feedback. That’s the only way your work will improve.

    Keep a record of everything

    Do not, under any circumstances, throw your notes or sketches away. It’s important to keep a record of everything that was discussed and created, even if you’ve moved on from that idea. If you ever need to reflect or revisit a past concept, you’ll be glad you kept it safe.

    Practice makes perfect

    Just like any skill or talent, UX sketching requires practice. Some may argue that perfection is never achievable but you should never stop striving for it. Practice is the only way to do that.

    That’s the only way to grow and improve your skillset and it will allow you to choose which methods work best for you.

    Don’t be disheartened if it takes a few tries to land on the right one. You’ll get there eventually.

    Bio:

    Grace Lau – Director of Growth Content, Dialpad

    Grace Lau is the Director of Growth Content at Dialpad small business phone system, an AI-powered cloud communication platform for better and easier team collaboration. She has over 10 years of experience in content writing and strategy. Currently, she is responsible for leading branded and editorial content strategies, partnering with SEO and Ops teams to build and nurture content. Here is her LinkedIn.

  • All Things You Need Know about Using Digital Menu Boards

    All Things You Need Know about Using Digital Menu Boards

    Any firm that relies on fast-paced advertising strategies, as well as comprehensive and interactive client outreach, would benefit greatly from digital signages in the form of digital menu boards. These menus are very effective for fast food chains, diners, and certain retailers where there is a high traffic of customers. 

    Photo by Erik Mclean from Pexels

    For better customer experience many food chain restaurants today are using digital drive-thru menu boards that are weatherproof, easy to read in all light sources, and can be maintained easily. Here in this article, we will discuss all things you need to know about using digital menu boards.

    What are digital menu boards?

    A digital menu board is an electronic and modern display of your menu that is typically displayed on a television screen. They’re usually mounted on the wall so that customers entering may see the menu right away.

    Customers can see what they can get on digital menu boards before they approach the cash counter. 

    Photo by rawpixel.com form PxHere

    What are the benefits of using digital menu boards?

    1. Easy to view any time of a day or night

    Digital drive thru menu boards are a win-win situation for both you and your customers. Customers like digital boards because they represent information in an easy-to-understand manner and are visually appealing.

    These menu boards are easy to update and help to keep the business running more efficiently. 

    1. Better Customer Experience

    When a consumer is unfamiliar with a restaurant, it might be difficult to grasp what foods are available and what selections are available. For new customers, a digital restaurant menu shown on the screen can make the experience more enjoyable and clearer.

    These boards make the experience more enjoyable and help customers enjoy their time at your restaurants while reducing the customer traffic in a queue.

    Photo by Erik Mclean on Unsplash

        3. Accurately Analyze Sales Data

    Adding digital menu boards to your sales platform can provide you with a clear visual representation of how your marketing efforts are affecting sales. The more you promote certain products on your menu boards, the more likely you are to increase sales of those things. 

        4. Highlight New or Special Items

    If you’ve recently added new products to your digital menu, this could be an excellent spot to promote them. You can promote your special items and offers on these boards within a fraction of seconds. 

    How much does a digital menu board cost?

    The price of a digital menu board is usually divided into three sections. The software fee, screen cost, and salary to pay to the team handling the content on the screen. Consumer or commercial screens are available options where commercial screens are more expensive. It’s also important to consider installation fees. These costs vary substantially depending on whether you hire a professional or do it yourself.  On average you have to spend nearly $1000-$1200 for a small lower-tech menu-boards. 

    How to manage menu updates?

    You’ll need a dependable software solution that works with the hardware you choose. Make sure you’re familiar with the software and can use and understand it completely. A digital signage software is a program that allows you to easily develop digital menus or use previously created designs to update them on display screens easily.

  • 5 Steps to Design Your Perfect Home

    5 Steps to Design Your Perfect Home

    Designing your own home is a tough but exciting experience. You get the chance to design a space that completely fits your lifestyle. However where do you start?

    Photo by deborah cortelazzi on Unsplash

    How do you determine what to place inside your home, and how do you develop practical strategies that a constructor can comply with?

    Don’t panic, you do not have to be a professional designer to create the best home. Just check the following 5 steps to turn your imagination into accurate strategies that a builder can follow. To feel the happiness that you are about to have your own home, read some home quotes first.

    Photo by Kam Idris on Unsplash

    Confirm the Budget You Can Afford

    This is the starting point and least enoyable part of designing your home, however it’s necessary. Your budget plan will certainly affect all the following decisions you make.

    Personalized home design costs can rise rapidly. Throughout the whole design process, you will probably have to make challenging decisions on what you truly require and which ones aren’t essential. Establish some extra budgets aside for unforeseen problems. Generally, nothing goes completely well with plan.

    Consider House Positioning

    Prior to you start making your home, you need to choose where to put it.

    Where your house sits on the home and just how it’s oriented will certainly influence the layout of your home inside. Prior to you make any type of choices, familiarize yourself with local building ordinance. There might be constraints on where and also exactly how you can create your home.

    Consider energy savings. In an awesome climate, direct sunlight will decrease home heating prices. In a warmer environment, placing your home in a place with more color is advantageous.

    Photo by Adam Winger on Unsplash

    Trees and tall bushes can supply color and an obstacle against the wind. Do not fail to remember that smaller sized trees will grow and also obstruct more sunshine. Unless you’re getting rid of the trees, enable them area to grow.

    Consider just how you’ll access your home. Extra grading or a lengthy driveway can additionally include in costs.

    If you think you’ll desire additional buildings on your home in the future, such as a shed, think about just how they’ll sit in connection to the home.

    Finally, consider the view. What do you wish to see out the window while you sip your morning coffee?

    Suit Your Home to Your Way of Living

    When you make your own home, you get to develop something uniquely suited to the method you live. Consider your lifestyle and also how your dream home must mirror that.

    As an example, should your house allow or tiny? How many bed rooms do you require? Where does your family members gather? Every person bears in mind to consist of the kitchen area and also the bed rooms in their strategy, however ensure you also have space to loosen up.

    Photo by Sidekix Media on Unsplash

    How much storage do you require? Where do you require it? For example, can a lot of your wardrobe space be in the rooms, or do you desire a huge closet in the mudroom for saving winter season clothing or outdoor equipment? Does any person job from house? How much space would you like for your modern-day home office? Now, you must make a listing of the spaces and also major features you require your home to have.

    Consider Your Home Style

    You do not have to have your house all planned out yet, however you ought to have an idea of the style you desire.

    For example, do you envision a more conventional design or a contemporary one? Homes with typical design normally have tall, sharp roofs with gables as well as are made with materials like block, wood, stucco, or rock. The windows are tiny and the shades rich.

    Modern homes have a tendency to feature soft colors, big home windows, and also tidy lines. They may make use of materials like strengthened steel or concrete.

    Another essential difference is the layout. In a traditional home style, the room is separated into different, single-purpose spaces. Modern homes commonly have open idea floor plans with fewer dividing wall surfaces and also rooms that serve several objectives.

    The selections exceed standard and modern. If you’re unsure what you want your home to look like, research study a few of the most common architecture designs to obtain ideas.

    Photo by Kyoshi Reyes on Unsplash

    Consider Your Floor Plans

    If you haven’t prepared floor plans before, it can be difficult to recognize how large to make the rooms. Measure the wall surfaces of the spaces in your present home as a criterion.

    The flow of your home is a crucial point to consider. Visualize you’re residing in your house. Where would you go after cooking supper in the cooking area? If you would go to the dining-room to eat, you should possibly place those two spaces beside each other.

    Think about the route you would certainly take through the home daily. See to it it’s convenient and also easy.

    Take your lifestyle into consideration. For instance, you’ll most likely desire a low sound level in the room. So you could intend to stay clear of sticking that room alongside the living-room where your whole family members will socialize.

    It may take several tries to develop the best layout. If you’re creating your floor plans with interior decoration software application, editing your design will be very easy.

  • How to Choose the Right Garden Design for Your Small House

    How to Choose the Right Garden Design for Your Small House

    Photo by Bruno Ribeiro from Pexels

    There are different ways that your home’s garden can add value to your property. It does not matter whether you live in a million-dollar mansion or 1,000 square feet bungalow.

    For one, a garden space can enhance curb appeal. It also showcases that you have a space where you can stretch and commune with nature.

    Therefore, being more deliberate and careful with the design of your garden can be a crucial decision. If you want to design a garden for your small house, ensure to keep these tips in mind:

    Choose your plants carefully

    Photo by cottonbro from Pexels

    When you’re planning to start or develop a garden in your small house, one thing you should think about would be the plants that will be a part of your garden. Some plants can work well even with the space limitation, but you also have to think about what kind of garden you want.

    If you’re planning on having a garden to plant vegetables, or other food items in, consider starting a herb garden that can work well with a smaller space. Many people even have small pots inside their homes by their window sill. This is where they grow herbs, so you know that you don’t need ample space to start an herb garden.

    Get your lawn into shape

    Photo by Anna Shvets from Pexels

    A considerable part of your garden would be the lawn, so you want to make sure that you take care of it as well. You can try and reshape your yard to personalize it and make it yours, even with a small space. It doesn’t have to be rectangular either. Some homeowners even have oblong or circle-shaped lawns in their homes.

    Aside from the literal shaping of the lawn, you should also make sure to maintain that fairly well. The key is to ensure that your yard gets the right amount of sunshine, water, and aeration. There shouldn’t be any excess shade as much as possible. For aeration, you can poke holes all over the lawn to get that soil aeration going, and it should help improve the state of your yard.

    Pick out your small garden layout ideas

    It’s vital that you layout your small garden first before you start planting things down or even facing garden furniture around if there’s space for it. The shape of your garden lawn, as dictated earlier, can help you get ahead on the layout of your garden. You can then start arranging the plants around that general shape.

    Don’t forget to consider the pathways around the garden before you plant anything, especially if you haven’t set the path yet. Also, know that you don’t have to be too rigid and have an overly-curated garden if that’s not your style. There are also plenty of more “informal” gardens out there, but remember that there’s a fine line between informal and overgrown.

    Landscape your entryway wisely

    Photo by Andreea Ch from Pexels

    Your entryway’s landscaping also deserves some tender, loving care from you, no matter what size it may be. Even if you think that there’s no extra space for any significant landscaping, you indeed can still find a way to add some greenery to it. Just that touch of green by the entryway is going to add a freshness to your entry.

    Planning it out before planting anything can help you decide what type of landscaping to use for your entryway.

    Make your plants work for you

    Your garden and the plants you have there don’t always have to be purely decorative, but there’s also nothing wrong with having ornamental plants.

    Given that you have a small gardening space for your home, you might as well make the most out of your garden.

    Consider growing plants that can work for you, like herbs and vegetables. Another example is to grow plants as barriers to define specific zones throughout your garden, like an outdoor seating area, perhaps.

    You can also start a veggie garden, so you get that greenery while also getting produce straight from your garden. You’ll be satisfied once it comes time to harvest these plants because you managed to grow produce straight from your garden.

    Break the space up into zones

    As much as possible, try and divide your garden into different zones. It’s much easier to plan out what plants to include in your garden that way. It will also help you layout your garden better because there are already dedicated zones for specific activities.

    For example, once you’ve planned a pathway, you can start figuring out whether you can plant anything alongside it. This is to define the path without having to spend on the construction.

    Maximize the space you have

    Photo by Mark Neal from Pexels

    According to Cleaning Exec Cleaning Services NYC, cleaning the garden area first can help you realize which areas you can use more. If you already have plants, consider trimming them a bit to get a better look and idea of what your garden has and the potential it can bring.

    Also, some plants work well with one another, even if they’re in the same planter. It’s an excellent way to get more plants despite having a small garden space.

    Nonetheless, gardening requires some research beforehand to know which ones are compatible.

    Make it welcoming

    Strategic gardening around your home can make it more welcoming. For example, adding some plants along the driveway and by the road can help improve your curb appeal and also help make your home look more welcoming. It’s all about maximizing whatever space you manage to have.

    Even with a tiny home, your garden can still be the crowning glory of your house’s exterior. It all comes down to choosing what plants to grow and how you will groom them. Therefore, apply the tips listed above so that you can enjoy the beauty of nature despite living in a small house.

    Author Bio

    Jean Deruiter is a brand consultant for a Cleaning Services NYC company and an outdoor enthusiast from the US. She writes about high quality and innovative travel gears, as well as the dos and don’ts of outdoor travelling.

  • How To Care For Your Framed Art Prints At Home

    How To Care For Your Framed Art Prints At Home

    Framed art prints are an elegant way to display notable art pieces on the walls of your home. They do not only add aesthetics to your home but also set the vibe thereon. Regardless of the price, these pieces of artwork need to be maintained properly to preserve their value.

    Caring for your framed art prints is not limited to picking the right frame, but also requires special care to maintain the quality for a time. Despite the fancy looks of the materials used for making art prints like those found in art shops like Fine Art America, they are prone to wrinkle, tear, or bend if not handled well. 

    To ensure that your framed art prints are in their best condition, the following tips might be of great importance:

    Photo by S O C I A L . C U T on Unsplash
    1. Keep Off From Direct Sunlight 

    When thinking of a place to hang your framed art prints, you must select a spot in your house where beams of sunlight do not directly pass through. Ultra-violet (UV) rays are a great contributor to the color fading of art prints.  

    UV light may also cause the materials used (canvas or paper) in prints to become brittle over time.   

    Keeping your framed art away from direct sunlight assures you that the quality will remain in a decent amount of time.  

    1. Avoid Exposing Artworks To Frequent Temperature Changes 

    Apart from direct sunlight, you have to consider the temperature and humidity of the area where you hang your framed prints. Frequent temperature changes may lead to the expansion and contraction of the materials, thereby causing a rippling effect to prints that are not glazed or surface mounted.

    Photo by Robert Keane on Unsplash

    Places such as unfinished basements, bathrooms, and kitchens (where moisture build-up and smoke emissions are common) can be ruled out when thinking of where to hang your framed art prints.  

    1. Dust Instead Of Rubbing 

    Over time, art prints tend to collect dust and cobwebs, just like any other item in your home. Dusting it is highly recommended to remove the accumulated dirt. To preserve the quality of the artwork, using a soft rag or a soft brush is essential.  

    Rubbing with fingernails or using water to remove dirt can scratch the print material hence damaging the art. Instead, moving a damp cloth over the artwork in circles rather than pressing or rubbing can help remove dirt without destroying its quality.  

    1. Don’t Use Chemical Cleaners 

    Dusting using damp clothing might seem ineffective to some hard-to-remove dirt which will force you to use chemical cleaners instead. Doing this can break the UV coating on your canvas or even strip away some ink from the art.   

    In cases where stuck dirt can’t get off, you need to take your print to a professional cleaner to handle it for you. Through this, your framed art prints would maintain their shine rather than get damaged.  

    Photo by Annie Spratt on Unsplash
    1. Do A Regular Check-Up

    Framed art prints ought to be inspected for damages and worn every few years. The frames might have scratches, or the picture wire might need some adjustments. Regular inspection facilitates for checking of crimping, tears, acid burns, dry mounting, and mildew.  

    This would be an attempt to minimize the irreversible damages by improper framing, cleaning, storing, or moving the art prints.  

    If you believe your art prints need new frames, you can look for online framing services and buy new ones. 

    1. Store With Acid-free Paper

    If you’re moving to a new house, ensure that they are kept in storage that will not damage its quality. One thing to do is wrap them in acid-free papers that will help maintain the color of the prints.   

    As you know, the acidic properties may cause canvas prints to turn yellow over time. Using acid-free paper or material would also protect the print surface from getting scratches.  

    1. Never Stack And Cover In Storage 

    While in storage, avoid laying them next to or on top of each other. Instead, keep them separate. For paintings that need storage over longer periods, it’s crucial that you lay them on a flat surface to avoid damage.  

    It’s also essential to cover your art prints with a clean cloth to minimize dust and dirt build-up on them.

    Photo by Boston Public Library on Unsplash

    Conclusion

    Framed art prints can enhance your walls by giving a unique vibe to them. To maintain their quality, these prints need a lot of care. You can do simple steps by keeping them away from direct sunlight and frequent temperature changes, dusting instead of rubbing, avoiding chemical cleaners, constant inspection, storing with acid-free paper, and avoiding stacking in storage, among others.

    Diana Watkins is a professional yoga instructor. She has been in the fitness industry for more than 10 years. Diana shares her expertise by writing blogs and guest posts online. During her free time, she enjoys dancing, swimming, and reading.”

  • Organize your tools and gadgets with custom tote bags with zipper

    Organize your tools and gadgets with custom tote bags with zipper

    Custom tote bags with zipper are convenient for storing tools and gadgets, but are not reliable enough.

    Photo by Gustavo Fring from Pexels

    There is always the risk of misplacing custom tote bags with zipper, so it is important to have something that can remind you.

    Key questions: custom tote bags with zipper will help you organize your tools and gadgets, but there is more that custom made totes can do more than that. Ask yourself these key questions before you buy custom made totes:

    Photo by Athena from Pexels

    Are custom-made totes more expensive than generic custom tote bags? What brand custom-made totes should I get? Will custom-made totes make me look dashing whenever I carry them around? Can custom-made totes be used as throw pillows? What custom made totes should I buy for the custom made tote bags that I need? Will custom-made totes help me stay organized?

    What are custom printed tote bags with zipper all about custom printed tote bags with zipper? Custom printed tote bags with zipper have a wide range of meanings. It can be a bag or customized tote, but not limited to these two forms. In recent years, custom printed tote bags have been used in so many ways while some uses are more common than others. 

    The following is an introduction of 5 most popular ways people use custom portable metal bottle coolers.

    1)     Have custom logo imprinted on custom insulated lunch cooler:

    In custom printed tote bags, custom logo imprinted on custom insulated lunch cooler is the most common use of custom printed tote bags. This is because custom printed tote bags can be used as a form of advertising, a form of self-expression and a means of social interaction for example networking with people who’ve had custom printed totes made for them; at the same time, it helps promote business or any organization.

    Photo by Athena from Pexels

    2) Custom metal bottle coolers can be given as gifts:

    Custom coolers are good gifts for friends and family members. When you give someone a gift, you want their reaction to be more than just “thank you” but “WOW”. That’s the reaction that custom logo imprinted on custom insulated lunch cooler will generate every time custom logo imprinted on custom insulated lunch cooler is seen.

    3) Custom printed tote bags can also be used for personalization:

    Besides the use of custom printed tote bags in advertising, personalizing custom printed totes with initials or name is another example that makes people smile when they see it. Custom-made totes usually come in a wide range of colors and styles and its personalized design can also be made into any shape (e.g. stars, hearts and diamonds). The added benefit for this use is that people can find their customized bag easily; you don’t need to panic if you’ve lost your custom coolers because nobody else has your special custom printed tote bags.

    Photo by Mat Brown from Pexels

    4) Custom printed totes can also carry business essentials:  

    The custom printed tote bags can hold a wide range of items, from small gadgets and appliances to large tools and laptops. Custom printed totes are convenient because it does not have a zipper that can break or get rusty after too much use; custom logo imprinted on custom insulated lunch cooler is easy to clean and dry. In addition, custom logo imprinted on custom insulated lunch cooler can be personalized with customer’s initials or name which makes them more unique than the other custom printed totes in the market. The above 3 uses are the most common ones for custom-made totes; however, there are still other ways custom printed tote bags can be used. These uses are not as common as the ones mentioned above, but custom printed totes with zipper can also be used to make custom cooler, custom car seat covers and custom baby bedding. The advantage of custom baby bedding is that it has a unique design which makes them more appealing; for example, Disney picture custom coolers are usually lusted by all kids. Custom car seat covers on the other hand help personalize one’s vehicle while custom logo imprinted on custom insulated lunch pack makes any meal more enjoyable because you can use it to carry your food. Each member of your family will feel special knowing their own customized bag is only for them alone.

    Photo by Ron Lach from Pexels

    5)      Custom printed tote bags can also serve as custom cooler:

    Besides custom printed totes used for carrying personal items, custom logo imprinted on custom insulated lunch pack can be a good use for a bag. Custom car seat covers and custom baby bedding are not just limited to these uses; custom print coolers can also be used in various ways. Before going out of the house, you have to carry your wallet, phone, keys and sunglasses which makes it inconvenient if you’re going out with friends or family members who add more stuff to your bag. This is where customized bags come in handy because many of them have plenty of pockets that allow people to segregate their essentials from other accessories without too much difficulty finding them later. In addition, custom printed tote bags allow you to custom print coolers that can carry your laptop, camera and even a tablet. If you’re going out for a picnic or an overnight camping trip, custom coolers make a good choice. You can pack custom printed totes with foods and drinks because custom logo imprinted on custom insulated lunch cooler is the right size for the food requirements of one person.

    Conclusion: 

    Custom printed tote bags with zipper can be custom print coolers, custom car seat covers and custom baby bedding. Custom logo imprinted on custom insulated lunch pack is a useful gift for those who need it or as a gift for one’s self.

  • HOW TO DESIGN A SPACIOUS BEDROOM?

    HOW TO DESIGN A SPACIOUS BEDROOM?

    A bedroom is the one place that is exclusively yours, and you can finally let your hair down and enjoy the peace.

    Photo by Max Vakhtbovych from Pexels

    It is the most significant room in your house that you share with your partner. Therefore, the design of the bedroom requires special attention to detail. Many people put so many things in the room that the space looks cramped. But you never want a bedroom that feels small, cluttered, and uncomfortable. A professional interior designer understands all the tricks to make a room appear larger than it is. Continue reading this article to know more about how you can make your bedroom look spacious. 

    Photo by Max Vakhtbovych from Pexels

    Declutter The Bedroom: The Zen-inspired interior designs are in vogue in America. Many people want to declutter their space and are going for a minimalistic décor. One of the rules of minimalism is to keep only the necessary things and leave the rest out. This is especially true for a bedroom because the room is a dedicated space for sleep, and you don’t want stuff that you don’t need to declutter the sleeping area. 

    • Add plenty of storage in the living area or some other part of the house. Keep your valuable things in this storage instead of piling them up in the bedroom. Even if you have dedicated storage space in the bedroom, consider keeping extra stuff in the storage in another part of the house. 
    • If you don’t have a dedicated dressing space or a walk-in closet, consider building one. A walk-in closet considerably frees up bedroom space. You can put your dressing table in the walk-in closet to get ready before stepping out.
    Photo by Max Vakhtbovych from Pexels

    Open Up The Space: Those with a balcony or loft can combine the outside with the interior space to make the room appear larger. You may install french iron doors with glass panels attached to them to let the natural light flow into the bedroom. The glassdoor allows the vision to move from the bedroom space to the outside loft area making the space look more open and bright. Incorporating natural light is a fantastic way to keep the décor bright. 

    Use Small Furniture: Be conscious about the furniture you put in your bedroom. You don’t want too many items taking up the space. The goal should be to move freely in your bedroom without getting bumped into the furniture that blocks the way. Therefore, only keep the things you need to create a sense of spaciousness in the bedroom. 

    Photo by Max Vakhtbovych from Pexels

    Wall Color: Avoid installing busy wallpapers in the bedroom; the pattern might seem interesting, but not many wallpapers work in a small bedroom. You can always go with minimalistic wallpaper to create a sense of calmness in the space or eliminate wallpaper altogether and paint the room in muted tones. Most designers would suggest incorporating gray tones and light hues to give the room a more spacious and open feel. There is a range of monochromatic palettes available for one to choose from when it comes to selecting the bedroom color.