Category: HOME

  • What are the signs that your walls are cracking?

    What are the signs that your walls are cracking?

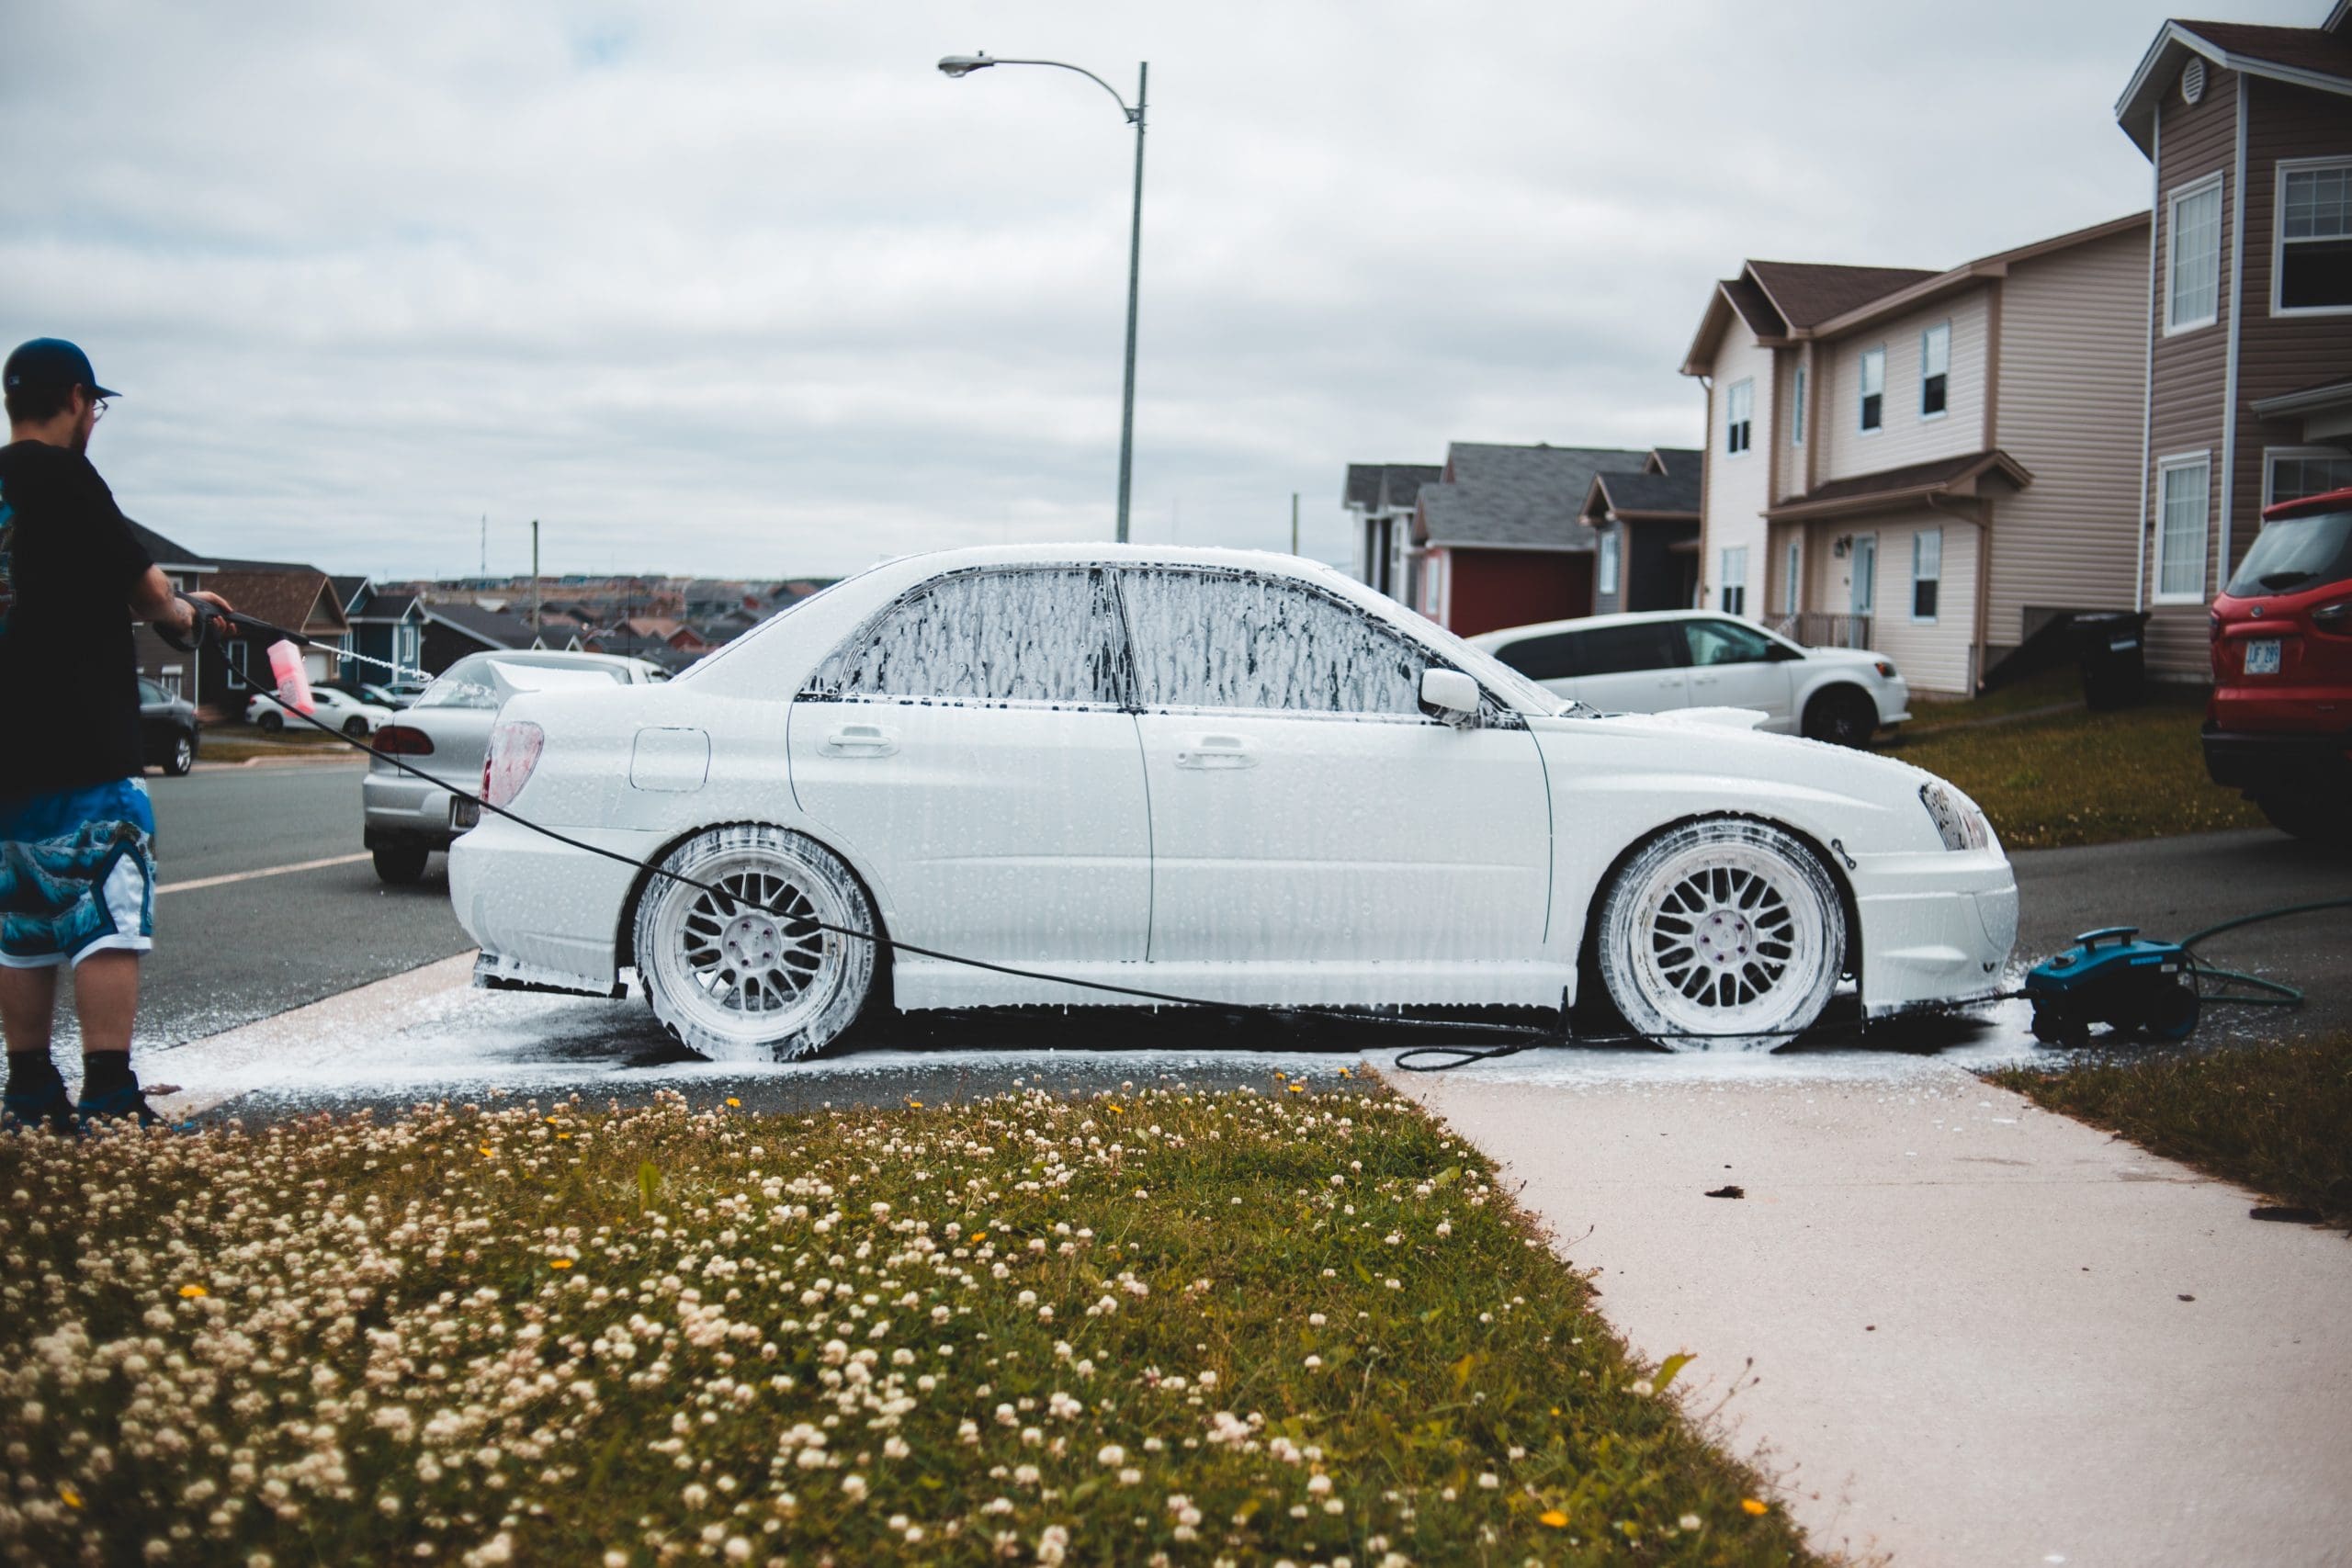
    Some cracks in walls are not a cause for concern, but others may indicate a sinking or damaged foundation (subsidence). Damage to the foundation can quickly devalue your property if you do not address problematic cracks in walls.

    Photo de Sam Moghadam Khamseh sur Unsplash

    You can perform structural and cosmetic repairs mainmark.com on buildings and prevent existing damage from worsening by understanding how to fix cracks in plaster walls and other types.

    Photo de Greg Rosenke sur Unsplash

    Homes with cracked walls

    Cracks in walls can be repaired with Mainmark’s level correction methods in buildings of any size, including residential homes. As soon as we arrive at your home, we assess the damage and determine what caused it. With the help of our engineers and technicians, we create a custom-made plan specific to your house’s needs.

    Photo de Ante Gudelj sur Unsplash

    It is common for houses that need to be re-leveled to develop cracks in the walls, which can occur both internally and externally. The foundations of these houses must be lifted and re-leveled. As the building is re-leveled, wall cracks usually close up, requiring only cosmetic repairs like patching and painting. It is most important that structural damage is resolved and that the house has a solid future. Compared to traditional concrete underpinning, our cutting-edge solutions are modern alternatives. As well as concrete slab floors, we can raise and reveal strip footings, raft slabs, and fill gaps in paths and driveways.

    Cracks in walls are caused by what?

    Types of soil:

    Depending on the amount of moisture in the soil, loosely packed soils, sands, and reactive clays expand, contract, or wash away.

    Roots of trees:

    By absorbing moisture in the ground and growing, neighbouring trees and shrubs cause soil to move.

    System of footings:

    Structures settle when their foundations are inadequately designed or the soil is not compacted during construction.

    Water in excess:

    Whenever water pipes burst or crack, the ground absorbs moisture as it absorbs the sewage and rainwater.

    Weather Extremes & Seasons:

    As a result of natural disasters like flooding, droughts, and earthquakes, clay soils become more compressible and expandable, resulting in excessive foundation movement.

    Building or renovating:

    Construction activity nearby such as drilling or piling, or heavy road traffic can cause soil particles to shift and weaken the ground.

    Photo de Ross Elder sur Unsplash

    Why do walls crack so much?

    The building’s foundation may have shrunk or lost its strength, resulting in large cracks. When this happens, the building sinks, causing large cracks. When this happens, it is usually caused by either too much or too little moisture in the soil underneath the settled section of the building.

    Photo de Marina Grynykha sur Unsplash

    Wall cracks: how to fix them?

    For large cracks, lifting, re-leveling, and re-supporting the building is the best long-term solution. Underpinning is a method of level correction. During re-leveling, cracks in walls may close or become smaller (ready for patching and repainting after plastering or rendering). It is also common for windows and doors to begin working again once the repair is completed. It is traditional to excavate or dig up parts of the foundation, pour in concrete, wait for it to set, and then lift the building off the concrete blocks. Traditional methods, however, can be time-consuming and messy (often requiring weeks or months). While tradespeople are working on the building, you will have to vacate part or all of it.

  • The Ultimate Guide to Choosing the Right Pressure Washer for Your Car

    The Ultimate Guide to Choosing the Right Pressure Washer for Your Car

    Maintaining a clean car is essential to car care. Filthy cars look ugly and might cause rust or paint damage. Car owners prefer hand washing, yet pressure washing is fast and effective. This post will teach you about pressure washing and how to pick the correct one for your automobile.

    Photo by Tima Miroshnichenko

    Why Pressure-Wash Your Car?

    Before picking a pressure washer, it’s crucial to understand its benefits for your car. Car owners benefit from pressure cleaning. First, it cleans even the dirtiest surfaces in minutes. It cleans hard-to-reach locations like the undercarriage and wheel wells. Pressure washing is eco-friendly because it uses water and no chemicals. It’s safer and greener for drivers.

    Photo by Erik Mclean

    Pressurized Washers

    Pressure washers are electric or gas-powered. Electric pressure washers are cheaper, simpler, and better for light-duty applications. They clean automobiles well despite being less forceful than gas-powered pressure washers. Electric pressure washers are perfect for those who don’t need to clean their cars often or have tenacious filth and grime.

    Photo by Erik Mclean

    Gas-powered pressure washers cost more and require more upkeep. They are more powerful and suitable for heavy-duty chores like cleaning huge vehicles or industrial equipment. They remove tenacious dirt and grime better, making them suitable for people with a lot of terrain to cover and who need a more vigorous cleaning method.

    PSI/GPM

    Photo by Tima Miroshnichenko

    While choosing a pressure washer, consider PSI and GPM (gallons per minute). PSI measures nozzle water pressure, while GPM measures pressure washer water volume. Pressure washers with higher PSI and GPM blast dirt and grime more easily. However, choose a pressure washer with the proper PSI and GPM for the job. For instance, a high-PSI pressure washer may not be essential for car cleaning and may damage the paint if used improperly.

    Car Nozzle Selection

    Photo by Erik Mclean

    While choosing a car pressure washer, consider the nozzle. Most pressure washers have interchangeable nozzles for different tasks. A 25-degree or 40-degree nozzle gives a soft, wide spray that won’t damage the paint when washing your car. Water pressure and volume depending on nozzle size. A narrower nozzle delivers more water and pressure than a broader one.

    Vehicle Pressure Washing Tips

    Start car cleaning with the right pressure washer and nozzle. To safely and effectively clean your car, remember these tips:

    • Start by thoroughly rinsing your car. Employ a car-pressure-washing detergent. This will assist in cleaning the paint and prevent damage. Avoid bleach and other harsh detergents that might harm or discolor the paint.
    • Scrub the automobile from top to bottom with a soft-bristled brush. Avoid using steel wool or stiff-bristled brushes, which might scratch the car’s paint.
    • Remove all detergent from the automobile with a wide spray. Soap residue can leave streaks or patches on the paintwork and attract dirt and grime, ruining your hard work.
    • Microfiber towels prevent water marks on cars. Microfiber towels are soft on paint and won’t leave lint. Dry the car completely to avoid wet marks.

    Pressure washing your car cleans and shines quickly. This tutorial will help you choose and use a car pressure washer safely. The correct pressure washer, nozzle, and detergent can clean even the dirtiest car. Get a pressure washer and wash your dusty automobile!

    Photo by Tima Miroshnichenko

    In conclusion, pressure washing is a great alternative for automobile owners who desire quick, effective cleaning. It removes tough dirt and grime and is more environmentally friendly than standard cleaning methods. To choose the correct car pressure washer, examine the kind, PSI, GPM, and nozzle size. With sufficient knowledge and effort, you can make your car appear brand new!

  • Elevate Your Home Decor with Affordable Wall Paneling – The Ultimate Guide

    Elevate Your Home Decor with Affordable Wall Paneling – The Ultimate Guide

    Decorative wall paneling is ideal if you’re searching for a quick yet practical approach to give your living room more texture, dimension, and personality. Wall panels are a versatile and attractive alternative that can drastically change the appearance of any space, whether you’re remodeling your entire house or just one wall. This article will examine the many advantages of decorative wall paneling, available varieties of paneling, and how to install them yourself in detail.

    Photo de alevision.co sur Unsplash

    Decorative wall paneling advantages

    Not only is decorative wall paneling a cost-effective solution, but it is also a clever way to give any space in your house depth and appeal. Some of the main advantages of ornamental wall paneling include the following:

    Affordability: Anybody wishing to renovate their house on a budget might choose decorative wall paneling, frequently less expensive than other wall treatments like wallpaper or painting.

    Installation Promptness: Wall panels are made simple to install, even for DIY novices. Finding the ideal fit for your area is simple with the range of sizes and styles available.

    Versatility: You may utilize decorative wall paneling in every part of your house, including the living room, the bedroom, the kitchen, and even the bathroom. Finding the ideal style to go with your current decor is simple, thanks to the variety of finishes, textures, and colors available.

    Photo de Tim Mossholder sur Unsplash

    Decorative wall paneling types

    With so many options available, deciding which wall paneling is best for you might be challenging. The most common wall paneling types are listed below:

    Wood Paneling: This traditional paneling design brings warmth and character to any space because it is constructed from natural wood. Wood paneling is a classic alternative that complements any house design and comes in various finishes, including raw lumber, painted, and stained.

    MDF Paneling: Constructed from compressed wood fibers, medium-density fiberboard (MDF) paneling is a cost-effective solution. MDF paneling is perfect for achieving a modern and minimalist aesthetic because it is available in various designs, from smooth and sleek to textured and rustic.

    Bathrooms and other damp areas of the home are ideal places to use PVC paneling, which is a challenging and moisture-resistant solution. PVC paneling is an excellent alternative for a low-maintenance option because it is available in various finishes, including smooth and textured.

    3D wall panels are a stylish and eye-catching solution that gives any room depth and interest. 3D wall panels are a trendy and distinctive choice for making a statement wall because they come in various forms, including geometric patterns, waves, and bubbles.

    Photo de Meritt Thomas sur Unsplash

    Installing Decorative Wall Panels: A Guide

    Installing ornamental wall paneling is easy and quick, and it only takes a few hours to finish. An instruction manual for installing wall paneling is provided below:

    Measure the Wall: Using a tape measure, ascertain the size of the wall that will be covered with paneling. You can use this to determine how many panels you’ll need.

    Cut the Panels: Cut the wall panels to the appropriate size using a saw. Before cutting the boards, be careful to put on safety glasses and a dust mask.

    Apply Adhesive: Spread a thin layer of glue over the back of each panel before firmly pressing it against the wall.

    Attach the Panels: Use a nail gun to affix the panels to the wall. The panels may split or crack if the nails are not evenly spaced and driven through the panels’ borders.

    Fill the Seams: Fill in any seams between the panels with wood filler. When the filler has cured, sand it smooth to provide a seamless surface.

    Paint or Stain: You can paint or stain the panels to achieve the desired finish after the filler has dried. Although this step is optional, it can improve the wall paneling’s appearance and robustness.

    Photo de Meritt Thomas sur Unsplash

    As a result,

    Each area in your house may be quickly and affordably transformed with decorative wall paneling. You can choose the ideal wall paneling to enhance the appearance of your home and compliment your current décor, thanks to the large selection of designs and materials available. There is a style to suit every preference and price range, whether you choose traditional wood paneling, contemporary 3D wall panels, or something in between.

    We’ve written an essay that offers helpful information and engages the reader with a good level of ambiguity and burstiness by adjusting sentence length and complexity, utilizing a wide variety of terminology, and using transitional phrases and clauses. With the help of these strategies, this article might get a high position in organic search results for the term “decorative wall paneling,” ensuring that it reaches a larger audience that can take advantage of this smart and cost-effective home décor option.

  • All you need to know before you start your yoga training

    All you need to know before you start your yoga training

    Yoga activities have grown in popularity worldwide, as have the number of instructors and training courses. Many people are eager to participate in yoga activities for physical fitness and health reasons.

    Photo de kike vega sur Unsplash

    However, consider enrolling in yoga instruction. In that case, you may experience excitement and fear, which is natural because training may be an extremely demanding personal and professional journey.

    If you want to transform your yoga enthusiasm into a job, you should know a few things before starting your first yoga training classes. Here are some pointers to consider before beginning your yoga training. Let’s get started.

    Photo de Shashi Chaturvedula sur Unsplash

    Lay out the foundation.

    To begin, choose the yoga program in which you want to participate, then go through the literature or speak with recent graduates to discover what is required of you. You will be able to determine how much time it will take to finish the course, how much homework will be assigned, and how frequently tests will be delivered.

    Furthermore, even simple problems such as determining the proximity of a pharmacy, particularly for first aid assistance in the event of an injury during training, are essential. Reading through the course will give you an idea of what to expect and how the movement will fit into the rest of your life.

    Photo de Derick McKinney sur Unsplash

    Release expectations.

    There are many expectations associated with yoga training, yet you must thoroughly prepare for what is ahead in yoga training. Despite reading the course literature, no one can predict how you will feel, so before commencing this trip, remember that all you can do is your best.

    Set your objectives.

    Set an intention, just like you would at the start of a lesson. Remember why you practice yoga and why you might want to teach it. This intention is helpful to return to if things get a little challenging or to overwhelm at times.

    Seek support.

    Sharing the experience with other yogis is an excellent part of the journey. Most yoga training programs assign students a teacher-mentor to help them through difficult times, but classmates may also be a valuable source of support and inspiration. You may also get advice from healthcare experts on the ideal training program to participate in patient education.

    Learn to pay attention.

    Prepare to take direction and work hard. Bring an open mind. More than your physical and mental fitness, this decides your potential to transform.

    Learn to be patient.

    Everything will take time, even after your teacher training, to settle in. Yoga is a transforming discipline that only happens after some time. Your abilities will emerge over time. Be patient and continue to teach and practice.

    Commitment.

    Before you begin your training, your willingness to devote yourself is the only thing that counts. The course is difficult, if not exhausting. However, if you are determined, this might be one of the most remarkable things ever happening to you.

    Prepare your psyche.

    The more open you are, the more advantage you will receive from the teacher training. Before you begin, go within and assess your current situation. Try to comprehend your fears and difficulties, learn to disregard your problems, and avoid those things that might prevent you from changing, among other things.

    Photo de David Hofmann sur Unsplash

    Determine the financials.

    Yoga training is also costly; therefore, you need to plan ahead to make a seamless transition. If you are the trainer, you must decide on a payment policy, such as enabling your pupils to pay in installments or whole for their tuition.

    Conclusion.

    Whether you are a devoted yoga practitioner wishing to extend your knowledge of practice or a teacher hoping to grow and increase your skills, it is critical to have a sound strategy and preparation program in place before the start of training to complete the program effectively.

  • Great Reasons to Consider Cooking Outdoors

    Great Reasons to Consider Cooking Outdoors

    Do you envision dirty grills and stained picnic tables when you think of cooking outdoors? Though that may be the case in your neighborhood park, it does not have to be the condition of your backyard!

    With the right tools and some sharp tips, you can enjoy cooking with friends and family while also eating healthier. It’s also cheaper than dining out!

    Check out these great reasons to cook outside!

    Photo de Nick Artman sur Unsplash

    Change of Pace

    As long as you’ve got the equipment to cook outdoors, it  can be much more enjoyable and fun than heading to the kitchen or ordering takeout. Consider the possibility of gathering the family outside to make individual pizzas and put them into an outdoor pizza oven.

    Doesn’t that sound much more enjoyable than ordering delivery pizza or throwing a frozen pizza into the kitchen stove? There are so many ways to cook outside; aside from the common grill, your other options include:

    • Outdoor kitchens
    • Cooking in a firepit
    • Outdoor stoves
    • Smokers
    • Dutch ovens
    • Outdoor pizza ovens

    All of these options are fun to do with family and friends, and can lead to great memories. At the very least, a change of pace can be beneficial for your mental health.

    By cooking outdoors, you may add a little variety to a routine that might have grown too casual or monotonous.

    Photo de Dan Edwards sur Unsplash

    Social Events

    If you’ve ever been stuck cooking during a social event, you know what it’s like to be left alone in the kitchen while everyone else is visiting in the living room. Perhaps you’ve been embarrassed to let visitors in the kitchen because of the mess that’s being made, so you encourage them to go somewhere else.

    Cooking outdoors dispels both of these concerns. Most of the time when you cook outdoors, there’s enough space for people to visit even while you’re preparing the food.

    In addition, there’s less of a standard of cleanliness to maintain outdoors, so you’re apt to feel more comfortable with a mess. Whether they’re near a grill, or around the fire, everyone finds it easier to feel involved in the conversation. 

    Saves Time and Allows More Productivity

    It’s not unusual to find you have too many things to cook and not enough appliances when you’re in the kitchen. All too often, food gets stored in refrigerators, skipped over, or reheated.

    The simple solution is to cook outside. Rather than having to reheat the rolls after the meat comes out of the oven, you could bake the rolls while the meat is on the grill.

    Photo de Andy Chilton sur Unsplash

    As a result, the food is fresher, and more items can be cooked simultaneously, which saves time. Cooking outside also saves time when it comes to cleaning.

    Indoor cooking can be messy and require a lot of cleanup. Outdoor cooking generally requires fewer appliances and dishes. Since cleaning expectations outside are usually different from indoors, there’s usually less to wipe down and scrub.

    Healthier

    People tend to use more fresh food when they cook outside. Whether they’re grilling chicken or vegetables, or cutting up fruit, people usually cook more health fare when they tackle an outdoor meal.

    This is especially true when you consider that the alternatives are getting takeout or putting processed food in the oven. 

    Photo de Andy Chilton sur Unsplash

    Conclusion

    Outdoor cooking is a good way to mix it up, stay more involved in the social activity, and save some time. If you’ve never experimented with cooking outdoors, or don’t know where to start, a simple flat-top grill is a great way to try things out.

    These are great for experimenting with various recipes and cooking just about anything. Once you get a few recipes down, you can be confident and ready to make outdoor cooking a regular part of your meal prep and socializing.

  • How to Prevent Dampness and Mould in your Home

    How to Prevent Dampness and Mould in your Home

    Excessive moisture in your home might be a problem. It can find its way into the structure of the building, causing it to degrade over time. Worse, it can provide exactly the habitat which several species of harmful fungus need to thrive. 

    Photo de Paul Hanaoka sur Unsplash

    What is damp?

    ‘Damp’ is a term which refers to a build-up of moisture in a particular part of the home. In some cases, it can result from a leak – but this isn’t always so. For example, if your bathroom isn’t properly ventilated, you might find that you run into problems with damp, even when everything’s nicely sealed. The same goes if you’re drying clothes indoors, perhaps by turning the heating up. All of the moisture has to go somewhere – and it will often end up soaking into the walls.

    Photo de Hutomo Abrianto sur Unsplash

    What is mould?

    Mould is a kind of fungus which feeds on dead material. It needs moisture to live, which is why it often develops in damp places. If you can see black patches spreading across the walls and tiles, the chances are good that you’re looking at mould.

    So, how does mould get there? It actually reproduces by releasing tiny spores into the air. These spores eventually settle in a place where there’s warmth and moisture, and a new colony is established. 

    This is why mould poses a health problem: these spores can trigger allergic reactions. In some vulnerable people, the effects can be very serious. As such, it’s a good idea to get on top of moisture problems before mould becomes a factor.

    Photo de Kari Shea sur Unsplash

    Preventing damp

    There are several ways to deal with damp. The best is to make sure that your home is well-ventilated. Any areas of your home where moisture is going to be created, like the shower or the hob, should have an extractor fan nearby. Increase the amount of airflow in your home in general. 

    You might also use an electric dehumidifier. This is an excellent option if you’re drying clothes indoors, since it’s cheaper to run than a tumble-dryer

    Avoid leaks

    If your pipes are leaking, then moisture problems are inevitable – even if the leaks are very small you should replace faulty plumbing and heating equipment. Deal with sections of pipe that develop faults, and protect them proactively, too. Pipes that run through exposed areas are vulnerable to freezing up – so clad them appropriately.

    Using your heating system

    If you don’t have a means of improving the ventilation situation, then you might deal with mould in the short-term by heating, and thereby drying, the offending space. Just be aware that, when the surface cools down again, it’ll once again attract condensation.

    Photo de Minh Pham sur Unsplash

    Getting rid of mould

    You might find off-the-shelf mould-removing formulas at major supermarkets, and from specialist online vendors. On the other hand, if the problem is severe, you might call in a professional. Just be aware that you need to tackle the underlying causes of the excess moisture if you want a mould-free property in the long-term.

  • Selecting the Best Whole House Paint Colors: Enhancing Your Home’s Beauty

    Selecting the Best Whole House Paint Colors: Enhancing Your Home’s Beauty

    Choosing the best paint colors for your home can be overwhelming, as there are countless options. The proper color selection can significantly impact the ambiance and appearance of your home.

    Photo de Elena Rabkina sur Unsplash

    Don’t worry; we’ve covered you with some of the most captivating whole-house paint color ideas that will take your home’s visual appeal to the next level.

    Photo de Stephanie Harvey sur Unsplash

    Neutral Colors: A Classic Choice Neutral colors are an ageless and enduring choice regarding whole house paint. Shades of beige, gray, and white are some options to consider. These colors are popular due to their versatility, timelessness, and ability to complement various design styles. The tranquil and soothing atmosphere that neutral colors create is perfect for a home.

    Bold Colors: Make a Statement Incorporating bold colors is an ideal way to add a personality to your home. If you want to create lasting impressions, bold colors are the way to go. Blue, green, and even pink are some colors that fit this category. Bold colors can serve as accent walls or help create a room’s focal point.

    Photo de Jessica Arends sur Unsplash

    Pastel Colors: Creating a Soft and Feminine Look Pastel colors work incredibly well in creating a soft and feminine look in your home. Shades of pink, lavender, and baby blue are some options. Pastel colors are perfect for bedrooms and bathrooms where a relaxed and tranquil environment is desired.

    Dark Colors: A Bold and Dramatic Choice Dark colors are a bold and dramatic choice that can create a moody and intense atmosphere in your home. Navy, forest green, and even black are some colors to consider. Dark colors work well in rooms with high ceilings or plenty of natural light, making the space feel more intimate.

    Choosing Whole House Paint Colors: Some Tips to Consider Now that you have some of the best whole house paint color ideas, you might wonder how to choose the perfect color for your home. Here are some tips to help you make a wise decision:

    Photo de Ján Jakub Naništa sur Unsplash

    Consider the Natural Light The amount of natural light in your home can significantly affect how colors appear on your walls. Using darker colors may be possible if your home has a lot of natural light. But if your home lacks natural light, you might opt for lighter colors.

    Think About the Mood You Want to Create Different colors can evoke different moods in your home. If you want to create a calm and relaxing atmosphere, then neutral colors might be the way to go. But bold colors are a better choice if you want to create a more energetic and lively atmosphere.

    Photo de Mike Yukhtenko sur Unsplash

    Consider Your Home’s Design Style Your home’s design style plays a vital role in color selection. If you have a modern home, bold colors may work well. But sticking with neutral colors may be more appropriate if you have a traditional house.

    In conclusion, choosing the perfect whole-house paint colors can enhance the visual appeal of your home, making it more welcoming and beautiful. Whether you prefer neutral colors, bold colors, pastel colors, or dark colors, selecting a color that complements your home’s natural light, your desired mood, and your home’s design style is crucial. With these tips, you can confidently choose the best whole-house paint colors for your home, creating a harmonious and attractive environment that you will enjoy for years to come.

  • The Art of Carpet Deep Cleaning: A Comprehensive Guide to Achieving Professional Results

    The Art of Carpet Deep Cleaning: A Comprehensive Guide to Achieving Professional Results

    Carpets are an integral part of our homes, adding warmth, comfort, and a cozy feel to our living spaces. However, with time, dirt, dust, and other debris can accumulate in the fibers of our carpets, leaving them looking dull and unkempt.

    Photo de Sina Saadatmand sur Unsplash

    Deep cleaning is essential to keep our carpets looking their best and to maintain a healthy living environment. This article will explore the intricacies of deep cleaning carpets like a pro, ensuring that your home remains fresh, clean, and hygienic.

    Photo de Lexie Barnhorn sur Unsplash

    The Right Tools for the Job Before embarking on the deep cleaning journey, it is imperative to have the right tools and supplies. Here is a comprehensive list of what you will need:

    1. A powerful and reliable vacuum cleaner with strong suction power.
    2. A carpet cleaner or steam cleaner.
    3. Carpet cleaning solution.
    4. A stiff-bristled brush.
    5. White clothes or towels.
    6. Protective gloves.
    7. A bucket.

    Thorough Vacuuming

    Photo de Kowon vn sur Unsplash

    The first step in deep cleaning your carpets is to remove any loose dirt, dust, and debris on the surface of your carpets. A thorough vacuum will help you achieve this. Make sure to use a vacuum cleaner with robust suction power, and go over each area several times to ensure that you’ve removed as much dirt as possible.

    Pre-Treat Stains with Precision

    Photo de No Revisions sur Unsplash

    Once you have completed Vacuuming, it is time to tackle any stains on your carpets. You can use a commercial carpet cleaning solution specifically designed for removing stains or create your solution by mixing equal parts of water and white vinegar. Apply the key to the color, let it sit for a few minutes, and then blot it up with a white cloth or towel.

    Embrace the Power of Carpet Cleaners and Steam Cleaners

    The next step is to use a carpet cleaner or steam cleaner to deep clean your carpets. If you’re using a carpet cleaner, follow the manufacturer’s instructions carefully for mixing the cleaning solution and operating the machine. If you’re using a steam cleaner, fill the machine with water, add the recommended cleaning solution, and start at one end of the room, working your way to the other. Overlap each pass to ensure you’ve covered every inch of the carpet.

    Rinse and Extract with Care

    Photo de Ashwini Chaudhary(Monty) sur Unsplash

    After cleaning your carpets, and it is crucial to rinse and extract the cleaning solution to remove any remaining dirt and debris. If you’re using a carpet cleaner, follow the manufacturer’s instructions for rinsing and extracting. If you’re using a steam cleaner, refill the machine with clean water and remove the cleaning solution from the carpets.

    Patience is a Virtue – Allow Your Carpets to Dry Completely

    Photo de Erfan Banaei sur Unsplash

    The final step is to allow your carpets to dry completely. This can take several hours, so be patient and avoid walking on the mats or placing furniture on them until they’re scorched to prevent any damage.

    In conclusion, deep cleaning your carpets is vital to maintaining a clean, healthy, and comfortable home. By following these steps, you can achieve professional results, ensuring that your carpets remain fresh, clean, and hygienic for years to come. The text has been written with a high degree of perplexity and burstiness, emphasizing the importance of deep cleaning and providing a comprehensive guide to help you achieve the best results possible.