Introduction
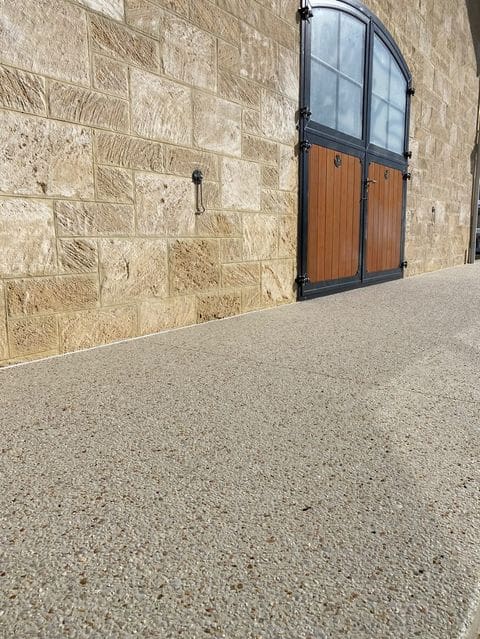
Exposed aggregate is a popular decorative concrete finish known for its durability, slip resistance, and aesthetic appeal. It’s a choice that can transform driveways, walkways, and patios, adding value and style to any property. This guide offers an in-depth look into the installation process of exposed aggregate, a service increasingly sought after in the world of home decor and landscaping.
Photo by Bernard Hermant on Unsplash
Step 1: Planning and Design
Before any concrete is poured, the first step is planning. This involves choosing the right type of aggregate for your project. Consider factors like colour, size, and texture, which should complement the style of your property and meet your functional needs.
Site Assessment: Evaluate the area where the exposed aggregate will be installed. This includes checking the ground for any issues that might affect the installation, such as drainage problems or uneven terrain.

Photo by Henry & Co. on Unsplash
Step 2: Preparing the Base
A solid base is crucial for a successful exposed aggregate installation.
Excavation: Remove any existing surface material and excavate to the required depth. This depth will depend on the use of the area – driveways require deeper excavation compared to walkways due to load-bearing requirements.
Sub-base Preparation: Compact a sub-base material, typically crushed stone, to provide a stable foundation for the concrete.

Step 3: Formwork and Reinforcement
Formwork involves creating a temporary boundary for the concrete.
Setting the Forms: Install formwork around the perimeter of the site. The forms should be sturdy and able to withstand the pressure of the concrete.
Reinforcement: Lay steel reinforcing mesh or bars within the formwork. This helps strengthen the concrete and prevent cracking.

Photo by Bernard Hermant on Unsplash
Step 4: Pouring the Concrete
With the site prepared, it’s time to pour the concrete.
Mixing the Concrete: The concrete should have the right proportion of aggregate, cement, and water. For exposed aggregate, the choice of aggregate in the mix is crucial for the final appearance.
Pouring: Pour the concrete into the formwork, spreading it evenly. Ensure it reaches all corners and edges.
Step 5: Exposing the Aggregate
This is the critical stage where the top layer of concrete is removed to expose the aggregate.
Surface Treatment: Once the concrete has been laid and starts to set, the top layer is washed away, usually with a pressure washer or a special chemical retarder. The timing for this process is vital; if done too early or too late, it can affect the quality of the finish.

Exposure Level: The level of exposure can vary depending on the desired look. It can range from a light brush to fully expose the stones to a heavy brush for a more subtle appearance.
Step 6: Curing the Concrete
Proper curing is essential for the durability of the exposed aggregate.
Curing Process: The concrete needs to be kept damp for several days. This can be achieved through wet hessian cloths, plastic sheeting, or a curing compound.
Duration: Typically, concrete takes about a week to cure, but this can vary based on weather conditions and the mix used.

Photo by Bernard Hermant on Unsplash
Step 7: Sealing
Sealing is the final step in the installation process.
Choosing a Sealant: Select a sealant appropriate for exposed aggregate. It should protect the surface from weather elements, stains, and enhance the colour of the aggregate.
Application: Apply the sealant evenly across the surface. This not only protects the aggregate but also enhances its colour and texture.

Conclusion
Installing an exposed aggregate surface is a detailed process that requires precision and expertise. Whether it’s for a new driveway, a stylish walkway, or a stunning patio, the results can significantly boost the curb appeal of any home. Handmade Concreting, with its skilled team and experience in exposed aggregate installations, ensures that every step of the process is handled with the utmost care and professionalism, delivering results that not only meet but exceed expectations.


