Getting the renovation sequence wrong — even by just one trade — can cost you $2,000 to $6,000 in rework, and it happens in nearly every kitchen project where a firm plan wasn’t locked in before demolition began. That’s not a contractor scare tactic. That’s what happens when a plumber moves a drain after tile is down, or when countertop fabrication starts before the cabinets are confirmed level. The money doesn’t disappear into thin air — it goes directly into undoing work that was already paid for. If you’ve ever asked yourself what is the best order to renovate a kitchen, the answer starts here: sequence is not optional, and every phase creates the physical conditions the next one requires.
The sequence of a kitchen renovation isn’t a preference. It’s a set of hard dependencies, where every trade creates the physical conditions the next trade requires. Understanding that logic — not just memorizing a checklist — is what separates a project that finishes on time and on budget from one that drags into month five with a plywood subfloor and a borrowed microwave.
Here’s the full sequence, explained phase by phase, with the real reasons behind each step.
Why the Sequence of a Kitchen Renovation Matters More Than the Budget
Most homeowners fixate on budget. Budget matters — HomeAdvisor puts the average kitchen remodel between $14,611 and $41,432 — but sequencing errors are consistently among the leading causes of overruns within that range. You can have a perfectly sized budget and still blow it by scheduling the wrong trade on the wrong day.
The reason sequencing failures are so expensive is compounding damage. When flooring goes in before the plumbing rough-in is inspected and confirmed, and the inspector later requires pipe rerouting, the floor comes up. You pay for the first installation, the tear-out, the replumbing, and the reinstallation. That’s three to four line items added to your budget for one scheduling mistake. The floor didn’t fail. The sequence did.
Trade dependencies are the governing logic of any renovation. Here’s what that means in practice:
- A framing change must happen before plumbing is roughed in, because you can’t run new drain lines through a wall that might be relocated.
- Rough-in must happen before drywall closes the walls, because inspectors need to see pipe and wire before it’s buried.
- Cabinets must be set before countertops are templated, because stone fabricators cut to the actual installed cabinets — not to drawings.
- Countertops must be confirmed before appliances are delivered, because cutout dimensions vary by model.
Each of these is a dependency, not a suggestion. Violating one pushes the error forward through every subsequent phase, and the further downstream you catch it, the more it costs to fix.
A wrong sequence also costs time in ways that money can’t always recover. A single failed inspection can pause a project for three to ten business days depending on your municipality’s backlog. Add a countertop template that has to be redone and a four-cabinet reorder because the wrong ones shipped, and a twelve-week project becomes seventeen. That’s five additional weeks without a functioning kitchen — which typically means $200 to $400 per month in extra takeout costs that nobody budgets for.
Understanding what is the best order to renovate a kitchen isn’t just an academic exercise. It’s the difference between a project that closes out cleanly and one that accumulates rework charges on every other invoice. Contractors who work in the right sequence spend less time waiting on other trades, which also means lower overall labor costs — because idle tradespeople on a job site still get paid for their time.
Actionable takeaway: Before you contact a single contractor, write out every trade you expect to hire and draw a line between each one showing what work it depends on. If you can’t draw that line, you’re not ready to schedule.
Before You Touch a Single Cabinet: The Planning Phase That Most Homeowners Rush
The planning phase isn’t the exciting part. It’s where you’re staring at cabinet door samples and arguing about whether the island needs seating for four or five. But it’s also where every downstream decision either gets made correctly or gets deferred until it becomes an emergency.
Every irreversible decision needs to be finalized before demo day. That means your cabinet layout, appliance specifications, plumbing fixture locations, lighting plan, and countertop material are all confirmed — not “pretty much decided.” Pretty much decided gets you a countertop template that doesn’t account for a 33-inch farmhouse sink you switched to three weeks after ordering the 30-inch one.
The product schedule is what most homeowners skip and almost every project suffers for. Custom cabinetry lead times average 6–12 weeks. Semi-custom runs 4–6 weeks. Some appliance lines — particularly professional-grade ranges from brands like La Cornue or Ilve, or panel-ready refrigerators from Sub-Zero — have lead times of 12–20 weeks. If you set a demo date before those orders are placed and confirmed, you will run out of project before you run out of kitchen.
A realistic planning checklist includes:
- Finalize the full design with measured drawings — not just a mood board
- Order cabinets as soon as the design is locked, before anything else
- Pull permits before demo begins — not after; permit delays are a leading cause of stalled projects
- Confirm appliance dimensions down to cutout requirements, not just overall specs
- Identify long-lead items like specialty tile, custom range hoods, or imported fixtures
- Establish a product arrival schedule that dictates when each phase can realistically begin
Permits deserve specific attention. Many homeowners treat permits as a bureaucratic annoyance and pull them late or not at all. Skipping permits doesn’t save time — it creates a liability. Unpermitted electrical and plumbing work is a standard disclosure issue in real estate transactions and can complicate or kill a home sale. In some jurisdictions, inspectors can require walls to be opened retroactively if work was done without permits. Pull them during planning, before you’ve spent a dollar on labor.
Actionable takeaway: Set your demo date based on your cabinet delivery date, not on your availability. If your cabinets won’t arrive for eight weeks, your demolition should happen no earlier than one week before that window closes.
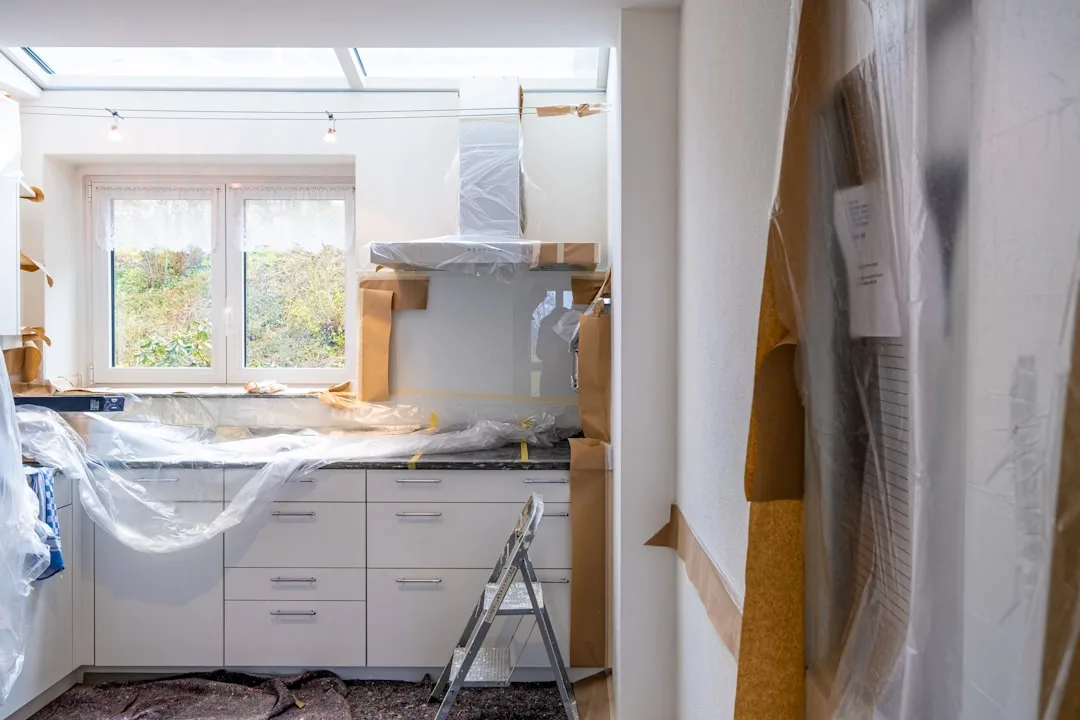
Demolition Day: What to Remove, What to Protect, and What Order to Do It In

Demolition looks like the straightforward part. It isn’t. Done in the wrong order, demo day damages items you planned to reuse, destroys documentation you’ll need later, and occasionally exposes hazards that halt the entire project.
Utility disconnection happens before anything else is touched. Water, gas, and electricity need to be shut off in that order for a standard kitchen, with gas requiring a licensed plumber or gas fitter in most jurisdictions. Don’t assume shutting off a circuit breaker is sufficient — confirm that the specific circuits serving the kitchen are dead with a non-contact voltage tester before cutting anything.
The removal sequence for a standard kitchen gut looks like this:
- Disconnect and remove appliances first — refrigerator, range, dishwasher, microwave
- Remove upper cabinets before lower cabinets — this gives workers unobstructed standing access and prevents upper cabinets from being dislodged onto lower ones during removal
- Remove lower cabinets and sink base after upper cabinets are clear
- Strip backsplash tile before opening walls — this protects the substrate documentation and lets you assess what’s behind the tile before committing to a drywall plan
- Open walls only after the tile and cabinet removal is complete, so you have full access and a clear picture of what the rough-in conditions actually are
- Remove flooring last — after walls are opened and rough-in conditions are confirmed, so you don’t tear up a floor that might need to stay as a work surface during structural or plumbing changes
One hazard that regularly halts demo: asbestos and lead paint. Homes built before 1980 frequently have asbestos in floor tile adhesive, drywall joint compound, and pipe insulation. Homes built before 1978 may have lead paint on walls or cabinets. Both require professional testing before any demolition that creates dust or debris. A certified abatement contractor typically charges $1,500 to $3,500 for kitchen-scope remediation, and skipping this step creates both a health liability and a legal one in most states.
Photograph everything before and after demo. Inside every wall cavity, photograph the pipe and wire routing, note the existing circuit sizes and wire gauges, and document where the drain stack is located. These photos are reference material for every rough-in trade that follows, and they’re your documentation if a dispute arises about existing conditions versus new work.
Actionable takeaway: Schedule a hazmat test at least two weeks before your planned demo date. If the results come back clean, you’ve lost nothing. If they don’t, you’ve avoided a stop-work order and a potential health crisis.
Rough-In Phase: Framing, Plumbing, and Electrical in the Right Order
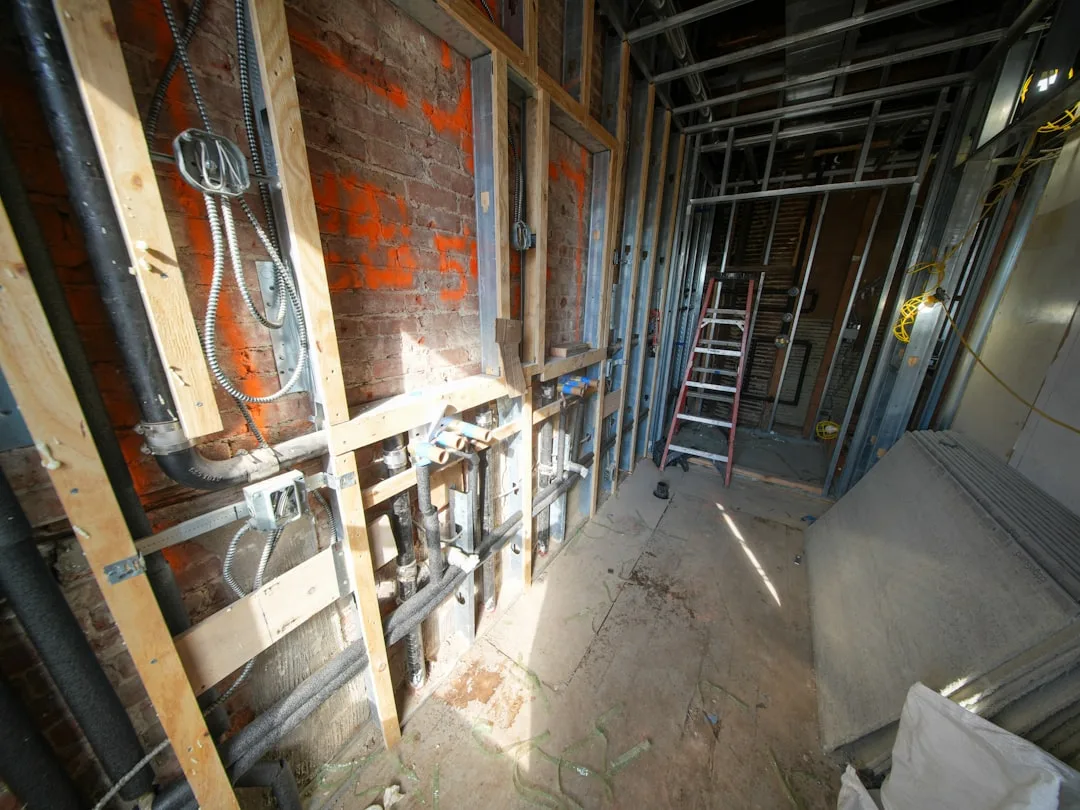
The rough-in phase is where what is the best order to renovate a kitchen becomes most technically specific — and where the most expensive mistakes happen. Rough-in covers everything that goes inside the walls, floor, and ceiling before they’re closed up. It includes structural framing changes, plumbing drain and supply lines, and electrical wiring. All of it must be completed and inspected before drywall goes up.
Framing changes come first. If you’re moving a wall, widening a doorway, or adding a soffit, that structural work happens before any pipe or wire is run. The reason is straightforward: you cannot finalize where a drain line or electrical circuit runs if the wall framing it travels through might move. Frame first, then route everything else around the confirmed structure.
The rough-in order after framing is:
- Plumbing rough-in — drain lines before supply lines, because drain routing is constrained by gravity and slope requirements that supply lines aren’t. A 3-inch drain line needs a consistent ¼-inch drop per foot of horizontal run, which limits where it can go. Supply lines are pressurized and flexible in routing. Run the constrained system first.
- HVAC rough-in — ductwork and ventilation, including range hood ducting, which often needs to penetrate an exterior wall or travel through a cabinet run before those spaces are closed
- Electrical rough-in — wiring for outlets, circuits, under-cabinet lighting, and appliances. Electrical runs last in rough-in because wires are the most flexible to route around the constraints established by plumbing and HVAC
After rough-in is complete, schedule your inspections before touching drywall. Most jurisdictions require separate inspections for plumbing rough-in and electrical rough-in. Some require a combined rough-in inspection. Confirm with your local building department what’s required in your municipality before scheduling any trades, because a failed inspection or a missed inspection type can require walls to be reopened after drywall is hung.
Actionable takeaway: Book your rough-in inspections the same week you schedule rough-in labor to start. Inspection slots fill up, and a one-week delay waiting for an inspector is a one-week delay for every trade that follows.
Drywall, Flooring, and Paint: The Middle Phase That Sets Up Everything Else
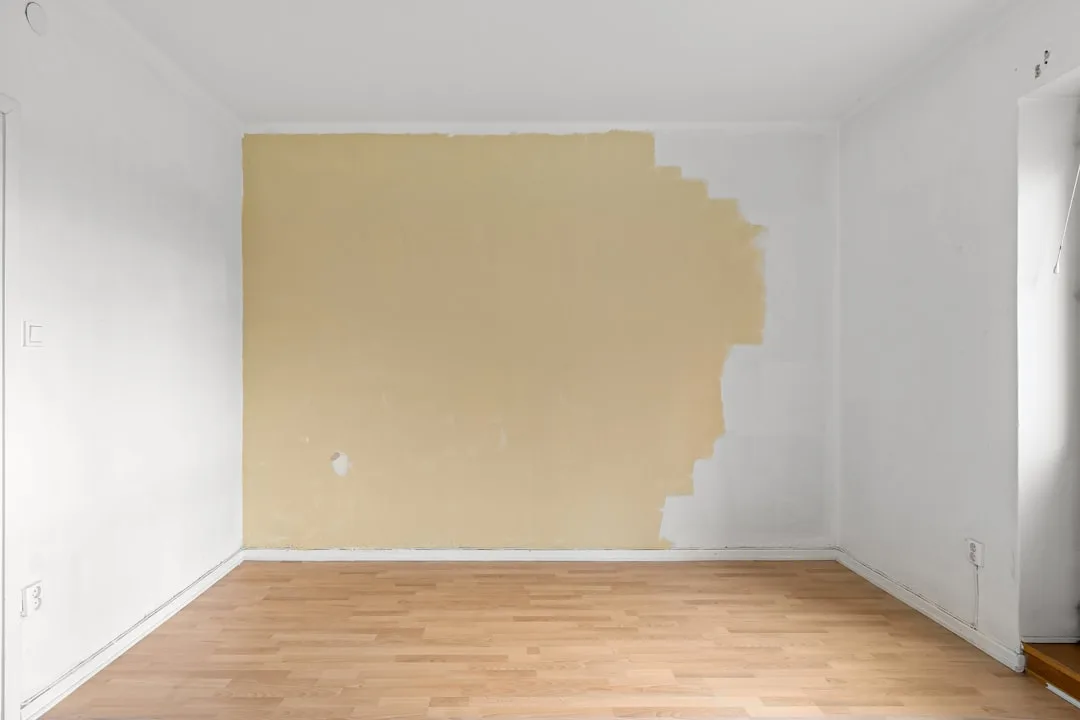
Once rough-in inspections are passed and walls are closed, the project enters the middle phase — the part that transforms an open frame back into a room. The sequencing logic here is about protecting finished surfaces from the trades that follow.
Drywall first, always. Hanging and finishing drywall before flooring goes down protects the floor from compound dust, joint knife scratches, and the foot traffic of multiple workers. It also lets you paint before cabinets are installed, which is significantly faster and produces cleaner results — you’re painting flat walls, not cutting in around cabinet boxes.
The correct sequence through the middle phase:
- Hang and finish drywall — including any ceiling work, soffit construction, or recessed light rough-in boxes
- Prime and paint walls and ceiling — at minimum, prime all surfaces; paint the ceiling and upper wall areas that will be difficult to access after cabinets are set
- Install flooring — after walls are closed and primed, before cabinets go in
That last point — flooring before cabinets — is debated among contractors, and there are two legitimate camps. Installing flooring before cabinets means you run flooring under the cabinet toe kicks, which adds material cost but simplifies the install and makes future cabinet replacement easier. Installing flooring after cabinets saves material but requires precise cuts around cabinet bases and creates a situation where removing cabinets later damages the floor. For most homeowners doing a full renovation, flooring before cabinets is the cleaner approach and the one that protects resale flexibility.
One exception: large-format tile floors. Tiles over 24 inches require a more rigid substrate and often a mud bed or uncoupling membrane installation that works better on a clean subfloor before cabinets add load and complicate access. In those cases, tile goes in before cabinet installation but after a final subfloor inspection confirms there’s no flex that would crack grout joints.
Actionable takeaway: Paint your ceiling and at least one coat on walls before cabinets arrive on site. It takes a fraction of the time it will take after the room is furnished, and you’ll get cleaner results without the masking gymnastics.
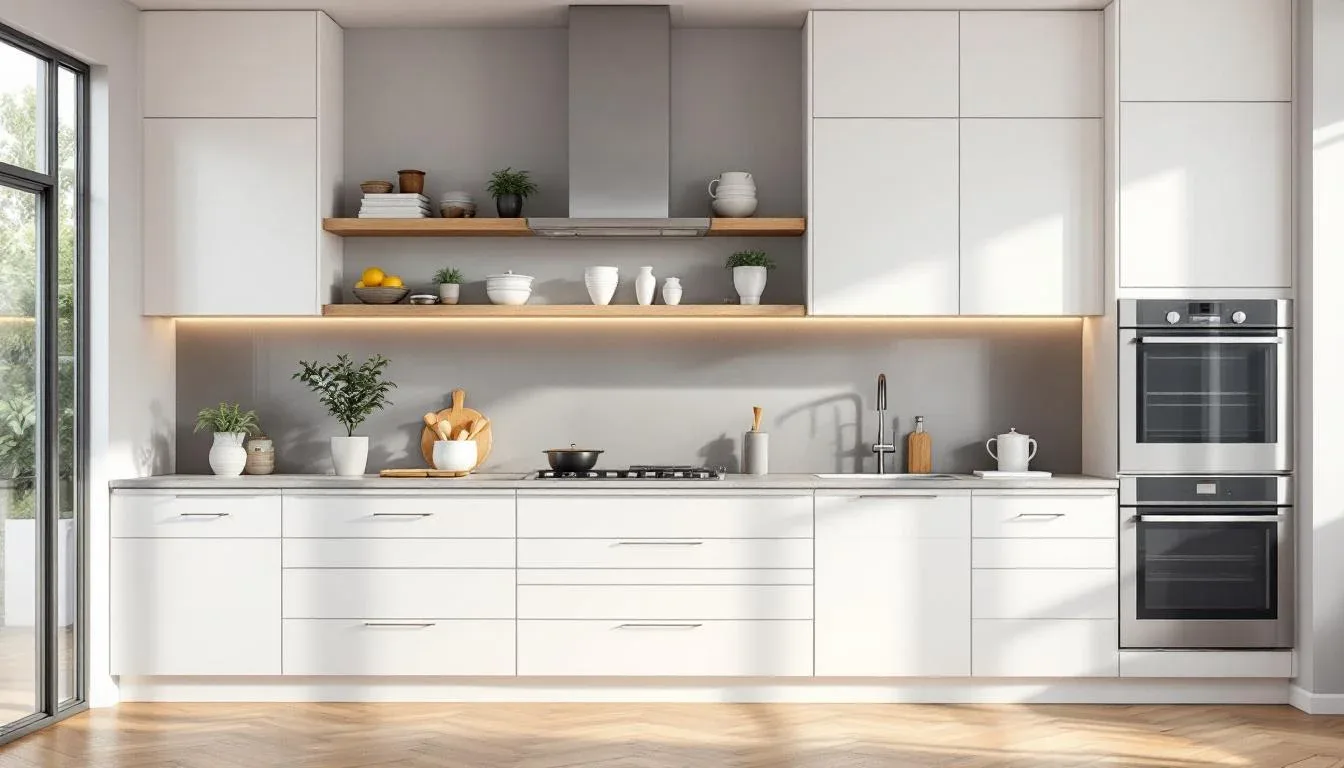
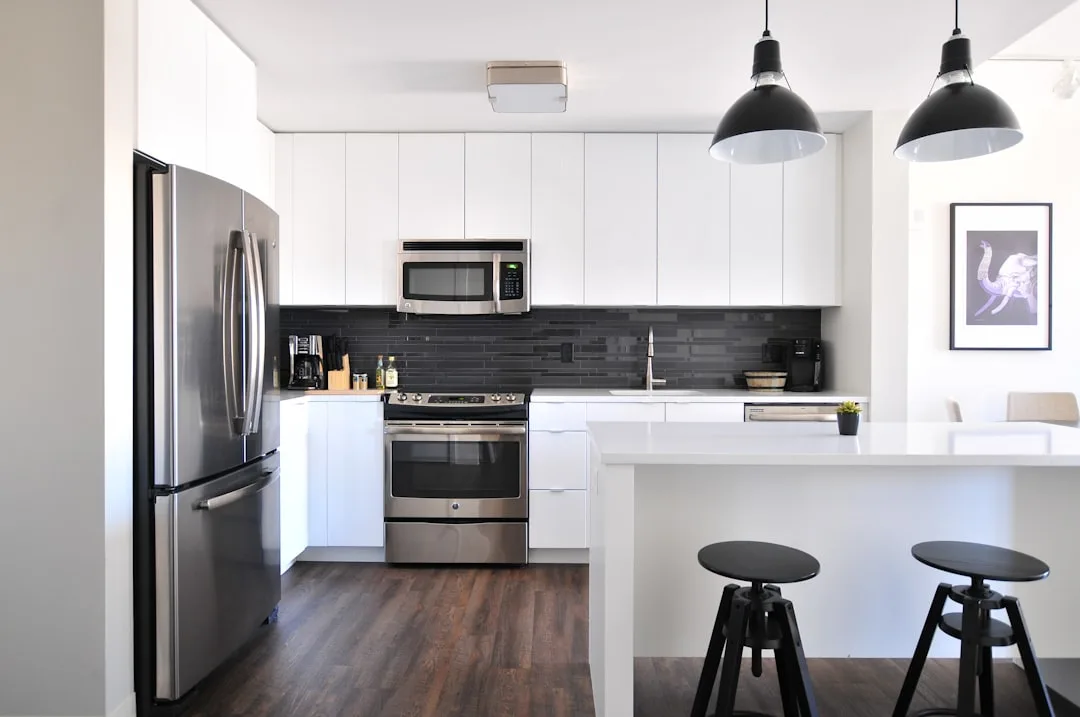
Cabinet Installation: The Phase That Everything Else Locks In Around

Cabinet installation is the structural anchor of the kitchen renovation. Once cabinets are set and confirmed level, every subsequent trade works to their dimensions. Countertop fabricators template off installed cabinets. Appliance cutouts reference cabinet openings. Backsplash tile terminates at cabinet edges. Getting cabinets wrong — either out of level or in the wrong position — cascades through every phase that follows.
Verify level before you do anything else. Most residential floors are not perfectly level, and kitchen floors are no exception. Cabinet installers should use a long level or a laser level to identify the high point of the floor and work from there, shimming low spots rather than scribing cabinets down at high spots. The goal is a perfectly level run of cabinet tops across the entire kitchen, because that’s what the countertop fabricator needs to work from.
The installation sequence within cabinet work:
- Upper cabinets first — installed before lower cabinets so installers have unobstructed floor access and don’t risk damaging lower cabinet boxes while reaching overhead
- Tall cabinets (pantry, oven towers) — installed alongside uppers, as they’re typically structural reference points for the overall cabinet run
- Lower cabinets — set after uppers are confirmed plumb and level, shimmed and screwed into wall studs
- Doors and hardware — typically left off until after countertops are installed to avoid damage during templating and delivery
After all cabinet boxes are set, have your contractor do a final level check across the entire run before calling the countertop fabricator. The template appointment is a billable visit, and if the fabricator arrives to template and discovers the cabinets aren’t level, you pay for the visit and reschedule — which delays countertop delivery by the full fabrication lead time, typically two to four weeks for stone.
Actionable takeaway: Don’t schedule the countertop template appointment until cabinet installation is 100% complete and you’ve personally verified level with a 6-foot or longer level across the full cabinet run.
Countertops, Appliances, and Finishing Trades: The Final Sequence

The final phase of a kitchen renovation runs from countertop templating through final punch list, and the sequencing logic shifts from structural dependencies to surface protection. Every trade in this phase has the potential to damage what came before it, so the order prioritizes the most permanent, hardest-to-repair surfaces last.
The sequence through the final phase:
- Countertop template — scheduled immediately after cabinet installation is complete and verified level
- Countertop fabrication — typically two to four weeks for natural stone; one to two weeks for quartz; three to five days for laminate or butcher block
- Countertop installation — countertops set before backsplash tile so the tile can terminate cleanly against the countertop edge and any gap is grouted, not caulked
- Plumbing fixtures — sink and faucet installed after countertop, since the sink drop-in or undermount requires the countertop cutout to be complete
- Backsplash tile — installed after countertops and before appliances, so tile setters have unobstructed wall access
- Appliance installation — refrigerator, range, and dishwasher installed after backsplash is grouted and sealed, so delivery doesn’t scratch tile or damage grout before it cures
- Under-cabinet lighting and electrical trim-out — outlet covers, switch plates, and fixture trim installed after painting is fully complete
- Cabinet hardware — pulls and knobs last, after all trades are finished and the kitchen has been cleaned, so hardware isn’t loosened or scratched by subsequent work
- Final punch list — walk through with every contractor to document and address incomplete or deficient items before final payment is released
The backsplash-before-appliances rule trips up many homeowners who are eager to get the kitchen functional as quickly as possible. Installing a range before the backsplash behind it is tiled means moving the range to complete the tile work — which adds a service call, risks damaging the range finish, and requires re-leveling the appliance after it’s moved. Leave appliances for last.
Actionable takeaway: Write out what is the best order to renovate a kitchen as a one-page schedule with each trade listed in sequence and the dependency noted next to each. Share it with every contractor at the start of the project so there are no scheduling conflicts driven by miscommunication.
Common Sequencing Mistakes That Cost Real Money

These aren’t hypothetical. Each of these is a recurring pattern in kitchen renovation projects, and each one has a documented cost range attached to it.
Scheduling countertop template before cabinets are fully installed. Cost: $300 to $800 in wasted template fees plus two to four weeks of added fabrication lead time.
Installing flooring after cabinets instead of before. Cost: Minimal in the short term, but floor replacement later requires full cabinet removal — which can add $3,000 to $8,000 to a future renovation.
Beginning demolition before permits are pulled. Cost: Stop-work orders, potential retroactive inspection requirements, and fines that vary by municipality but commonly run $500 to $2,500 for first violations.
Ordering appliances without confirming cutout dimensions against cabinet openings. Cost: $200 to $600 per appliance in modification work, or full cabinet reorder if the opening can’t be modified.
Painting after cabinets are installed instead of before. Cost: Three to five additional hours of labor per coat for masking and cutting in, which adds $300 to $700 at typical painter rates.
Tiling backsplash before countertops are installed. Cost: The tile installer returns for a second visit to complete the row that terminates on the countertop — typically $200 to $500 in additional labor.
FAQ
What is the best order to renovate a kitchen from start to finish?
The full sequence is: planning and permits → demolition → structural framing changes → plumbing rough-in → HVAC rough-in → electrical rough-in → inspections → drywall → paint → flooring → cabinet installation → countertop template and fabrication → countertop installation → plumbing fixtures → backsplash tile → appliances → electrical trim-out → cabinet hardware → punch list. Each step creates the conditions the next one requires, and skipping or reordering steps creates rework costs that compound downstream.
Can I live in my home during a kitchen renovation?
Yes, most homeowners do. Set up a temporary kitchen station in another room with a microwave, toaster oven, electric kettle, and a mini-fridge. Budget $200 to $400 per month in additional food costs — restaurant meals and convenience food add up quickly when your kitchen is offline for eight to fourteen weeks. The biggest hardship is typically the four to six weeks after demolition when there’s no sink, not the final weeks when the kitchen is taking shape.
How long does a full kitchen renovation take?
A full gut renovation with custom cabinets typically runs ten to sixteen weeks from demolition to punch list. The single biggest variable is cabinet lead time — custom cabinetry at 6–12 weeks is usually the longest single dependency in the project. Semi-custom renovations with 4–6 week cabinet lead times can close out in eight to twelve weeks. Renovations that hit permit delays, failed inspections, or product backorders routinely extend to seventeen to twenty weeks.
Do I need permits for a kitchen renovation?
Any work that involves moving or adding electrical circuits, moving plumbing, or changing structural walls requires permits in virtually every U.S. jurisdiction. Cosmetic work — painting, replacing cabinet doors, swapping a faucet on existing supply lines — typically doesn’t. When in doubt, call your local building department before work begins. The consequences of unpermitted work (disclosure obligations, retroactive inspection requirements, potential fines) are consistently more expensive than the permit fees.
What’s the most common reason kitchen renovations go over budget?
Sequencing errors and scope changes are the two leading causes. Sequencing errors are covered in detail throughout this guide. Scope changes — deciding mid-project to move the sink, add an island, or upgrade the countertop material — reset dependencies and generate change order costs that typically run 15% to 30% above what the same work would have cost if it had been included in the original scope. Lock the design before demolition begins, and treat any mid-project change as a cost and schedule risk, not just a design preference.