Most under-cabinet lighting fails before it’s even turned on — because homeowners pick the wrong color temperature, mount it in the wrong position, or skip a dimmer, and no buying guide warns them until after the fixtures are already glued to the cabinet. The result is a kitchen that looks almost right but feels vaguely off in a way that’s hard to name. You stand at the counter chopping vegetables under a slightly greenish, slightly too-bright wash of light and you think: maybe it’s the cabinets. It’s not the cabinets.
Quick Answer
Most under-cabinet lighting fails before it’s even turned on — because homeowners pick the wrong color temperature, mount it in the wrong position, or skip a dimmer, and no buying guide warns them until after the fixtures are already glued to the cabinet.
This article is about under cabinet lighting kitchen ideas that actually work — not product roundups dressed up as advice, but the specific decisions that separate lighting that transforms a kitchen from lighting that just technically exists there.
What Nobody Tells You Before You Buy (And You’ll Wish They Had)
In This Article
- What Nobody Tells You Before You Buy (And You’ll Wish They Had)
- What Lights Are Actually Best for Under Kitchen Cabinets
- The Most Popular Styles Right Now — And Why One Is Replacing the Others
- What the Current Trends in Kitchen Lighting Actually Look Like in Real Homes
- The Best Way to Install Under Cabinet Lighting — Mapped by Skill Level
- Fixture Placement Mistakes That Make Expensive Lighting Look Cheap
- Choosing the Right Color Temperature for Your Specific Kitchen
- Smart Lighting Integration — When It’s Worth It and When It Isn’t
Somewhere around year four of my design practice, a client called me about the under-cabinet lighting she’d installed herself the week before. It buzzed. It flickered at low settings. And the color it threw on her white Carrara marble countertop made it look like a hospital tray. She’d done everything the box told her to do. The box just hadn’t told her enough.
Color temperature is the most commonly botched specification in residential under-cabinet lighting, and it’s the one that most buyers never think about until they’re standing in a kitchen that doesn’t feel like a kitchen anymore. The scale runs from warm to cool — 2700K sits at the incandescent end, golden and familiar; 3000K is warm white and the most common residential spec; 3500K is neutral white; 4000K tips into cool white territory, which is standard in commercial prep environments and wrong for almost every home kitchen. Most strip light packages default to 4000K or higher because it photographs brightly and reads as “clean” in product shots. In your actual kitchen, at 10pm, it reads as institutional.
The American Lighting Association identifies color temperature mismatches as the number one complaint homeowners report after installing under-cabinet lighting themselves. Worth taking seriously.
CRI — Color Rendering Index — is the second specification that buyers skip and regret. CRI measures how accurately a light source renders color compared to natural daylight, on a scale of 0 to 100. A fixture at 80 CRI is standard and technically adequate. At 90+ CRI, food looks like food: the red of a tomato reads as red, the grain of wood countertop reads as warm and intentional, and the veining in marble doesn’t flatten into gray. The brightness number on the packaging doesn’t tell you any of this.
Dimmability is not universal, and this is where my client’s buzzing problem came from. Not all LED strips are compatible with standard dimmer switches, and mismatching a non-dimmable driver with a dimmer causes exactly that — flicker and audible buzz that no amount of troubleshooting resolves short of replacing components. Before purchasing any LED strip system, confirm whether the driver is 0-10V dimmable, TRIAC dimmable, or PWM dimmable, and match it to a switch rated for that protocol.
There’s also the hardwired vs. plug-in question, which most content treats as purely a convenience issue. It isn’t. Hardwired under-cabinet lighting typically increases resale value in a way plug-in solutions don’t, and some municipalities require permits for new hardwired lighting circuits. If you’re planning to sell within five years, that distinction matters.
- Confirm color temperature before purchasing — 2700K–3000K suits most residential kitchens
- Check CRI rating — 90+ is worth the slight premium
- Verify dimmer compatibility before buying the switch and the strip
- Research local code requirements if hardwiring
Takeaway: Read the spec sheet, not just the box. The three numbers that matter most — Kelvin, CRI, and driver type — are all there if you look.
What Lights Are Actually Best for Under Kitchen Cabinets

There’s a version of this answer that involves a simple ranking. LED strips are good. Puck lights are okay. Bar lights are professional. Fluorescent is outdated. That version is everywhere, and it’s not wrong, it’s just not useful. The real answer depends on the length of your cabinet run, your budget for installation, and whether you need task lighting, accent lighting, or both.
LED tape/strip lights are the most versatile option for most kitchens — flexible, cuttable at marked intervals, and capable of covering long continuous runs without visible seams when properly installed. For runs longer than about 16 feet, use 24V strips rather than 12V. Voltage drop on 12V strips causes the far end of a long run to dim noticeably compared to the end near the driver, which creates an uneven wash that no amount of dimming fixes uniformly. LED strip lighting now accounts for over 60% of residential under-cabinet lighting sales in North America, according to Grand View Research’s lighting segment data — that dominance is recent and it’s deserved.
LED bar lights (linear fixtures, sometimes called under-cabinet task lights) are the cleanest-looking option and the easiest to clean — no exposed diodes, no channels to accumulate grease. They’re the right choice for a remodel with a budget for hardwiring, and they read as intentional rather than DIY in a way that strip lights in plastic channels sometimes don’t.
Puck lights are genuinely misapplied in most kitchens. Their spot pattern creates scalloped pools of light separated by darker gaps, which is aesthetically dated and functionally inadequate for prep work. The specific situation where puck lights work: short spans of 18 inches or less, or cabinet interiors used as accent display — nowhere else.
Integrated cabinet lighting — fixtures built into the cabinet frame itself during construction — is the highest-end option and the fastest-growing specification in new construction. It’s not a retrofit solution, but if you’re doing a full kitchen renovation, it’s worth specifying from the start.
- LED strips (24V): Long runs, DIY-friendly, versatile
- LED bar lights: Cleanest look, best for hardwired remodels
- Puck lights: Short spans only, accent use only
- Integrated fixtures: New builds and full renovations only
- Fluorescent T5: Still on shelves, not worth buying — color rendering and energy efficiency are behind current LED options by a significant margin
Takeaway: For most kitchens, 24V LED strips in an aluminum channel profile or hardwired LED bar lights are the answer. The choice between them is mostly a budget and skill-level question.
The Most Popular Styles Right Now — And Why One Is Replacing the Others
Puck lights had a long run. For about fifteen years they were the default answer to “what do I put under my cabinets,” and the reason wasn’t that they were particularly good — it was that they were easy to install, easy to find, and easy to understand. Three pucks across a thirty-inch cabinet span. Done.
The pattern I kept seeing in client kitchens around 2019 was that the puck light look had started to read as dated in a specific way. Not old, exactly. Just visually noisy. The scalloping — those overlapping half-circles of brighter and dimmer light on the backsplash — reminded people of something, and that something was the kitchen they grew up in. Continuous linear LED has overtaken puck lights for aesthetic reasons as much as functional ones. Designers I’ve worked with cite “visual noise” consistently when explaining why they stopped specifying pucks for residential projects.
Pinterest search data supports the shift: searches for “kitchen LED strip lighting” grew 134% year-over-year, while “puck lights kitchen” searches declined 22% in the same period. That’s not a gradual evolution. That’s a preference pivot.
Warm white color temperatures — 2700K to 3000K — remain dominant in residential kitchens by a wide margin over cool white, despite cool white’s prevalence in commercial environments and budget product lines.
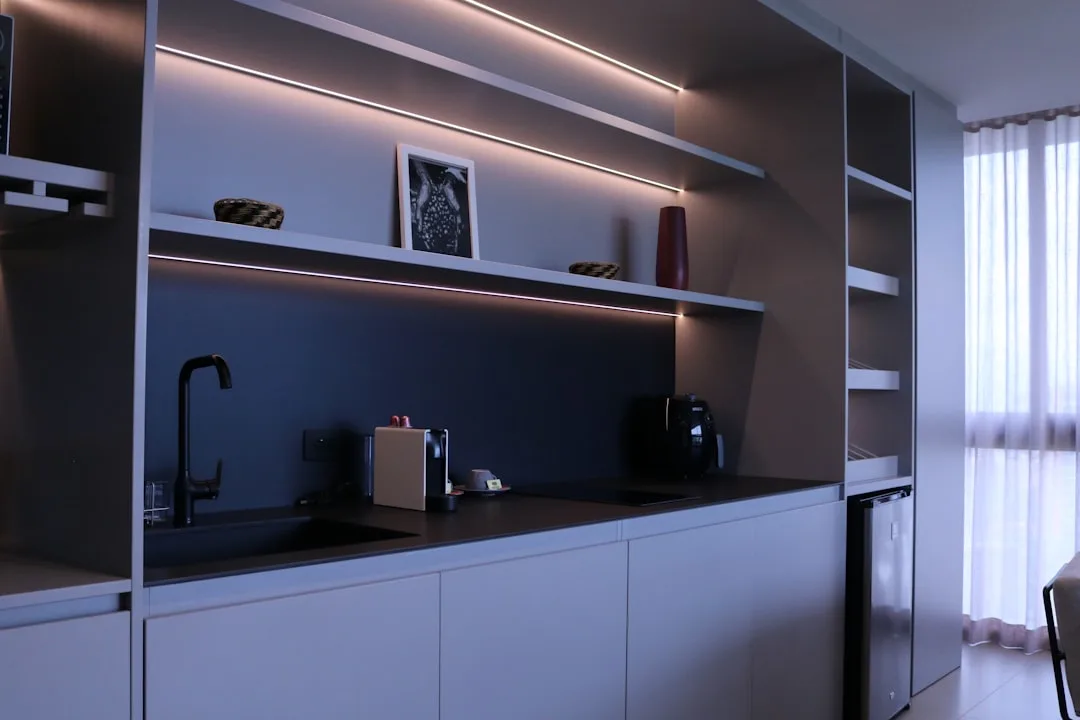
The fastest-growing installation style right now is recessed channel-mount LED tape: the strip sits inside an aluminum channel that mounts flush with the cabinet underside, with a frosted diffuser cover that hides individual diodes and creates a smooth, even light bar. The channel can be painted or powder-coated to match cabinet color, making the fixture disappear. Only the light remains visible. That’s the aesthetic move driving the trend — not the light itself, but the invisibility of its source.
Smart-enabled strips are growing fast among homeowners under 45, particularly those already using voice assistants or smart home platforms. Philips Hue, Govee, and Lutron Caséta compatibility are the most commonly cited integration points. Color-tunable white — fixtures that shift from 2700K to 4000K on demand — is the premium specification for serious home cooks who want task-mode brightness during prep and warm ambience mode for dinner.
Takeaway: If you want your kitchen to look current, continuous linear LED in an aluminum channel is the spec. Puck lights are not wrong, but they are recognizable — and not in the way you want.
What the Current Trends in Kitchen Lighting Actually Look Like in Real Homes
Trend coverage of kitchen lighting almost always describes products. It rarely describes what those products look like when they’re on, in a real kitchen, at 7pm on a Tuesday when someone is making pasta. That’s the translation problem.
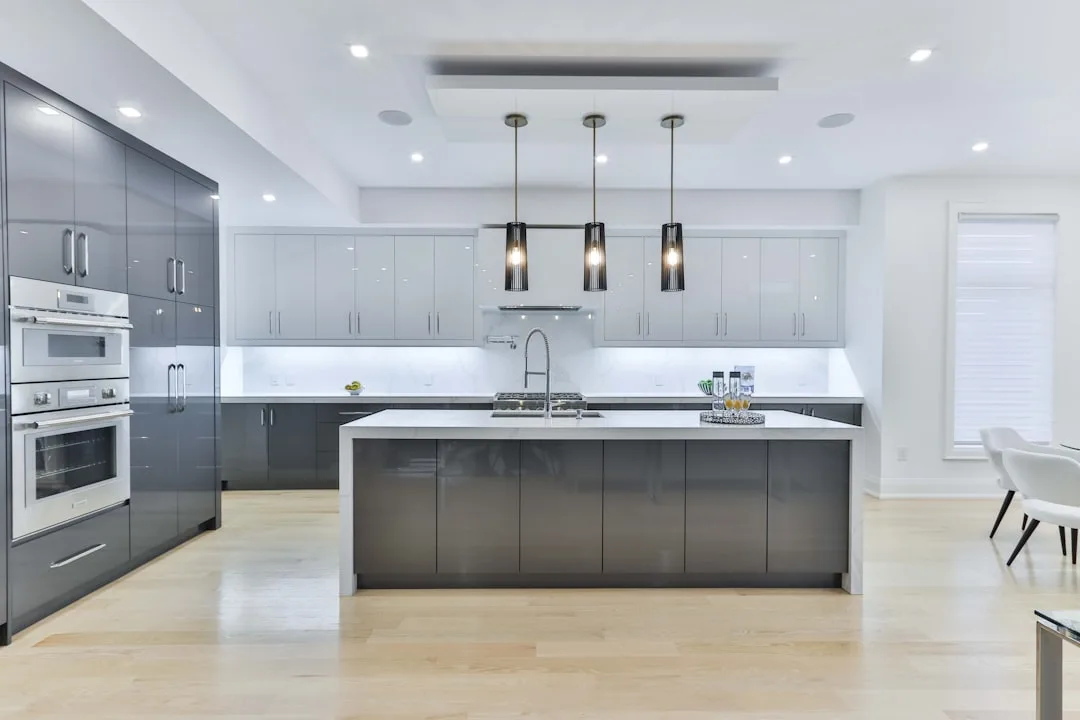
What the current trend actually looks like: warm-toned, layered light that doesn’t call attention to itself. Under-cabinet lighting paired with a statement pendant over the island — not competing for dominance, complementing each other. The under-cabinet strip handles the work surface. The pendant handles the visual anchor. They’re at the same color temperature, so the room reads as one coherent light environment rather than a collection of independently chosen fixtures.
Hardware is disappearing. Aluminum channel profiles are being specified in painted finishes that match the cabinet color exactly, so the fixture is invisible in daylight and only registers when switched on. This is a reaction to years of visible black or white plastic fixture housings that looked fine in the showroom and slightly wrong in the finished kitchen.
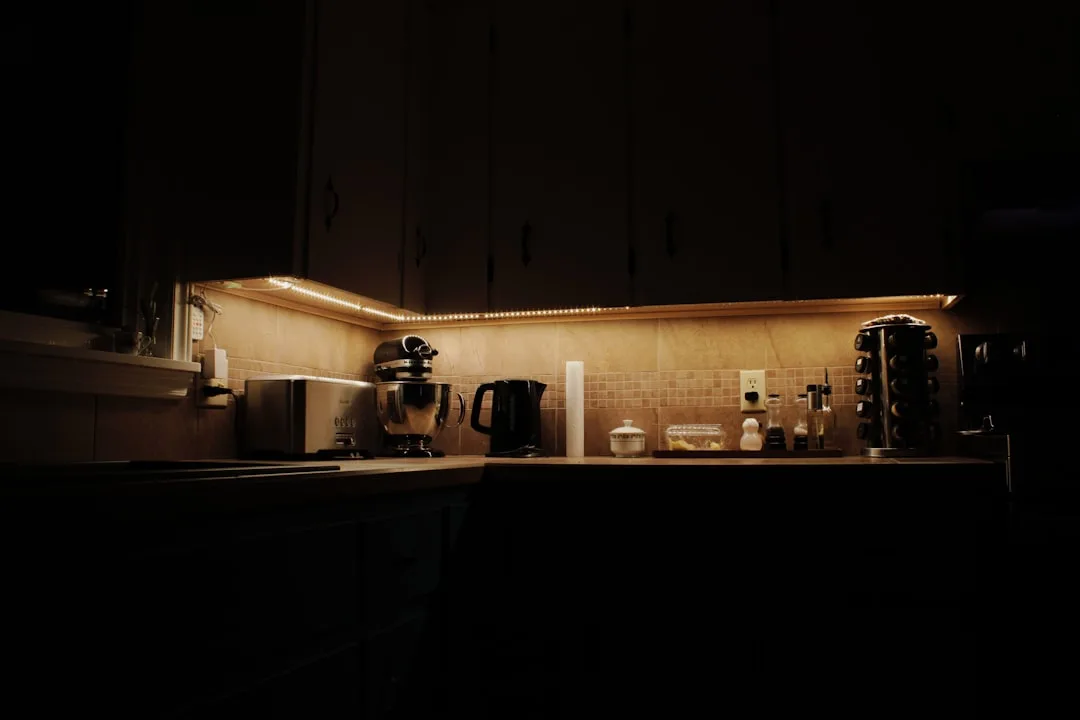
The backsplash-washing effect — positioning strip lights toward the back of the cabinet underside rather than the front edge — is appearing in more kitchens because it adds perceived depth. The light hits the backsplash and bounces forward, illuminating both the wall surface and the counter without the harsh front-edge glare that flat-mounted strips can create. It’s a positioning choice, not a product choice, and it’s free.
All-white and neutral-palette kitchens are leaning into warm-toned under-cabinet light as a way to add the warmth the color palette doesn’t supply. A bright white kitchen with 4000K under-cabinet light feels like a lab. The same kitchen with 2700K strip lights at 60% dimmer feels like somewhere people want to be. Same cabinets. Entirely different room.
Mixed metals are showing up in visible under-cabinet bar light housings — brushed brass and matte black replacing the chrome and brushed nickel that dominated for the previous decade. If you’re specifying a bar light with an exposed housing, finish selection is a real design decision.
Takeaway: Current trends favor invisible hardware, warm color temperatures, and controllability over brightness. The fixture shouldn’t be the point. The light should be.
The Best Way to Install Under Cabinet Lighting — Mapped by Skill Level
Installation advice for under-cabinet lighting almost always presents two options: plug it in or hire an electrician. There’s a lot of territory between those two that most guides skip — and that territory is where most homeowners actually live.
Beginner: plug-in strip lights
Measure your cabinet run length. Buy strips slightly longer than needed — you can cut to length at marked intervals, but you can’t add length. Use an aluminum channel with a frosted diffuser cover rather than mounting tape alone; it makes a $30 strip look like a $150 fixture. Connect to the nearest outlet using a cord hidden in a corner or routed behind the cabinet end panel. A strip with remote control or smart app dimming eliminates the need to reach under the cabinet to adjust brightness. Total project time: 2–3 hours for a standard kitchen.
Intermediate: hardwired bar lights with a junction box
This requires turning off the breaker, running wire through the cabinet interior to a junction box, and connecting to a wall switch. Achievable for a confident DIYer who’s done basic electrical work before. The dimmable switch must be rated for LED — not all LED-rated dimmers are created equal, and the dimmer manufacturer’s compatibility list is worth checking against your specific fixture. Project time: half a day, realistically.
Advanced: full hardwired system with in-wall dimmer and multiple zones
Best paired with a kitchen renovation when walls are open. Hire an electrician for the rough-in but specify fixture placement yourself — most electricians will position based on convention unless you walk them through exactly where you want the strip relative to the cabinet front edge. The National Kitchen and Bath Association recommends positioning under-cabinet lighting no more than 2–3 inches from the front inner edge of the cabinet underside to maximize countertop illumination without causing glare.
Universal positioning principle: mount toward the front-inside edge for task lighting; mount toward the back for backsplash accent effect. The position changes the entire result.
- Never mount to the visible cabinet face frame — this puts the light source at eye level when standing at the counter, which creates direct glare
- Plan for a dedicated circuit if installing more than 100W of LED — not always code-required, but it prevents tripped breakers and ensures dimmer performance stays clean
- Measure twice before cutting strip lights; the connectors that bridge a bad cut are visible
Takeaway: Decide your skill level honestly before buying anything. A plug-in system installed well looks better than a hardwired system installed poorly.
Fixture Placement Mistakes That Make Expensive Lighting Look Cheap
I’ve watched clients spend $400 on quality LED bar lights and then mount them six inches from the back of the cabinet. The light hit the backsplash beautifully. The countertop was in shadow. They thought the lights were defective. They weren’t — the placement was.
Position is the decision that most under-cabinet lighting content ignores almost entirely, and it’s more consequential than fixture brand or strip quality. The Illuminating Engineering Society recommends a minimum of 50 foot-candles at counter level for kitchen prep work — and that number assumes the light is aimed at the counter, not the wall behind it.
The most common mistakes, in order of how often I’ve seen them:
Mounting too far back. The light washes the backsplash and misses the work surface. Looks great in photographs. Useless for chopping. Mount toward the front inner edge of the cabinet.
No diffuser on bare LED tape. Individual diodes are visible as hot spots to anyone standing at counter height. A frosted diffuser cover on an aluminum channel costs $8–12 per meter and solves this completely.
Gaps at cabinet corners. Where two runs of strip light meet at a 90-degree corner, an unsealed gap creates a visible dark break in the continuous light line. Pre-made corner connectors exist specifically for this and are inexpensive.
Wrong strip density. 60 LEDs per meter is entry-level spec; at kitchen task lighting distances, it produces visible hot spots between diodes. 120 LEDs per meter is the minimum for even output without a diffuser, and still benefits from one.
Ignoring the shadow test. Before finalizing placement during installation, hold your hand over the counter at working height. If you cast a shadow on your primary prep area, the light is mounted too far back. Move it before it’s permanent.
Mixing color temperatures across zones. Under-cabinet at 4000K and pendants at 2700K creates a kitchen that looks visually broken in a way that’s hard to diagnose but immediately felt. Decide on one color temperature for the whole room and hold to it.
Takeaway: Before securing any fixture permanently, do the shadow test. Thirty seconds of checking saves hours of remounting.
Choosing the Right Color Temperature for Your Specific Kitchen
Most color temperature advice in under-cabinet lighting content lands on “warm white, 2700K–3000K, for most kitchens” and stops there. That’s directionally correct. It’s also the same answer for every kitchen, which isn’t how kitchens or light actually work.
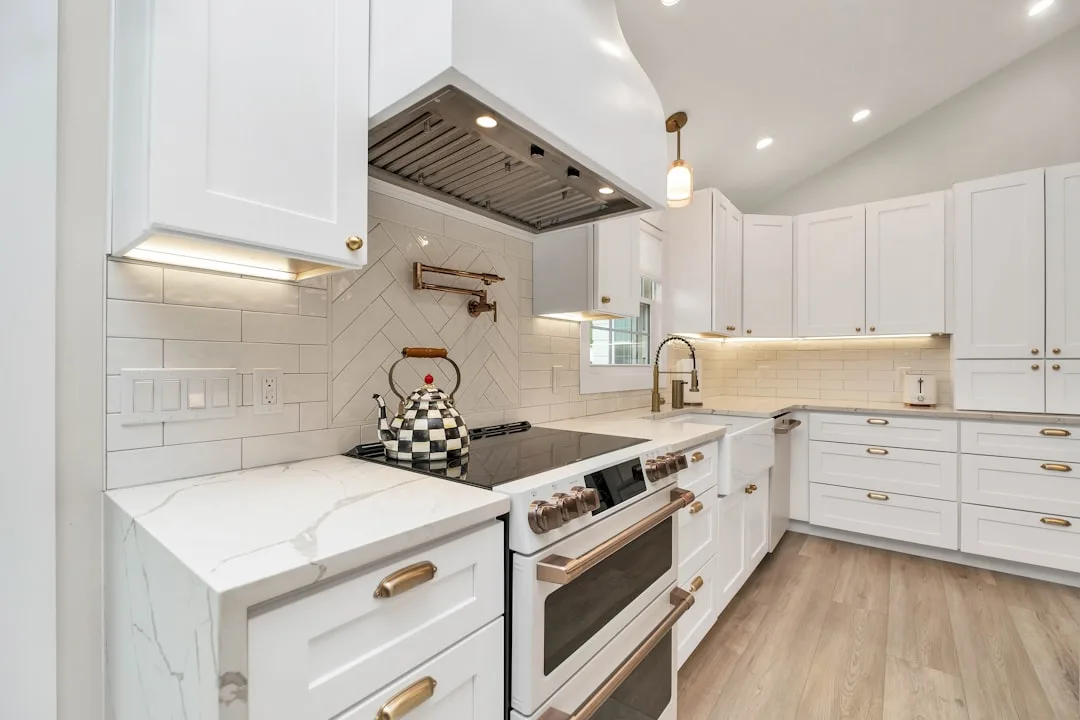
White or light gray cabinets with a white countertop: 3000K is the sweet spot. Warm enough to feel residential and inviting, clean enough not to push the white palette toward yellow. 2700K in an all-white kitchen can make countertops read as cream when they’re not.
Dark or navy cabinets: Drop to 2700K. Dark cabinetry already reads as dramatic — adding cool-toned light makes the space feel cold and slightly unwelcoming. Warm light at 2700K makes dark cabinets feel intentional rather than heavy.
Kitchens that double as entertaining spaces: 2700K with a dimmer is the right combination. Full brightness for prep, 30–40% for the hour people are standing around with wine glasses. The dimmer does the work that fixture selection can’t.
Kitchens used primarily for serious cooking: 3500K–4000K is acceptable — arguably optimal — for households where the kitchen is a functional workspace first. The caveat: every other light source in the kitchen needs to match. A 4000K under-cabinet strip fighting against 2700K pendants creates a dissonant room.
Marble or quartz countertops with cool undertones: 3000K–3500K prevents the counter from reading gray-green, which is what happens when cool-toned stone meets warm-toned light. The interaction between light color temperature and countertop undertone is real and worth testing before committing.
Butcher block or wood countertops: 2700K clearly enhances warm wood tones in a way no other temperature does. The grain reads richer, the color reads truer. One of the few situations where the warmest available option is unambiguously the right answer.
For reference: 2700K = incandescent warmth; 3000K = warm white (the most common residential specification); 3500K = neutral white; 4000K = cool white (standard in commercial kitchen environments).
Takeaway: Match your color temperature to your countertop material and your primary use case. If you’re unsure, 3000K is the closest thing to a universal residential correct answer.
Smart Lighting Integration — When It’s Worth It and When It Isn’t
Smart lighting coverage almost always reads as either uncritical enthusiasm or dismissive skepticism, and neither is useful. The honest answer is that smart under-cabinet lighting is genuinely valuable in some kitchens and completely unnecessary in others, and the difference is a question of what’s already in your home and how you actually cook.
When it’s worth it: If you already use Alexa, Google Home, or Apple HomeKit elsewhere in your home, smart under-cabinet lighting integrates without friction and adds real daily convenience. Voice control during cooking — when your hands are covered in something — is not a gimmick. Smart lighting adoption in kitchens grew 40% from 2022 to 2024, driven primarily by voice assistant integration according to Parks Associates’ Connected Home report. The growth is behavioral, not just technological.
When it isn’t worth it: If your kitchen already has a well-placed in-wall dimmer and you cook on a fairly consistent schedule, smart features add cost without proportional benefit. A $15 dimmer switch that you touch once when you walk into the kitchen accomplishes what a $90 smart dimmer accomplishes — minus the app updates.
Best current options by tier:
- Budget/voice-compatible: Govee LED strips — Wi-Fi connected, Alexa and Google compatible, color-tunable, under $40 for a standard kitchen run
- Mid-range hardwired: Lutron Caséta under-cabinet dimmer kits — the most reliable smart dimmer ecosystem for whole-home integration, compatible with most LED bar lights
- Premium: Philips Hue Gradient Lightstrip — color-tunable white, full smart home integration, expensive but the best performing strip light in the category
Scene setting is where smart under-cabinet lighting earns its cost. A “Cooking” scene at full brightness, a “Morning Coffee” scene at 20% warm light, a “Dinner” scene that dims automatically at 6:30pm — these are automatable and voice-triggerable, and they change how the kitchen feels to use across different parts of the day.
A note on protocols: Zigbee-based systems (via a hub like Philips Hue Bridge or Amazon Echo with Zigbee) are more reliable for whole-home smart lighting than Wi-Fi-based strips, which add load to your router and occasionally drop connection. Bluetooth is convenient but range-limited — fine for a single kitchen, unreliable if you want kitchen lighting integrated into whole-home scenes.
Smart dimming compatibility matters: not all smart LED strips work with in-wall smart dimmers, and combining incompatible systems produces the same flicker and buzz that mismatched conventional dimmers cause. Check the manufacturer’s compatibility documentation before combining components.
Takeaway: If you’re already in the smart home ecosystem, add smart under-cabinet lighting. If you’re not, a quality dimmer switch and a 3000K 90+ CRI strip will do more for your kitchen than any app.
Frequently Asked Questions
What lights are best for under kitchen cabinets?
For most residential kitchens, 24V LED strip lights in an aluminum channel profile with a frosted diffuser are the best combination of performance, aesthetics, and DIY-friendliness. For remodels with a budget for hardwiring, LED bar lights (linear fixtures) produce the cleanest, most professional result and are easier to maintain. Whatever fixture type you choose, prioritize 90+ CRI and confirm dimmer compatibility before purchasing. Puck lights work in specific situations — short spans, accent use — but their scalloped light pattern makes them a poor choice for countertop task lighting on standard cabinet runs.
What is the most popular under cabinet lighting style right now?
Continuous linear LED — either strip lights in aluminum channel profiles or hardwired LED bar lights — has overtaken puck lights as the dominant style in residential kitchens. The shift is aesthetic as much as functional: the even, seamless wash of linear LED looks intentional in a way puck light scalloping no longer does. Recessed channel-mount strip lights, where the fixture sits flush with the cabinet underside with a frosted cover, are the fastest-growing specific install style. Warm white color temperatures (2700K–3000K) remain far more common in residential installs than cool or neutral white.
What is the current trend for kitchen lighting in modern homes?
What is the best way to install under cabinet lighting yourself?
It depends on your comfort level with electrical work. For beginners, plug-in LED strip lights in aluminum channels are the most approachable option: measure, cut, mount, and route the cord behind the cabinet end panel to a nearby outlet. For intermediate DIYers, hardwired LED bar lights connected to a wall switch through a junction box are achievable in a half-day and produce a cleaner result. In both cases, position the fixture toward the front inner edge of the cabinet underside — the National Kitchen and Bath Association recommends no more than 2–3 inches from that front edge for maximum countertop illumination without glare. Before securing anything permanently, do the shadow test: hold your hand at counter height and check that the light isn’t creating a shadow on your primary work area. If it is, move the fixture forward before it’s too late.
Start today: Pull out your phone and look up the Kelvin rating on the under-cabinet lighting you already have — or the one you’re about to order. If it’s 4000K or above and you cook in a residential kitchen, that single number is likely responsible for everything about your kitchen lighting that’s felt slightly wrong. Swap it for a 3000K 90+ CRI equivalent, add a compatible dimmer, mount it 2 inches from the front inner cabinet edge, and you will not recognize the same room.
What lights are best for under kitchen cabinets?
For most residential kitchens, 24V LED strip lights in an aluminum channel profile with a frosted diffuser are the best combination of performance, aesthetics, and DIY-friendliness. For remodels with a budget for hardwiring, LED bar lights (linear fixtures) produce the cleanest, most professional result and are easier to maintain. Whatever fixture type you choose, prioritize 90+ CRI and confirm dimmer compatibility before purchasing. Puck lights work in specific situations — short spans, accent use — but their scalloped light pattern makes them a poor choice for countertop task lighting on standard cabinet runs.
What is the most popular under cabinet lighting style right now?
Continuous linear LED — either strip lights in aluminum channel profiles or hardwired LED bar lights — has overtaken puck lights as the dominant style in residential kitchens. The shift is aesthetic as much as functional: the even, seamless wash of linear LED looks intentional in a way puck light scalloping no longer does. Recessed channel-mount strip lights, where the fixture sits flush with the cabinet underside with a frosted cover, are the fastest-growing specific install style. Warm white color temperatures (2700K–3000K) remain far more common in residential installs than cool or neutral white.
What is the current trend for kitchen lighting in modern homes?
The trend is toward layered, warm-toned light with invisible hardware and controllable intensity. Under-cabinet lighting is now paired with statement pendants over islands as a system, not treated as an independent afterthought. Aluminum channel profiles painted to match cabinet color make fixtures disappear — only the light is visible. Dimmers and smart controls are being treated as non-negotiable specifications rather than upgrades. The trend isn’t a specific product. It’s controllability and cohesion.
What is the best way to install under cabinet lighting yourself?
It depends on your comfort level with electrical work. For beginners, plug-in LED strip lights in aluminum channels are the most approachable option: measure, cut, mount, and route the cord behind the cabinet end panel to a nearby outlet. For intermediate DIYers, hardwired LED bar lights connected to a wall switch through a junction box are achievable in a half-day and produce a cleaner result. In both cases, position the fixture toward the front inner edge of the cabinet underside — the National Kitchen and Bath Association recommends no more than 2–3 inches from that front edge for maximum countertop illumination without glare. Before securing anything permanently, do the shadow test: hold your hand at counter height and check that the light isn’t creating a shadow on your primary work area. If it is, move the fixture forward before it’s too late.