You don’t have to be an expert in interior photography to take a few good-looking shots but will they be enough to sell a house or sell interior design services?
Probably not.
Besides, for careful staging of all the elements that will appear in the shot, you will need to get some basic understanding of what makes interior shots great.
Such simple things as a correct angle, straight walls, and flattering light are all important and can enhance or damage the interior photos. This article will give you some tips regarding interior design photography.
1. Tripod is a Must
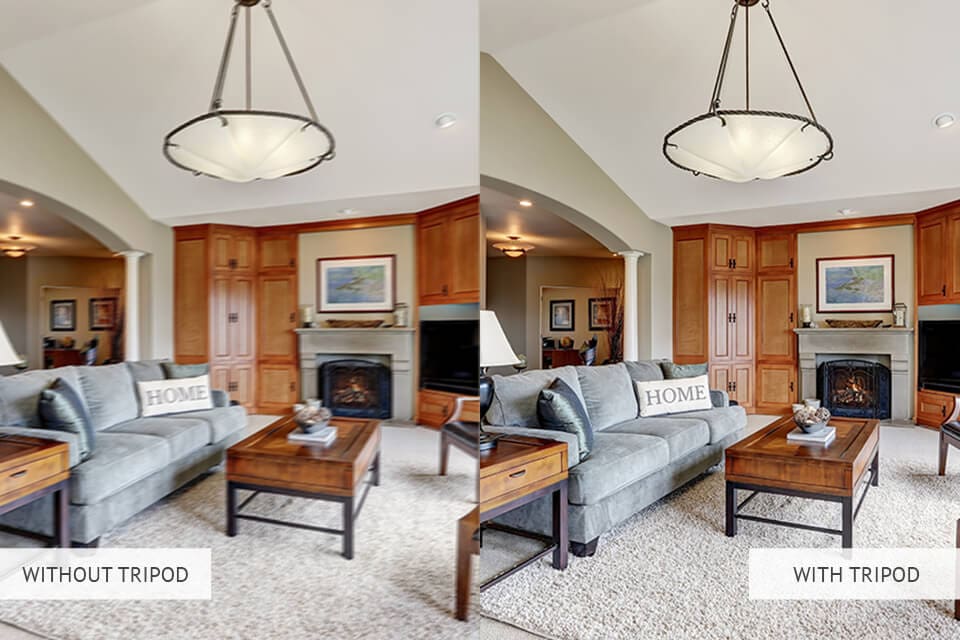
Let’s face it, you need low ISO to shoot a house, especially if you are not getting the natural light in any of the rooms. Shooting handheld can be an option, but it does not allow you to take photos with longer exposures.
So, if you want to get the sharpest images possible, you need a tripod.
Yes, it is slower but it will also let you really focus maximum attention on the shot and what you will see in it. Read more interior photography tips for shooting with a tripod.
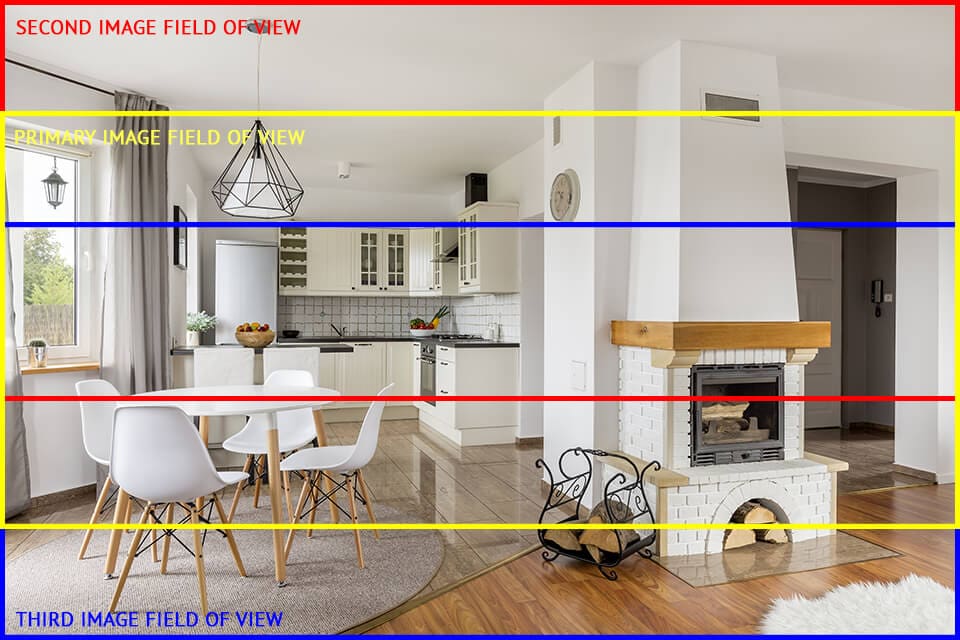
2. Wide Angle is Key
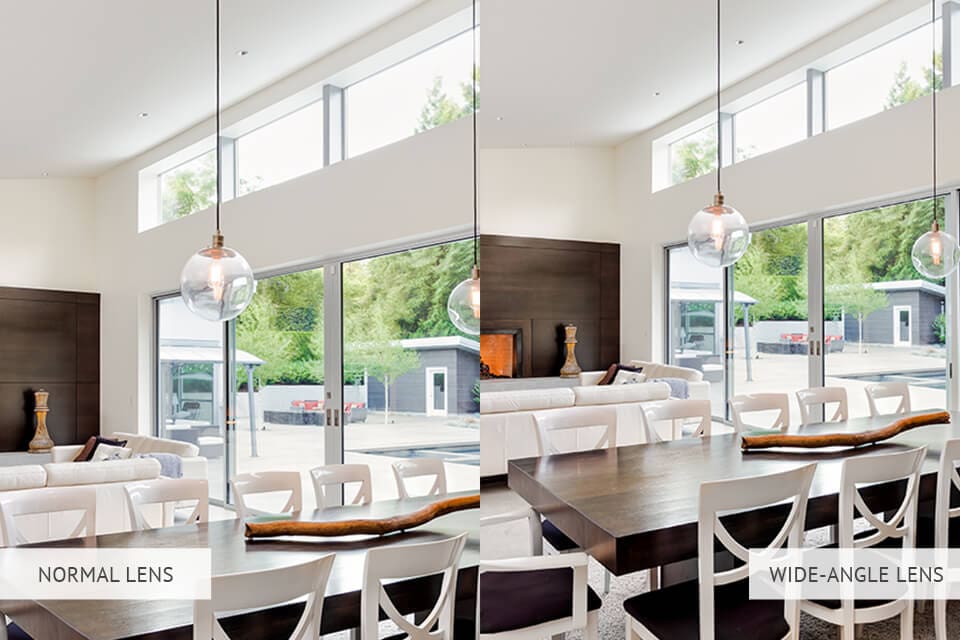
What you shouldn’t do is shoot from one of the corners trying to get everything in the frame.
Pick a lens with 16-24mm range on full-frame or the crop one equal to about 10-16mm. Check out http://fixthephoto.com/tech-tips/best-lens-for-real-estate-photography.html.
Remember, you don’t need to get the whole object in the shot. Our brains can imagine the rest of the wardrobe or the bed if they see only half.
3. Natural Light is the Way to Go
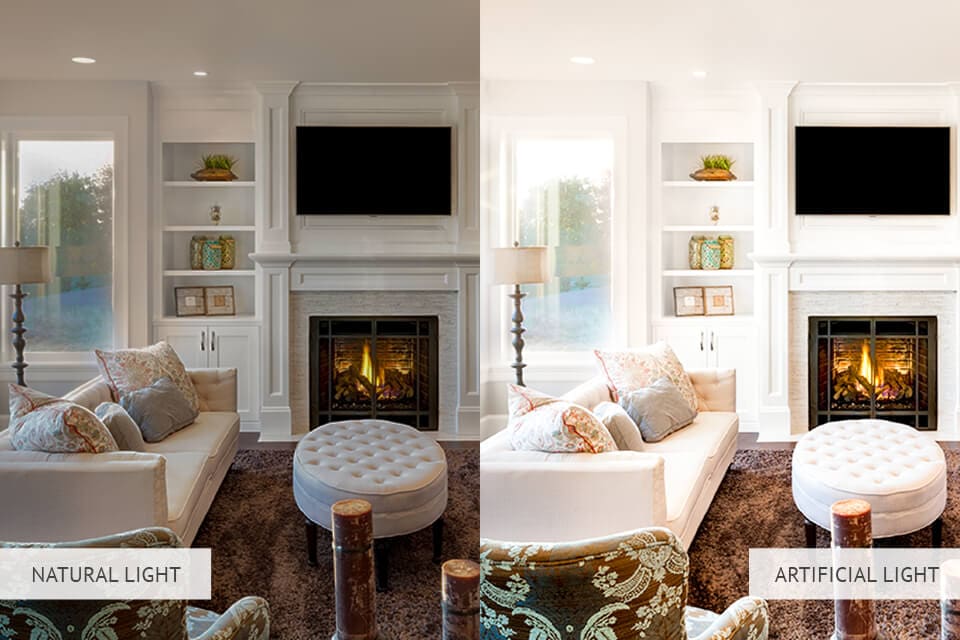
Artificial light can be your worst friend, especially if it is the incandescent light bulb or fluorescent light. You’ll get awful unnatural shadows or color cast because the camera, unlike our brain, doesn’t interpret the light from the bulb.
Interior photography lighting should be as natural as possible, even if the day is dull and dark. You’d better make color correction in Lightroom.
4. 1-Point and 2-Point Perspectives
These are two standard perspectives for interior photography. The 1-point perspective means that you keep the sensor plane parallel to the wall. This will help you set the scene by letting the side wall lead into the back one.
With the second approach, you shoot into a corner. It doesn’t have to be dead center in the shot but make sure you don’t have the third wall. Read more compositional real estate photography tips.
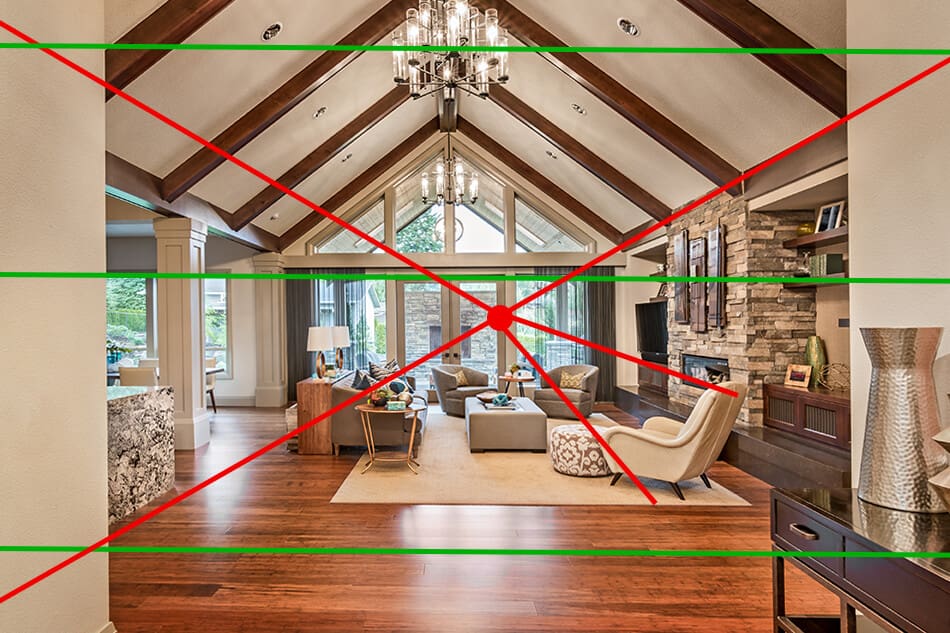
5. Height Is Important
A tilt-shift lens is expensive. So to make sure the perspective in your interior shots is correct, shoot at a mid-room height or maybe just a bit above it.
Don’t forget to point the camera straight, otherwise, the walls won’t look perfectly vertical (that’s where a tripod comes in handy). Surely, you can edit the walls at the image post-production stage but why should you waste your time on that.
6. Time to Turn ON the Lights
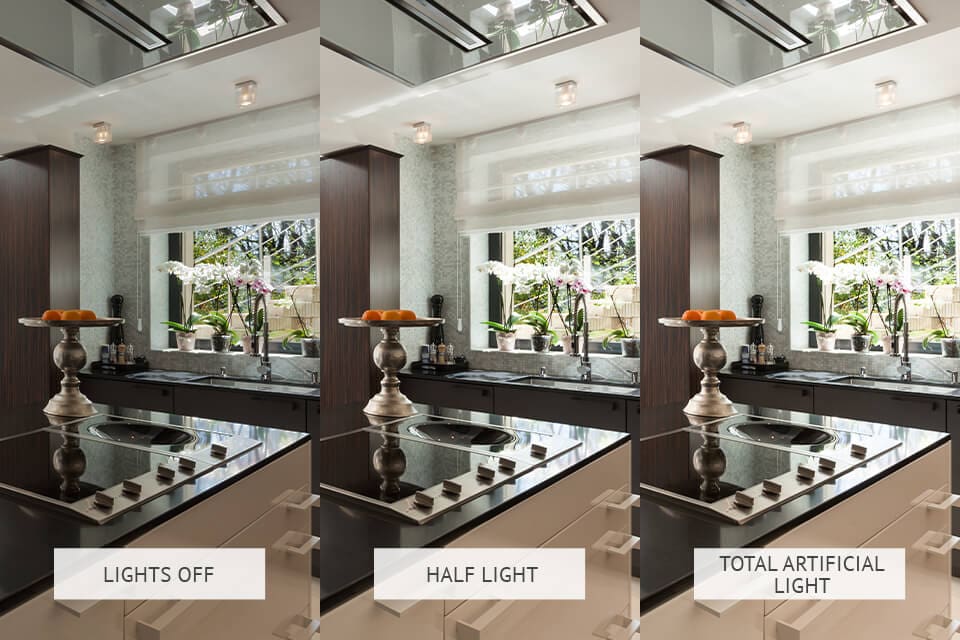
If you want to have interior photography lighting just perfect, try getting as much light as you can. It means opening all the windows, switching all the light sources available in the room. This will help you create an inviting warm atmosphere as well as some beautiful shades.
The light will be reflected from the surfaces and the room will look magical and welcoming.
Try using a high wattage photoflood bulb. One of the best interior photography tips is to actually put it behind the camera, in a corner that doesn’t get light, or even just outside the window.
7. Try the Fill Flash
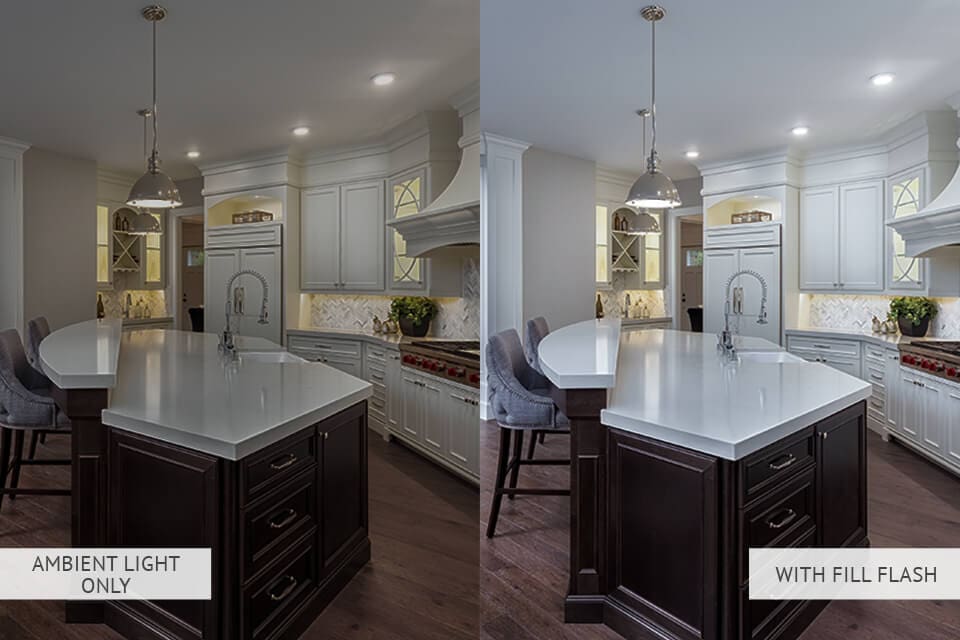
Bounce flash will fill in the shadows and lower the dynamic range in your interior designing photographs. The best way to do this is to aim the flash towards the ceiling or the wall behind the camera.
You can simply hold the flash in your hand and point it upward. What you’ll be getting are reduced shadows in front of the camera.
A radio trigger for the flash is what you need in this case. It can also be a system that has a built-in trigger (Cactus RF-60 or V6ii). When you compare the images taken with and without fill light, you can notice how lifted the light is when the flash is used correctly.
8. Rule of Thirds is Never a Bad Option
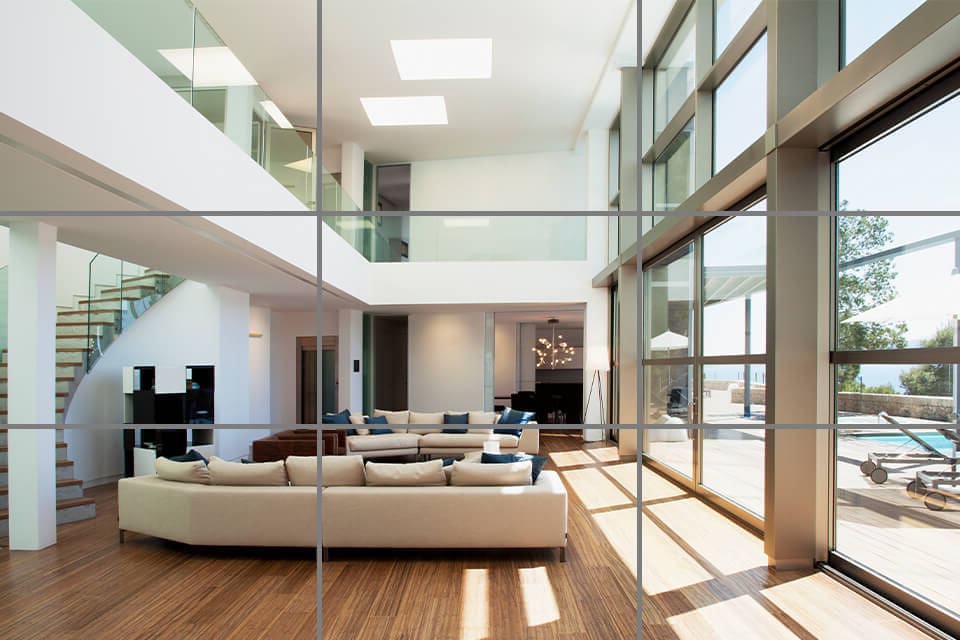
This is one of the classic rules of creating the perfect composition in interior designing photos. It takes some imagination but it is definitely worth it.
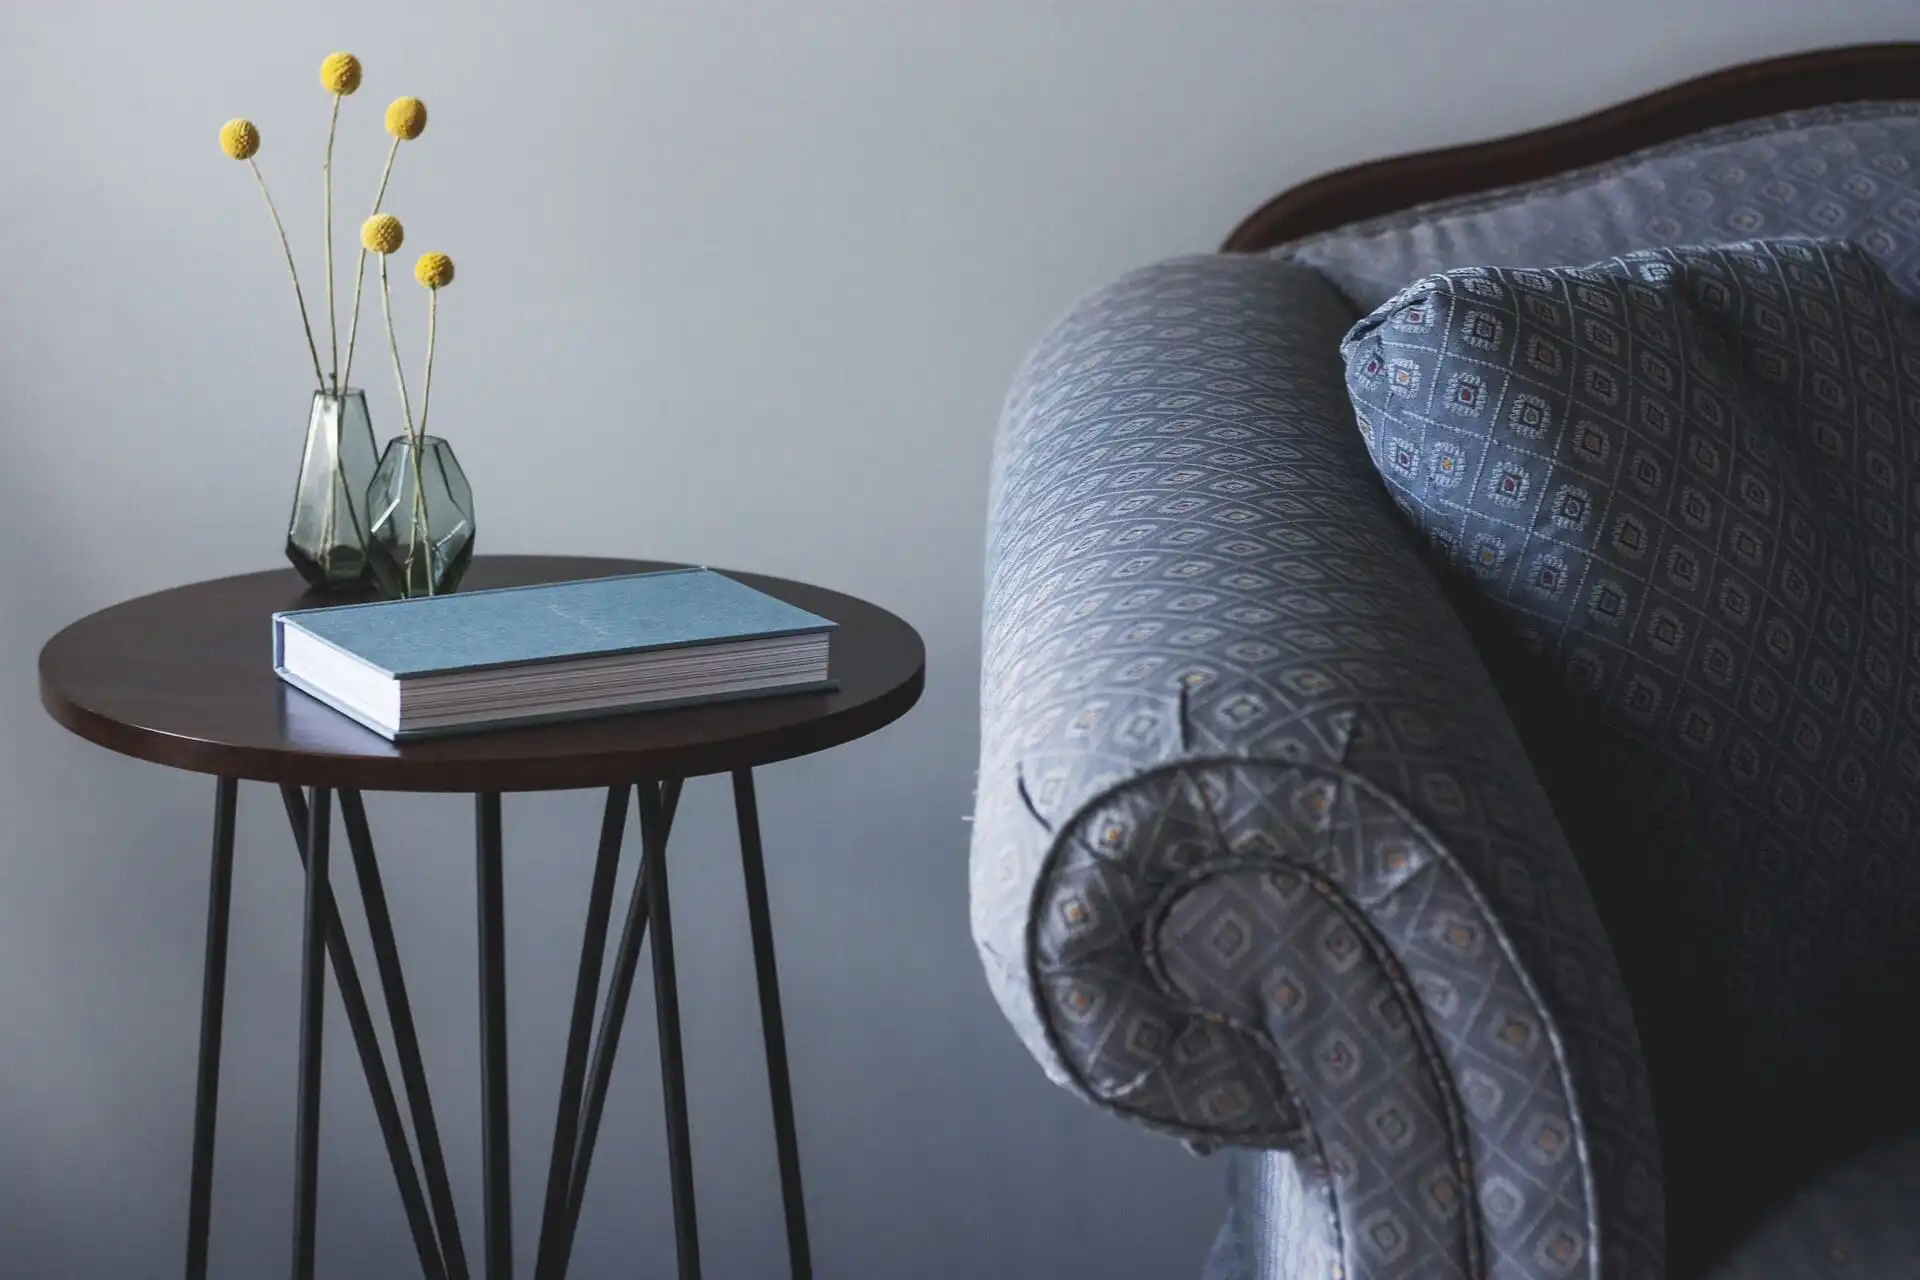
First, imagine there’s a tic-tac-toe grid in the shot. Then, use vertical lines to put some interesting objects (a lamp, a vase, some art) in the frame.
This will guarantee your imaginary horizontal lines will keep the shot square.
9. Enhance White Balance
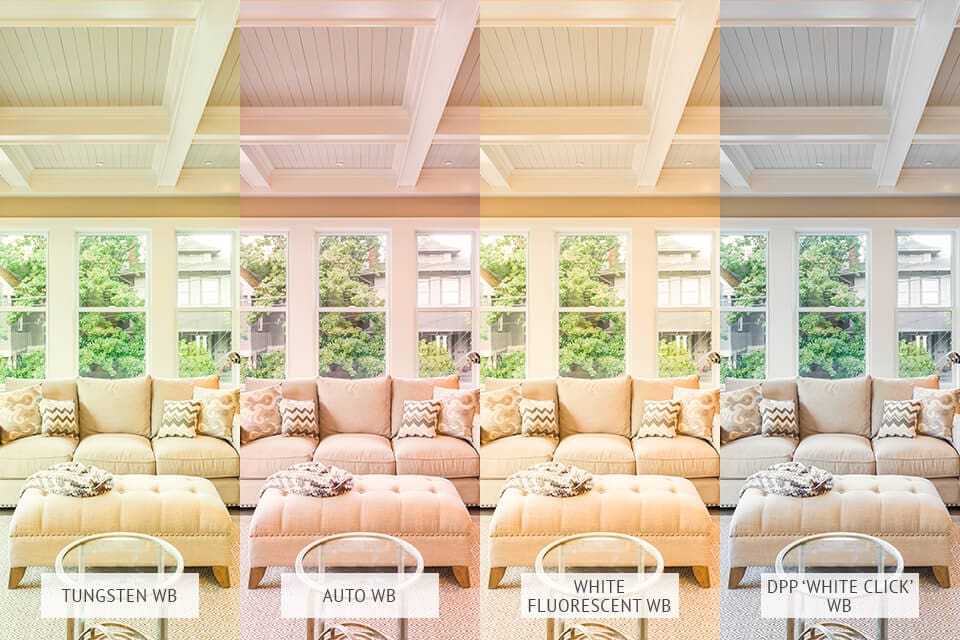
How to photograph interiors that are white? Check if your camera has a white balance feature and make sure to use it. If you do not, all the white that the camera sees will lead to a wrong exposure.
Don’t forget to switch to a regular mode when you shoot other rooms for exactly the same reason.
A styling tip for you: use plants, fruit, or flowers to balance the white or the neutrals in the space you are shooting. Basically, any pop color will do the trick.
10. Make Color Correction

Editing photos is the next logical step in interior photography. You can use any photo editing software you prefer to experiment with contrast and colors, correct or hide the flaws, make your photos sharper or softer. It’s a great way to really elevate your photos.
No time or desire to do it yourself, delegate and outsource or use Lightroom presets. These days you can find reasonably priced services like Fixthephoto or Weeditphotos, to help you do image post-production in just a couple of days and with great quality.
Make sure you follow all of the tips mentioned above and take stunning interior shots that only highlight the skill of the interior designer or the beauty of the real estate property on sale.