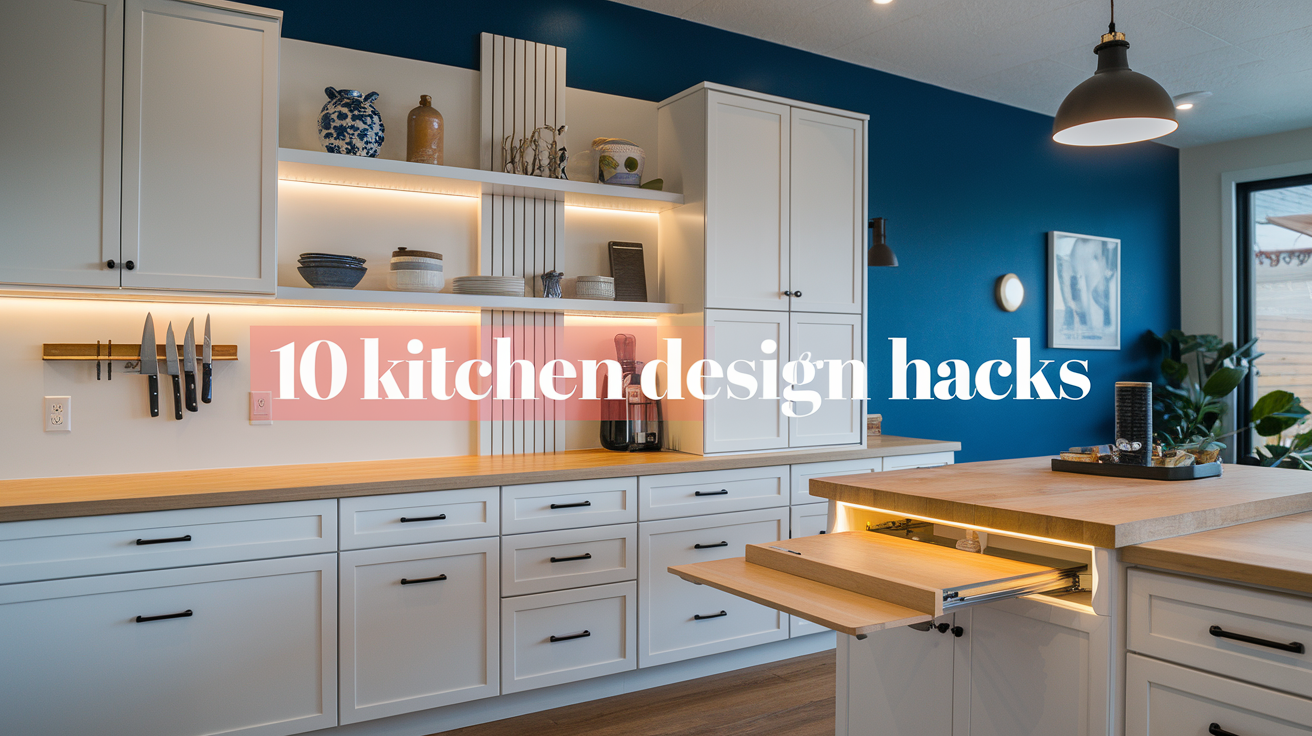
Are you tired of feeling cramped and frustrated in your kitchen? 🏠👨🍳 Imagine effortlessly preparing meals, entertaining guests, and enjoying a space that’s both functional and beautiful. Your dream kitchen is closer than you think!
With just a few clever tweaks, you can transform your kitchen from cluttered chaos to culinary paradise. Whether you’re dealing with a tiny apartment galley or a spacious family hub, these 10 game-changing design hacks will revolutionize your kitchen experience. From maximizing counter space to creating stunning focal points, we’ll guide you through simple yet effective strategies that pack a big punch. 💪✨
Get ready to unlock the full potential of your kitchen! In this blog post, we’ll explore innovative storage solutions, lighting tricks, color psychology, and more. You’ll discover how to make the most of every inch, from floor to ceiling, and learn the secrets of professional designers. So, let’s dive in and start your kitchen transformation journey!
Maximize Counter Space
Install a pull-out cutting board
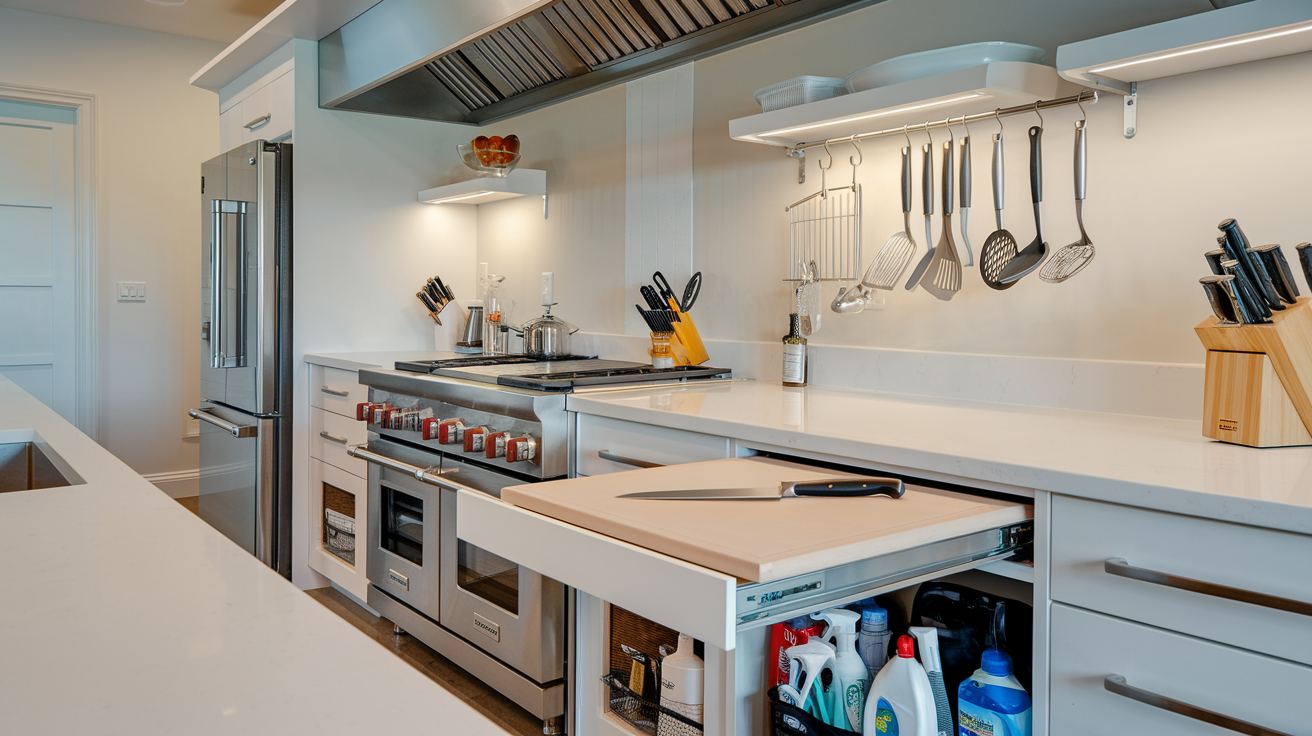
One of the most effective ways to maximize counter space in your kitchen is by installing a pull-out cutting board. This clever addition serves multiple purposes and can significantly increase your workable area without taking up permanent counter space.
A pull-out cutting board is typically installed just beneath your countertop, allowing you to slide it out when needed and tuck it away when not in use. This feature is particularly beneficial for smaller kitchens where every inch of counter space counts.
Here are some key advantages of installing a pull-out cutting board:
- Space-saving: When not in use, it’s completely hidden, freeing up valuable counter space.
- Convenience: Easy to access and use, right at countertop height.
- Versatility: Can be used for food preparation, as an extra serving surface, or even as a temporary desk.
- Hygiene: Many models are removable for easy cleaning and sanitizing.
When selecting a pull-out cutting board, consider the following factors:
| Factor | Consideration |
|---|---|
| Material | Wood, bamboo, or plastic – each with pros and cons |
| Size | Should fit your cabinet space and meet your needs |
| Installation | DIY-friendly or professional installation required |
| Features | Built-in knife storage, integrated colander, etc. |
Remember to measure your cabinet space carefully before purchasing to ensure a perfect fit. With a pull-out cutting board, you’ll wonder how you ever managed without this space-saving hack!
Use hanging magnetic knife strips
Another excellent way to free up counter space is by utilizing hanging magnetic knife strips. These innovative storage solutions not only save space but also add a touch of professional flair to your kitchen.
Magnetic knife strips offer several benefits:
- Space-saving: Eliminates the need for bulky knife blocks on your countertop.
- Accessibility: Keeps knives within easy reach while cooking.
- Safety: Reduces the risk of accidents from rummaging through drawers.
- Knife care: Prevents blade damage that can occur when stored in drawers.
- Aesthetic appeal: Can create an attractive display of your knife collection.
When installing a magnetic knife strip, consider these tips:
- Choose a location that’s convenient but out of reach of children.
- Ensure the strip is securely mounted to support the weight of your knives.
- Clean the strip regularly to maintain hygiene and magnetism.
- Arrange knives with handles facing the same direction for a uniform look.
While magnetic strips are primarily used for knives, they can also hold other metal utensils like scissors, peelers, or even small pots and pans. This versatility makes them an excellent addition to any kitchen looking to maximize space.
Add a rolling kitchen island
For those seeking a more substantial solution to increase counter space, a rolling kitchen island is an excellent option. This versatile piece of furniture offers additional work surface, storage, and mobility, making it a valuable asset in any kitchen, especially those with limited space.
Benefits of a rolling kitchen island include:
- Mobility: Can be moved around the kitchen as needed or rolled away when not in use.
- Additional counter space: Provides extra surface area for food preparation or serving.
- Storage: Many models include shelves, drawers, or cabinets for added storage.
- Versatility: Can serve multiple purposes – prep station, dining table, or bar cart.
- Design flexibility: Available in various styles to complement your kitchen décor.
When choosing a rolling kitchen island, consider these factors:
| Feature | Options to Consider |
|---|---|
| Size | Should fit your kitchen space when in use and storage |
| Material | Wood, metal, or a combination for durability and style |
| Storage | Open shelves, drawers, cabinets, or a mix |
| Top surface | Butcher block, stainless steel, marble, or granite |
| Additional features | Towel bars, spice racks, wine racks, or electrical outlets |
To make the most of your rolling kitchen island:
- Use it as a prep station during cooking and roll it to the dining area for serving.
- Store less frequently used appliances on its shelves to free up cabinet space.
- Opt for a model with a drop-leaf to expand the surface area when needed.
- Choose one with locking wheels for stability during use.
By incorporating these three space-maximizing hacks – a pull-out cutting board, magnetic knife strips, and a rolling kitchen island – you can significantly increase your usable counter space without major renovations. These solutions not only add functionality but also contribute to a more organized and efficient kitchen layout.
Remember, the key to maximizing counter space is to think vertically and utilize multi-functional pieces. By keeping your countertops clear of clutter and incorporating these clever storage solutions, you’ll create a more spacious and enjoyable cooking environment.
Now that we’ve explored ways to maximize counter space, let’s move on to discover some clever storage solutions that can further enhance your kitchen’s functionality and organization.
Clever Storage Solutions
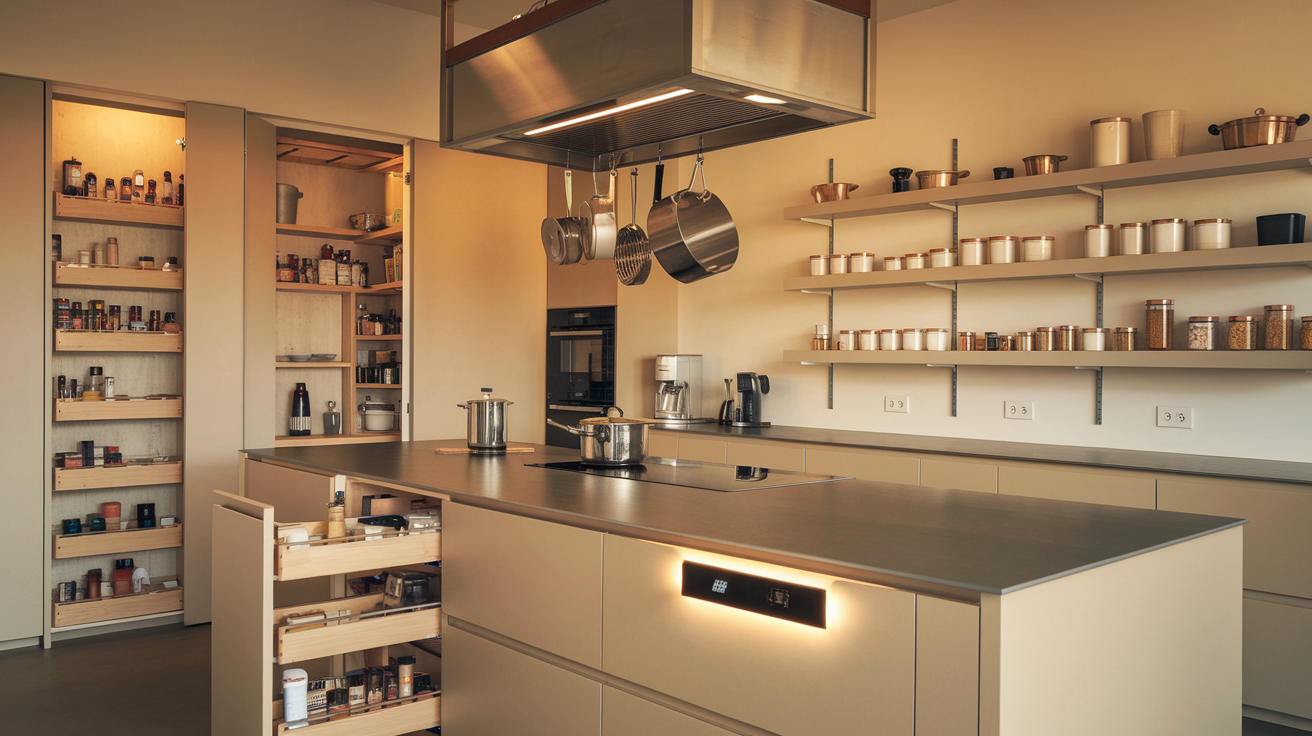
Implement vertical shelving
Vertical shelving is a game-changer when it comes to maximizing storage in your kitchen. By utilizing the often-overlooked vertical space, you can significantly increase your storage capacity without taking up valuable floor space. Here are some innovative ways to implement vertical shelving in your kitchen:
Floor-to-ceiling pantry: Install tall, narrow shelving units that reach from floor to ceiling. This type of shelving can store a surprising amount of items and is perfect for dry goods, canned foods, and small appliances.
Over-the-door shelving: Make use of the back of your pantry or kitchen door by installing an over-the-door shelving system. These are great for storing spices, small utensils, or cleaning supplies.
Wall-mounted pot racks: Free up cabinet space by hanging your pots and pans on a wall-mounted rack. This not only provides easy access but also adds a decorative element to your kitchen.
Magnetic knife strips: Install a magnetic strip on your wall to hold knives and other metal utensils, freeing up drawer space and keeping sharp objects safely out of reach.
Corner shelving units: Utilize corner spaces with specially designed corner shelving units. These can be particularly useful for storing items that are not frequently used.
| Vertical Shelving Option | Best For | Space-Saving Potential |
|---|---|---|
| Floor-to-ceiling pantry | Dry goods, canned foods | High |
| Over-the-door shelving | Spices, small utensils | Medium |
| Wall-mounted pot racks | Pots and pans | High |
| Magnetic knife strips | Knives, metal utensils | Low |
| Corner shelving units | Less-used items | Medium |
By implementing these vertical shelving solutions, you can dramatically increase your kitchen’s storage capacity while maintaining a clean and organized look.
Use door-mounted organizers
Door-mounted organizers are an often-overlooked storage solution that can make a significant difference in your kitchen’s organization. These clever devices allow you to utilize the inner surface of cabinet doors, which is typically wasted space. Here are some creative ways to use door-mounted organizers:
Spice rack: Install a narrow spice rack on the inside of a cabinet door near your cooking area. This keeps your spices organized and easily accessible while freeing up valuable shelf space.
Lid organizer: Use a door-mounted rack to store pot and pan lids. This keeps them neatly organized and prevents them from cluttering up your cabinets.
Cutting board storage: Install hooks or a slim rack on the inside of a cabinet door to store cutting boards vertically. This keeps them easily accessible and prevents them from taking up counter or cabinet space.
Cleaning supplies caddy: Mount a small caddy on the inside of the under-sink cabinet door to store cleaning supplies. This keeps them organized and easily accessible while freeing up space under the sink.
Aluminum foil and plastic wrap holder: Install a holder for aluminum foil, plastic wrap, and wax paper on the inside of a cabinet door. This keeps these items neatly stored and easily accessible when needed.
By utilizing door-mounted organizers, you can maximize every inch of available space in your kitchen, leading to a more organized and efficient cooking environment.
Install pull-out pantry shelves
Pull-out pantry shelves are a revolutionary storage solution that can transform the way you organize your kitchen. These shelves slide out smoothly, allowing you to easily access items stored at the back of deep cabinets or pantries. Here’s why pull-out pantry shelves are a must-have for any kitchen:
Improved accessibility: Pull-out shelves bring items from the back of the cabinet to the front, eliminating the need to reach or dig through cluttered spaces.
Increased visibility: With pull-out shelves, you can see all your items at a glance, reducing the likelihood of forgotten or expired food.
Maximized space utilization: These shelves allow you to use the full depth of your cabinets efficiently, making the most of your available storage space.
Customizable organization: Many pull-out shelves come with adjustable dividers, allowing you to create custom compartments for different items.
Reduced waste: By keeping all your pantry items visible and accessible, you’re less likely to buy duplicates or let food expire.
Here are some tips for installing and using pull-out pantry shelves effectively:
- Measure your cabinets carefully before purchasing pull-out shelves to ensure a proper fit.
- Consider the weight capacity of the shelves, especially if you plan to store heavy items like canned goods.
- Use clear containers or labels to further organize items on your pull-out shelves.
- Group similar items together for easy access and inventory management.
- Consider installing pull-out shelves at varying heights to accommodate different sized items.
| Benefits of Pull-Out Pantry Shelves | Implementation Tips |
|---|---|
| Improved accessibility | Measure cabinets carefully |
| Increased visibility | Consider weight capacity |
| Maximized space utilization | Use clear containers or labels |
| Customizable organization | Group similar items |
| Reduced waste | Install at varying heights |
By installing pull-out pantry shelves, you’ll transform your kitchen storage, making it more efficient and user-friendly.
Utilize under-sink storage solutions
The space under the kitchen sink is often underutilized and can become a cluttered mess. However, with the right storage solutions, this area can be transformed into a highly functional and organized space. Here are some innovative ways to maximize your under-sink storage:
Tension rods: Install tension rods vertically in the cabinet to hang spray bottles. This keeps them off the bottom of the cabinet, freeing up space for other items.
Slide-out drawers: Install slide-out drawers or bins to make it easier to access items stored at the back of the cabinet. These can be particularly useful for storing cleaning supplies or rarely used items.
Over-the-door organizers: Utilize the inside of the cabinet door by installing an over-the-door organizer. This is perfect for storing sponges, scrub brushes, and other small cleaning tools.
Lazy Susan: Install a Lazy Susan in the under-sink cabinet to make it easier to reach items stored at the back. This is particularly useful for storing cleaning products or small appliances.
Stackable bins: Use stackable bins to maximize vertical space. These are great for storing items of different sizes and can be easily moved around as needed.
Pipe wrap: Use pipe wrap or foam insulation to cover exposed pipes under the sink. This not only protects your items from moisture but also creates a flat surface for storing items.
Magnetic strips: Install magnetic strips on the inside of the cabinet door or walls to hold metal items like scissors or small tools.
Here’s a comparison of different under-sink storage solutions:
| Storage Solution | Best For | Ease of Installation | Cost |
|---|---|---|---|
| Tension rods | Spray bottles | Easy | Low |
| Slide-out drawers | Cleaning supplies | Moderate | Medium |
| Over-the-door organizers | Small tools | Easy | Low |
| Lazy Susan | Cleaning products | Easy | Medium |
| Stackable bins | Various items | Easy | Low |
| Pipe wrap | Creating flat surfaces | Easy | Low |
| Magnetic strips | Metal tools | Easy | Low |
By implementing these under-sink storage solutions, you can transform this often-overlooked space into a highly organized and functional area of your kitchen. This not only helps keep your cleaning supplies and other items neatly stored but also makes them more accessible when you need them.
Remember, when organizing the space under your sink, it’s important to consider the location of pipes and disposal units. Always ensure that your storage solutions don’t interfere with these essential components. Additionally, if you’re storing cleaning products in this area, consider using childproof locks if you have young children in the home.
With these clever storage solutions – vertical shelving, door-mounted organizers, pull-out pantry shelves, and under-sink storage – you can significantly increase your kitchen’s storage capacity. These hacks not only help you maximize space but also contribute to a more organized and efficient kitchen environment. By implementing these ideas, you’ll find that your kitchen becomes easier to navigate, more pleasant to work in, and ultimately more functional for your daily needs. Next, we’ll explore how lighting upgrades can further enhance your kitchen’s ambiance and functionality.
Lighting Upgrades
Install under-cabinet LED strips
Upgrading your kitchen lighting can dramatically transform the look and functionality of your space. One of the most effective and budget-friendly ways to achieve this is by installing under-cabinet LED strips. These versatile lighting solutions not only enhance the visual appeal of your kitchen but also provide practical illumination for your work areas.
LED strips offer several advantages over traditional lighting options:
- Energy efficiency: LED lights consume less power, reducing your electricity bills.
- Long lifespan: They can last up to 50,000 hours, meaning less frequent replacements.
- Low heat emission: Unlike halogen lights, LEDs don’t heat up, making them safer for use in cabinets.
- Customizable: Many LED strips come with color-changing options and dimming capabilities.
When selecting and installing under-cabinet LED strips, consider the following tips:
- Choose the right color temperature: Opt for warm white (2700K-3000K) for a cozy ambiance or cool white (4000K-5000K) for task lighting.
- Measure carefully: Ensure you have the correct length of LED strips for your cabinets.
- Use a diffuser: This will help spread the light evenly and prevent harsh spotlighting.
- Consider adhesive backing: Many LED strips come with strong adhesive for easy installation.
Here’s a quick comparison of different under-cabinet lighting options:
| Lighting Type | Energy Efficiency | Lifespan | Heat Emission | Customization |
|---|---|---|---|---|
| LED Strips | High | Long | Low | High |
| Fluorescent | Medium | Medium | Medium | Low |
| Halogen | Low | Short | High | Medium |
| Puck Lights | Medium | Medium | Medium | Medium |
By installing under-cabinet LED strips, you’ll not only improve the functionality of your kitchen but also create a modern, sleek look that will impress your guests and make your daily cooking tasks more enjoyable.
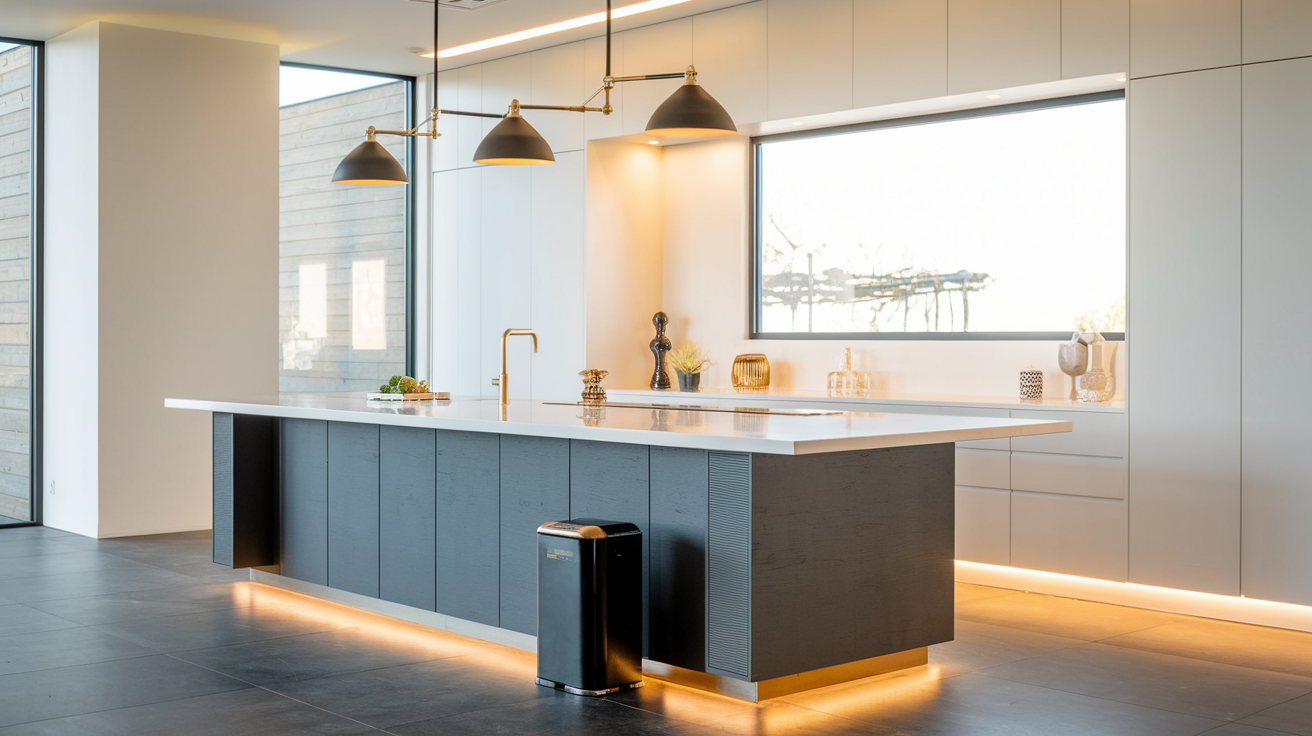
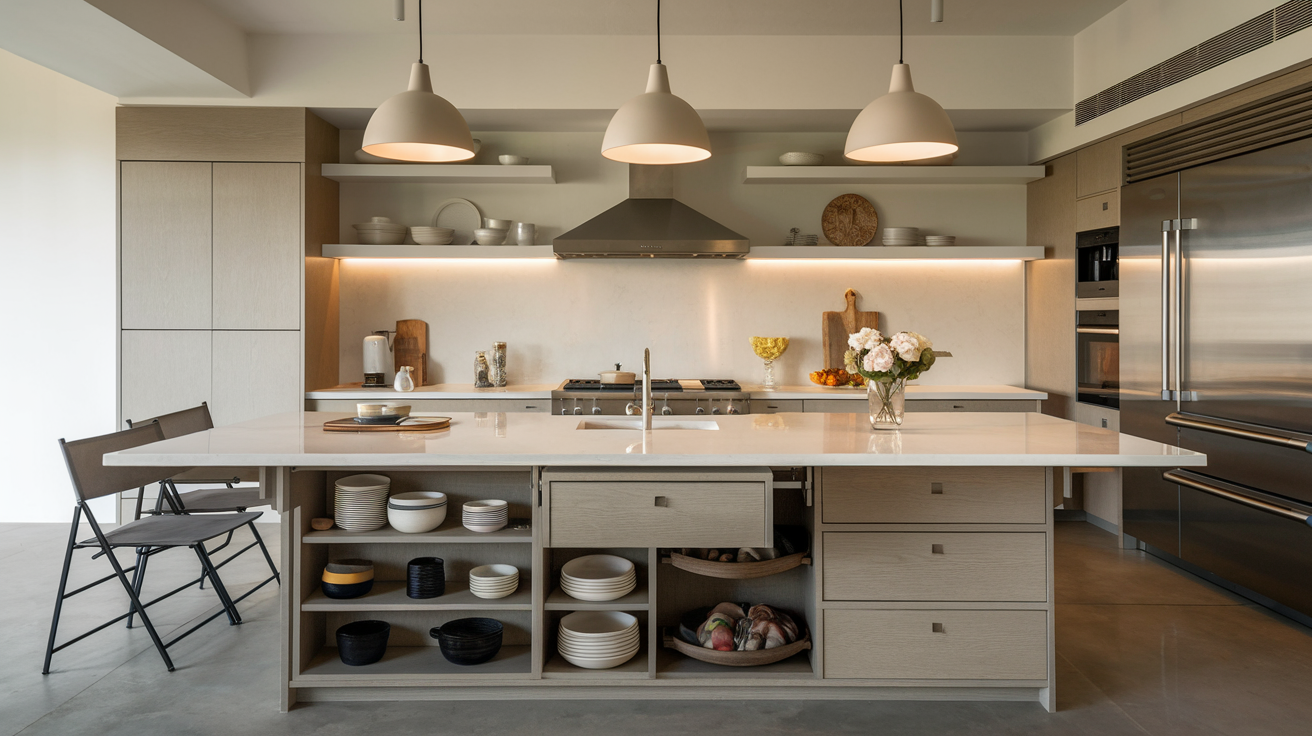
Add pendant lights over islands
Once you’ve enhanced your work areas with under-cabinet lighting, it’s time to focus on the centerpiece of many modern kitchens: the island. Adding pendant lights over your kitchen island is an excellent way to combine style with functionality, creating a focal point that draws the eye and provides essential task lighting.
When selecting pendant lights for your kitchen island, consider these factors:
- Size and scale: Choose lights that are proportional to your island’s size.
- Height: Hang pendants 30-36 inches above the countertop for optimal lighting.
- Number of lights: Use the “rule of three” for visual balance, or adjust based on your island’s length.
- Style: Select fixtures that complement your kitchen’s overall design theme.
To help you choose the right pendant lights, here’s a guide based on island size:
| Island Length | Number of Pendants | Pendant Size |
|---|---|---|
| 4-5 feet | 2 | 10-12 inches |
| 6-7 feet | 3 | 12-14 inches |
| 8+ feet | 3-4 | 14-16 inches |
When it comes to styles, there’s a wide variety to choose from:
- Industrial: Metal fixtures with exposed bulbs for a rustic, urban look.
- Modern: Sleek, minimalist designs in glass or metal.
- Farmhouse: Lantern-style or mason jar pendants for a cozy, country feel.
- Glamorous: Crystal or metallic finishes for a touch of luxury.
- Eco-friendly: Pendants made from sustainable materials like bamboo or recycled glass.
To maximize the impact of your pendant lights:
- Use matching finishes: Coordinate the finish of your pendant lights with other hardware in your kitchen for a cohesive look.
- Consider dimmable options: This allows you to adjust the lighting based on the time of day or activity.
- Play with heights: Hang pendants at slightly different heights for a more dynamic visual effect.
- Use smart bulbs: Incorporate smart technology for color-changing capabilities and voice control.
By carefully selecting and positioning pendant lights over your kitchen island, you’ll create a stunning visual centerpiece while providing essential task lighting for food preparation, casual dining, or entertaining guests.
Use dimmer switches for ambiance
The final touch in your kitchen lighting upgrade is the installation of dimmer switches. This simple addition can dramatically enhance the versatility and ambiance of your kitchen, allowing you to adjust the lighting to suit different moods and activities throughout the day.
Benefits of using dimmer switches in your kitchen:
- Energy savings: Dimming lights reduces energy consumption, lowering your electricity bills.
- Extended bulb life: Lower brightness levels can significantly increase the lifespan of your light bulbs.
- Versatility: Adjust lighting for various tasks, from bright illumination for cooking to soft ambiance for dining.
- Mood setting: Create the perfect atmosphere for different occasions, from intimate dinners to lively gatherings.
When installing dimmer switches, keep these tips in mind:
- Ensure compatibility: Not all light fixtures work with dimmers. LED lights require specific dimmer switches designed for LED use.
- Consider smart dimmers: These allow you to control your lights via smartphone apps or voice commands.
- Install in key areas: Focus on areas where lighting versatility is most beneficial, such as over the island or in the dining area.
- Use multiple dimmers: Control different light sources independently for maximum flexibility.
Here’s a comparison of different dimmer switch types:
| Dimmer Type | Compatibility | Smart Features | Installation Difficulty |
|---|---|---|---|
| Rotary | Limited | No | Easy |
| Slide | Good | Some models | Moderate |
| Touch | Excellent | Many options | Moderate to Complex |
| Smart | Excellent | Full range | Complex |
To make the most of your dimmer switches, consider these lighting scenarios:
- Morning routine: Bright, cool light to energize and focus.
- Daytime cooking: Full brightness for safe and efficient food preparation.
- Evening relaxation: Warm, dimmed light for a cozy atmosphere.
- Dinner parties: Moderate lighting with accent areas for an inviting ambiance.
- Late-night snacks: Low, warm light to avoid disrupting sleep patterns.
By incorporating dimmer switches into your kitchen lighting plan, you’ll have the flexibility to create the perfect ambiance for any occasion. Whether you’re hosting a dinner party, enjoying a quiet family meal, or burning the midnight oil, you’ll have complete control over your kitchen’s atmosphere.
As we conclude our exploration of lighting upgrades, it’s clear that these changes can have a profound impact on both the functionality and aesthetic of your kitchen. From the practical task lighting of under-cabinet LED strips to the stylish statement of pendant lights over your island, and the versatility offered by dimmer switches, each element contributes to a more vibrant and adaptable kitchen space. With these lighting improvements in place, you’re well on your way to creating a kitchen that’s not only more efficient but also more enjoyable to spend time in. Next, we’ll explore how smart color choices can further enhance your kitchen’s design and atmosphere.
Smart Color Choices
Paint cabinets for a fresh look
Transforming your kitchen doesn’t always require a complete overhaul. One of the most impactful and cost-effective ways to breathe new life into your culinary space is by painting your cabinets. This simple yet powerful technique can completely alter the look and feel of your kitchen, making it appear fresh, modern, and inviting.
When considering painting your cabinets, it’s essential to choose the right color that complements your overall kitchen design. Here are some popular color choices and their effects:
- White: Creates a clean, bright, and timeless look
- Gray: Offers a modern and sophisticated appearance
- Navy blue: Adds depth and a touch of elegance
- Sage green: Brings a natural and calming element
- Black: Provides a bold and dramatic statement
Before you start painting, follow these steps to ensure a professional-looking finish:
- Remove cabinet doors and hardware
- Clean surfaces thoroughly
- Sand the cabinets to create a smooth surface
- Apply primer
- Paint with high-quality cabinet paint
- Allow sufficient drying time between coats
| Paint Type | Pros | Cons |
|---|---|---|
| Oil-based | Durable, smooth finish | Long drying time, strong odor |
| Latex | Easy to clean, quick-drying | Less durable than oil-based |
| Chalk | No prep work needed, matte finish | May require sealing |
Remember, painting your cabinets is a cost-effective alternative to replacing them entirely. This kitchen design hack can save you thousands of dollars while still achieving a dramatic transformation.
Use light colors to make space feel larger
In smaller kitchens, the choice of color can make a significant difference in how spacious the room feels. Light colors have the magical ability to create an illusion of more space, making your kitchen appear larger and more open. This optical trick works by reflecting light and creating a sense of airiness.
Here are some light color options that can help expand your kitchen visually:
- Soft whites
- Pale grays
- Light beiges
- Pastel blues
- Subtle yellows
When incorporating light colors into your kitchen design, consider these tips:
- Apply light colors to walls, cabinets, and backsplashes for a cohesive look
- Use glossy or semi-glossy finishes to enhance light reflection
- Pair light colors with natural materials like wood for warmth and balance
- Incorporate light-colored countertops to maintain the spacious feel
It’s important to note that using light colors doesn’t mean your kitchen has to be boring or lack personality. You can still add depth and interest through textures, patterns, and subtle contrasts. For example:
| Element | Light Color | Contrasting Accent |
|---|---|---|
| Walls | Soft white | Textured wallpaper |
| Cabinets | Pale gray | Brushed nickel hardware |
| Backsplash | Light beige | Mosaic tile pattern |
| Countertops | White quartz | Wood cutting boards |
By strategically using light colors throughout your kitchen, you can create a bright, airy, and visually spacious environment that feels welcoming and open.
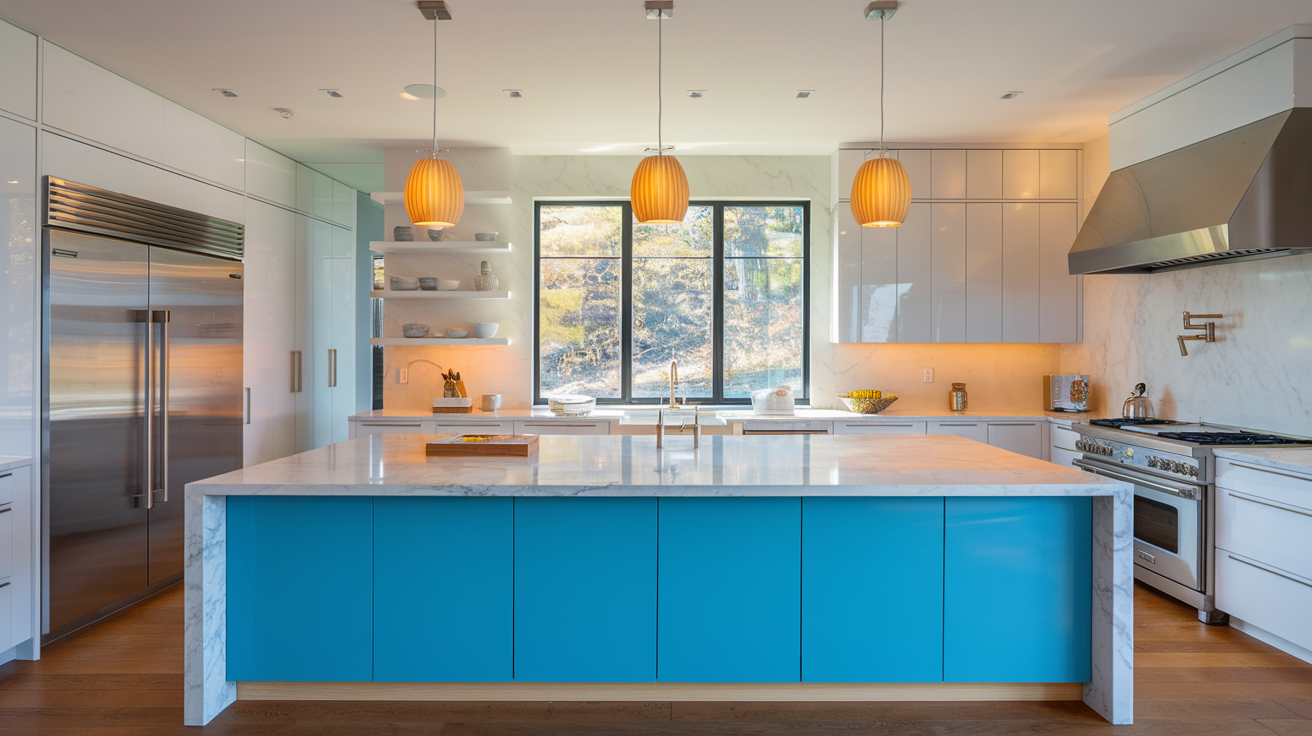
Add a bold accent wall
While light colors can make your kitchen feel larger, adding a bold accent wall can inject personality and create a stunning focal point in your space. An accent wall is a perfect way to experiment with color without overwhelming the entire room. It allows you to incorporate trendy or vibrant hues that might be too intense for the whole kitchen.
When choosing a color for your accent wall, consider these popular options:
- Deep navy blue
- Rich emerald green
- Warm terracotta
- Charcoal gray
- Vibrant coral
To create a successful accent wall, keep these tips in mind:
- Choose a wall that naturally draws attention, such as the one behind the stove or sink
- Ensure the accent color complements the overall color scheme of your kitchen
- Use high-quality paint or wallpaper for a polished look
- Consider adding texture through brick, stone, or tile for added visual interest
Here’s a comparison of different accent wall materials and their effects:
| Material | Effect | Maintenance |
|---|---|---|
| Paint | Easy to change, affordable | May need touch-ups over time |
| Wallpaper | Wide variety of patterns, textures | Can be difficult to remove |
| Tile | Durable, easy to clean | More expensive, permanent |
| Brick | Adds rustic charm | Requires sealing, can be dust-prone |
An accent wall doesn’t have to be limited to just paint or wallpaper. You can get creative with other materials to add visual interest:
- Install a chalkboard wall for a functional and fun element
- Create a gallery wall with framed artwork or photographs
- Use decorative tiles to create a unique pattern or mural
- Apply reclaimed wood for a rustic, textured look
- Hang a large mirror to reflect light and create the illusion of more space
Remember, the key to a successful accent wall is balance. It should complement the rest of your kitchen design while still standing out as a distinctive feature.
Now that we’ve explored smart color choices for your kitchen, from painting cabinets to creating an eye-catching accent wall, you have the tools to transform your space with color. These design hacks can significantly impact the look and feel of your kitchen without requiring a complete renovation. As we move forward, we’ll examine how efficient appliance placement can further enhance your kitchen’s functionality and aesthetic appeal.
Efficient Appliance Placement
Create a kitchen work triangle
The kitchen work triangle is a fundamental concept in efficient kitchen design that can revolutionize your cooking experience. This design principle focuses on the placement of three key areas: the refrigerator, sink, and stove. By positioning these elements strategically, you can create a seamless workflow that minimizes unnecessary movement and maximizes efficiency.
To implement the kitchen work triangle:
- Measure the distance between each point (refrigerator, sink, and stove)
- Ensure the sum of all three sides of the triangle is between 13 and 26 feet
- Each leg of the triangle should measure between 4 and 9 feet
Here’s a breakdown of the ideal distances:
| Triangle Side | Minimum Distance | Maximum Distance |
|---|---|---|
| Refrigerator to Sink | 4 feet | 7 feet |
| Sink to Stove | 4 feet | 6 feet |
| Stove to Refrigerator | 4 feet | 9 feet |
By adhering to these guidelines, you’ll create a kitchen layout that promotes efficient movement and reduces fatigue during meal preparation. Remember, the goal is to minimize the number of steps between these key areas while maintaining enough space to work comfortably.
Install a pot filler near the stove
A pot filler is a game-changer for any kitchen, especially for those who frequently cook large meals or use oversized pots. This clever addition not only adds a touch of luxury to your kitchen but also significantly improves functionality and efficiency.
Benefits of installing a pot filler:
- Eliminates the need to carry heavy pots of water from the sink to the stove
- Saves time during meal preparation
- Reduces strain on your back and arms
- Adds a stylish, professional touch to your kitchen
When installing a pot filler, consider the following tips:
- Height: Mount the pot filler at a height that allows it to clear your tallest pots
- Reach: Ensure the spout can extend to cover all burners on your stovetop
- Clearance: Leave enough space for the pot filler to fold back against the wall when not in use
- Water line: Work with a professional plumber to install the necessary water line behind the wall
While pot fillers are often associated with high-end kitchens, they’re becoming increasingly popular in homes of all sizes and styles. This small addition can make a big difference in your daily cooking routine and elevate the overall functionality of your kitchen.
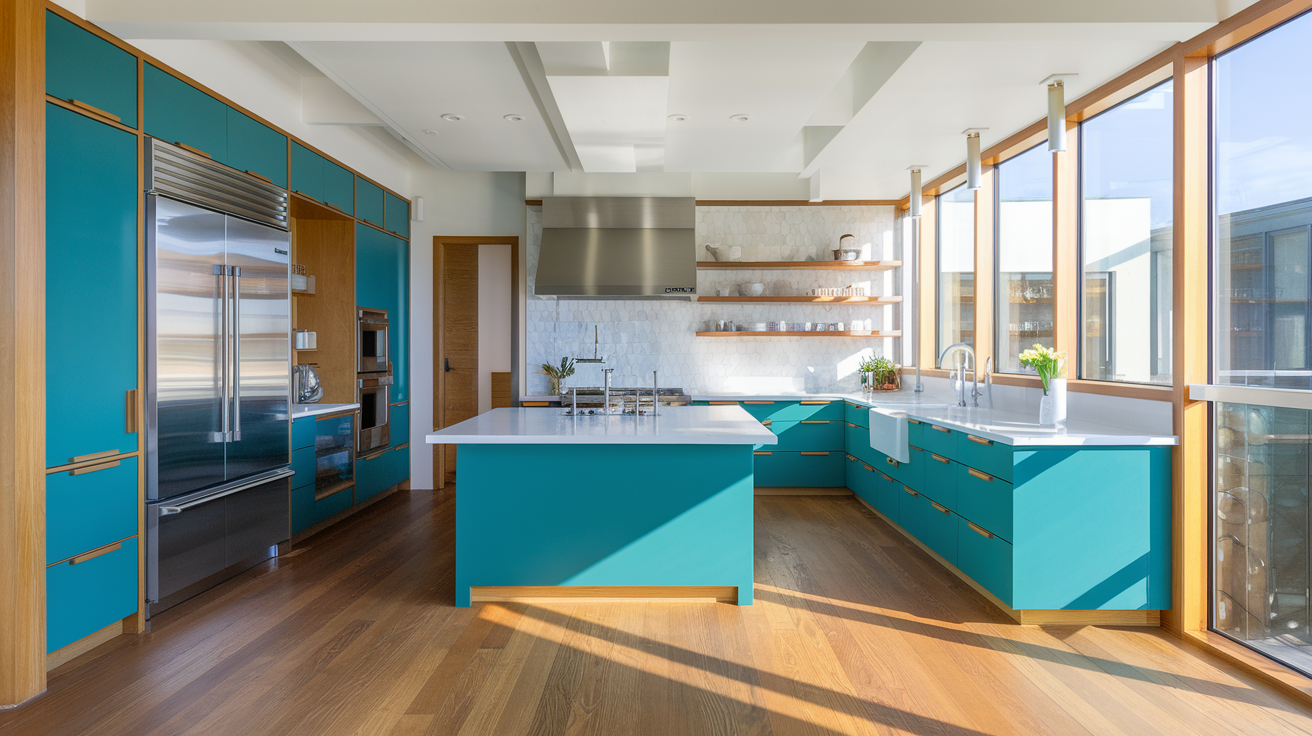
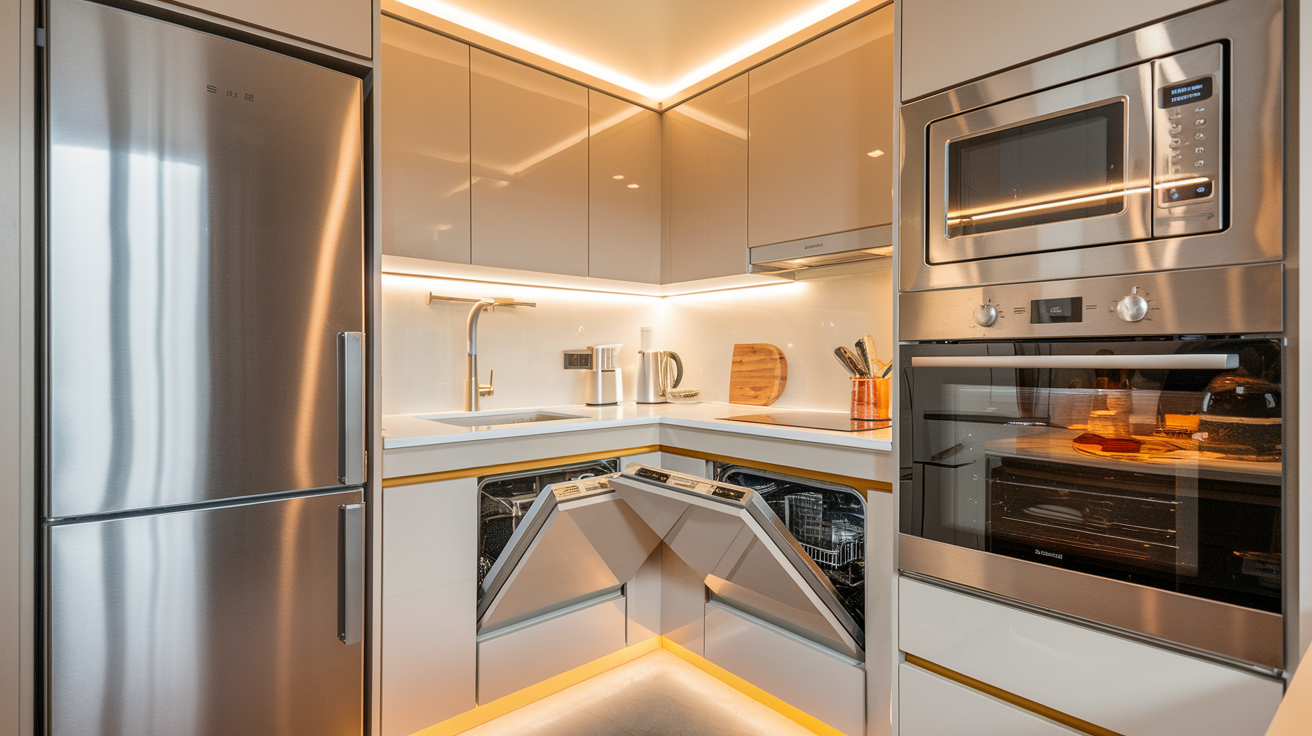
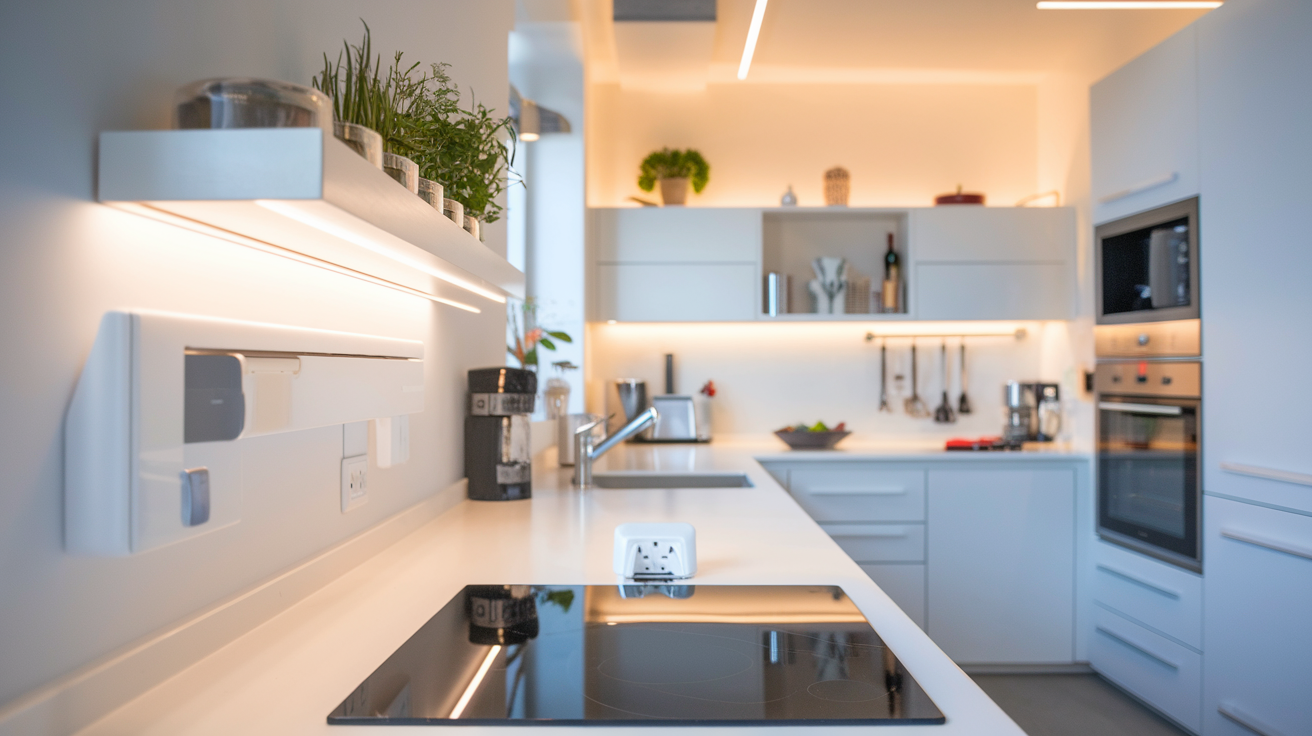
Use built-in appliances to save space
Incorporating built-in appliances is an excellent way to maximize space and create a sleek, cohesive look in your kitchen. This approach not only saves valuable floor and counter space but also gives your kitchen a custom, high-end appearance.
Here are some popular built-in appliance options to consider:
- Refrigerator: A built-in refrigerator sits flush with your cabinetry, creating a seamless look
- Dishwasher: Choose a model that can be fitted with a cabinet panel to blend in with your kitchen design
- Microwave: Install a built-in microwave in a wall cabinet or under the counter to free up valuable counter space
- Oven and stovetop: Separate built-in ovens and cooktops offer more flexibility in kitchen layout
- Coffee maker: A built-in coffee system can be a luxurious addition for coffee enthusiasts
When incorporating built-in appliances, keep these factors in mind:
- Measure carefully: Ensure you have accurate measurements of your kitchen space before selecting appliances
- Plan for ventilation: Built-in appliances may require special ventilation considerations
- Consider future maintenance: Access for repairs and replacements should be factored into your design
- Match finishes: Choose appliance finishes that complement your overall kitchen aesthetic
| Appliance Type | Space-Saving Benefit | Design Advantage |
|---|---|---|
| Built-in Refrigerator | Flush with cabinetry | Seamless look |
| Panel-Ready Dishwasher | Blends with cabinets | Uniform appearance |
| Wall Oven | Frees up floor space | Flexible placement |
| Under-Counter Microwave | Clears counter space | Clean, uncluttered look |
| Built-in Coffee Maker | Eliminates countertop clutter | Luxury touch |
By strategically incorporating built-in appliances, you can create a more spacious and visually appealing kitchen. This approach not only improves the functionality of your space but also adds value to your home.
Now that we’ve explored efficient appliance placement strategies, it’s important to consider how these elements work together to create a cohesive and functional kitchen design. The kitchen work triangle, strategically placed pot filler, and space-saving built-in appliances all contribute to a well-organized and efficient cooking space.
When implementing these design hacks, remember to consider your personal cooking habits and lifestyle. For instance, if you frequently entertain or cook large meals, you might want to prioritize a larger work triangle and more built-in appliances. On the other hand, if you’re working with a smaller space, focusing on space-saving solutions like under-counter appliances might be more beneficial.
Additionally, don’t forget to factor in the overall aesthetic of your kitchen when making these changes. While functionality is crucial, the visual appeal of your kitchen is equally important. Choose finishes and styles that complement your existing decor or the new look you’re aiming for.
By thoughtfully implementing these efficient appliance placement strategies, you’ll not only transform the functionality of your kitchen but also create a space that’s a joy to cook and entertain in. With a well-designed kitchen work triangle, a convenient pot filler, and smartly integrated appliances, you’ll find that your kitchen becomes more than just a place to prepare meals – it becomes the heart of your home, where efficiency meets style.
Open Shelving Ideas
Display decorative dishes and glassware
Open shelving in the kitchen offers a fantastic opportunity to showcase your favorite decorative dishes and glassware. Not only does this add a personal touch to your space, but it also creates a visually appealing display that can serve as a focal point in your kitchen. Here are some creative ways to arrange your dishes and glassware on open shelves:
Color coordination: Group items by color to create a cohesive and eye-catching display. This can be particularly striking with colorful glassware or vibrant pottery.
Stacking and layering: Combine different heights and sizes by stacking plates and bowls, then placing smaller items in front or on top.
Mix and match: Blend different styles, textures, and materials for an eclectic look. For example, pair rustic ceramic pieces with sleek, modern glassware.
Functional art: Arrange everyday items in an artistic way, turning your kitchen essentials into decorative elements.
Themed displays: Create themed shelves based on seasons, holidays, or your personal interests.
When displaying your dishes and glassware, consider the following tips to maximize the impact of your open shelving:
- Keep frequently used items within easy reach
- Use risers or small stands to create different levels
- Incorporate bookends or decorative objects to break up the monotony
- Rotate your display periodically to keep the look fresh
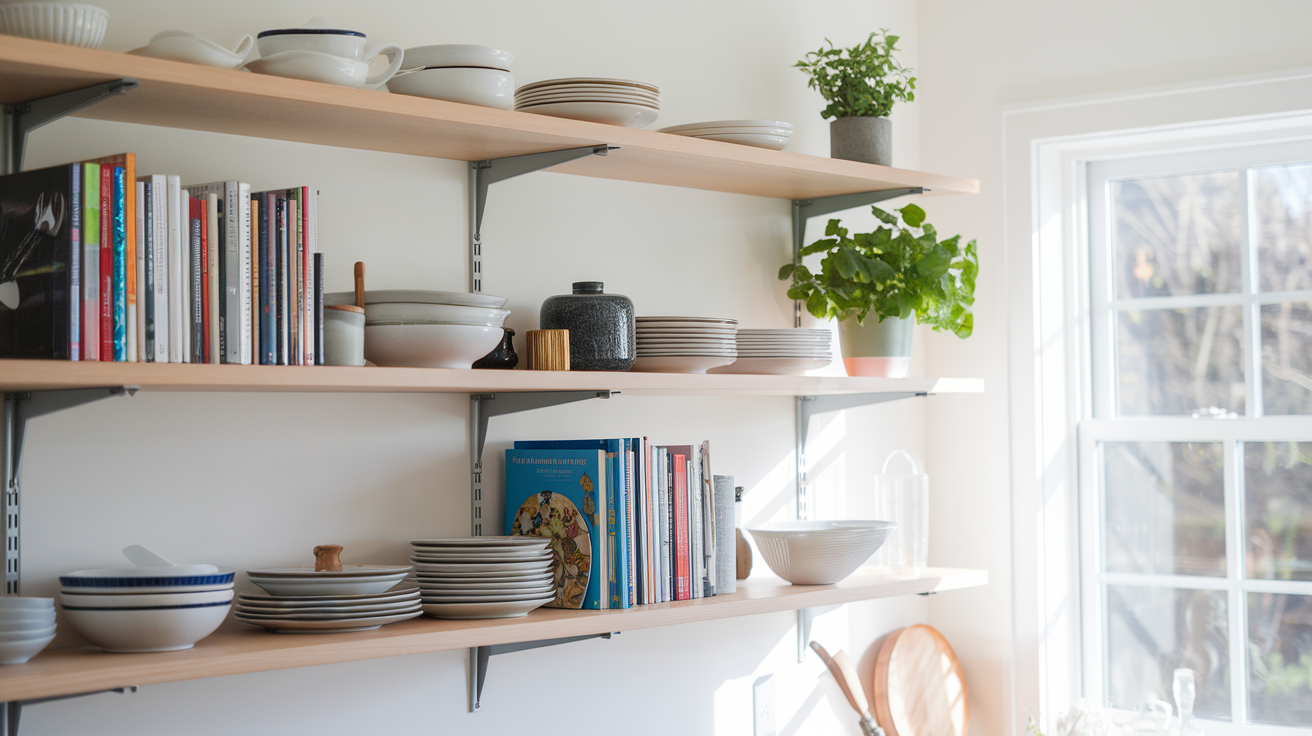
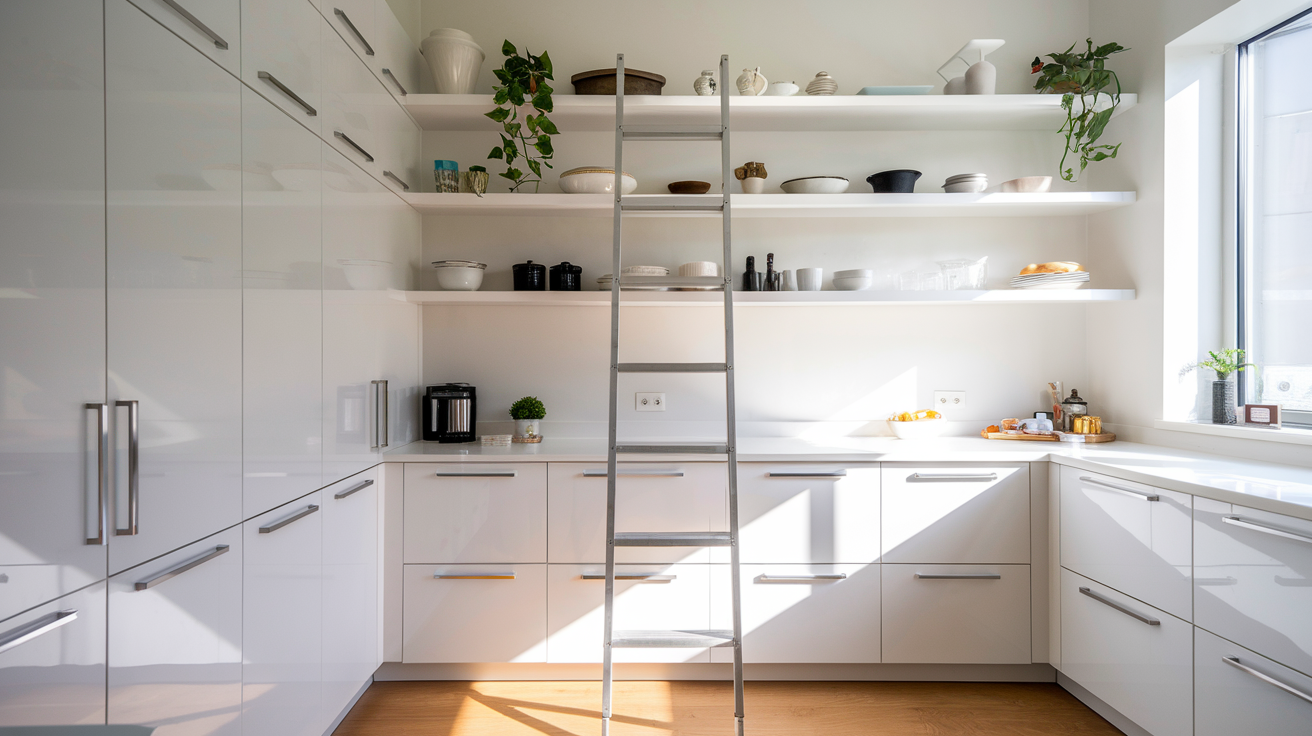
Use floating shelves for a modern look
Floating shelves are an excellent choice for creating a sleek, modern aesthetic in your kitchen. These shelves appear to “float” on the wall without visible brackets, giving your space a clean and minimalist look. Here’s why floating shelves are a great option for open shelving in your kitchen:
Space-saving: Floating shelves take up less visual space than traditional cabinets, making your kitchen feel more open and airy.
Versatility: They can be installed in various configurations to fit your specific needs and kitchen layout.
Customizable: Available in different materials, sizes, and finishes to match your kitchen’s style.
Easy access: Items stored on floating shelves are easily accessible, making them ideal for frequently used kitchen items.
Budget-friendly: Floating shelves are often more affordable than traditional cabinetry, making them a great option for budget kitchen makeovers.
When incorporating floating shelves into your kitchen design, consider these ideas:
- Install a single long shelf for a dramatic, minimalist look
- Create a grid pattern with multiple smaller shelves
- Use contrasting colors or materials to make the shelves stand out
- Combine floating shelves with closed cabinets for a balanced look
Here’s a comparison of different materials commonly used for floating shelves:
| Material | Pros | Cons |
|---|---|---|
| Wood | Warm, natural look; customizable | May warp or expand with moisture |
| Metal | Sleek, modern appearance; durable | Can be expensive; limited color options |
| Glass | Creates an airy, open feel; easy to clean | More fragile; shows fingerprints easily |
| Laminate | Affordable; wide range of colors and finishes | Less durable than other materials |
Incorporate plants for a fresh feel
Adding plants to your open shelving not only brings a fresh, natural element to your kitchen but also improves air quality and creates a more inviting atmosphere. Here are some creative ways to incorporate plants into your open shelving design:
Herb garden: Create a mini herb garden on your shelves for easy access while cooking. Popular kitchen herbs include basil, thyme, rosemary, and mint.
Trailing plants: Use hanging or trailing plants like pothos or string of pearls to add a cascading effect to your shelves.
Succulents: Low-maintenance succulents are perfect for adding a touch of green without requiring much care.
Air plants: These unique plants don’t need soil and can be displayed in creative ways, such as in glass terrariums or on small stands.
Vertical garden: Install a vertical garden system on one of your open shelves to maximize plant space.
When incorporating plants into your kitchen open shelving, keep these tips in mind:
- Choose plants that thrive in kitchen conditions (consider humidity and light levels)
- Use decorative pots or planters that complement your kitchen’s style
- Vary plant sizes and heights for visual interest
- Group plants with similar care requirements together
- Rotate plants regularly to ensure even growth and light exposure
To help you choose the right plants for your kitchen open shelving, here’s a list of low-maintenance options that thrive in kitchen environments:
- Snake Plant (Sansevieria)
- ZZ Plant (Zamioculcas zamiifolia)
- Spider Plant (Chlorophytum comosum)
- Pothos (Epipremnum aureum)
- Aloe Vera
- English Ivy (Hedera helix)
- Chinese Evergreen (Aglaonema)
- Peace Lily (Spathiphyllum)
By incorporating these open shelving ideas into your kitchen design, you can create a functional and visually appealing space that showcases your personal style. The combination of decorative dishes and glassware, modern floating shelves, and fresh plants will transform your kitchen into a welcoming and inspiring environment. As you implement these ideas, remember to maintain a balance between aesthetics and functionality to ensure your kitchen remains both beautiful and practical.
Now that we’ve explored open shelving ideas, let’s move on to another important aspect of kitchen design: multifunctional furniture. This next section will discuss how to make the most of your kitchen space by incorporating versatile pieces that serve multiple purposes.
Multifunctional Furniture
Choose extendable dining tables
In the realm of multifunctional furniture for kitchens, extendable dining tables are a game-changer. These versatile pieces offer the perfect solution for homeowners who love to entertain but are constrained by space limitations. Here’s why extendable dining tables are a must-have for your kitchen:
- Space-saving design: When not extended, these tables take up minimal space, allowing for easy movement in your kitchen or dining area.
- Flexibility for various occasions: Extend the table for large gatherings or holidays, and collapse it for everyday use.
- Cost-effective: Instead of buying separate tables for different purposes, one extendable table serves multiple needs.
Let’s explore some popular types of extendable dining tables:
| Table Type | Description | Best For |
|---|---|---|
| Drop-leaf | Sides fold down when not in use | Very small spaces |
| Butterfly leaf | Center leaf folds and stores within the table | Medium-sized kitchens |
| Draw-leaf | Extensions slide out from under the main tabletop | Larger kitchens with storage space |
| Flip-top | Table doubles in size by flipping over the top | Versatile spaces |
When choosing an extendable dining table for your kitchen, consider the following factors:
- Available space when extended and collapsed
- Ease of operation
- Material durability
- Style compatibility with your kitchen design
By selecting the right extendable dining table, you’ll create a flexible dining space that adapts to your needs without compromising on style or functionality.
Use bar stools with hidden storage
Bar stools are a staple in many kitchens, especially those with islands or breakfast bars. However, why settle for ordinary stools when you can have ones that double as storage units? Bar stools with hidden storage are an excellent example of multifunctional furniture that can significantly enhance your kitchen’s efficiency.
Benefits of bar stools with hidden storage:
- Extra storage space without taking up additional floor area
- Convenient spot to store items you frequently use while seated at the counter
- Helps maintain a clutter-free appearance in your kitchen
- Ideal for small kitchens where every inch of storage counts
Here are some creative ways to utilize the hidden storage in your bar stools:
- Store rarely used kitchen gadgets or small appliances
- Keep table linens, placemats, or napkins within easy reach
- Hide away cookbooks or recipe cards
- Store kids’ art supplies for quick access during homework time
- Keep extra hand towels or cleaning supplies handy
When shopping for bar stools with hidden storage, consider these features:
- Seat design: Look for stools with lift-up seats or swivel tops for easy access to storage.
- Storage capacity: Ensure the storage space is adequate for your needs.
- Material: Choose durable materials that can withstand frequent use and cleaning.
- Height: Select the appropriate height for your counter or bar.
- Style: Pick a design that complements your kitchen’s aesthetic.
To maximize the functionality of your bar stools with hidden storage, organize the contents using small containers or dividers. This will help you make the most of the available space and keep items easily accessible.
Install a fold-down wall table
For kitchens where space is at a premium, a fold-down wall table is an ingenious solution that epitomizes multifunctional furniture. This clever design allows you to have a dining or work surface when needed, and then neatly tuck it away against the wall when not in use. Here’s why a fold-down wall table is a brilliant addition to your kitchen:
- Space-saving: When folded, it takes up minimal wall space, freeing up valuable floor area.
- Versatility: Use it as a dining table, work desk, or extra prep surface as needed.
- Customizable: Available in various sizes and styles to suit your kitchen’s design and space constraints.
- Cost-effective: Eliminates the need for a permanent table in small kitchens.
Installing a fold-down wall table:
- Choose the right location: Select a wall that’s easily accessible and doesn’t interfere with traffic flow when the table is extended.
- Determine the ideal height: Standard table height is about 30 inches, but adjust as needed for your specific requirements.
- Ensure proper support: Use sturdy brackets or a locking mechanism to support the table when extended.
- Consider additional features: Some models come with built-in storage or can double as a chalkboard or bulletin board when folded up.
To make the most of your fold-down wall table, consider these creative uses:
- Breakfast nook for quick morning meals
- Home office space for remote work
- Kids’ homework station
- Extra food prep area during busy cooking sessions
- Crafting or hobby surface
- Bar area for entertaining guests
When selecting a fold-down wall table, keep these factors in mind:
| Factor | Consideration |
|---|---|
| Size | Measure available wall space and desired table dimensions |
| Material | Choose durable, easy-to-clean surfaces like laminate or wood |
| Mechanism | Opt for smooth, easy-to-operate folding systems |
| Weight capacity | Ensure the table can support your intended use |
| Style | Select a design that complements your kitchen’s aesthetic |
By incorporating these multifunctional furniture pieces into your kitchen design, you’ll maximize your space’s potential and create a more efficient, versatile environment. Extendable dining tables offer flexibility for various occasions, bar stools with hidden storage provide convenient organization solutions, and fold-down wall tables make the most of limited space. These clever furniture choices not only enhance functionality but also contribute to a sleek, modern kitchen aesthetic.
Now that we’ve explored multifunctional furniture options, let’s move on to another important aspect of kitchen design: updating hardware and fixtures. These small changes can have a big impact on your kitchen’s overall look and feel.
Update Hardware and Fixtures
Replace outdated cabinet handles
One of the quickest and most impactful ways to update your kitchen’s look is by replacing outdated cabinet handles. This simple change can breathe new life into your kitchen without the need for a complete overhaul. Here are some trendy options to consider:
- Sleek bar pulls: These long, straight handles offer a modern and minimalist look.
- Vintage-inspired knobs: Perfect for adding character to traditional or farmhouse-style kitchens.
- Leather pulls: A unique and stylish option that adds warmth and texture.
- Matte black hardware: Creates a striking contrast against light-colored cabinets.
- Mixed metals: Combine different finishes for an eclectic and personalized touch.
When selecting new cabinet handles, consider the following factors:
- Size and proportion: Ensure the handles are appropriately sized for your cabinets.
- Finish: Choose a finish that complements your kitchen’s overall color scheme.
- Comfort: Test the handles to ensure they’re comfortable to grip and use daily.
- Durability: Opt for high-quality materials that can withstand frequent use.
Here’s a comparison of popular cabinet handle materials:
| Material | Pros | Cons |
|---|---|---|
| Stainless Steel | Durable, easy to clean, modern look | Can show fingerprints |
| Brass | Warm appearance, antimicrobial properties | Requires regular polishing |
| Bronze | Rich patina, timeless appeal | Can be expensive |
| Glass | Unique, adds sparkle | More fragile than metal options |
| Wood | Natural warmth, customizable | May require more maintenance |
By carefully selecting new cabinet handles, you can dramatically change the look and feel of your kitchen without breaking the bank.
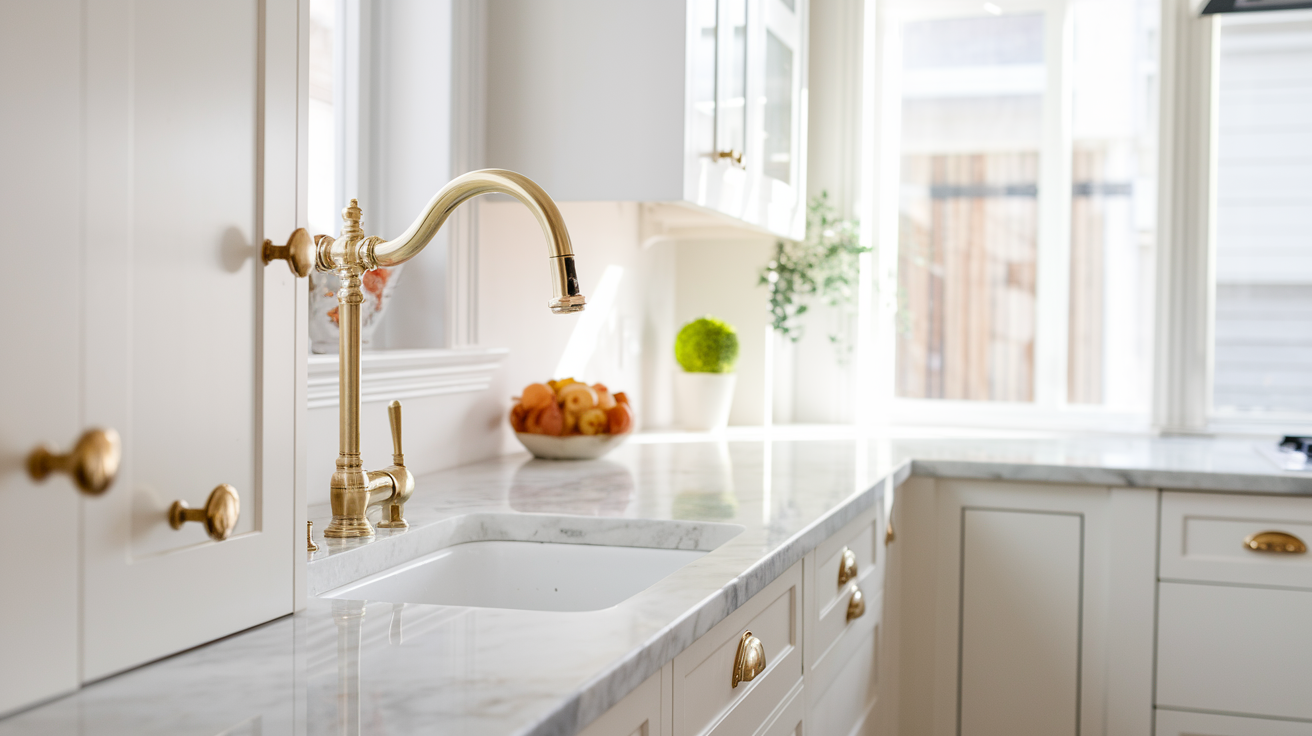
Install a statement faucet
A statement faucet can serve as both a functional necessity and a stunning focal point in your kitchen. When choosing a new faucet, consider these popular styles:
- Pull-down faucets: Offer flexibility and ease of use for cleaning and filling large pots.
- Touchless faucets: Provide convenience and improved hygiene with motion-activated sensors.
- Commercial-style faucets: Add a professional touch with their high-arc design and powerful spray.
- Wall-mounted faucets: Save counter space and create a unique, streamlined look.
- Pot filler faucets: Installed near the stove for easy filling of large pots and kettles.
When selecting a statement faucet, keep these factors in mind:
- Functionality: Ensure the faucet meets your daily needs and cooking habits.
- Finish: Choose a finish that complements your other kitchen fixtures and overall design.
- Water efficiency: Look for WaterSense-labeled faucets to conserve water and reduce bills.
- Installation requirements: Consider whether your existing sink configuration can accommodate the new faucet.
Here’s a comparison of popular faucet finishes:
| Finish | Appearance | Durability | Maintenance |
|---|---|---|---|
| Chrome | Bright, reflective | Highly durable | Easy to clean |
| Brushed Nickel | Warm, matte | Resistant to scratches | Hides water spots |
| Oil-Rubbed Bronze | Rich, dark | Develops patina over time | Low maintenance |
| Matte Black | Modern, bold | Durable | Shows water spots |
| Copper | Warm, unique | Develops patina | Requires special care |
Installing a statement faucet not only enhances your kitchen’s functionality but also adds a touch of luxury and personality to the space.
Add decorative drawer pulls
Decorative drawer pulls are an excellent way to add character and style to your kitchen. These small details can make a big impact on the overall aesthetic of your space. Consider these creative ideas for drawer pulls:
- Geometric shapes: Add a modern touch with triangular, hexagonal, or circular pulls.
- Natural materials: Incorporate wood, stone, or shell pulls for an organic feel.
- Novelty designs: Express your personality with themed pulls (e.g., food, animals, or hobbies).
- Textured finishes: Opt for hammered metal or embossed patterns for added visual interest.
- Oversized pulls: Make a bold statement with large, eye-catching drawer handles.
When selecting decorative drawer pulls, keep these tips in mind:
- Consistency: Choose pulls that complement your cabinet handles for a cohesive look.
- Scale: Ensure the size of the pulls is proportionate to your drawers.
- Practicality: Consider how easy the pulls are to grasp and use daily.
- Theme: Select pulls that align with your kitchen’s overall design theme.
Here’s a list of unique drawer pull ideas to inspire your kitchen update:
- Repurposed silverware handles
- Colorful ceramic knobs
- Rope or leather pulls for a nautical touch
- Vintage doorknobs or skeleton keys
- Glass or crystal pulls for a touch of glamour
- Industrial-style pipe fittings
- Carved wooden pulls with intricate designs
- Seashells or beach glass for a coastal vibe
- Antique brass or copper pulls for a vintage look
- Customized pulls with family initials or meaningful symbols
By carefully selecting decorative drawer pulls, you can add personality and charm to your kitchen while maintaining functionality.
Now that we’ve covered how to update hardware and fixtures, let’s explore how to maximize vertical space in your kitchen. This next section will provide valuable tips on utilizing often-overlooked areas to increase storage and improve overall kitchen efficiency.
Maximize Vertical Space
Hang pots and pans from a ceiling rack
When it comes to maximizing vertical space in your kitchen, one of the most effective and visually appealing solutions is hanging pots and pans from a ceiling rack. This clever kitchen design hack not only frees up valuable cabinet space but also adds a touch of professional chef ambiance to your cooking area.
Installing a ceiling rack for your cookware offers several benefits:
- Easy accessibility: Having your pots and pans within arm’s reach makes cooking more efficient and enjoyable.
- Space-saving: By moving cookware out of cabinets, you free up storage for other kitchen essentials.
- Decorative element: A well-organized pot rack can serve as a unique design feature in your kitchen.
- Improved air circulation: Hanging pots and pans allows them to dry more quickly after washing.
To make the most of this vertical space solution, consider the following tips:
- Choose the right rack: Select a ceiling rack that complements your kitchen’s style and can support the weight of your cookware.
- Position strategically: Install the rack over a kitchen island or near the stove for convenient access.
- Organize thoughtfully: Arrange your pots and pans by size or frequency of use for a neat appearance and practical functionality.
- Mix in other items: Hang colanders, strainers, or even dried herbs for added visual interest and utility.
Use tall cabinets for extra storage
Another excellent way to maximize vertical space in your kitchen is by incorporating tall cabinets. These floor-to-ceiling storage solutions can dramatically increase your kitchen’s storage capacity without taking up additional floor space.
Tall cabinets offer numerous advantages:
- Ample storage: Their height allows for storing a wide variety of items, from small appliances to bulk pantry goods.
- Versatility: They can be customized with various shelving options to suit your specific needs.
- Clean look: By extending to the ceiling, tall cabinets create a seamless, clutter-free appearance.
- Increased property value: Well-designed storage solutions can be a selling point for potential buyers.
To maximize the effectiveness of tall cabinets:
- Use adjustable shelving: This allows you to modify the space as your storage needs change over time.
- Implement pull-out drawers: These make it easier to access items stored at the back of deep cabinets.
- Install a lazy Susan: This rotating shelf is perfect for corner cabinets, ensuring no space goes to waste.
- Incorporate built-in organizers: Use dividers, racks, and bins to keep everything neatly arranged.
Here’s a comparison of standard and tall cabinets to illustrate their benefits:
| Feature | Standard Cabinets | Tall Cabinets |
|---|---|---|
| Height | 30-36 inches | 84-96 inches |
| Storage Capacity | Limited | Extensive |
| Accessibility | Easy for lower shelves | May require a step stool for upper shelves |
| Visual Impact | Standard | Creates a grand, spacious look |
| Customization Options | Limited | Numerous |
Install a pegboard for utensils
A pegboard is a versatile and practical solution for maximizing vertical space in your kitchen. This customizable organizational tool can transform an empty wall into a functional storage area for utensils, small pots, pans, and other kitchen tools.
Benefits of installing a kitchen pegboard include:
- Customization: Easily rearrange hooks and accessories to accommodate changing needs.
- Visibility: Keep frequently used items in plain sight for quick access.
- Space-saving: Free up drawer and counter space by hanging utensils vertically.
- Aesthetic appeal: Create an attractive display that doubles as kitchen decor.
To make the most of your pegboard installation:
- Choose the right size: Measure your wall space and select a pegboard that fits comfortably while maximizing storage potential.
- Paint it: Match your pegboard to your kitchen’s color scheme or create a contrasting accent wall.
- Use a variety of hooks: Different hook sizes and styles can accommodate various utensils and tools.
- Group similar items: Organize your pegboard by creating zones for different types of utensils or cooking tasks.
- Add shelves or baskets: Incorporate small shelves or hanging baskets for items that can’t be hung directly on hooks.
Here’s a list of items that work well on a kitchen pegboard:
- Cooking utensils (spatulas, whisks, ladles)
- Measuring cups and spoons
- Small pots and pans
- Cutting boards
- Colanders and strainers
- Kitchen towels and oven mitts
- Spice jars in hanging baskets
- Frequently used gadgets (can opener, peeler, grater)
By implementing these vertical space maximization techniques – hanging pots and pans from a ceiling rack, using tall cabinets for extra storage, and installing a pegboard for utensils – you can significantly increase your kitchen’s storage capacity and efficiency. These solutions not only help declutter your countertops and cabinets but also add visual interest to your kitchen design.
Remember that the key to successful vertical space utilization is to think creatively and assess your specific needs. Consider your cooking habits, the items you use most frequently, and your kitchen’s overall aesthetic when implementing these solutions. With careful planning and execution, you can transform your kitchen into a well-organized, functional space that makes cooking and meal preparation a joy.
As we move forward, we’ll explore how to create a striking focal point in your kitchen, which can tie together all of these clever design hacks and elevate your space to new heights of style and functionality.
Create a Focal Point
Add a stylish backsplash
A stylish backsplash can instantly elevate your kitchen’s aesthetic appeal and serve as a stunning focal point. When choosing a backsplash, consider materials, patterns, and colors that complement your overall kitchen design while making a bold statement.
Popular backsplash options include:
- Ceramic or porcelain tiles
- Glass tiles
- Natural stone (marble, granite, slate)
- Metallic tiles
- Mosaic patterns
- Concrete or cement tiles
To create a truly eye-catching focal point, consider these design ideas:
- Bold patterns: Opt for geometric shapes, Moroccan-inspired designs, or intricate mosaics to add visual interest.
- Contrasting colors: Choose a backsplash color that stands out against your cabinetry and countertops.
- Textured materials: Incorporate three-dimensional tiles or textured surfaces for added depth and character.
- Extended coverage: Extend the backsplash from countertop to ceiling behind the range or sink area for a dramatic effect.
Remember to balance the boldness of your backsplash with the rest of your kitchen design to avoid overwhelming the space. A well-chosen backsplash can tie together various elements of your kitchen while serving as a stunning centerpiece.
Install a statement range hood
A statement range hood can become the focal point of your kitchen, combining functionality with striking design. When selecting a range hood, consider both its aesthetic appeal and its ability to effectively remove cooking odors and smoke.
Types of statement range hoods:
- Wall-mounted chimney hoods
- Island hoods
- Custom-built hoods
- Decorative canopy hoods
- Curved glass hoods
To make your range hood a true focal point, consider these design elements:
- Material selection: Choose from stainless steel, copper, brass, or even custom-painted finishes to complement your kitchen’s style.
- Unique shapes: Opt for unconventional designs like curved, pyramidal, or angular hoods to add visual interest.
- Decorative details: Look for hoods with ornate moldings, rivets, or other decorative elements that match your kitchen’s aesthetic.
- Lighting integration: Select a hood with built-in lighting to enhance both functionality and ambiance.
When installing a statement range hood, ensure that it’s properly sized for your cooktop and kitchen space. A general rule of thumb is to choose a hood that’s at least as wide as your cooktop and has adequate CFM (cubic feet per minute) rating for your cooking needs.
Use a unique light fixture as a centerpiece
Lighting plays a crucial role in kitchen design, and a unique light fixture can serve as both a functional element and a stunning focal point. When selecting a centerpiece light fixture, consider the size of your kitchen, the height of your ceiling, and your overall design aesthetic.
Popular types of statement light fixtures for kitchens include:
- Chandeliers
- Pendant lights
- Linear suspensions
- Globe clusters
- Industrial-style fixtures
- Oversized lanterns
To create a truly impactful focal point with your light fixture, consider these tips:
- Scale and proportion: Choose a fixture that’s appropriately sized for your space. In general, larger fixtures make a bolder statement.
- Unexpected materials: Opt for fixtures made from unique materials like woven rattan, blown glass, or mixed metals to add interest.
- Artistic designs: Look for fixtures with sculptural elements or unconventional shapes to create a conversation piece.
- Color pop: Select a fixture in a bold color that contrasts with your kitchen’s color scheme for added visual impact.
- Layered lighting: Combine your statement fixture with other lighting sources like under-cabinet lights or recessed lighting for a well-balanced illumination scheme.
When installing your centerpiece light fixture, ensure that it’s positioned at the right height for both functionality and visual appeal. Over a kitchen island or dining table, the bottom of the fixture should typically hang 30-36 inches above the surface.
| Focal Point Element | Pros | Cons |
|---|---|---|
| Stylish Backsplash | Easy to clean, Protects walls, Wide variety of options | Can be expensive, May require professional installation |
| Statement Range Hood | Improves air quality, Adds visual interest, Can increase home value | Can be costly, May require special ventilation setup |
| Unique Light Fixture | Enhances ambiance, Provides task lighting, Adds personality | May require professional installation, Can be expensive to replace |
Creating a focal point in your kitchen not only adds visual interest but also helps to define the space and showcase your personal style. Whether you choose a stunning backsplash, a statement range hood, or a unique light fixture, remember to balance your focal point with the rest of your kitchen design for a cohesive look.
When selecting your focal point, consider these factors:
- Your budget
- The overall style of your home
- The size of your kitchen
- Your personal preferences and lifestyle
By carefully choosing and implementing a focal point, you can transform your kitchen from a purely functional space into a visually striking and inviting area that becomes the heart of your home.
Now that we’ve explored how to create a stunning focal point in your kitchen, you have the tools to make a bold design statement that will elevate your entire space. Whether you opt for a eye-catching backsplash, a striking range hood, or a unique light fixture, remember that the key is to balance your focal point with the rest of your kitchen design for a harmonious and impactful result.
Your kitchen is more than just a place to cook; it’s the heart of your home. By implementing these ten design hacks, you can transform your kitchen into a functional, beautiful, and inviting space. From maximizing counter space to creating a stunning focal point, each of these tips offers a unique way to enhance your kitchen’s efficiency and aesthetic appeal.
Remember, the key to a successful kitchen redesign is to balance form and function. Whether you’re working with a small space or a large one, these hacks can be adapted to suit your needs. So, roll up your sleeves and get ready to give your kitchen the makeover it deserves. Your dream kitchen is just a few clever changes away!