
The most common accent lighting mistake has nothing to do with your budget — it’s that most people light the wrong surfaces entirely, which is why a $300 fixture setup can look worse than a $30 one placed correctly. Before you buy a single bulb, there’s a framework that separates accent lighting that looks designed from accent lighting that looks like an accident. Here’s what that framework actually is.
Why Most Budget Accent Lighting Looks Cheap (And How to Avoid It)
Spend ten minutes in any home decor forum and you’ll see the same frustrated post: “I bought all this lighting and my room still looks flat.” The fixture isn’t the problem. Almost never is.
The difference between accent lighting that reads as intentional versus accent lighting that reads as an afterthought is almost entirely about placement angle and the surface being lit. A $15 clip-spot aimed at a rough plaster wall from 30 degrees off the surface will produce more visual drama than a $120 designer fixture pointed straight at smooth painted drywall. The wall has nothing to give you. The fixture has nothing to work with.
Color temperature is where budget lighting fails most quietly. Mixing a 3000K warm source with a 5000K cool source in the same open space creates a visual dissonance that the eye reads as cheap even when neither fixture is. Most people don’t consciously notice it, but they feel it — the room seems unresolved, restless. This single mistake undercuts otherwise solid lighting choices more reliably than anything else.
The other instinct to resist: adding more lights. More sources spread thin rarely create drama. Two or three well-placed lights with clear targets create depth. Six undirected ones create glare and visual noise.
Lighting designer surveys support this pattern. Approximately 70% of homeowners dissatisfied with their lighting results cite placement errors rather than product quality as the root cause. They didn’t buy wrong. They aimed wrong.
- Don’t add a fixture until you’ve identified the specific surface you want it to hit
- Don’t mix color temperatures in the same open room
- Don’t confuse bright with dramatic — contrast between lit and unlit areas is what creates drama
Actionable takeaway: Before shopping, walk your space and ask one question for every surface: does this have texture, depth, or visual interest worth revealing? If the answer is no, move on.
The Surface-First Method: Choose Your Target Before You Buy a Single Bulb
Most people start by browsing fixtures. The smarter approach starts with a flashlight.
Textured surfaces return the highest visual reward from accent lighting because they create shadow play. Brick, shiplap, linen curtains, rough plaster, cane furniture, woven baskets — any surface with depth or relief catches light differently across its surface, creating micro-shadows that make a wall look alive. Smooth painted drywall does the opposite: it flattens light, reflects it uniformly, and returns almost nothing worth looking at.
Interior architects note that grazing light at angles between 15 and 30 degrees from a surface amplifies texture perception by up to 5x compared to direct frontal illumination. That’s a dramatic multiplier, and it costs nothing to apply — it’s purely about angle.
Here’s the quickest way to preview that effect before spending anything. The reveal test: hold a flashlight close to a wall surface and angle it at roughly 15–30 degrees — nearly parallel to the wall rather than perpendicular to it. What you see is almost exactly what a wall washer or picture light will produce. If the wall texture catches and throws shadows, that surface will reward lighting investment. If it stays flat, redirect your attention.
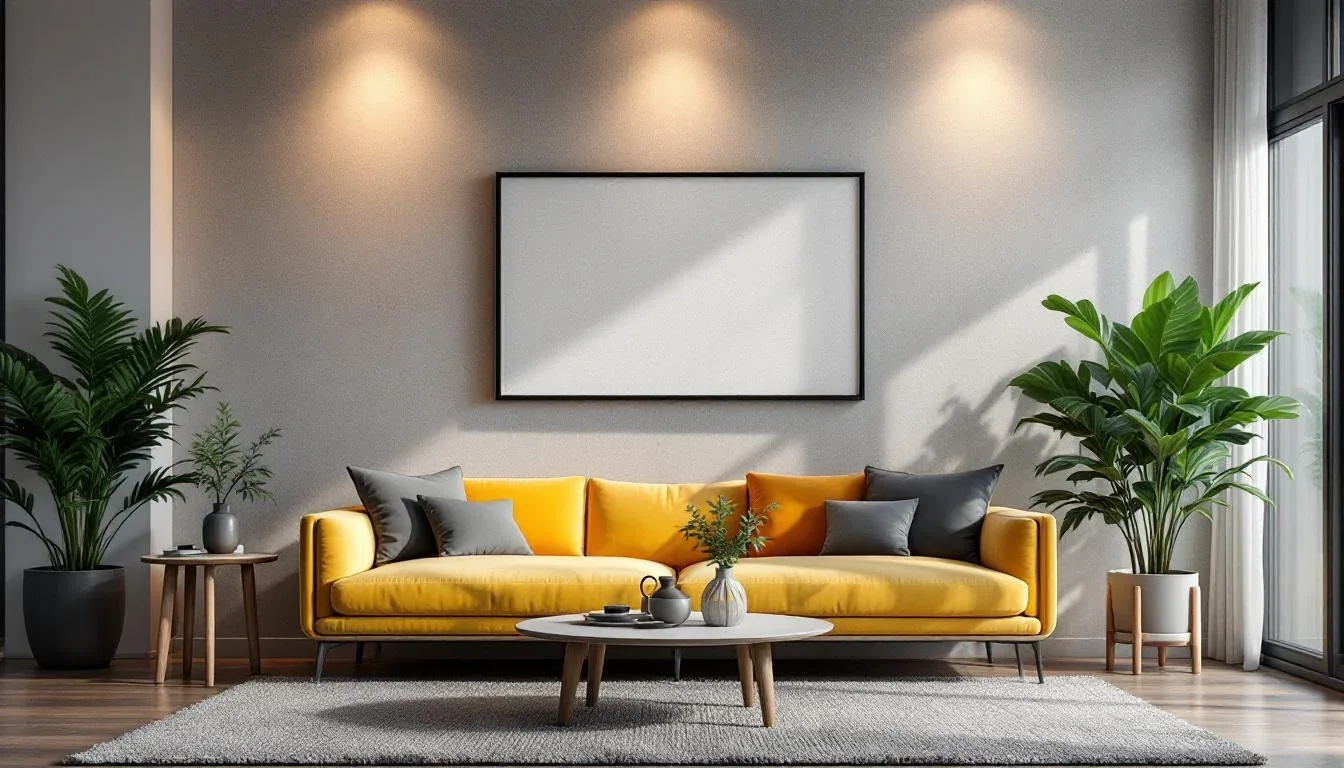
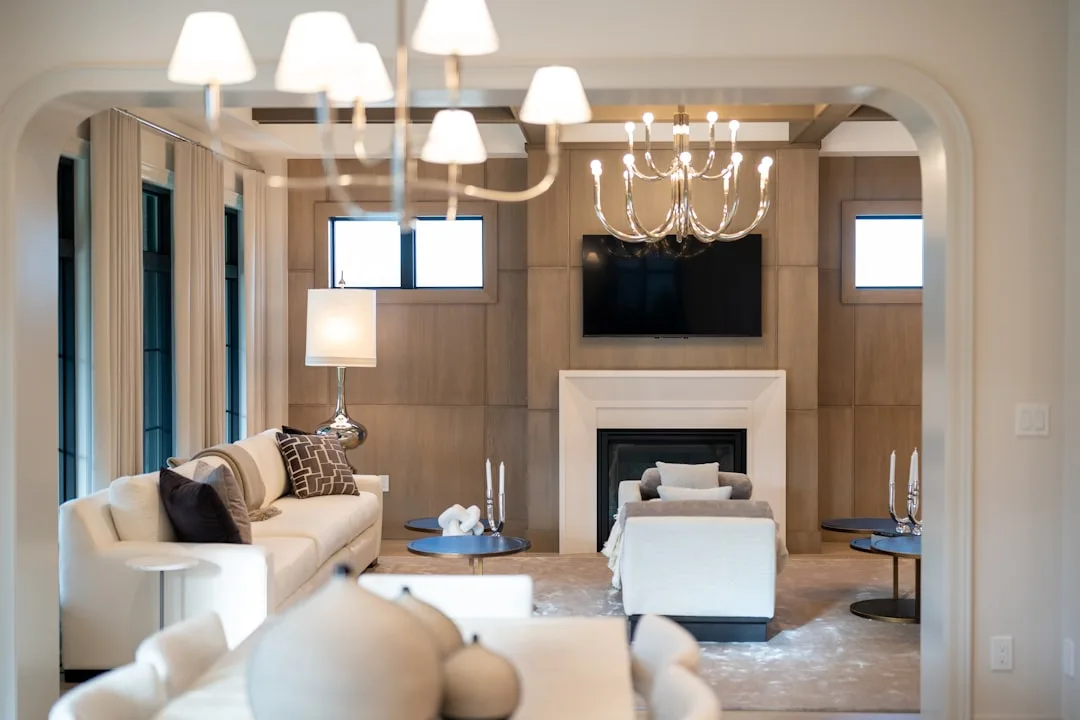
Vertical surfaces consistently outperform horizontal ones for perceived drama. Uplighting a floor-to-ceiling bookcase or a pair of curtain panels creates height and makes a room feel larger — a result that carries genuine value from a $15–$30 investment. The eye follows vertical light upward, and the ceiling appears higher as a result.
The surface hierarchy to work through:
- Rough or textured walls (brick, plaster, board and batten, grasscloth wallpaper)
- Large curtain panels or drapery in linen or velvet
- Bookshelves with layered objects
- Mirrors (especially oversized or vintage-framed ones)
- Significant artwork or gallery wall arrangements
- Architectural details: archways, niches, exposed beams
Smooth painted drywall, glass surfaces, and glossy tiles generally return little from accent lighting unless you’re using them for a deliberate reflection effect.
Actionable takeaway: Do the reveal test on every major wall surface in your primary living space tonight — it takes five minutes and will save you from buying fixtures for surfaces that won’t reward them.
Budget Accent Lighting by Mechanism: What Each Type Actually Does Well
Every budget lighting guide lists the same products. Almost none of them explain what each product is actually built to do — and more importantly, what it isn’t built to do.
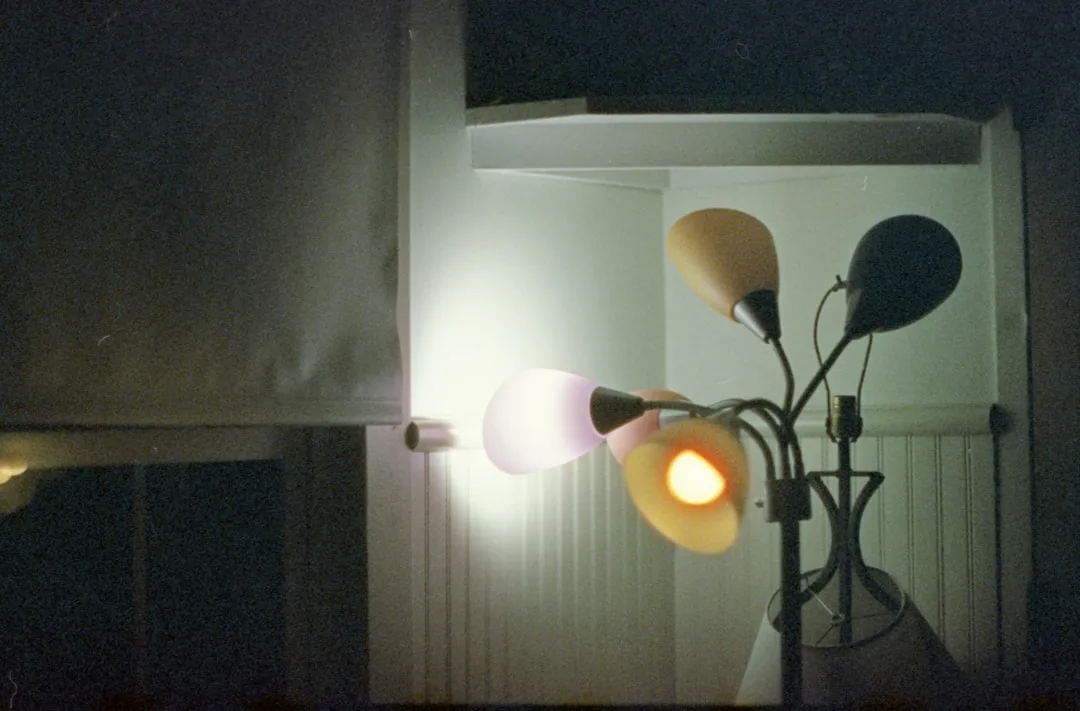
LED strip lights excel at wash and glow effects, not at surface illumination. Their strength is creating a luminous halo effect behind or beneath an object — behind a TV, under a floating shelf, along the back of a headboard. Used that way, they’re effective and inexpensive. Used to light a wall or artwork directly, they create uneven hot spots that immediately read as budget. LED strip lights account for over 60% of budget accent lighting purchases but are consistently cited in design forums as the most frequently misused product due to visible banding and improper diffusion — particularly strips with fewer than 60 LEDs per meter.
Clip-on and plug-in picture lights are dramatically underused. A $20–$35 plug-in picture light mounted above a large canvas, print, or mirror creates a gallery effect that reads as intentional and expensive regardless of what it cost. No wiring. No electrician. You plug it in, aim it, and the transformation is immediate. This is probably the most underrated purchase in the entire budget accent lighting category.
Battery-operated puck lights have one genuinely good use case: inside glass-front cabinets and bookshelves. Every limitation that makes them weak in other contexts — no cord, diffused soft output, modest brightness — becomes an actual advantage inside an enclosed cabinet. The diffusion looks deliberate. The cordless installation is genuinely clean. They make a display cabinet look curated.
Plug-in sconces with a swivel or adjustable head offer the highest return of any single budget purchase. In the $25–$60 range from brands like Globe Electric or Simple Designs, a plug-in sconce handles ambient, accent, and reading functions in one fixture with no electrical work required. A cord cover strip from Amazon for $8 makes the cord disappear against the wall. The result looks like a hardwired installation.
- LED strips: behind/beneath objects, not aimed at surfaces
- Clip-on picture lights: above artwork, mirrors, and gallery walls
- Puck lights: inside glass-front cabinets only
- Plug-in sconces: walls, beside furniture, anywhere you’d hang art
Actionable takeaway: Match the mechanism to the visual job before you search. If you want focal drama on a surface, that’s a directional spot or picture light — not a strip.
Room-Specific Accent Lighting Ideas That Go Beyond the Obvious
The ideas every competitor covers: LED strips under the bed, under-cabinet kitchen lights, TV backlighting. Those are fine. Here’s what they’re not telling you.
Living room: Instead of floor lamps aimed into the room, try uplighting the corners behind tall floor plants using a $12–$18 can spotlight aimed toward the ceiling. The light bounces off the ceiling in a warm wash and catches the plant foliage from underneath, creating an ambiance that overhead fixtures physically cannot replicate. It’s the light quality you associate with expensive restaurants, and it comes from a fixture that costs less than a cocktail.
Bedroom: The under-bed LED strip is overdone and often looks clinical. Instead, run a single warm LED strip inside the top channel of a canopy rod, curtain track, or ceiling-mounted drapery rod above the bed. The light falls downward across the headboard wall in a soft wash that reads as architectural — like cove lighting you’d find in a boutique hotel, achieved for under $25 in strip lights.
Kitchen: Skip the under-cabinet strips for now and try toe-kick lighting first — a strip light installed at floor level under your base cabinets. At night, it makes the island or cabinetry appear to float above the floor. This detail appears in $100,000+ kitchen renovations and is achievable for under $40. It’s genuinely distinctive because almost no one at the budget level does it.
Home office: Monitor backlighting is well-documented. What isn’t: placing a small uplight behind a bookcase or credenza behind your desk. It adds depth to the background of every video call and reduces the eye strain that comes from a bright monitor against a dark wall. Two benefits, one $15 placement.
Entryway: Entryway and foyer lighting ranks consistently in the top three details real estate stagers say influences a buyer’s first emotional impression of a home’s interior. A single plug-in picture light or adjustable clip-spot aimed at a mirror or piece of art in an entry hall creates a gallery arrival moment. It’s the highest-impact-per-dollar placement in the home, and it works in a 4-foot-wide entry hall just as well as a grand foyer.
Actionable takeaway: Pick one non-obvious placement from this list and test it with your phone flashlight before buying anything — the preview will tell you immediately whether the placement has potential.
The Color Temperature Rule That Budget Guides Always Skip
This is the technical detail that separates lighting that feels professional from lighting that feels slightly off without anyone being able to explain why.
Color temperature, measured in Kelvin, determines whether light reads warm, neutral, or cool — and mixing temperatures across accent sources in the same visual field is the fastest way to make a room feel unresolved. It doesn’t matter if you’ve placed everything correctly and bought quality fixtures. Two light sources with different color temperatures fighting each other in the same room will always look wrong.
Studies on retail and hospitality lighting show that environments lit at 2700K–3000K are perceived as significantly more comfortable and higher quality than those lit above 4000K — even when the fixtures are identical. The difference isn’t the hardware. It’s the warmth.
The practical rule for residential accent lighting:
- 2700K: Soft, amber-warm. Best for living rooms, bedrooms, dining areas, entryways. This is candlelight territory.
- 3000K: Warm but slightly crisper. Works for kitchens and bathrooms where you need warmth without the amber depth.
- 3500K–4100K: Neutral to cool-white. Best for task areas, studios, laundry rooms — not accent lighting in comfort-oriented spaces.
- 5000K–6500K (Daylight): Crisp and blue-white. Appropriate for garages, workshop lighting, some home offices. Never mix with 2700K accent sources in the same open room.
Reading product labels accurately:
- “Soft White” = 2700K
- “Warm White” = 3000K
- “Bright White” = 3500K–4100K
- “Daylight” = 5000K–6500K
The second number that matters: CRI, or Color Rendering Index. A 90+ CRI bulb at $4 will make colors, textures, fabrics, and artwork look dramatically more vivid and true than an 80 CRI bulb at $2. That $2 difference per bulb is the most cost-effective upgrade in accent lighting. An 80 CRI source makes everything look slightly muted and artificial. A 90+ CRI source makes a $30 thrift store print look like gallery art.
Actionable takeaway: Before your next lighting purchase, check every existing accent source in your room for its Kelvin rating. If anything is above 3000K in a comfort-oriented space, replace it with a 2700K equivalent. This single change costs under $10 and produces an immediate, room-wide improvement.
How to Layer Accent Lighting Without Buying More Fixtures
Layered lighting is one of those design concepts that gets described everywhere and explained almost nowhere. Here’s what it actually means in practical terms: different light sources operating at different intensities, aimed at different heights, creating contrast between lit and unlit zones.
You don’t need to buy your way to layered lighting. You need to reposition and control what you have.
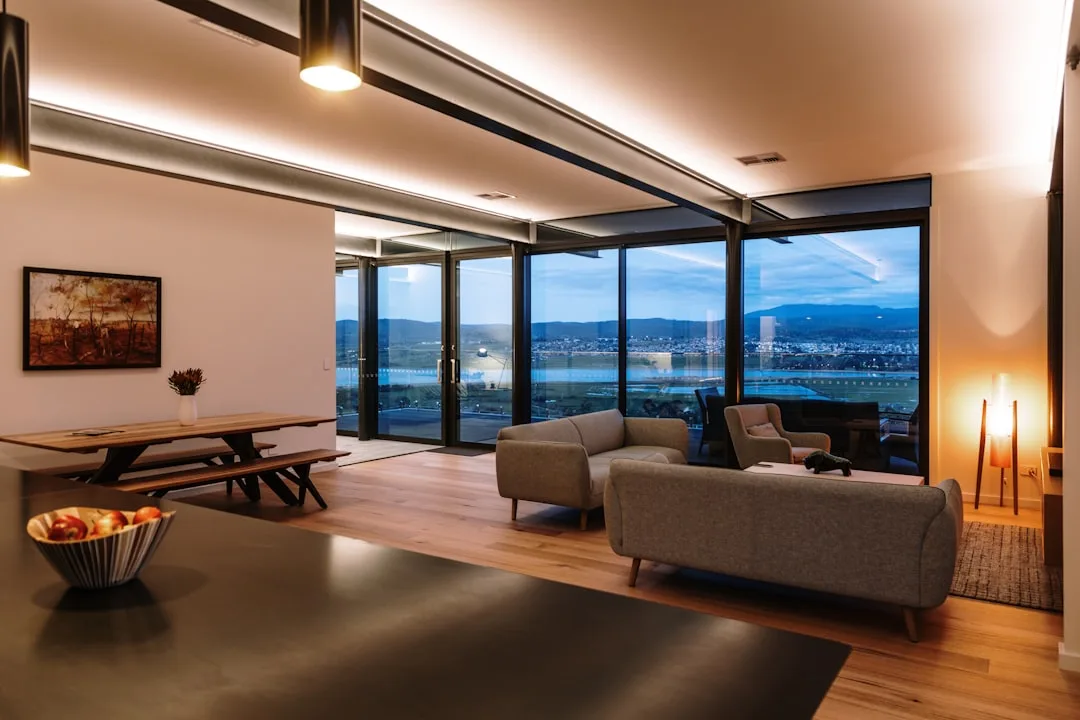
Dimmer switches are the highest-leverage $10–$15 purchase in lighting. A plug-in dimmer cord adapter — Lutron makes one for around $14 — on any existing floor lamp or table lamp instantly creates the ability to dial accent intensity and separate it from your overhead ambient light. Without this, you’re stuck in binary mode: everything on or everything off. With it, you can set accent lights to 40% brightness while overhead ambient runs separately, and the room suddenly has depth.
Repositioning costs nothing. Most accent lighting failures come from fixtures placed too close to their target surface — the light hits too harshly, washes out the texture, and creates a bright spot instead of a wash. Moving a clip-spot or floor lamp 18–24 inches further from the wall and angling it toward the surface from a lower position transforms it from a bright patch into a gradual wash. This is free. Do it before buying anything new.
The dark zone principle is what most people resist and what most designed rooms rely on. Intentional unlit areas between accent sources create visual rhythm. The lit areas register as significant precisely because they emerge from darkness. When every corner and surface is equally illuminated, nothing stands out. When there’s contrast — a lit bookcase beside an unlit wall, a glowing lamp beside a dark corner — the eye has somewhere interesting to rest.
For existing overhead recessed lights: swap the standard flood bulbs for PAR20 or PAR38 bulbs with a narrow 25–40 degree beam angle. A $6–$10 bulb swap turns a generic overhead downlight into a focused accent spotlight. Lighting designers recommend a minimum 3:1 ratio of accent to ambient light intensity for accent sources to register as intentional focal points — they need to be noticeably brighter than the ambient level to read as designed rather than as more of the same.
Actionable takeaway: Try dimming your existing lamps to 30–50% and turning off the overhead light for ten minutes. What you see in that moment — where the natural focal points are, where the interesting shadows fall — is your room telling you where accent light wants to live.
Where to Buy Budget Accent Lighting Without Getting Burned by Quality Issues
Not all budget lighting is the same quality of cheap. Some of it is genuinely good. Some of it is a waste of money that will look bad in two weeks. Here’s how to tell the difference before you buy.
LED strip light quality comes down to one number: LED density. Look for at least 60 LEDs per meter. Consumer product testing shows that strips with fewer than 60 LEDs per meter produce visible banding on walls from distances greater than 5 feet — meaning the individual points of light become distinguishable rather than blending into a smooth wash. Most sub-$10 strips on marketplace platforms fall below this threshold. Brands like Govee, Philips Hue Gradient, and Kasa have reliable density at their respective price points. If you’re buying off a no-name marketplace listing, check the spec sheet before purchasing.
For plug-in picture lights and sconces: metal construction is your quality signal. Brass or matte black metal reads well in person and in photos. Plastic construction telegraphs quality regardless of how well the finish is painted — it just looks different, and not in a good way. In the $25–$60 range on Amazon and Wayfair, you can consistently find metal-bodied plug-in sconces and picture lights that perform well above their price point. Globe Electric, Kira Home, and Brightech are reliable names in this range.
The highest-ROI sourcing channel that almost no lighting guide mentions: thrift stores, Facebook Marketplace, and estate sales. A ceramic table lamp for $5–$15 with a new $4 candelabra LED bulb at 2700K, 90+ CRI produces a result that a $60 new fixture rarely matches. Vintage ceramic and brass lamps have material quality and character that mass-market new production doesn’t replicate at the same price. The bulb is new. The warmth and weight of the base is already there.
The one category where budget genuinely doesn’t work: dimmer switches and smart home circuitry. Cheap dimmers cause flicker, audible buzz, and accelerate LED failure. For anything involving dimming, invest in Lutron (the Caseta line) or Leviton. For plug-in dimmer adapters, the Lutron $14 cord dimmer is worth every cent over a $4 off-brand version. Philips Hue bulbs are expensive but earn their price in a smart home context. Everywhere else, budget smartly — here, spend the extra $8.
Actionable takeaway: Check your existing LED strip lights’ spec sheets right now. If they’re below 60 LEDs per meter and you’ve been wondering why they look banded or uneven, you’ve found your answer.
A Simple Accent Lighting Starter Plan for Under $75
This plan is sequenced deliberately. Each step builds on the one before it, and each produces a visible result on its own — so you can stop at any point and still have something that works.
Step 1 — $0: The reveal test
Take a flashlight through your primary living space and test every major wall surface, bookcase, and vertical plane at a 15–30 degree grazing angle. Identify the two highest-texture or highest-visual-interest targets in the room. Write them down. These are your lighting targets. Every dollar you spend will be aimed at one of these surfaces.
Step 2 — $10–$15: Control before you buy
Purchase a Lutron plug-in dimmer cord adapter and a single 2700K, 90+ CRI PAR20 or PAR38 narrow-beam bulb (25–40 degree beam angle). Use these with an existing lamp to test your identified surface before committing to any new fixture. Move the lamp further from the wall than feels natural — 18–24 inches — and angle it toward the surface. This step confirms the placement and shows you the actual before-and-after shift.
Step 3 — $20–$35: The single highest-impact purchase
Add one plug-in picture light or adjustable clip-spot aimed at your highest-priority surface. A plug-in picture light above a large mirror or canvas, or an adjustable clip-spot on a bookcase, produces the most dramatic single before-and-after shift of any budget accent purchase. This one addition changes how the room reads more than any other step.
Step 4 — $15–$25: Add glow only after direction is established
If you want ambient glow or fill behind an object — TV, headboard, bookcase back panel — add one quality LED strip with at least 60 LEDs per meter, in 2700K–3000K, here and not earlier. Glow without directional accent first tends to make a room feel undefined. Once you have a focal point from Step 3, the glow from Step 4 supports it rather than competing with it.
Total: $45–$75 for a layered, intentional accent lighting result.
Interior design cost-per-impact analyses consistently rank lighting changes as the highest ROI home improvement category. Accent lighting upgrades under $100 produce perceived value increases that are genuinely disproportionate to their cost — because light is what the eye actually reads when it processes a room, before furniture or finishes register at all.
Start with Step 1 tonight. The flashlight test takes five minutes, costs nothing, and tells you more about your room’s lighting potential than any amount of browsing fixture catalogs.
Frequently Asked Questions
What is the cheapest way to add accent lighting to a room?
The cheapest effective method is repositioning a lamp you already own and swapping in a $4–$6 PAR bulb with a narrow beam angle (25–40 degrees) at 2700K, 90+ CRI. Angle it toward a textured wall or bookcase from 18–24 inches away rather than pointing it straight down. That bulb swap and repositioning, combined with a $14 plug-in dimmer adapter, produces a genuine accent lighting effect at under $20 total. The second cheapest method is a plug-in picture light ($20–$35) above a mirror or artwork — no installation, just plug in and aim.
What color temperature is best for accent lighting in a living room or bedroom?
2700K is the standard for living rooms, bedrooms, and dining areas — anywhere you want warmth, comfort, and intimacy. It’s the temperature closest to incandescent light and candlelight, and it makes skin tones, wood, textiles, and artwork look their best. If you prefer something slightly crisper without going cool, 3000K is acceptable. Never use anything above 3500K as accent lighting in these spaces — it will make the room feel clinical rather than comfortable, regardless of how well the fixtures are placed.
Can I add accent lighting without hiring an electrician or doing any wiring?
Yes, completely. Plug-in sconces, clip-on picture lights, plug-in dimmer adapters, battery-operated puck lights, and LED strip lights with adhesive backing all require zero electrical work. A plug-in sconce with a cord cover strip ($8 on Amazon) looks essentially identical to a hardwired wall sconce from across the room. The only scenario where you’d genuinely need an electrician is installing recessed lighting or hardwired in-wall dimmers — neither of which is necessary for effective accent lighting on a budget.
How do I make budget LED strip lights look more expensive and professional?
Four things, in order of impact. First, use a diffuser channel — an aluminum extrusion with a frosted plastic cover, available for $1–$2 per foot — which blends individual LED points into a smooth, continuous line of light. Second, use only strips with 60+ LEDs per meter; below that threshold, you’ll see banding. Third, set the color temperature to 2700K–3000K and never use RGB mode on a white setting, which almost always looks off-white and slightly green. Fourth, hide the strip itself entirely — mount it so the light is visible but the source isn’t, inside a channel at the back of a shelf, behind a valance, or inside a cove. The strip should never be directly visible. When the source is hidden and the output is smooth, budget strips are genuinely difficult to distinguish from architectural cove lighting.