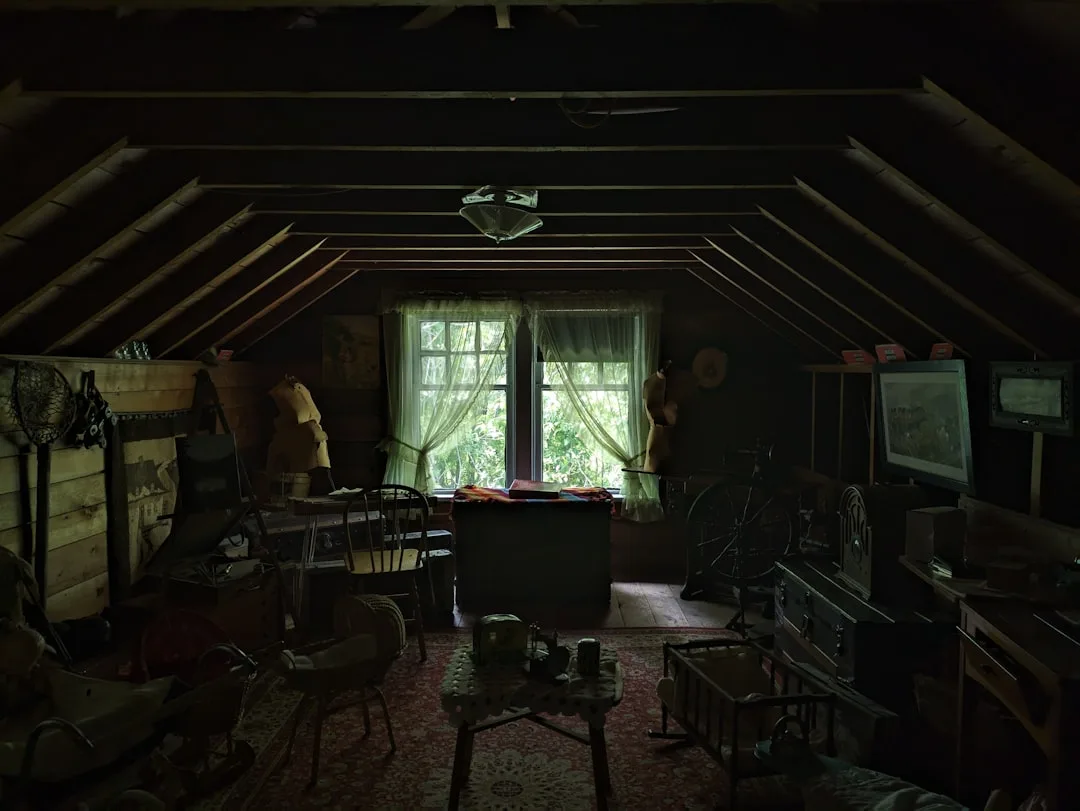
The average American home has 300–500 square feet of unclaimed floor space sitting directly above the living room ceiling — and most homeowners walk past the attic door every single day without realizing it already meets the basic structural requirements for an attic to room conversion. Not every attic does. But more qualify than people assume, and the ones that don’t qualify outright are often one dormer or one structural assessment away from becoming the most useful room in the house.
Quick Answer
The average American home has 300–500 square feet of unclaimed floor space sitting directly above the living room ceiling — and most homeowners walk past the attic door every single day without realizing it already meets the basic structural requirements for a conversion.
What nobody tells you before you start researching this is that most of the content out there treats attic conversion like a shopping decision. Pick your finish level, multiply by square footage, write a check. I spent eleven years doing residential design in Chicago and New York, and I watched that approach fail homeowners repeatedly — not because the numbers were wrong, but because the sequence was backwards. The structural reality of your specific attic determines everything else. Budget, design, timeline, legal standing. Until you know what you’re actually working with up there, every dollar figure you read online is decoration.
This article moves through the real sequence — from structural feasibility to design decisions — because that’s the only order that actually protects you.
Can You Actually Convert an Attic Into a Room?
In This Article
- Can You Actually Convert an Attic Into a Room?
- The 7 and 7 Rule: What It Means and Why It Controls Everything
- What an Attic Conversion Actually Costs (Beyond the $20,000 Average)
- Insulation, Ventilation, and the Hidden Comfort Problems
- Designing Around What You Can’t Change
- Permits, Inspections, and What Happens If You Skip Them

Before the mood boards and the contractor quotes, your attic has to pass a structural test that most people skip entirely because it’s not exciting. It is, however, the difference between a project that goes smoothly and one that stops dead when a structural engineer walks through the space and tells you the floor joists can’t hold furniture.
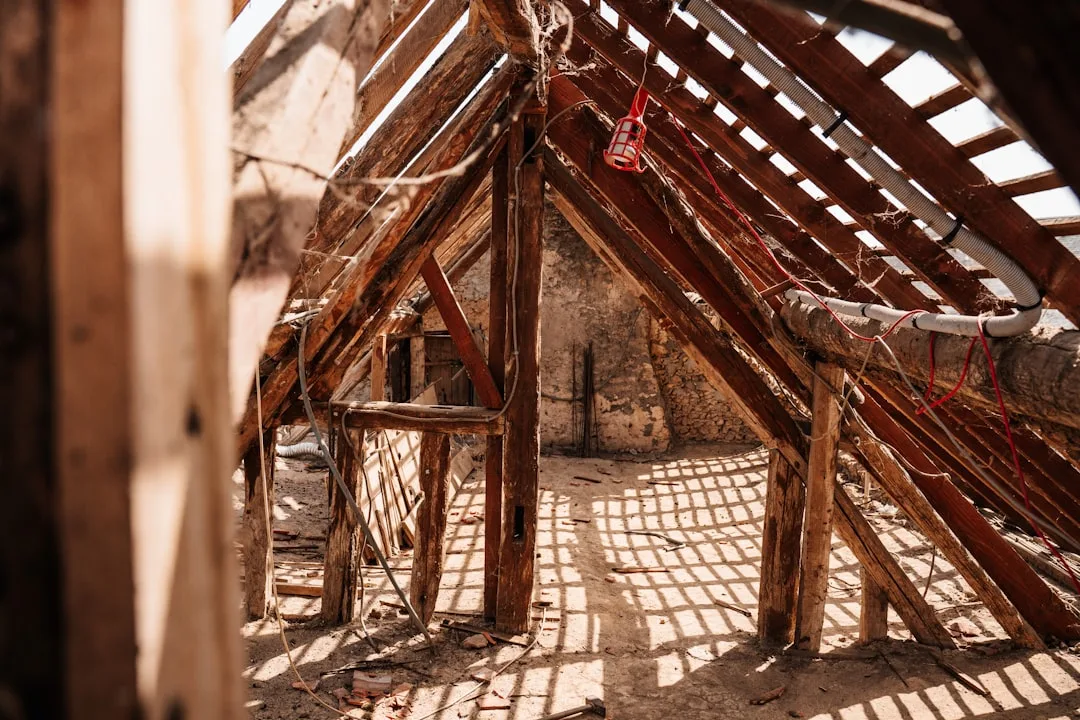
The single most important variable in attic to room conversion feasibility is how your roof was framed. Rafter-framed attics — common in homes built before the early 1970s — have open triangular structure inside, with clear floor space and room to move. Truss-framed attics, which dominate construction after 1975, are a web of diagonal and horizontal members engineered to carry roof load without an interior bearing wall. That web is load-bearing geometry. You cannot cut through it without engineering replacement structure, and that work is expensive.
So the first thing you do — before anything else — is go up there with a flashlight and look at the framing. If you see a clean triangle with a single ridge beam and sloped rafters on either side, you likely have rafter framing. If you see a lattice of interconnected wood members running diagonally through the center of the space, you have trusses, and you need a structural engineer before you have any other conversation.
The floor is the second issue most people discover too late. Attic joists in unconverted spaces are typically designed for 10–20 lbs per square foot — adequate for boxes and old furniture, not for people living in the space. A habitable room legally requires floor joists rated for at least 40 lbs per square foot live load. Sistering new joists alongside the existing ones is a common fix, but it adds cost and ceiling height complications for the room below.
A quick visual checklist for a first-pass assessment:
- Roof pitch: Anything below a 7:12 pitch — meaning 7 inches of vertical rise for every 12 inches of horizontal run — will likely fail headroom requirements without significant modification
- Collar ties: If the horizontal ties connecting opposing rafters sit lower than 7 feet from the floor, they’ll constrain your usable ceiling height
- Joist depth: 2×6 floor joists are almost certainly inadequate for live load; 2×8 or 2×10 gives you more to work with
- Obstructions: HVAC equipment, water tanks, and chimney chases sitting in the attic space all affect how the conversion gets configured
- Access point: A pull-down stair ladder does not meet code for a habitable room; a proper staircase requires roughly 35–40 square feet of floor space on the level below
- Insulation type: Blown-in insulation sitting between joists will need to be removed and replaced with spray foam or rigid board insulation against the roof deck — a meaningful cost difference depending on how much is up there
Actionable takeaway: Before any contractor conversation, spend twenty minutes in the attic with a tape measure and a flashlight. Measure joist depth, estimate headroom at the peak, and photograph the framing. That documentation will make every conversation you have after it faster and more productive.
The 7 and 7 Rule: What It Means and Why It Controls Everything
Most people encounter the 7 and 7 rule buried in a cost article, usually mentioned in a single sentence and never fully explained. It deserves more than that, because it’s the standard that determines whether your finished attic space is legally a room or legally a storage area — and that distinction carries real consequences for your home’s assessed value, its marketability, and your homeowner’s insurance coverage.
The 7 and 7 rule comes from IRC Section R305.1, which requires that habitable spaces maintain a minimum ceiling height of 7 feet over at least 50% of the finished floor area. The informal shorthand — 7 feet of height over 7 feet of horizontal floor space — is close enough for planning purposes, though technically the code specifies 50% of floor area rather than a fixed 7-foot floor dimension. Either way, the intent is the same: a room people live in cannot be a crouch-and-shuffle situation.
What this means practically is that the sloped portions of your attic — the areas under the eaves where the roofline angles down — don’t count toward your habitable square footage even if they’re beautifully finished. You can use them. Brilliantly, even — more on that later. But they don’t count.
Spaces that fail the 7 and 7 threshold have real options that don’t require a full structural rebuild:
- Closet or storage use: No height requirement applies to non-habitable space, so knee wall areas become dedicated storage rather than wasted volume
- Home office or hobby room: Some jurisdictions apply the habitable space standard only to rooms used for sleeping — check local code, because a legal bedroom and a legal bonus room are not always the same standard
- Non-sleeping use cases: A gym, craft room, or reading nook in a low-headroom attic is entirely viable; you just can’t count it as a bedroom for appraisal or listing purposes
- Partial conversion: Converting only the center section of the attic — where headroom is highest — keeps costs contained while still producing a genuinely functional room
The architectural fix when headroom falls short is almost always a dormer addition — a structural bump-out through the roofline that adds vertical space while simultaneously bringing in natural light. Shed dormers, which extend the full width of a roof plane, create the most dramatic headroom gain. Gabled dormers are more traditional in appearance and easier to integrate visually, but deliver less usable ceiling area.
A third option that often goes unmentioned: raising the ridge beam. In a rafter-framed roof, it’s structurally possible in some configurations to lift the peak of the roof several feet, dramatically increasing the volume of usable space throughout the entire floor plan rather than just in one dormer bump-out. It’s a bigger intervention than a dormer, but for attics that are frustratingly close to meeting headroom requirements across the full width, it can be the more efficient solution per dollar spent.
Actionable takeaway: Measure peak height and sketch your floor plan before you meet with any contractor. If you’re borderline on the 7-foot threshold, bring that measurement — a good contractor can tell you immediately whether a dormer makes financial sense for your specific roof configuration.
What an Attic Conversion Actually Costs (Beyond the $20,000 Average)
That $20,000 number is everywhere. It’s not wrong, exactly — it’s just incomplete in a way that causes real problems for homeowners trying to budget accurately.
The $20,000–$75,000 range that most sources cite covers a basic-to-mid-range attic to room conversion in a rafter-framed attic that already meets headroom requirements, with no structural complications and no dormer work. That’s a specific scenario. Here’s what the number typically includes in that baseline case:
- Subfloor installation and joist sistering (if needed): $3,000–$8,000
- Insulation — spray foam against roof deck: $2,500–$6,000 depending on square footage
- Drywall, taping, and finish work: $4,000–$9,000
- Electrical rough-in and fixtures: $2,500–$5,000
- HVAC extension or mini-split installation: $3,000–$7,000
- Staircase construction: $3,500–$10,000 depending on configuration
- Egress window or skylight (required for bedrooms): $1,500–$4,500 per opening
Add a dormer and the baseline jumps by $15,000–$40,000 depending on type and size. Add truss modification with engineered replacement structure and you’re adding $10,000–$30,000 before a single finish decision gets made. A full conversion of an awkward truss-framed attic in a high cost-of-living market, with a shed dormer and a proper staircase, can comfortably hit $100,000–$130,000.
None of this means the project isn’t worth doing. The average attic conversion returns 70–80% of its cost in appraised home value, and in markets where square footage is expensive, the ROI can exceed 100% on a per-square-foot basis. The point is that the budget conversation has to start from an honest assessment of what your specific attic requires — not from a national average that aggregates wildly different projects into a single misleading figure.
Insulation, Ventilation, and the Hidden Comfort Problems
This section gets skipped in most attic conversion guides because it’s not visual. Nobody posts before-and-after photos of properly installed spray foam. But thermal performance is the single largest driver of whether an attic room is genuinely comfortable year-round or becomes the room the family avoids in July and abandons entirely in January.
The core problem with attic spaces is that they’re directly exposed to the roof deck, which in summer can reach 150°F on a dark shingle roof in a sunny climate. Standard batt insulation between rafters, even at high R-values, can’t compensate for a poorly detailed thermal envelope at that temperature differential. The approach that actually works for attic conversion is unvented roof assembly — closed-cell spray foam applied directly to the underside of the roof sheathing, which eliminates the ventilation cavity and treats the attic as conditioned space from the roof down.
Key insulation decisions to understand before contractor conversations:
- Closed-cell spray foam provides the highest R-value per inch (approximately R-6.5 per inch) and acts as both insulation and air barrier — critical in an attic where air infiltration is a significant thermal load
- Open-cell spray foam is less expensive and provides good air sealing but lower R-value per inch (approximately R-3.7); adequate in moderate climates, often insufficient in extreme heat or cold
- Rigid foam board over the exterior roof deck — called exterior continuous insulation — is the most thermally efficient approach but requires re-roofing, which makes it cost-effective only if a roof replacement is already planned
- Knee wall insulation is frequently missed in attic conversions; the triangular spaces behind knee walls must be insulated and air-sealed or they become major thermal bridges regardless of how well the ceiling is insulated
Ventilation for the room itself is equally important and often underengineered. A mini-split system — a ductless heat pump — is the standard recommendation for attic spaces because it avoids the complexity of running new ductwork through finished floors and provides both heating and cooling efficiently. A properly sized single-zone mini-split for a 300–400 square foot attic room runs $2,500–$4,500 installed and will outperform a ducted extension in both efficiency and comfort.
One thing that surprises people: even a well-insulated, properly climate-controlled attic room will have noticeable temperature variation between the floor and the ceiling — warm air rises, and in a space with a peaked ceiling, the temperature differential can be 8–12°F on hot days. Ceiling fans aren’t optional in attic rooms; they’re functional equipment.
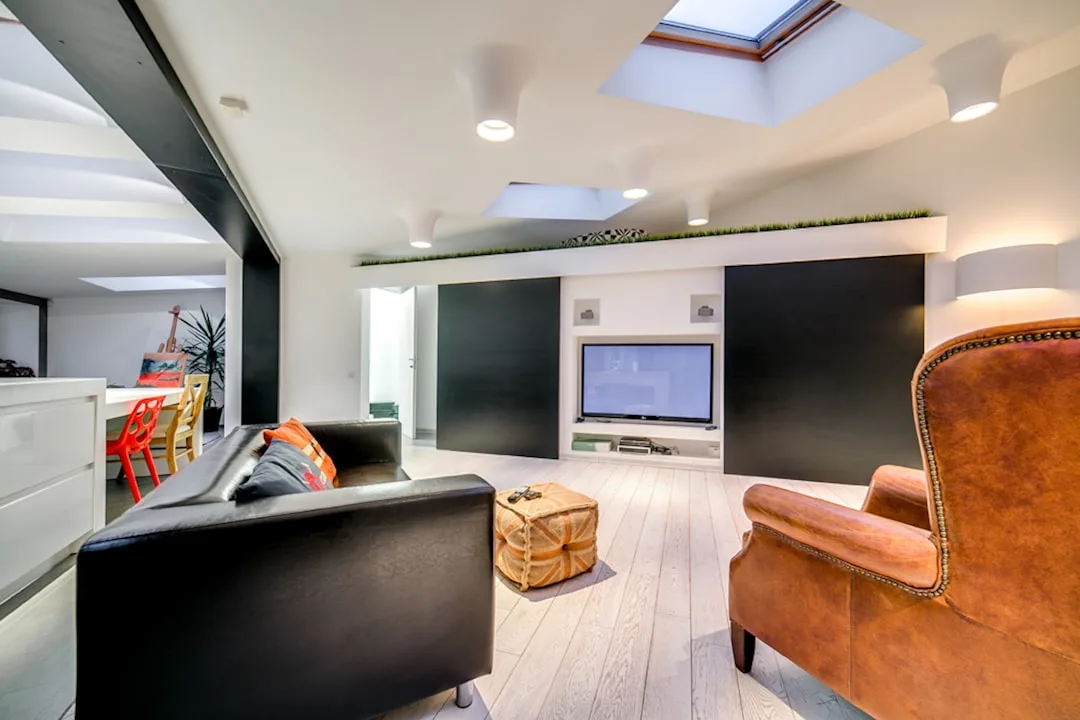
Designing Around What You Can’t Change
The constraints in an attic to room conversion — the slopes, the knee walls, the odd angles — are not problems to minimize. They’re the design opportunity. The attics that end up as genuinely distinctive rooms are almost always the ones where the designer worked with the geometry rather than fighting it.
Knee walls are storage architecture if you treat them that way. The 3–4 foot vertical wall space under the eaves, behind which the roof slopes to the floor, is one of the most efficient storage volumes in a house if it’s designed with intention. Built-in drawers flush with the knee wall face, full-depth shelving behind hinged access panels, cedar-lined closet space for seasonal clothing — any of these turns dead triangular volume into working storage that would cost considerably more to build in a square room on a lower floor.
Specific design moves that work in low-ceiling attic spaces:
- Platform beds built into the slope: A sleeping area positioned under the lowest part of the roofline places the activity (lying down) in the lowest-headroom zone — the constraint becomes the design feature rather than a compromise
- Window seats in dormer pockets: A shed or gabled dormer that doesn’t add enough headroom for a full workspace often adds exactly enough for a window seat with storage below — one of the most-used features in any finished attic
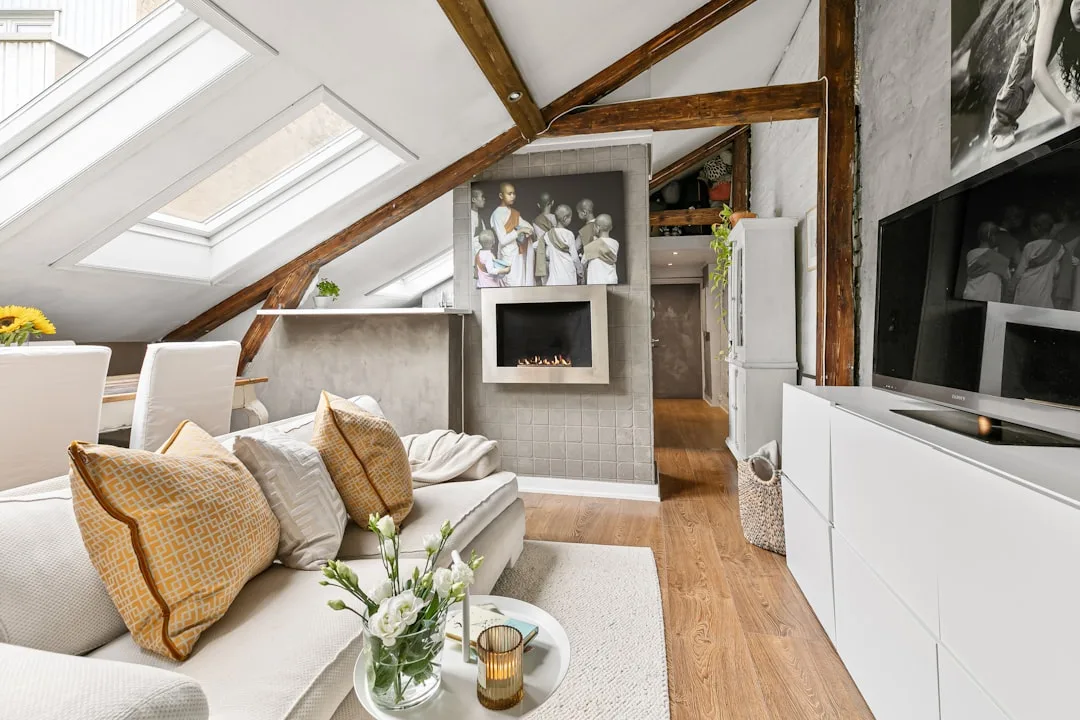
- Exposed rafter ceiling: Rather than drywalling flush against the rafters and losing 2–3 inches of already-constrained headroom, leaving the structural members exposed and painting them adds visual depth and recovers meaningful ceiling height
- Low built-in furniture along knee walls: Desks, bookshelves, and lateral file storage all function at knee wall height — designing built-ins to sit below the slope line makes the space feel more intentional and less cramped
- Skylights over the floor plan center: A flat skylight or tubular daylight device installed at the ridge brings light into the deepest part of the space where a window can’t reach; the effect on perceived spaciousness is disproportionate to the opening size
The staircase position matters more in an attic conversion than in any other room addition because it determines the circulation pattern through the floor below. Ideally, the stair emerges into the attic at the low end of the floor plan — near the knee walls — so the transition from stair to standing height feels natural rather than disorienting. A stair that deposits you directly under the peak works fine structurally but often creates an awkward spatial experience.
Permits, Inspections, and What Happens If You Skip Them
An attic to room conversion done without permits is not just a legal risk — it’s a financial one that surfaces at exactly the worst moment: when you’re trying to sell the house.
Most residential real estate transactions in the United States require disclosure of unpermitted work. An unpermitted attic conversion that has been counted in the home’s square footage — a common approach used to inflate listing prices — creates disclosure liability for the seller and financing complications for the buyer. Lenders who discover unpermitted habitable space during appraisal will frequently require remediation before closing, and that remediation in a finished space is dramatically more expensive than doing the work correctly the first time.
What the permit process actually requires for a typical attic conversion:
- Building permit: Covers structural work, floor load upgrades, staircase construction, and general framing
- Electrical permit: Required for any new circuits, outlets, or panel upgrades associated with the conversion
- Mechanical permit: Required for HVAC work — new ductwork runs, mini-split installation, or equipment relocation
- Egress compliance inspection: If the space will be used as a bedroom, an inspector will verify that the window opening meets egress requirements (typically 5.7 square feet of openable area, with minimum 24-inch height and 20-inch width)
- Final occupancy inspection: Before the space is legally occupied, the completed work must pass a final inspection that signs off on all permitted trades
The permit process adds time — typically 2–6 weeks for permit approval depending on jurisdiction — and some cost (permit fees generally run 0.5–1.5% of project value). It also adds the inconvenience of scheduled inspections at various project stages. The return on that investment is a project that adds legally recognized square footage to your home, carries no disclosure liability, and was built to a standard that a structural engineer or building inspector has actually verified.
Frequently Asked Questions About Attic to Room Conversion
How do I know if my attic floor is strong enough to convert?
The practical first step is measuring your floor joists — pull back any insulation near the hatch and look at the depth of the framing members. Standard attic joists are 2×6, which typically carry 10–20 lbs per square foot. Habitable rooms require 40 lbs per square foot. If you have 2×6 joists, you’ll almost certainly need sistering — adding new joists alongside the existing ones — before the floor can support regular occupancy. A structural engineer can confirm load capacity from measurements and joist span in about an hour, and that assessment typically costs $300–$600. It’s the single most useful money you can spend at the start of a conversion project.
Can I convert a truss-framed attic?
Yes, but not without a structural engineer and a meaningful budget. Trusses are engineered systems — every member carries load, and removing any of them without replacing that load path causes structural failure. The solution is a truss conversion that installs a new engineered beam system (typically a ridge beam and hip beams) that redistributes the roof load to the exterior walls, allowing the interior truss members to be removed. This work runs $10,000–$30,000 on top of the standard conversion costs and requires stamped engineering drawings for permit. It’s viable — many beautiful attic rooms started as truss-framed attics — but it’s not a DIY scope and it’s not a budget project.
Will an attic conversion add value to my home?
In most markets, yes — but the calculation depends on how the addition is permitted and finished. A properly permitted attic to room conversion that adds a legal bedroom typically returns 70–80% of project cost in appraised value. Adding a bedroom to a home that previously had only two or three can have an outsized impact because bedroom count is a primary pricing variable in residential real estate. Unpermitted conversions don’t add to appraised square footage and can actually create negative value if they surface during a transaction as a disclosure issue.
How long does an attic conversion take?
A straightforward conversion of a rafter-framed attic with adequate headroom and no dormer work typically takes 6–10 weeks of active construction, plus 2–6 weeks for permit approval at the front end. Add a dormer and the timeline extends to 10–16 weeks. Truss conversions with full engineering add further time on both the design and construction ends — budget 4–6 months from first contractor meeting to occupancy for a complex project. Weather delays, material lead times, and inspection scheduling all affect real timelines, and any contractor who quotes significantly shorter durations without seeing the specific attic is working from optimism rather than experience.
Do I need an architect for an attic conversion?
For a simple conversion with no structural modifications, a design-build contractor with strong residential experience can often handle the project without a separate architect. For any project involving dormer additions, truss modification, staircase design in a constrained space, or custom built-ins, an architect or residential designer adds real value — both in the quality of the finished space and in the efficiency of the permit process. Structural engineering stamps are required for any work that modifies load-bearing elements, regardless of whether an architect is involved. Some jurisdictions require architectural drawings for any habitable space addition; check local building department requirements before assuming a contractor-only approach is permitted.