Author: ION

  • How to make a waterproof dog bed?

    How to make a waterproof dog bed?

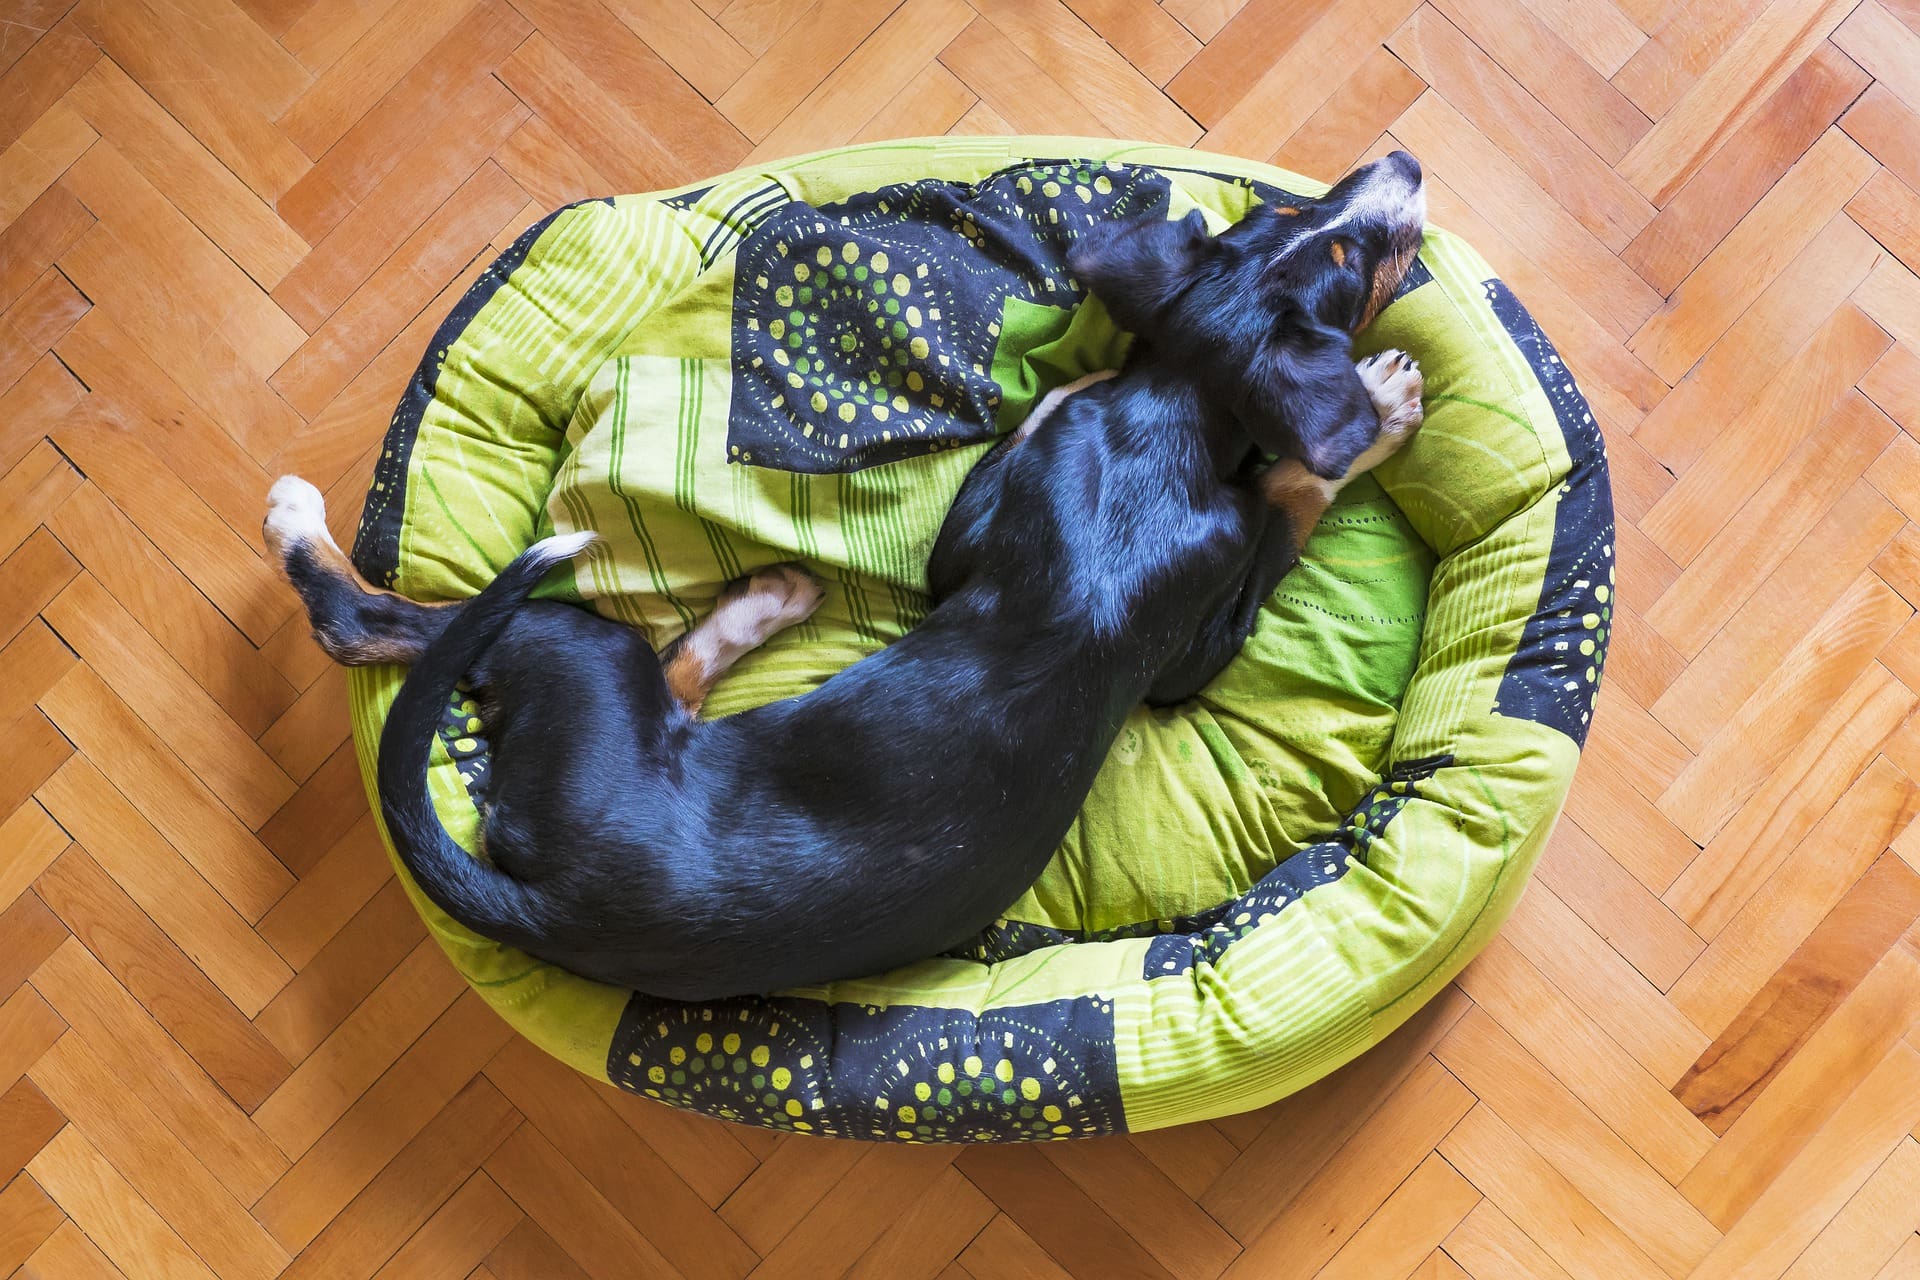
    Are you looking for a wonderful homemade dog bed that will not cost you a fortune? Are looking for one that will also hold up against the most slobbery dog? Well, then you might be happy to know that there is a DIY waterproof dog bed for your dog that can help him sleep comfortably. 

    Source: Gentle Dog Trainers

    This DIY bed will also allow you to easily remove the cover to wash and reuse. 

    The Reasons to have a DIY Waterproof Dog Bed

    The main reason to have a waterproof or indestructible dog bed is to protect the foam and interior of the bed from water damage. If you have a simple dog bed then whenever your dog urinates or comes in from the rain, or lies sick in the bed then you will have to wash the entire bed. Yes, you will have to wash the foam, too. Now, that’s not so fun, right? This can be a great hassle to handle. 

    Why Should You Make Your Own DIY Dog Bed?

    If you have a dog that slobbers and is still getting trained, a waterproof dog bed is a must item. However, not every dog bed available on the market is waterproof.  Fortunately, if you found one then they become a pain to wash since you have to wash the entire bed. 

    Let’s find out more about DIY Waterproof dog beds.

    DIY Waterproof Dog Beds

    This DIY dog bed will be made in two stages. 

    The time duration for the creation of this DIY waterproof dog bed is roughly about 2 to 3 hours at maximum depending on how quickly you work. This project will help you make an adorable and affordable waterproof dog bed for your cute and wonderful dog. 

    Stage 1: Preparation

    Step 1: Gather Supplies

    You will need:

    • Shower Curtain (But you can use any other waterproof fabric)
    • Foam Bed
    • Durable fabric for undercover
    • Scissors
    • Measuring Tape
    • Matching Color thread
    • Sewing Machine

    Step 2: Clean the Dog Bed (Optional)

    If you already have a dog bed and you want to use the foam of that very bed, before waterproofing your existing dog bed, make sure that the bed is thoroughly cleaned. To clean the bed foam and undercover cloth, wash the undercover cloth in the washing machine and wash the foam with your hands in the bath with some detergent. 

    Wait for them to get dry before moving to the next stage. 

    Stage 2: Cutting and Sewing

    Step 1: Cut the Bed Foam

    Cut the bed foam to be the same size as your dog crate. If you have a super jumbo-sized crate then start by cutting it in half and it should be just an inch or two short of filling the whole length of the dog crate. If your crate is smaller, then you should cut it to fit the crate precisely. The simplest and easiest way to cut the foam size is to lay it on top of the crate and cut the edges so you don’t have to measure again and again. 

    Step 3: Cut the Fabric 

    As we are using a shower curtain for the cover, spread the shower curtain out on the floor, design side down. Place the foam bed piece on top of one another with the bumpy side down. If you want to show a specific pattern or part of the shower curtain, place the foam bed piece on top of that. After that, wrap the curtain around the bed foam and cut off the excess fabric of the shower curtain. Do not forget to leave enough fabric on each side for overlap. Also, make sure that you cut off the area with the metal rings before starting the cutting. 

    Step 4: Start Stichting

    Now that you are done with the cutting of the foam and the cover, sew them together. Do not forget to add a zip so that you can easily remove the cover and wash them. 

    Enjoy your own homemade waterproof dog bed! 

  • Tankless Toilet Problems

    Tankless Toilet Problems

    Many of you might have heard about  “Tankless Toilets” as they are now getting more renown in a variety of communities.

    Why are Tankless Toilets Getting More Famous?

    The conventional toilets comprise a water tank that contains several moving parts, taking up a lot of space in the washrooms. Recall that conventional toilets also use about 3 gallons of water per flush.

    That’s quite a bit of water utilization for a mere flush of the toilet, don’t you think?

    This amount of water per flush has been the ultimate reason for high utility bills.

    These conventional toilets have a large number of mechanisms within the tank to facilitate the flush, it necessitates many adjustments, replacements, and repairs.

    Besides, the tank. The tank lid of traditional toilets are easily broken and super expensive to replace. That’s why a need exists for a space-saving wall-hung toilet that takes up less space and uses less amount of water per flush.

    Mechanism of Tankless Toilets

    As the name implies, tankless toilets are without tanks. A tankless toilet does not store water and, therefore, it does not need a tank. Unlike the conventional toilets where water is stored in the tank, the tankless toilet is hooked up to the building’s plumbing system and flushes in one of two ways:

    • The water enters the bowl of the tankless toilet at very high pressure directly from the plumbing pipes.
    • An electric pump in the tankless toilet bowl provides additional pressure for the water flush.

    Tankless Toilets Problems

    The wall-hung toilets offer more than an aesthetic appeal.

    The streamlined tankless toilets forms and relatively small sizes mean they save space in the washrooms. The advanced flushing method of tankless toilets helps save a large amount of water annually.

    However, not every household is a great fit for wall-hung toilets. Yes, there are many problems associated with a tankless toilet. Therefore, if you are thinking about installing one, make sure you can handle the drawbacks.

    • More Expensive than Conventional Toilets

    Typically, the prices of wall-hung toilets are higher than traditional or conventional toilets.  An average tankless toilet costs roughly $900 and rises into the thousands. Even if we think about the fact that a tankless toilet can help us cut our water bill, we still should take a moment to think and then make a decision.

    • High Installation Requirements

    Recall that wall-hung toilets require very high water pressure to operate properly. This is the main reason why tankless toilets are often found in large commercial and public buildings. For instance, shopping centers or airports that can support the large pipes needed for such high water pressure to operate. Of course, there might be a possibility, your residential building’s plumbing can not support this kind of pressure.

    Now, if you still go for the tankless toilets, there is a high possibility that your standard residential water supply lines can not handle such high water pressure and pressure from the flushing could leave you with damaged pipes. In such a situation, you will be left with damaged pipes and a toilet that no longer works.

    • Extra Cost of Hiring a Professional for Installation

    Unlike traditional or conventional toilets that are a fairly straight-forward job for anyone, the tankless toilet is more complex and requires a licensed professional. Wall-hung toilets are complex and difficult to install and, therefore, require the plumber to open up the wall to access the building pipes.

    • Repair Costs

    You also have to pay a professional plumber for repairing a tankless toilet as the pipes are hidden in the wall or the floor and the electric pump is hidden as well. Because of this, the chances that your DIY skills will work to repair the wall-hung toilets are minimal or none.

    It is quite a decision to make but now you have more than enough information to move forward and act.

  • Looking to Spruce up Your Home? Here Are 6 YouTube Channels to Guide you.

    Looking to Spruce up Your Home? Here Are 6 YouTube Channels to Guide you.

    Gone are the days when homeowners and DIY artists derived inspiration for their home decor ideas from Pinterest and Tumblr.  

    These image-sharing platforms that consisted of beautiful and breathtaking home decor shots have now been replaced by YouTube channels wherein viewers are able to see designers in action alongside the entire process involved in decoration.  

    With tools such as a handy and simple YouTube video editor, home decor videos are all the rage these days. As an interior designer or a DIY enthusiast, you could even use VideoCreek as a platform where you could create, curate, and edit videos to put it up on YouTube.  

    As such, whether you’re a DIY artist, an amateur Interior designer, or a homeowner who’s simply looking for a change of scenery,  here’s a list of some amazing and creative YouTube channels that you should definitely check out.   

    Mr. Kate 

    This YouTube channel is ideal for homeowners who are left with awkward spaces and strange layouts within their homes. Being able to utilize dark shades and hues in small and enclosed spaces is something these YouTubers are especially good at.  

    The channel is presided over by Kate, who is a self-taught interior designer. Her husband, who does the heavy lifting, brings her ideas to life. 

    Kate and her husband are the professionals that homeowners, office owners, and so on go to when they’re looking to beautify a weirdly shaped room or office space. The YouTube couple then documents the entire transformation.  

    This is one YouTube channel that DIY artists and even amateur decorators are sure to binge on.   

    Lone Fox 

    This YouTube channel is ideal for DIY enthusiasts and amateurs. You don’t need an array of power tools to duplicate the creations on this channel.  

    Drew (the YouTuber who owns the channel) is adept at holiday-themed decorations, extreme makeovers, and ones that involve a minimal retouch as well.  

    He also has several videos where he takes viewers through simple hacks (including IKEA hacks) that could literally transform a space or a piece of decor into something phenomenal. Be it art decor, thrift shop decor, or transformations of bedrooms and bathrooms, Drew does it all.  

    Lone Fox is a great place for people who’re just starting out and are looking for unique ideas on how they can spruce up their home or workspace.   

    The Sorry Girls 

    This channel is ideal for seasoned DIY artists and home decor aficionados as it involves the use of a lot of power tools. Alternatively, many of their DIY videos feature tools that could be replicated with just a pair of scissors and glue for first-timers.  

    The YouTubers who maintain this channel are Kelsey and Becky. The channel mostly features DIY and organization hacks, makeovers, room decor, thrifting, and upcycling ideas.  

    The duo mainly reworks and re-transforms their own living and workspaces, constantly looking for new and creative ways to remodel and redesign their interiors. Their videos also have a lot to do with beautiful woodwork.  

    A couple of their creative series hinges on replicating designer items on a budget and working on items purchased from one-dollar stores. As such, if you’re planning to take inspiration from these series of videos, you don’t have to worry about burning a hole in your pocket.   

    Studio McGee 

    Studio McGee is a design studio managed by husband and wife duo, Syd and Shea McGee. The channel boasts of videos featuring home makeovers, interior finishes, kitchen, and room remodeling, and sprucing up outdoor spaces.  

    The studio is the combined effort of Syd’s business acumen and Shea’s creative vision. As such, their clientele is vast and varied. The couple puts up beautiful videos of home and office tours which throw light on their very uber, sleek, and contemporary style of decorating spaces.  

    Moreover, If you’re looking for simple tips and tricks on how to remodel and rework on regular household items such as beds, shelves, and ledges that require little effort and planning, this channel is the place to go.   

    House and Home 

    Unlike the YouTube channels mentioned above, House and Home is a brand that is known for interior design. The company also has its very own magazine based in Canada. The videos are replete with Canadian influence that renders them very uber-modern, smooth, and savvy in terms of its look, feel, ambiance, and design.  

    The channel features several home tours, each one bringing its own uniqueness to the video as per the design influence of the designer in-charge. The brand also has its own series of maker over clips, renovation tips, themed makeovers, and big reveals.   

    XO, MaCenna 

    If you’re fascinated with the idea of thrifting, this channel is the place for you. MaCenna takes you through all kinds of thrift and DIY shopping in her videos.  

    From showing you how to shop for ceramics, wood decor, and discovering items that originally cost a fortune in thrift stores to telling you how to beautify your kitchen, patio, and rooms with DIY items and furniture, MaCenna does it all.  

    On her channel, MaCenna treats her viewers on how to make DIY ornaments (holiday and themed ones), DIY Ikea hacks, 1 dollar hauls, flea market shopping for homes, and accessory items in your homes like desks, curtains, and so forth.   

    She also puts up extreme makeover videos for different home and office spaces like the ones for breakfast nooks, entryways, bookcases, closets, makeovers on a budget, bathroom, living, and bedroom do-overs. Her channel features modern, mid-century, bohemian, and classic home decor as well.   

    Wrapping Up 

    As a homeowner, DIY enthusiast, or even as someone who’s looking to increase their knowledge of home decor fashion, YouTube Channels are a great place to start your journey.  

    That is because these channels not only provide you with the head start you need with all their creative inputs and the actual visualization of everything they have planned, you will get a complete idea of what to expect before jumping into a project. When it comes to editing, have a peek here.

  • The essential considerations to make while choosing café furniture

    The essential considerations to make while choosing café furniture

    Currently, the youth love to meet their friends at a café and spend hours. The same is true for other age groups who love cakes, sandwiches, coffee, and tea. However, other than these four factors, various others decide whether you will succeed in your café business. A lot depends on the kind of café you want to build and how you go about fine-tuning it. The café design and the furniture will play a massive role in whether your customers will love your décor. It will also decide the kind of customers who will love to visit your café for their daily dose of caffeine and wraps.

    It is essential to understand that restaurant chairs and tables are crucial assets for cafes. It can reflect various gestures in a specific setting. When you step into a café, we get attracted to the café furniture and interiors. Once we sit comfortably, we order the food and our best beverage. Hence, café furniture determines our mood and what we want to have in the café. It also determines whether we want to repeat our visit to the café or not.

    Some of the essential points to consider here are:

    Additionally, you also need to think about the durability, worthiness, material, and sustainability of the café tables, chairs, and other furniture. To know more about this, you can check out cafe furniture Melbourne.

    The size of tables and chairs

    It is always good to maximize the number of chairs and tables in the café to welcome maximum customers. However, you need to ensure that it is not making space cramped to have a negative experience. It is essential to ensure that the customers and staff have ample room to move the furniture. Once you have measured the café area, you need to plan the number of people you can fit inside the café. It is an excellent practice to maintain a space of 70cm to 80cm in between the tables. And that would let you know the tables that are perfect for you.

    In some regions of your café where people need to sit for long hours, it is essential to consider moderate height chairs and low-level chairs, as it is ideal for relaxation. It is necessary to check the chair weight that makes the customer experience a favourable one.

    Any finish and stain

    It is good practice to choose a specific finish of a chair that would complement the café décor and the table with which you are pairing it. You can also opt-in for the bespoke furniture, which comprises tables and café chairs along with the sofas and the beam seating. Hence, it would help if you browse what the service providers have to offer, read the customer reviews, and order the furniture that caters to your budget capacity and preference.

  • How to create ‘Instagrammable’ creative displays in the home

    How to create ‘Instagrammable’ creative displays in the home

    Each room in the home has its own personality, often created with a clear purpose for you and your family – whether that is for relaxing and unwinding, working, or playing. Displays are a great way to decorate a room while creating a homely and intimate feel depending on how you choose to dress each area. Here, we will discuss how to curate a photo-worthy display for your home.

    Choose good lighting

    To capture a good photo, natural light is key. By choosing an area close to light, or in front of a window, patio or bifold doors, this will make a naturally bright area in the home a focus point for visitors. Hanging displays are great use of natural lighting and look stunning in front of larger open spaces such as patio doors from Quickslide to make the most of a feature display in the home. Larger windows are also great to maximise upon shelving space, with room for family photos, ornaments, or botanical and floral arrangements.

    Create a focal point

    Instead of several larger items together, try including one larger feature in your display. Side tables, windows and shelving are great areas in the home to utilise this. Select a larger item you wish to display, such as a sculpture, vase, or photo collage and position one or two smaller items next to it, such as tea lights, to create a relaxing atmosphere. 

    Use colour blocking

    Depending on personal preference, colour blocking can work well in many homes when it is selective and sparingly used. Whether you prefer the use of subtle nudes, pastels or autumnal tones, colour can work well and compliment the room of the display. If colour is widely used within the home already, monochromatic themes work well for window displays. Try a black or white vase, or candle holder paired with shades of cream and grey to not overpower the space.

    Keep it minimal

    Often, the use of too many items on display in one area can become cluttered and unimpactful. Less items of high quality will have a greater effect on the mood of your room if places correctly. Consider the mood of the room, particularly for smaller rooms and social areas, by keeping a calm and relaxed theme to make it look classic and effective. Try greenery with some personal touches, such as a photo frame and a few of your favourite books on display.

    Make it unique to you 

    Each home has its own personality built into it by its occupant, so make sure that your home reflects your needs in the best way. By displaying memories, keepsakes, and items with a personal history, this will reflect throughout your home and remind you of happy memories daily.

    Choose mirrored surfaces, neutral and white tones for photo frames and ornamental pieces in smaller spaces, as lighter colours will reflect light, making the space appear brighter and bigger.

    By creating displays throughout the home to showcase your favourite items of décor, you can create works of art in each while keeping it homely and personal to you.

  • Why Fall is the Perfect Season for Home Renovations

    Why Fall is the Perfect Season for Home Renovations

    Summer gets all the attention from eager homeowners on a mission to renovate. Perhaps it’s because people spend the winter dwelling on what’s wrong with their home (you’re inside most of the time, after all). Maybe it’s because they spend the winter dreaming of all the changes they would make if the weather permitted.

    But here’s a plug for a sometimes-overlooked season of renovation: the fall. Arguably, fall is the better time of year to lay out a plan, roll up your sleeves, and start enacting changes around the home.

    If you didn’t get around to your summer reno plans and are considering waiting until next spring to retry, think again. There’s no need to wait – fall can be the perfect season for home renovations. With a plan in mind, a budget in place, and a one stop shop for your renovation needs at the ready, you can start right away.

    Beat the Summer Heat

    When it comes to renovations, one of the greatest advantages fall has over summer is climate. If you’ve ever labored under the summer sun, you can attest to the discomfort. Whether you’re landscaping, tiling, roofing, or re-caulking, the summer rays are a major impediment to a careful, comfortable job.

    Even if you aren’t DIYing, chances are you still have to be active in the process of managing or overseeing professionals. Rather than waste your warm summer keeping tabs on your renovation projects, do everyone a favor and save the work until fall. It’s milder, more comfortable weather for everyone, and you can save your summers for leisure and outdoor enjoyment.

    Get Prepared in Time for Winter

    The thinking around spring projects is that you want to prepare your home in time for summer enjoyment, but summer is a season most people spend outdoors anyways. It’s better to prepare your home for the winter, when you spend most of your time indoors.

    Home renovations to improve efficiency are particularly beneficial. Inefficient windows and doors, for instance, cause you to pay more on your energy bill throughout the winter. A damaged roof can lead to leaks, infestations, and ice damming in the winter. To avoid these financial and emotional headaches, it’s best to get them out of the way in the fall.

    Create a More Enjoyable Home Experience

    Finally, part of preparing your home for winter is making sure it’s as liveable as possible. You will likely spend the bulk of your time indoors over the winter, so it makes sense to invest in home enjoyment. That might mean redoing the bathroom to improve fixtures, water pressure, and aesthetics. It might mean renovating the kitchen to make your at-home cooking more enjoyable. Or it could entail installing new windows to allow abundant natural light into your home.

    Don’t wait around until next year just because you missed your summer window of opportunity for renovations. For a more comfortable autumn experience, and to prepare your house for the winter, undertake your renovations this fall.

  • Should Your New Home Have an Open or Closed Floor Plan?

    Should Your New Home Have an Open or Closed Floor Plan?

    There’s a lot of questions when you’re moving homes. There’s the location: condo living downtown or more space, peace, and quiet further out in the country? There’s the kinds of countertops, trims, and fixtures you want. There’s whether or not you want a move in ready home or something that will take some fixing up before everything’s perfect.

    One of the most fundamental questions you have to ask has to do with home design. Do you want an open floor plan or closed? When you work with custom home builders on a new home, they typically have a number of different designs to choose from. You can find dozens of floor plans from Blythwood Homes, custom home builders in Niagara Region, to compare a variety of detached and townhome bungalows, with both open floor plans and separate kitchens.

    Let’s take a look at how open and closed floor plans compare.

    #1 Space

    This is where having an open interior often comes out ahead. It just feels bigger and it’s easier to use the space. Walls tend to break up the flow of movement through a home and they make a home feel visually more cut-up.

    If you love a cozier kind of feeling, the smaller rooms created by walls can be put to excellent effect, but people often prefer the sightlines and airiness of the alternative.

    #2 Style

    One of the big style challenges that comes with an open floor plan is making sure everything is cohesive across multiple rooms: living room, dining room, and kitchen. When you’re planning a home where those three main living areas blend together, it helps if you have the option of working with a custom home builder that allows you to pick and choose countertops, tiles, colors, etc. With a bit of preplanning, you can make sure your kitchen will gel well with the interior design you want for the other parts of your home.

    #3 Lifestyle

    Do you love being able to just close a door and hide away clutter when guests come over? Are you the type of person who gets bothered by kitchen smells in the living room, or who enjoys the privacy of cooking in a separate room? Or do you prefer being able to prepare a meal without abandoning your company and enjoy the sightlines of a kitchen that blends in with the dining or living room areas?

    The home floor plan can be designed so that the kitchen is right in the middle of the great room. In these plans homeowners often like to have the sink and dishwasher in the island facing the area with guests. Some home buyers like to have a design which includes a spacious butler’s pantry so messy stuff can be hidden away from the great room.

    Approximately 70% of homebuyers want an open floor plan, so it’s the clear front-runner, and thatalso helps resale value. However, when you’re looking for your dream home, it’s really a matter of your personal preferences. Think about how you use the space and what you want out of it. It’s a decision that will guide your interior design and even your lifestyle once you’ve moved in.

  • How to Design a Flood-Proof Basement

    How to Design a Flood-Proof Basement

    Across North America, cities of all sizes are starting to feel the effects of climate change in real time.

    Summers are getting hotter, seasonal storms are getting worse, and properties of all kinds are at greater risk from flooding. In large lake-side cities like Toronto, Buffalo, Milwaukee, and Chicago, many homeowners are looking for ways to make their houses more flood-resistant and better able to cope with heavy precipitation and municipal drainage systems that were not designed to handle such large quantities of water. 

    To that end, if you want to ensure that your basement is as waterproof as possible, here are three flood-protection upgrades to consider.

    1. Grading and Eavestrough Repair

    Surprising as it may sound, protecting your basement starts with your roof. When it rains, water flows from the roof to the eavestroughs, which should channel it away from your foundation and toward sewers or patches of ground that can absorb it.

    But if those eavestroughs get clogged, the water will simply overflow onto the ground under your eaves. If the soil or asphalt doesn’t to direct water away from the house, it will pool by your foundation and seep in over time.

    Cleaning your eavestroughs regularly is important, but it is even more essential that you make sure your property is properly graded.

    2. Interior Waterproofing

    During heavy rains, some pooling is inevitable, so it is equally important to make sure that even if water does gets into your basement, your living area is protected. There are two main steps you need to take to ensure your interior waterproofing is up to standard:

    • Install an Interior Drainage System: Interior drainage systems channel water out of your basement and into a pit underneath, where a sump pump can pump the water that collects there away from your home.
    • Install a Vapor Barrier: Even a new foundation will be pervious to the external conditions in some ways, but installing a vapor barrier is a good way to make sure that moisture can’t get into the living area itself. In a situation where the earth around your house is saturated with water, a vapor barrier will provide essential protection.

    If you want to explore your options for improving your interior drainage system or install a vapor barrier, get in touch with a basement waterproofing company that specializes in upgrades and repairs to book a consultation.

    3. Filling Foundation Cracks

    If you live in a colder region, your foundation undergoes stress every winter and spring as the ground around it freezes and thaws. This stress causes cracks to form over time, and these cracks can cause leaks during wet weather. In the case of heavy precipitation where the ground becomes saturated, these leaks can lead to serious basement flooding.

    Fortunately, these cracks can be patched using a variety of different methods, one of the most popular of which involves injecting the cracks with polyurethane foam for a fast, easy way to seal your foundation to keep your basement dry. 

    The latest climate projections suggest that even if significant changes are made to reduce greenhouse gas emissions, climate change is already here.Homeowners who want to protect their investments by making their properties more resilient should start taking concrete steps to do so now.

    Because of the rising risk of flooding in large cities, waterproofing your basement is one of the first projects you should undertake. If you live on the GTA, get in touch with Toronto basement waterproofing contractors today to learn more about your options.