Author: ION

  • HOUSE CONSTRUCTION CAN BE TOUGH – BUT NOT ANYMORE

    HOUSE CONSTRUCTION CAN BE TOUGH – BUT NOT ANYMORE

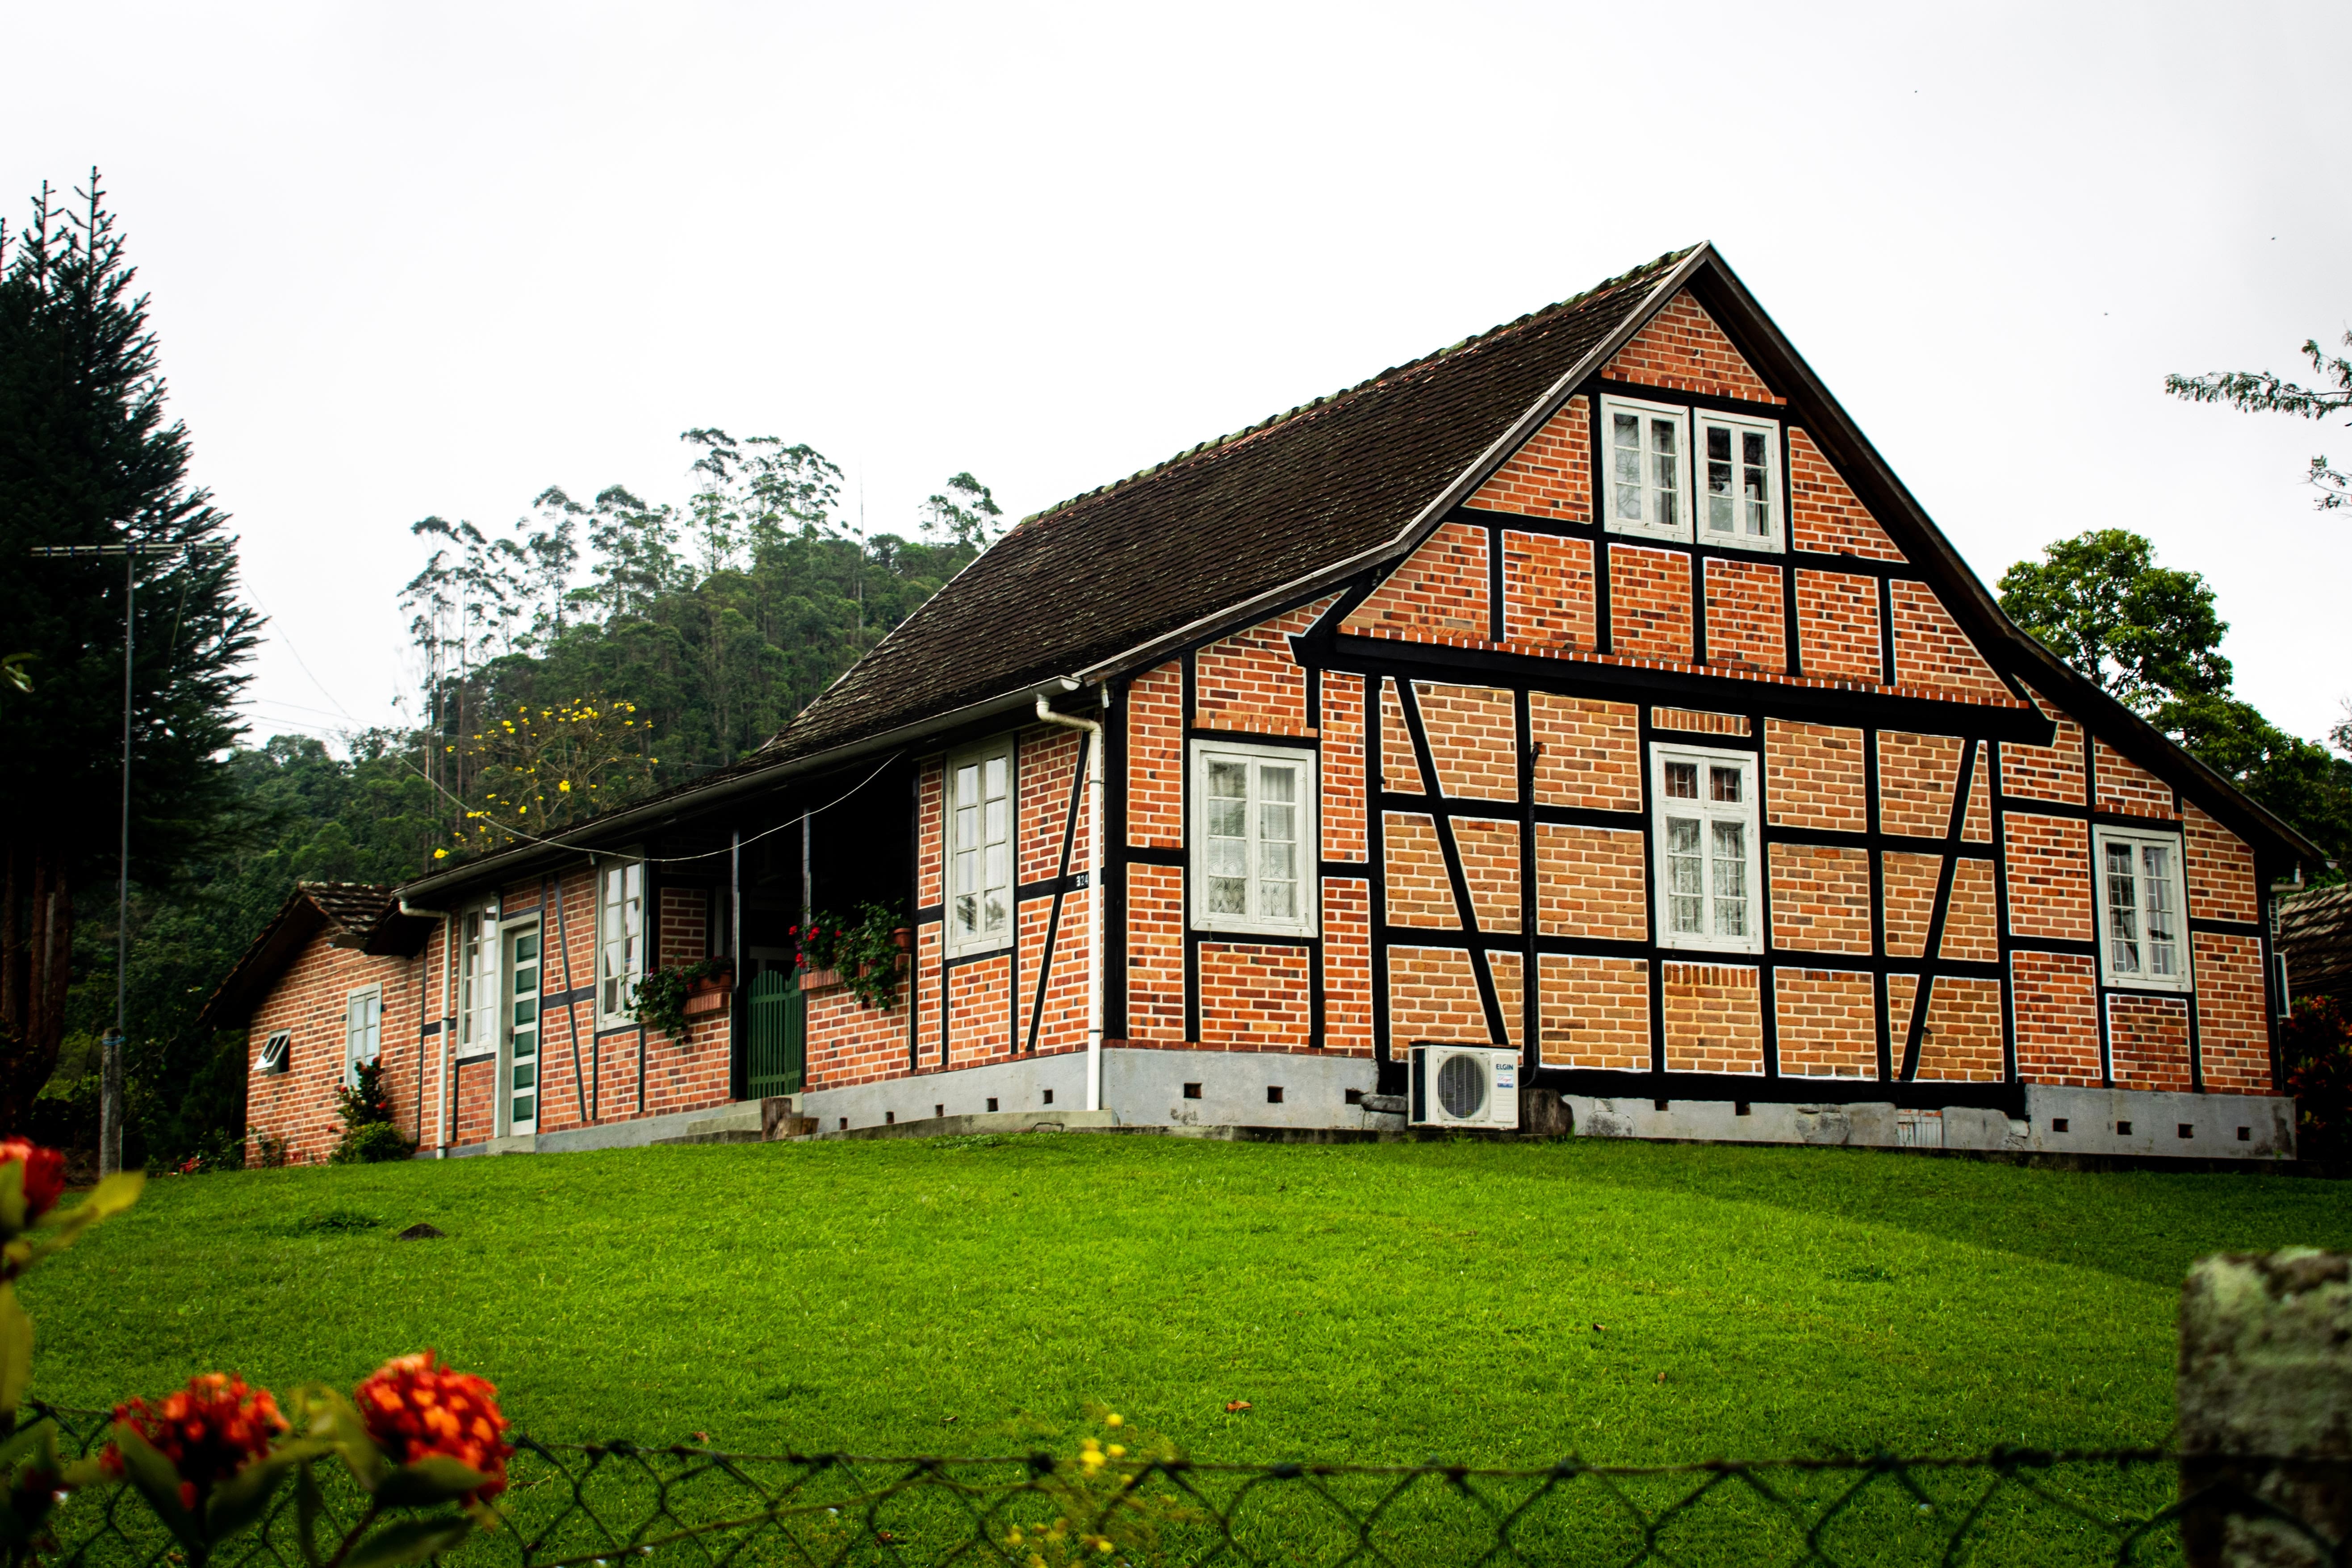
    Constructing a house is no easy task; you need all the time, effort, and patience you have to build a house you desire. 

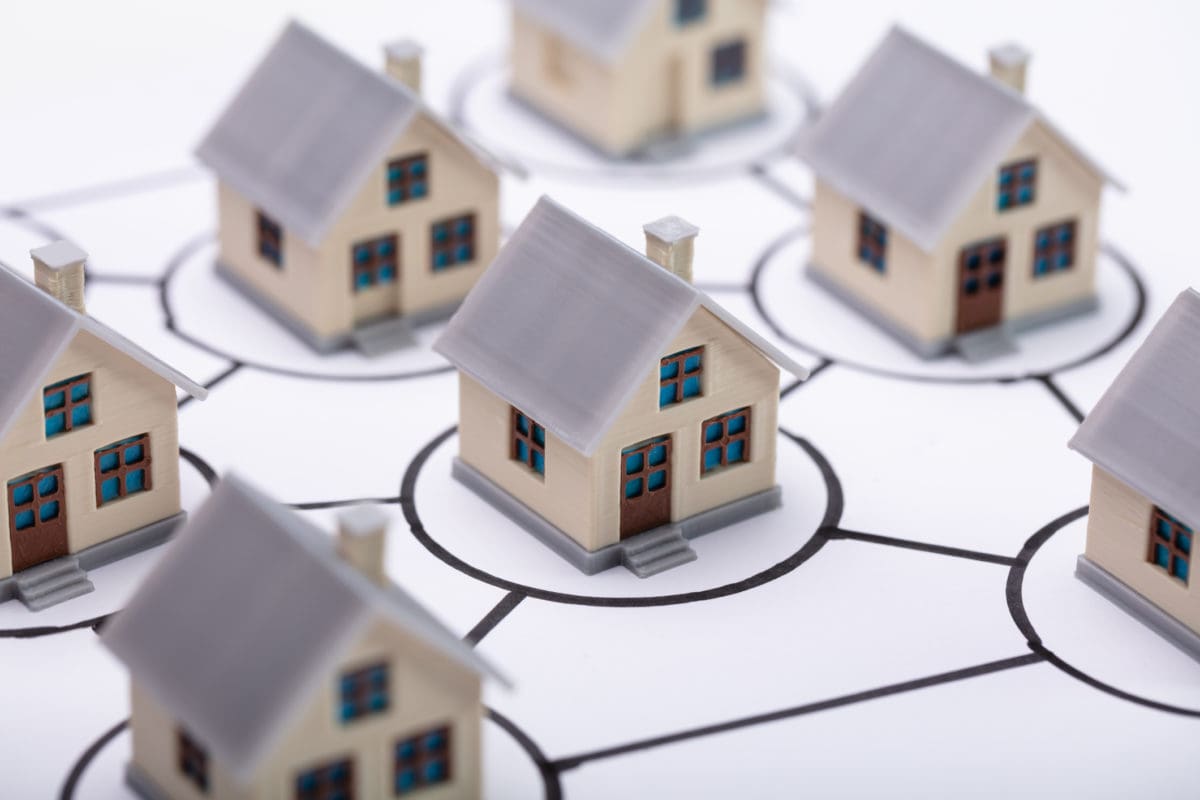
    No matter what region you are from, everyone desires to build a custom house. Even with the cons involved, the end game is what makes it worth the wait. And why shouldn’t it be? You have the perfect opportunity to plan out every step of the process. 

    Building a house from the ground up is a huge responsibility and can be overwhelming, too, even for the experienced builders. If you are ready to take on the challenge, then you have landed on the right page. 

    Ready, set, BUILD!

    Legal requirements and floorplan

    Before you begin working, make sure you have government approval to carry out the construction. Everything from zoning to the grading (change in the contour of the land to accommodate the driveway and home), home construction, septic systems, plumbing, and the electrical work has to be approved first. Sounds annoying, right? You cannot move forward with the structure if you do not have all the legal formalities done. 

    Once that is over, you are ready to roll, pun intended. The first step is you need a bulldozer or the backhoe to clear out the site from all the rocks, trees, and debris for the house; you cannot construct on rough land. You cannot do this alone; you need more workforce. Hiring the right people to do the job for you makes it a lot easier. 

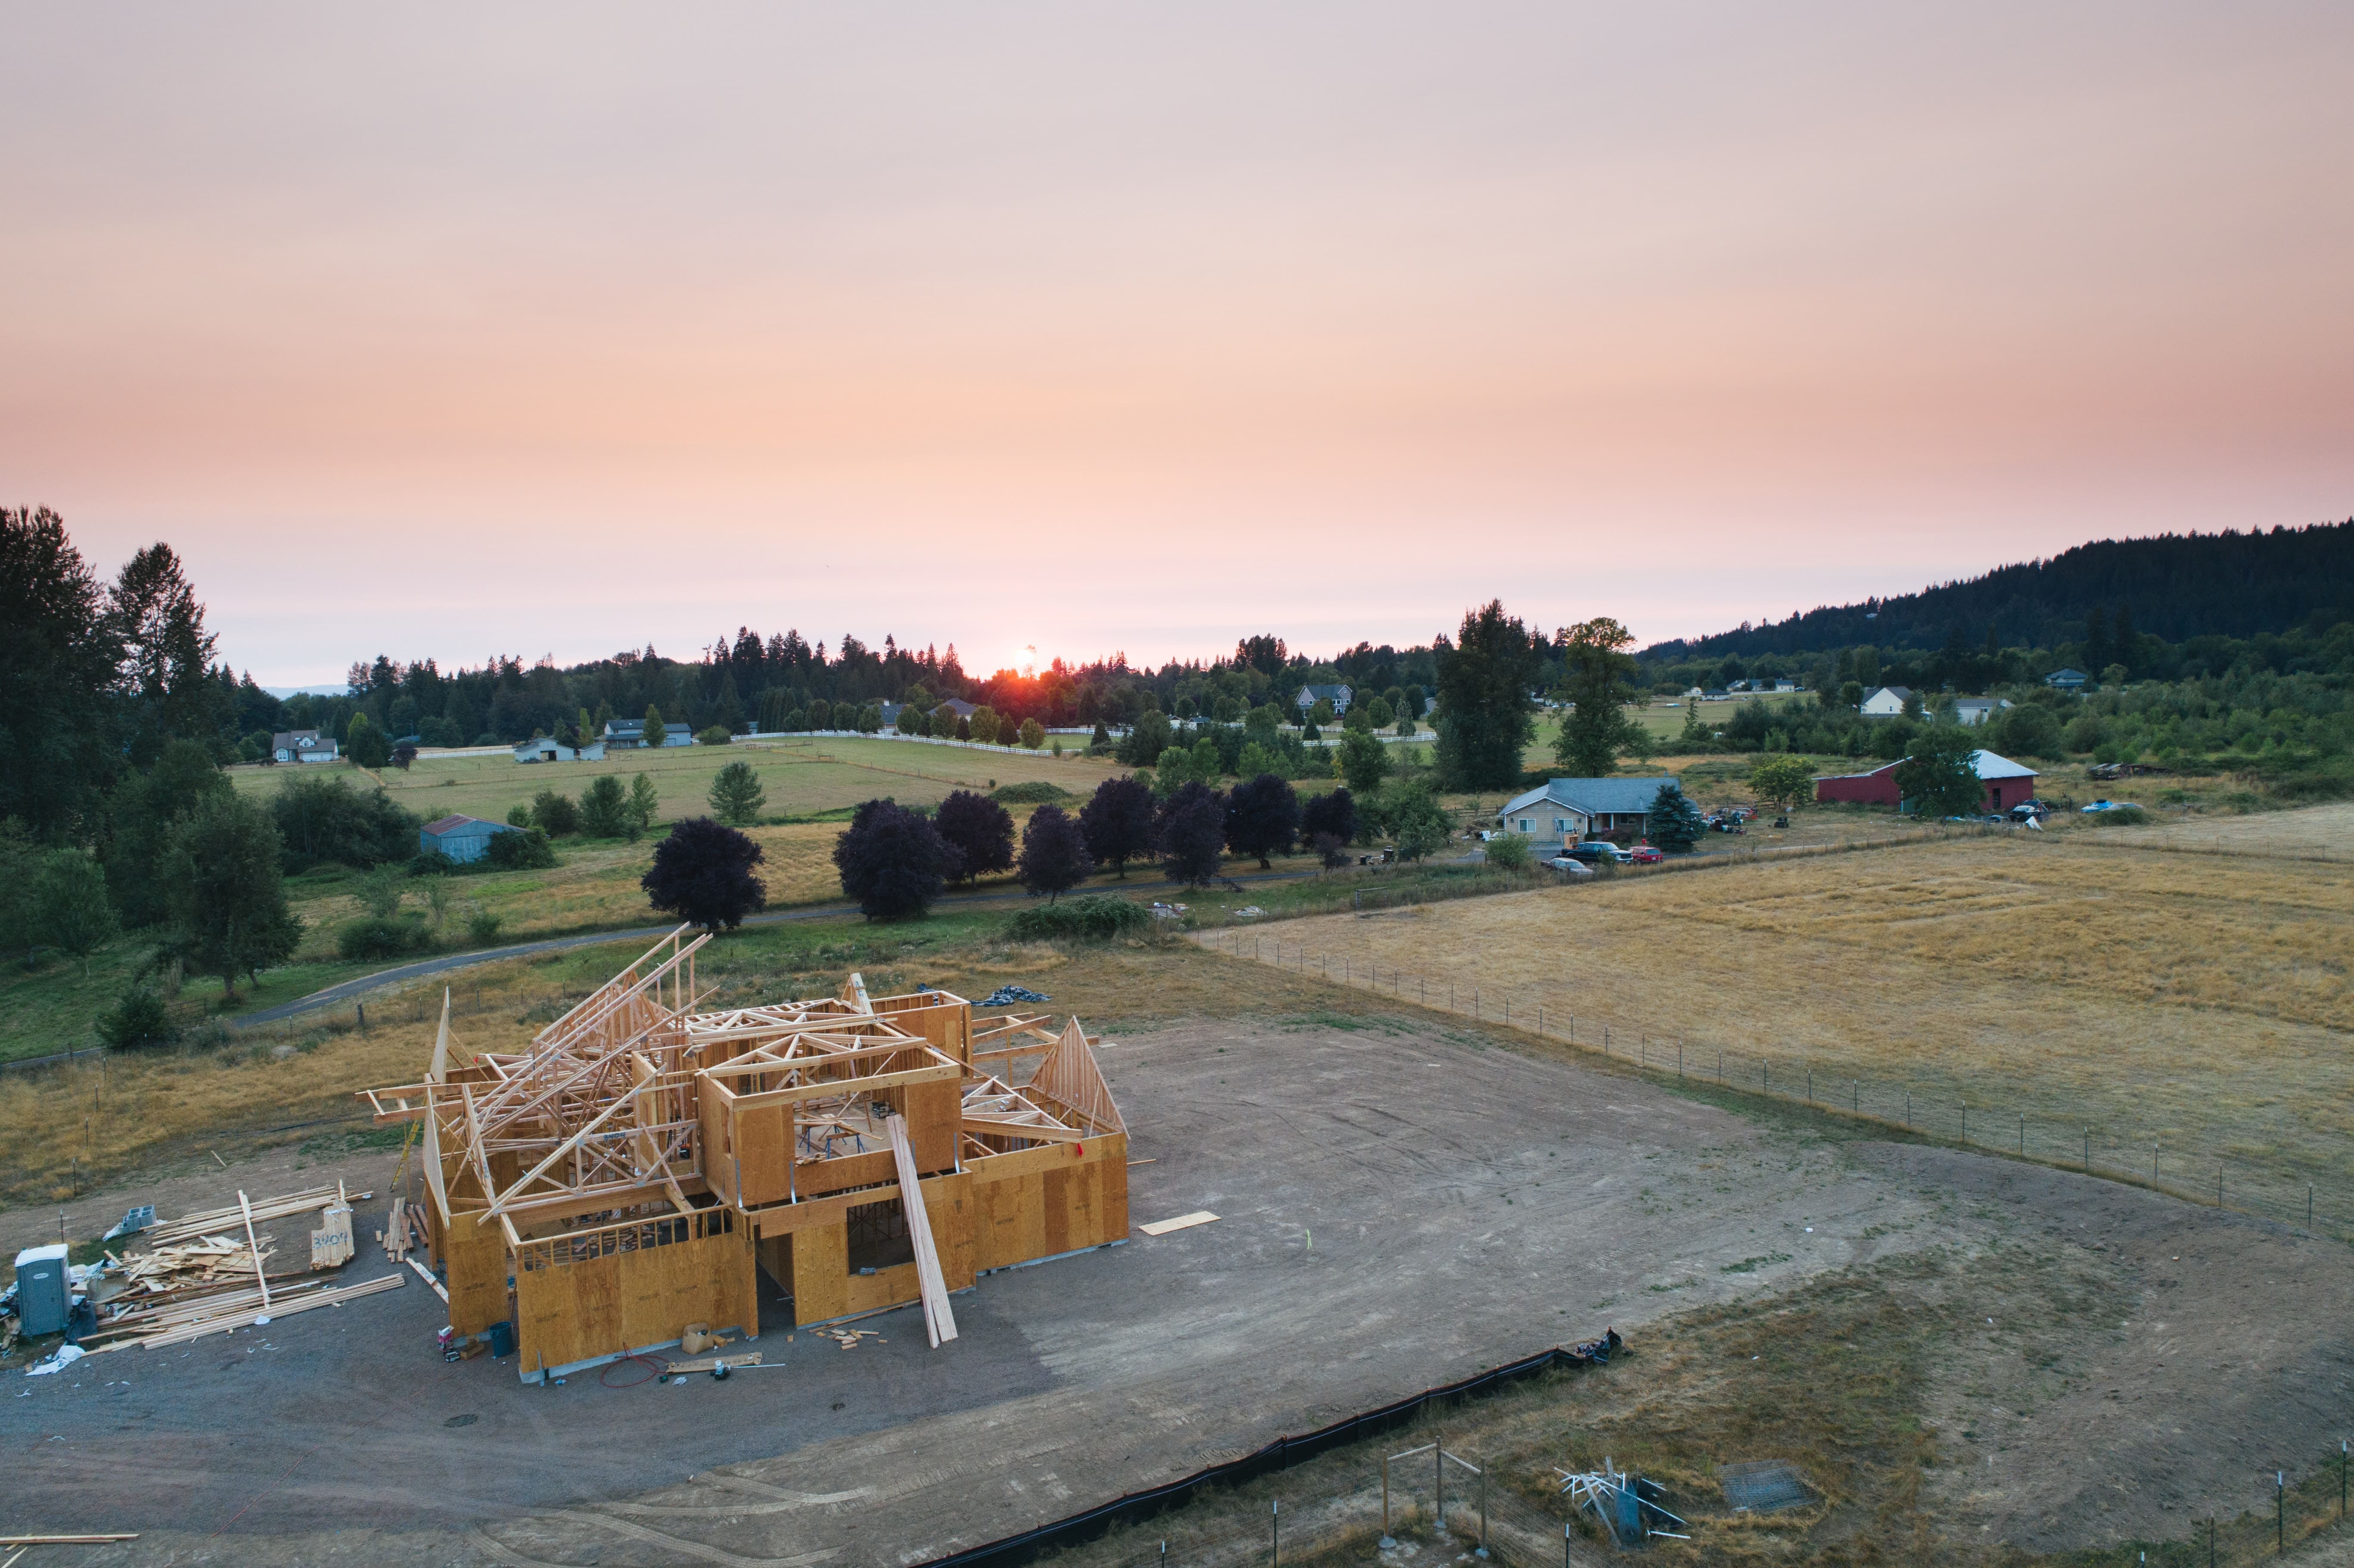
    Once the site is leveled, you have to put up the wooden pillars, which you can use as a template for the foundation. Digging holes and trenches and pouring the concrete is the next step. 

    Please note that once the foundation procedure is complete, the city inspector must inspect the foundation to ensure that the components are up to code and installed well.

    It would help if you had a generator.

    You may be wondering why? But having a generator during the construction process can be helpful, especially when it is dark. Those torches would do no good at night. Krugerpower generators are the best solution for such a problem as they are portable and highly robust.  

    When would you need a generator? You would most need it when your building is ready, and you need to begin with the fixtures and fittings inside. You can also use it in a tent or trailer to keep a lookout. 

    Consider hiring a designer.

    If your pocket allows you, don’t shy away from hiring a designer to give you a hand. A designer can bring you many benefits; one of them is clearing away half the stress and burden off your shoulders. Looking at the floorplan, a designer can guide you better on the spacings, fixtures, and fittings, and guide your choice of the style you chose.

    If you think that a builder can do the job for you, you might want to think again. A builder talks logistics, whereas a designer takes everything into account accordingly. Yes, it is pricey to hire one, but here is a little good news, some designers charge on an hourly basis, so you can hire them only when you need them. 

    One thing to keep in mind here is that you should tell the designer what you want, do not compromise on the things you had been dreaming about, like a spacious kitchen or a sunroom. It is your house, and you are the one who gets to live in it. 

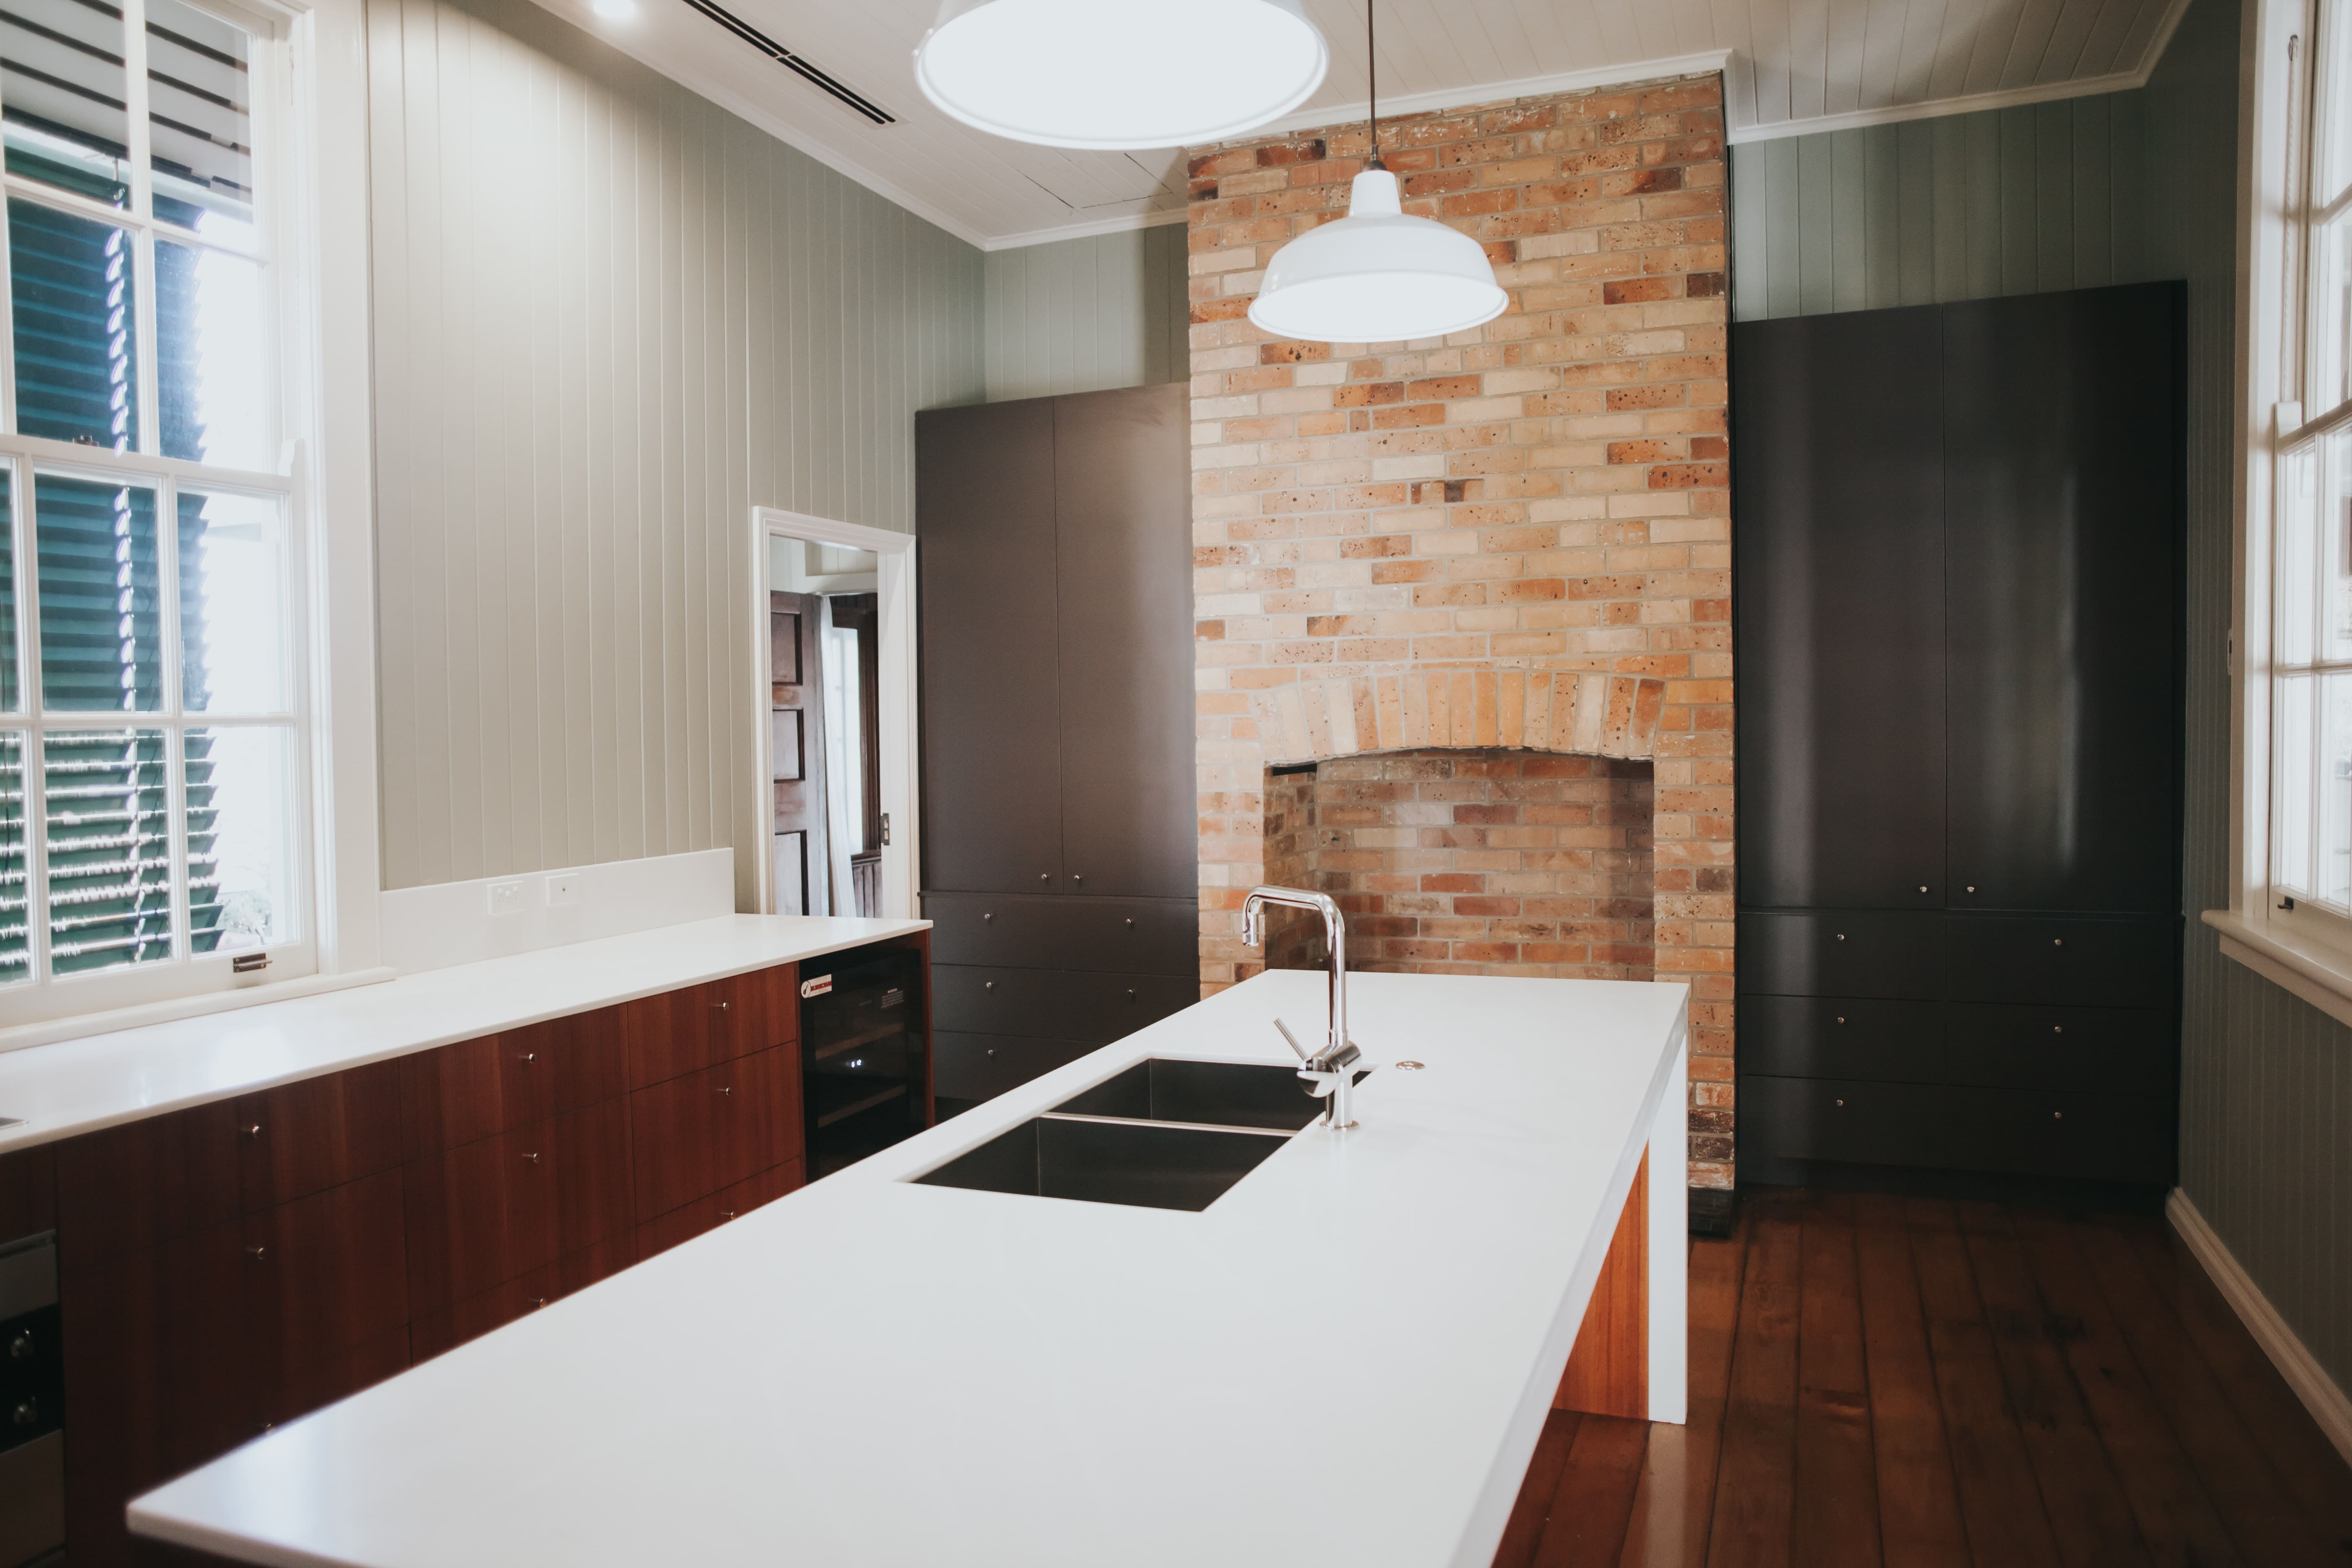
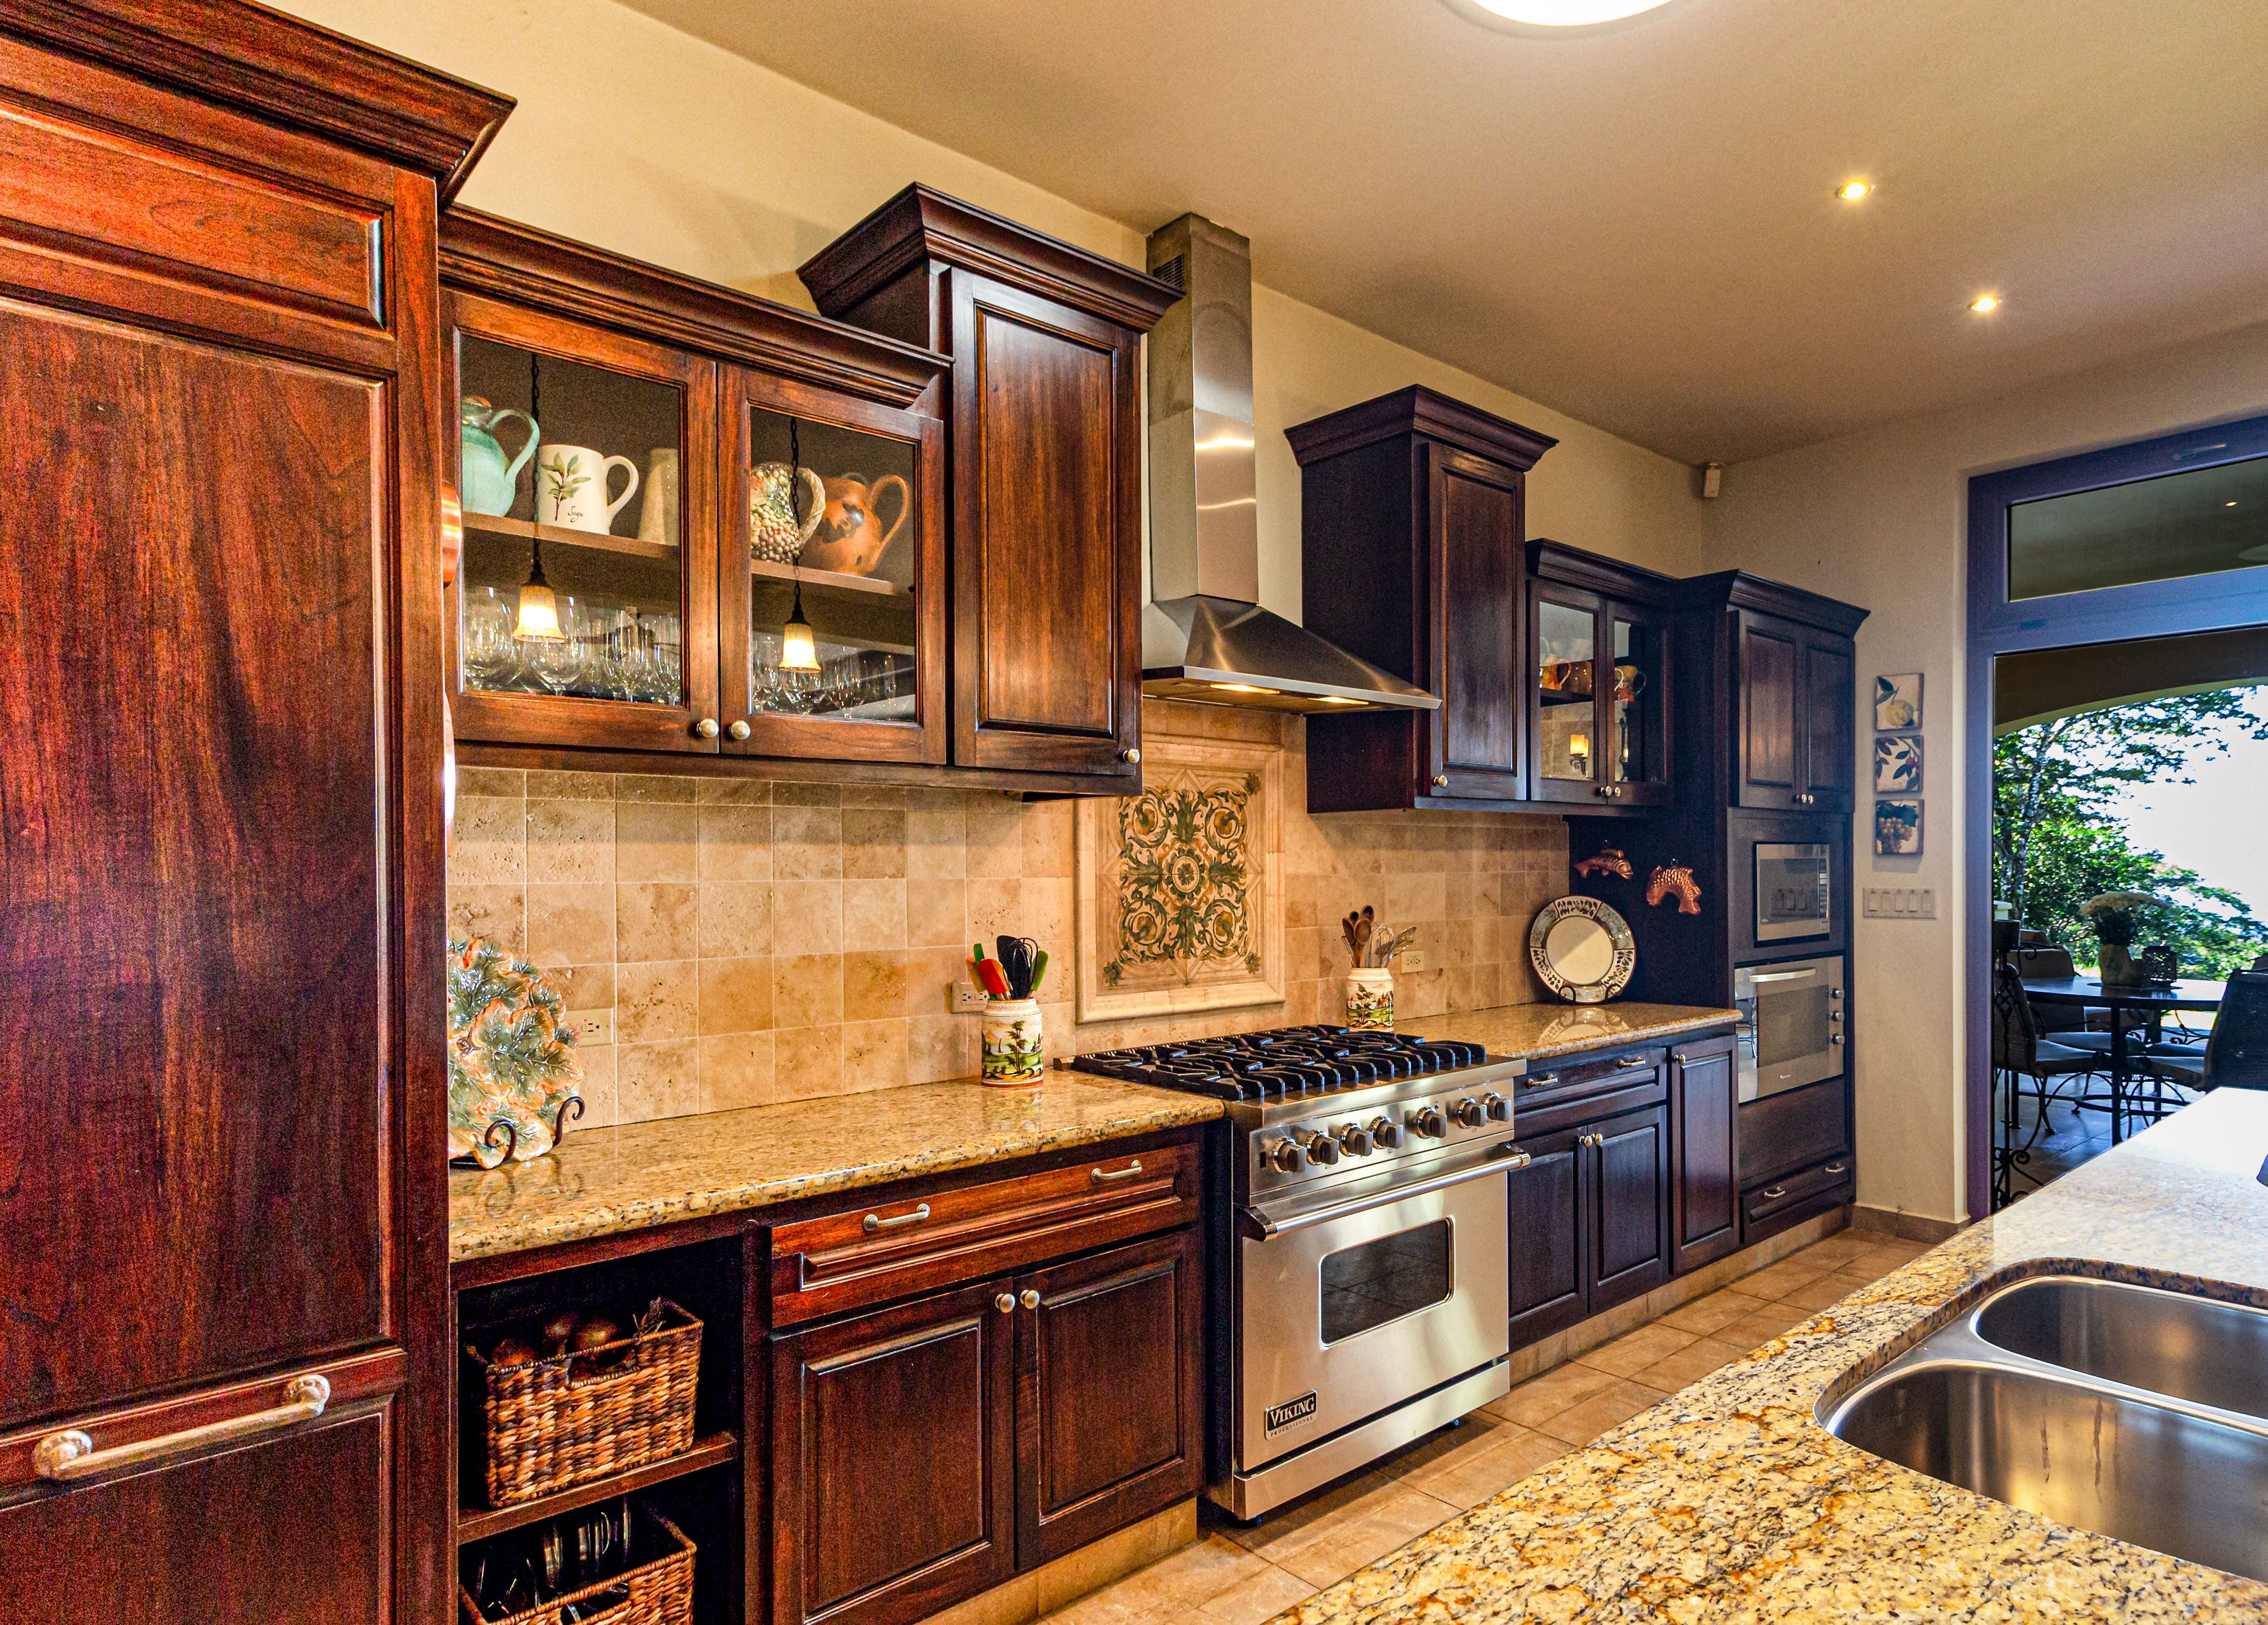
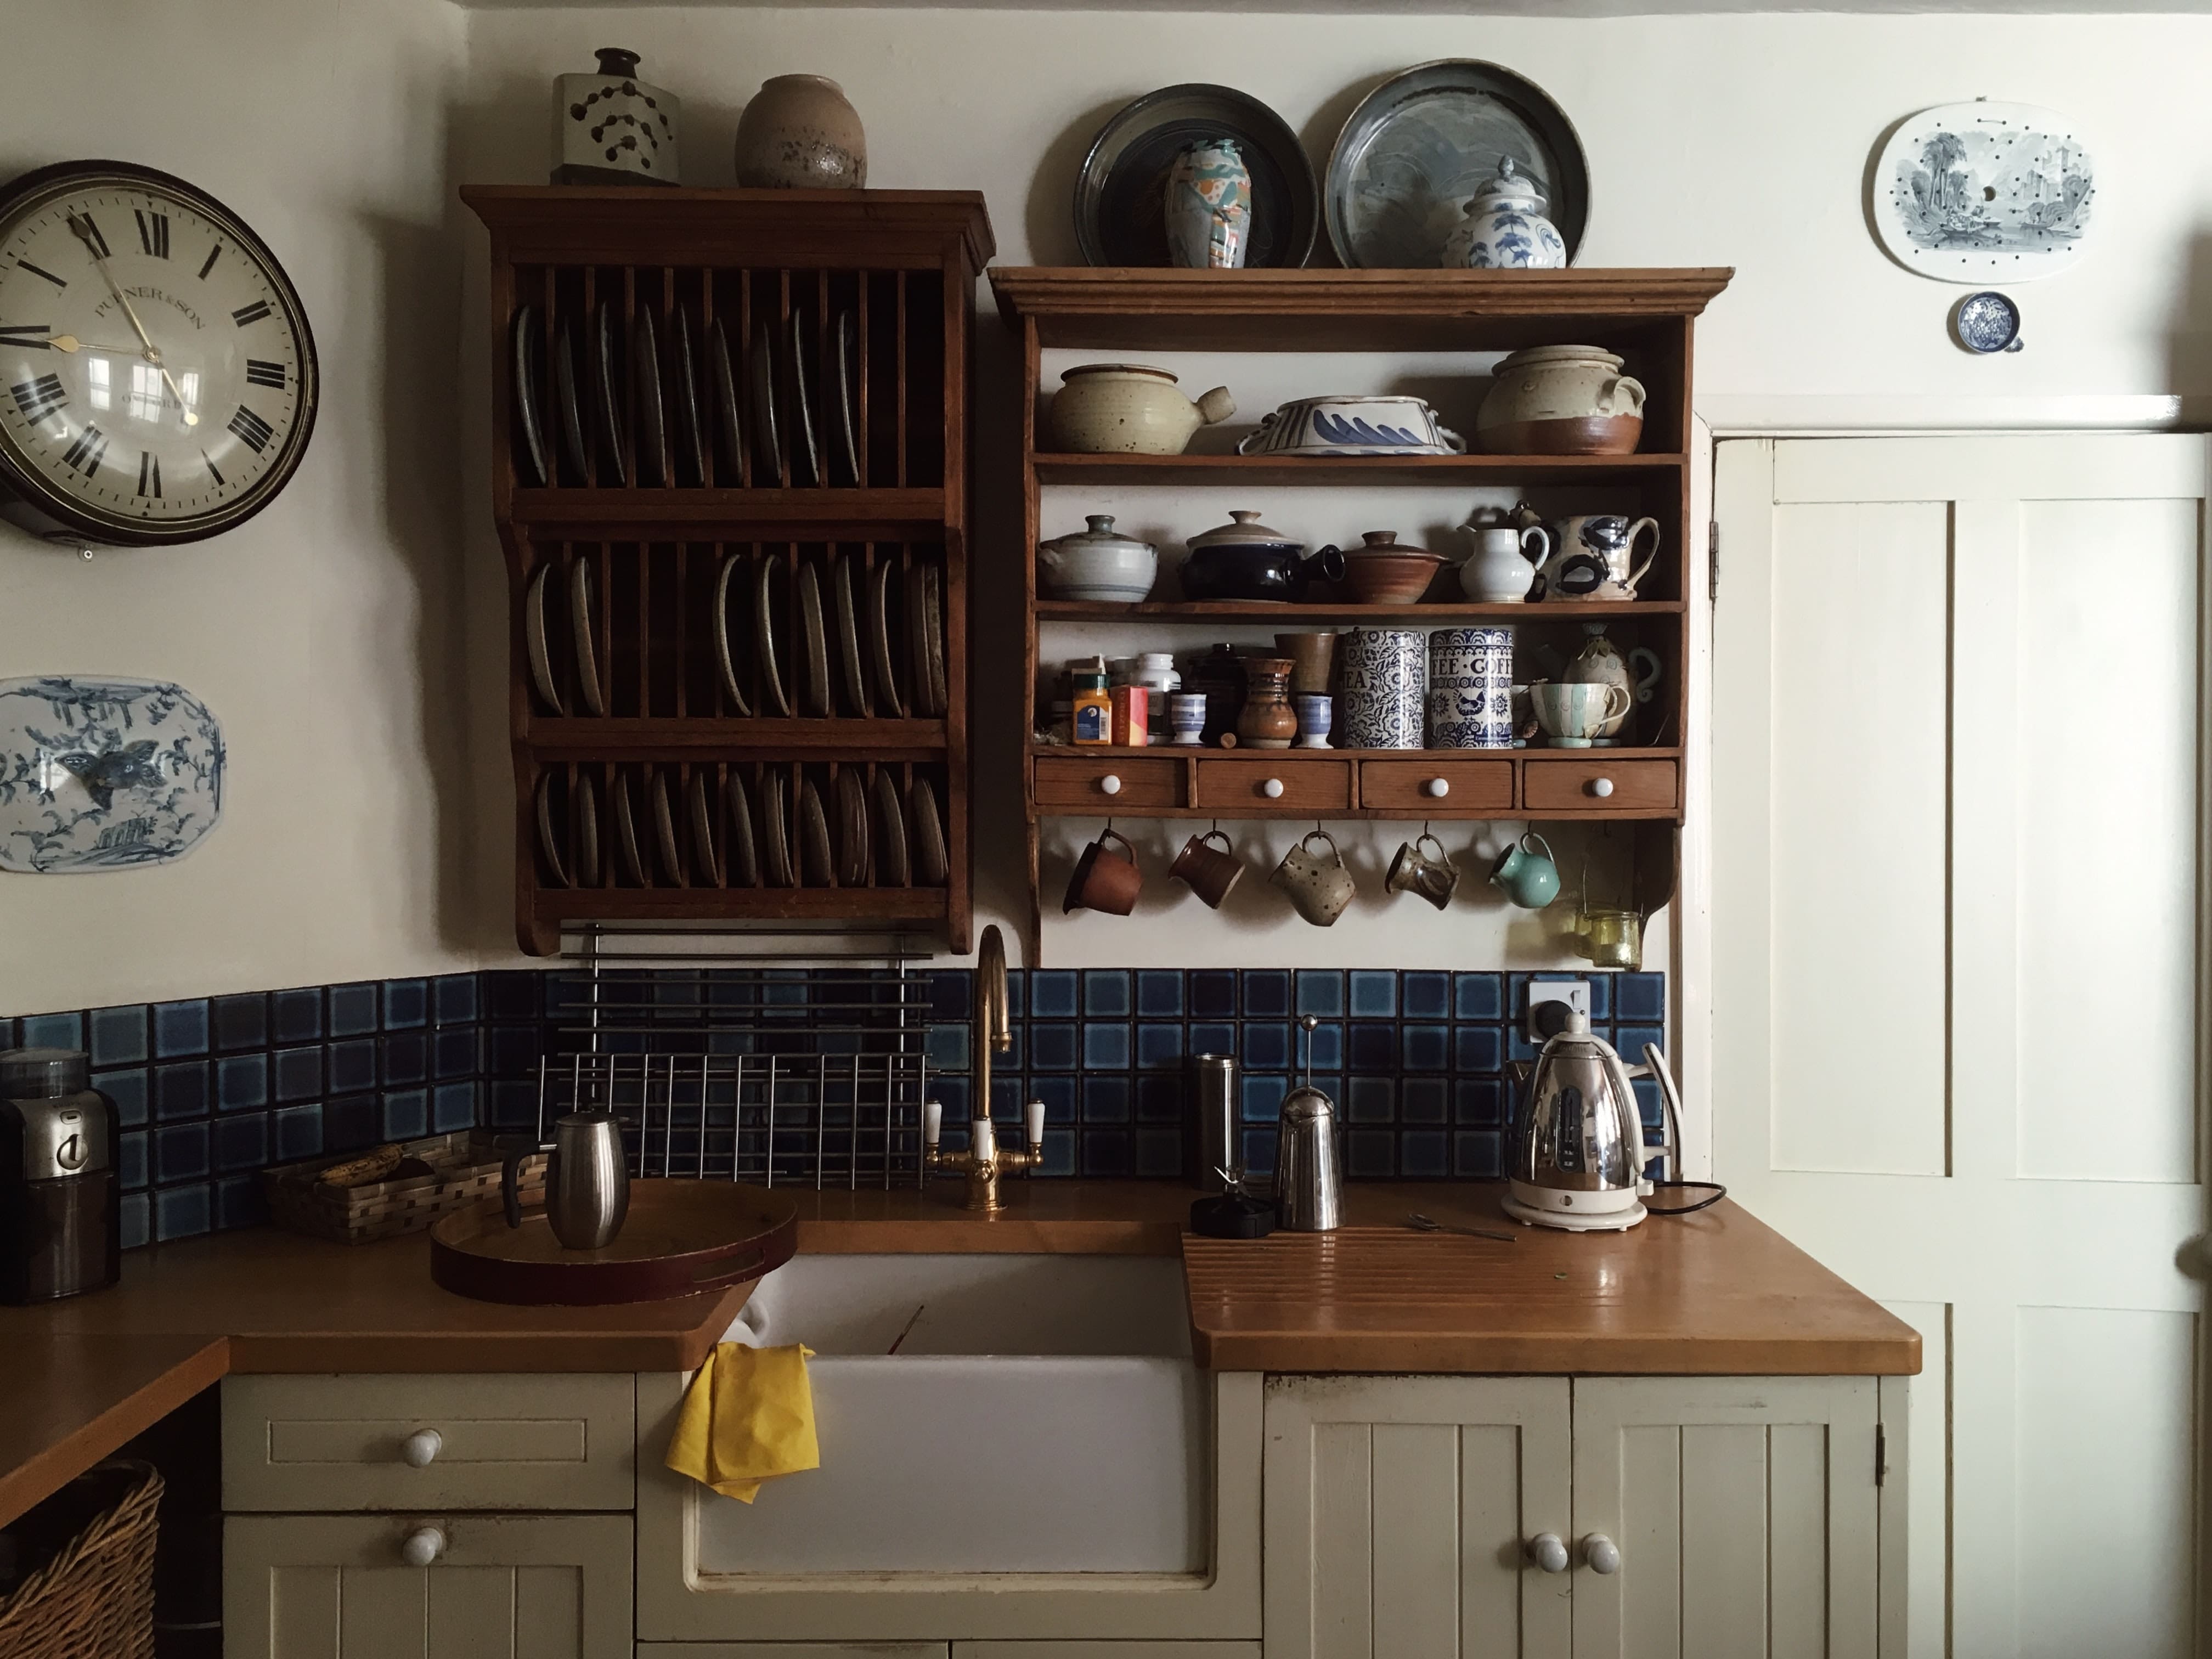
    Fixtures and fittings, electricals, cabinets, furniture and closets

    Having things planned out beforehand can save you time. As the construction takes place, it is advisable to visualize what you would want to add where. 

    How big is your closet space? What size of the bed will fit where? How many cabinets do you need in the kitchen? Do you need a chandelier? How do you want your master bathroom to look like? Answer these questions and more along the way. 

    Conclusion

    As hard as it may seem and sound, the big picture makes it rewarding. You have a dream house set in place, and now you get to live in it. Please note that the construction process and legal requirements vary from region to region. 

  • 10 Advantages of Retractable Fly Screens Melbourne

    10 Advantages of Retractable Fly Screens Melbourne

    If you are living in Australia, you must have known how frustrating it is to live together with flies, insects and other harmful species. It will take out the comfort from your life and even put the lives of your loved ones at risk. You might end up keeping your doors and windows shut for the whole day. However, there is a solution and the fine one that will keep the flies and insects away. The answer is retractable fly screens Melbourne that can be installed in your home doors and windows to keep those unwanted guests away. 

    Retractable fly screens are very popular in Australia. Not just for the reason that they keep insects away, but due to some additional advantages they have to offer. In this post, we will discuss all these advantages in detail.

    1. It Allows Light and Air Into Your Home

    Yes, you can now open your doors and windows when you have fly screens installed at your home. Let the cool breeze enter your home to give you some cool time. In summer, when you keep the doors and windows shut, it might skyrocket your energy bills due to constantly running the air conditioning system. Now, with fly screens present in your home, you can open your doors and windows and have fresh air to enter your nostrils. 

    1. Reduce Sunlight Glare

    Apart from keeping those insects and flies away from your home, these retractable fly screens also protect you from the scorching heat of the sun. Not just that, you can easily enclose your outdoor spaces such as decks and patios with these retractable fly screens to cover your space from the sun. You can enjoy weekend parties with your loved ones in daylight without worrying about sunlight glare. You can raise and lower the fly screens with a remote control to cover the space. All you need to do is to lift them when you are in the outdoor area with your loved ones, enjoying your hot coffee. When you find the glare increasing, you can just lower them down and you are all good to enjoy your time.

    When you decide on a retractable screen door, make sure to contact Go Retractable. Isn’t it fantastic to enjoy the outdoor view without worrying about the sun and its harmful rays?

    1. Flyscreens are Invisible

    Traditional fly screens were not attractive and used to make a light room appear dark. However, those conventional window screens are replaced with retractable fly screens that can be raised fully and can be retracted when not in use. They will disappear completely when you are not using them and it is the perfect solution for you. This facility makes retractable fly screens more user-friendly and convenient and pleasing. 

    1. They are High Quality and Long-Lasting

    Everyone wishes to have reliable and durable products and when it comes to retractable fly screens, they are highly reliable and long-lasting. Once installed, you can have 10-15 years of full functioning life of these fly screens. In addition to that, they are also made from high-quality materials and are easy to clean and maintain too. You will get a good value for the money you have spent on these fly screens. 

    handsome young man installing bay window in a new house construction site

    1. No Unwanted Guests

    Bugs, insects and flies are a real nuisance when you are living in any part of Australia. With these fly screens, you can happily say bye to these unwanted guests. These termites, cockroaches, flies and insects are potential disease carriers and can play with the health of your loved ones. It is the best thing to keep them away and these fly screens serve the purpose very brilliantly. You can have a good quality of life with peace with the presence of these removable fly screens. 

    1. Available in a Wide Range of Options & Look Great

    When you have to choose retractable fly screens, you will be flooded with a wide range of colours, materials, sizes and styles. You will find something that matches your home decor and appeal. There are conventional as well as contemporary designs with finest finishes and classic looks available to give an elegant and aesthetic appeal to your home. You can have the best ambience in your home with these fly screens. 

    1. Easy to Install

    Another thing to mention here is the easy installation process. Retractable fly screens Melbourne are easy to install on your windows and doors of any size. Whether you have bi-folding windows or sliding windows or sliding doors, you will get the shape and size for all types that fit them. You can also customise them as per your wishes and preferences. 

    1. Easy to Clean

    When it comes to cleaning the fly screens, you don’t have to have headaches as they are easy to clean and maintain without any need to hire a professional for the job. 

    1. Add the Value to Your Home

    Retractable fly screens play a vital role in your home decor. Furthermore, these retractable fly screens will give a pleasing, attractive look to your home and add value to it. Even real estate agents accept the fact that homes with fly screens are easy to sell compared to homes with no fly screens. 

    1. Affordable Price

    Top-notch quality retractable fly screens are available at the best price in the market and you don’t have to spend a fortune on that. Also, the value of the money you have spent is incredible. 

    Conclusion

    Retractable fly screens are versatile, attractive and redefine your home completely. All you need is to find a reputed brand and ask the manufacturer to install them in your home to have a healthy and protected life. 

    Author Bio

    Amelia Johnson is an interior design consultant at Metablinds. She is an avid reader of home interior and home decor. She loves to write on the home interior, home decor, home renovations. Her ultimate objective while writing these topics is to help her clients to increase the beauty of their homes. You can follow her on Twitter.

  • Common Problems New Homeowners Face and How to Address Them

    Common Problems New Homeowners Face and How to Address Them

    Before you dive headfirst into the process of buying a home, you’ll want to make sure your budget accounts for the inevitable repair and maintenance expenses you’ll experience as a homeowner. From the occasional leaky faucet to a crack in the driveway, owning a home isn’t destined for perfection, there will eventually be a dishwasher that needs fixing or a toilet that needs plumbing.

    Once you become a homeowner, you assume the responsibility for every square foot of your property. Unlike renting, you won’t be able to rely on your landlord to call an electrician every time the power goes out unexpectedly. So, you’ll want to prepare for every worst-case scenario before you commit to homeownership. However, with the right preparation and a proactive approach to common household problems, you’ll be able to troubleshoot these unwelcome guest appearances in no time. To avoid being blindsided, here are some common problems homeowners may face and their accompanying solutions.

    Invasion of bugs

    Bugs gain access to a home through cracks, holes, and gaps within the structure, which can be found on foundation vents, poorly-sealed doors, window ledges, and crevices between the siding and the foundation. When they do find their way in, these insects can be more than a nuisance. Some insect species can cause serious harm to your family, so it’s necessary to seek out a pest control company like Moxie Pest Control. Leave it to the experts to locate the bugs crawling around your home.

    Your pest control service provider will perform inspections to determine the extent of invasion, entry points, and eliminate any pests that may threaten the health and safety of your loved ones. To ensure the success of your pest control efforts, you should make regular appointments for servicing, adopt prevention measures, and even supplement professional services with DIY solutions.

    Loss of heat and cool air

    The living conditions in your new home will be negatively impacted if the house stores too much heat or loses it too quickly. Unexpected decreases or increases in heat retention can result from unsealed cracks on the doors, windows, walls, poor insulation, weak HVAC system, and leaky ductwork.

    The first step in solving this problem is to check various parts of the house to uncover its origin. Once you discover these unsealed gaps, be sure to seal any existing cracks. If that doesn’t resolve the issue, you may have to invest in energy-efficient windows/doors, or you might have to install a better HVAC system. 

    A number of gas companies can also assess the energy efficiency of your home. If you suspect that your losing heat or cold area at exorbitant rates, you can take advantage of their expertise to make the necessary improvements and ultimately lower your energy costs.

    Presence of mold

    Moisture buildup from leaking pipes, roof, and window damages which allows rain to seep into the house and introduces dampness in the basement can sustain the growth of mold. Some noticeable signs of thriving mold signs include peeling wallpaper, strange smells in the air conditioning system, colored/dark spots on the walls, and an overall musty odor. Once you ascertain that you have a mold problem, you should have it tested, find its cause, and fix it.

    You can remove the mold using a heavy-duty cleaner if it’s the result of condensation and covers under 3×3 feet of square footage. When you apply this cleaner, make sure you put on protective gloves and goggles. However, if it’s the result of contaminated water, you should hire a professional. 

    Water in the basement

    If you notice water in your basement, chances are, you may already be experiencing issues with your plumbing or drainage system. Water fixtures and pipes in older homes may have existing problems, so you’ll want to inspect them to determine their condition and make the necessary repairs.

    Poor drainage may also lead water to pool in your home, rather than serving its purpose of carrying water away from your home. Take time to assess your drainage system, including the gutters, and develop a maintenance plan to ensure that you live comfortably in your new home. If you don’t have the time to develop your own maintenance plan, you’ll want to recruit the experts.

    Water damage can be a major issue for homeowners and has the potential to garner hundreds and even thousands of dollars in expenses. To avoid experiencing costly flooding or water damage, it’s important to address these issues as soon as possible.

    Smelly carpet

    Carpets can accumulate odors that may linger in the air for a prolonged period of time, making it hard to enjoy your brand new home. Musty odors in carpets can result from collected moisture underneath the carpet’s surface. This moisture can collect due to overwatered potted plants, humidity, past flooding, or spills. If left unresolved, the dampness can cause mildew and mold, which intensifies the smell and can even pose health risks.

    You can solve the problem by hiring a professional carpet cleaner to deep-clean your carpet’s fibers. If that doesn’t work, consider replacing the rug. If you do choose to dispose of the rug, make sure you also remove the carpet pad, as a musty carpet pad could be the origin of the smell.

    Faulty power outlets

    If you buy an existing home rather than building your own, you may experience issues with one or more of its power outlets. Electrical outlets can stop working due to a short circuit or temporary circuit overload. In rare cases, it can be an outcome of a loose wire in the electrical box.

    To solve the problem, visit a hardware store to buy a multimeter, then test each outlet to locate the faulty outlets You can easily replace the outlets that do not work. However, if that remedy doesn’t solve the issue, hire an electrician who can take a more in-depth look and offer informed solutions.

    Rotten wood

    You can find rotten wood in any area with humidity, moisture, and mold problems. Therefore, conduct a comprehensive assessment of your home, including the roof, the base, and pay particular attention to your window sills. If your home is older, you’ll want to be wary of comb-joint materials that were once rampantly utilized. These comb-joint materials are prone to faster water penetration, meaning expedited rotting.

    As you inspect your home, be sure to check the deck’s maintenance work if made of wood, and determine whether or not it can withstand the cold weather. Tackle the issue by removing the rotten wood, applying a polyester filler, and hardening salvageable wood by using a wood hardener.

    Conclusion 

    It is best to solve these common issues that new homeowners may encounter before they become too severe. Adequate knowledge, hiring the right people, planning, and keeping an eye on your home help target and solve any household problems before the damage is unrecoverable. 

  • Black High-Gloss Kitchen Cabinet Designs

    Black High-Gloss Kitchen Cabinet Designs

    The color for every day may be dark but once you get an opportunity to take a better look at the designs. You will surprise at how these styles describe the classy look. These designs include a modern look and traditional designs that will impress you. Well, read and enjoy and take look at the black high-gloss kitchen design that will make you smile. When you see a black high-gloss kitchen cabinet, you will change your mind when building your home kitchen. 

    Impressive Look:

    Black is a solid color, it also indicates a serious tone. This is the ideal for a romantic and modern feel. The kitchen cabinets are essential for the design and appearance.  You may think that black is always the right color for it. Black high- gloss kitchen cabinets are now a new trend for kitchen design. Black is a good contrast for other color schemes in the house, making each of them pop out. You can pour a little black in the kitchen. Black high-gloss kitchen cabinets would enhance any style of kitchen. It is classical, fresh, or rustic. The shiny black high- gloss kitchen cabinet is the main focus of your kitchen. Here are a shiny black best kitchen design that may expand your view on why black is so beautiful.

    The new satisfies and courageous:

    Black high-gloss kitchen cabinets enhance the shiny light blue backsplash and perfectly fit with white cabinets paired with white flooring, create more space, and adding a pleasant and modern feel to this expertly built home kitchen.

    The Victorian: 

    Owners mostly used gray-stained black wood such as walnut and strawberry. A wall sconce and a marble or granite work surface are the perfect components for a Victorian-inspired kitchen design set against glossy black cabinets. Your friends and visitors will feel like it.

    The minimalist one:

    Pulled down to the whole needs. This minimalist kitchen equipped with new high-gloss kitchen cabinets with polished finishes. At the same time, it is stylish and fresh.  The dark paint of the cabinets enhanced accuracy with the white walls. It makes the kitchen design look beautiful, simple but stylish.

    The Pop of Color:

     You can add any color. You can mix the color of various kitchenwares to enhance the formal tone. It established by the black high-gloss kitchen cabinets. Attach a little shiny touch from the other equipment, and you’ve got a full sweet smile

    The Elegant One:

    Black is graceful color. When it combines with the right artificial light, it produces the most heavenly appearance for a home kitchen. Hanging light fixture adds a stylish impression given by black cabinets.

    There are several beautiful black high-gloss kitchen cabinets. These are taking up modern kitchens design today. Black is confident, stylish, the romantic because black is the right color.

    Kitchen Black:

    This style is a futuristic look. It loves by artists who want to mix and match the classic look of the traditional era. The aluminum and necklace lights enhance the perfect blend. You are certain to think because you enjoyed them. You cannot wait for the next topics that we’re going to bring. The design inspires by a dress a friend saw in the market that looks great a black dress. The same as how we saw the designs of the kitchen already.  You may also take a look at bold and black Kitchen Designs.

  • Decorating the Christmas tree – creative ideas and tips

    Decorating the Christmas tree – creative ideas and tips

    A festively decorated Christmas tree has always been the symbol of Christmas and Christmas Eve. When the warm light of the tree candles illuminates families’ living room, children’s eyes light up, and the long-awaited gift-giving can begin. There are no limits to creativity when it comes to Christmas tree decorations.

    In some families, it is a long-standing tradition to decorate the tree in the same colors year after year, while others like to try out new decorations to make your Christmas tree shine in a new festive look. Some people choose fibre optic tree for their Christmas decoration as well. To decorate the Christmas tree, we have summarized useful tips that will showcase your tree for Christmas.

    The color scheme: Classic red-gold, wintry blue-silver or metallic colors

    A Christmas tree looks harmonious and complete if you choose a color scheme. The selected colors should match the room in which the Christmas tree is placed. One differentiates between warm Christmas tree decorations or a rather cool Christmas decoration. For example, a warm fir tree could contain red, orange, and gold elements. In contrast, a fresh tree shines in green, blue, or silver. Here are some popular color schemes that you can use as inspiration for your Christmas tree.

    The classic – Christmas tree in red and gold

    If you want to decorate your Christmas tree very traditionally, you can decorate your fir tree with red and gold balls, as in the picture.

    The colors red, gold and green, are traditional Christmas colors. These are less modern than other color combinations, but they are timelessly beautiful.

    The warm red harmonizes very well with the green needles and radiates Christmas coziness. Golden elements such as bows or a star on the top of the tree look particularly elegant.

    A Christmas tree in the winter colors of white, blue and silver

    A decorated Christmas tree in the colors white, blue, or silver accentuates Christmas in the winter-cold season.

    White icicles or silver tinsel look like a snow-covered fir tree. This color combination looks very noble and is suitable for rooms that are modern and minimalist.

    If you choose a Christmas tree with this color combination, you should avoid red or yellow tree decorations.

    Christmas tree with metallic colors like gold, silver or bronze

    Metallic colors such as gold, silver, or bronze can be combined very well. These color combinations appear modern and noble. You can underline this effect by using colorless lights.

    Natural materials are inexpensive ways to decorate Christmas tree decorations. Pine cones and small branches can be easily combined with self-made jewelry.

    Wooden stars, reindeer made of felt and homemade cookies and gingerbread, not only give the tree an individual design and bring a Christmas scent into your living room.

    The correct attachment of the tree decoration – a brief guide

    When the Christmas tree has found its safe place, you can start decorating. If you use a light chain, this should be attached to the Christmas tree first so that the cables can be laid safely. When attaching the lights, go down in a circle from the top of the tree and place the individual candles as far out as possible.

    In the next step, you can decorate your tree with bows. For a harmonious impression, all decorative elements should be distributed evenly over the tree. You can then attach the Christmas balls. Start at the bottom of the tree with the gigantic balls; the medium and small Christmas balls hang in the upper part of the tree. Heavy balls and decorative elements should not be attached too far out, but closer to the trunk of the fir tree. The tree is most reliable at these points and can carry a higher weight so that no branches are pulled down.

    If you decorate the outer and the inner branches and twigs, the Christmas tree gets more visual depth and looks more versatile and perfect. To achieve this, you can, for example, attach medium and small balls in the upper area and the gaps.

    If you decorate your Christmas tree with angel hair, tinsel, or jewelry chains, you can attach them in the last step. However, it would be best if you keep in mind that the thin silver threads must be removed entirely before the Christmas tree is disposed of.

  • Light-Filtering Blinds vs. Blackout Shades

    Light-Filtering Blinds vs. Blackout Shades

    Searching for window coverings for your office or commercial space can be overwhelming due to the sheer number of options available. Two common options include light-filtering blinds and blackout shades. You might think terms are synonymous for the same type of window treatment; however, light-filtering blinds and blackout shades actually differ in style and functionality, and how they can help meet your lighting needs and desired aesthetic. 

    In this article, we will explore why filtering light for your commercial space is important, as well as the unique benefits of light-filtering and blackout window treatments.

    The Cost of Unfiltered Sunlight

    Unfiltered sunlight can lead to some costly consequences for your interior. Exposure to ultraviolet (UV) rays from unfiltered sunlight — the same rays that cause skin damage — can discolour, fade and warp furniture, carpets and more. In extreme cases, UV rays can even weaken otherwise durable materials.

    This typically isn’t top of mind when furnishing your office or installing the flooring, it should be. Replacing flooring or furniture means an unnecessary expense for your business, and it can be challenging to find identical furnishings or matching flooring if the manufacturer discontinues the lines.

    In addition to damaging property, unfiltered sunlight can cost you in another significant way. It can increase your utility bills during the summer, by making you more dependent on air conditioning to moderate the temperature for employee comfort. Glare caused by unfiltered sunlight can also result in a loss of productivity by making computer monitors challenging to see.

    Light-Filtering Blinds vs. Blackout Shades

    Now that you’re up to speed on the consequences unfiltered sunlight can have in commercial settings, it’s time to examine two types of commercial blinds and shades designed to mitigate these effects: light-filtering blinds and blackout shades. 

    Light-Filtering Blinds & Shades

    The goal of light-filtering window treatments is not to block out sunlight completely, but to diffuse it, thus reducing its intensity and establishing a more comfortable environment for employees and customers. 

    Of the two types of commercial window coverings, light-filtering blinds are the most versatile and can be found in a variety of commercial settings, including restaurants, hotels, stores and other commercial businesses. However, light-filtering blinds only offer a moderate degree of privacy. In spaces where privacy is of utmost importance or where achieving total darkness is necessary, blackout window treatments are the best solution. 

    Even when light-filtering blinds are used, some light can still enter between the slates. Therefore, these window treatments are less ideal for spaces where blackout conditions are favourable. For example, in a conference room where projectors are used for presentations. For a greater degree of light control, light-filtering blinds can be paired with more opaque curtains or drapes that can be closed when the situation warrants it.  

    Light-filtering shades feature many of the same benefits as light-filtering blinds. The materials used for shades tend to be sheer or thinner, allowing diffused sunlight to permeate the space. Installing them will help create a more comfortable work setting. 

    Light-filtering shades can also help you maintain privacy. They make it difficult to see inside, but still provide a semi-permeable view to the outside world. Motorized shades are a popular option for office or commercial spaces, as some of these window treatments can be programmed to automatically raise and lower throughout the day, or can be controlled remotely. 

    Blackout Shades

    As the name implies, blackout shades have a darkening effect that is ideal for environments requiring total darkness or privacy. Blackout shades are commonly used in hotel rooms, allowing customers to get quality rest regardless of the time. Certain places of business also require blackout shades to maintain privacy, including hospital rooms, spas and doctor exam rooms. 

    In addition to privacy and quality sleep, when used strategically throughout the day, these commercial window coverings can reduce your heating and cooling costs, as well as your environmental impact. 

    It’s not only light that blackout shades reduce. These thicker window treatments boast some noise insulation as well. Though not specifically designed with sound absorption in mind, blackout shades can help reduce the din of sound from the outside world. This is a great addition for businesses located in a busy city core where street noise can be distracting. 

    Finally, both light-filtering and blackout shades can help to keep office furniture and flooring looking newer for longer. You’ll experience less discoloration and overall sun damage than you would otherwise. 

    As mentioned, you want to be strategic with your use of blackout shades. While they will effectively block out sunlight, most employees and customers prefer natural light to artificial light, so it’s best to only use them when the sun is most intense or to opt for light-filtering shades instead. 

    Choosing the right window treatment for your commercial space can be difficult, so it’s important to begin the process with an understanding of the benefits of each option. To learn more, contact your commercial window treatment provider.

  • 4 Signs It Is Time To Replace Your Home’s Windows

    4 Signs It Is Time To Replace Your Home’s Windows

    While sometimes expensive and time-consuming, home renovation and improvement is a rewarding process. Besides improving the resale value of a property, home renovation projects like new roof and gutter installation also improve the aesthetic value and performance of a home. 

    However, there are certain parts of our home that we tend to overlook because of the fear of expensive repairs and replacements.

    One example of the same is the windows of our homes. Most of us tend to take our home’s windows for granted and completely forget that they need to be maintained and repaired from time to time.

    In this article, we will be discussing the signs that are indicative of pending repairs (or replacement) of your home’s windows.

    Without further delay, let us begin:

    Visible Damage

    While windows are made up of mostly glass panes, they are designed to be very durable. After all, windows are part of your home’s first line of defence against natural elements.

    Being subjected to these natural elements, it should not be surprising if your windows are mildly scratched or scuffed from time to time. Thankfully, these are not signs of serious damage.

    However, other visible damage, like rotten frames or visible development of mole are serious issues. If you notice such damage, you must contact a window repair and replacement contractor at once.

    Damaged frames not only mess with the curb appeal of your home but also compromise your home’s insulation abilities.

    Condensation Between The Layers

    Double glazed windows have recently become a popular choice among homeowners. While these are great from the insulation point of view, there is a unique problem that some double glazed windows are prone to- condensation.

    Condensation is usually a sign that the double glazing has failed. The solution for condensation between the window panes is usually a simple window glass replacement.

    Word of advice, if you do plan to replace your window glass, it is best to call a professional. With a professional installation job, you can rest assured that the same problem will not bother you for a very long time.

    Closed Windows Letting In Drafts Of Air

    If you find yourself feeling cold because of a breeze, despite closing your windows, then there is a good chance that your windows have developed a crack.

    However, other reasons may include improper sealing of windows or simply a subpar installation job.

    The drafts of air can dramatically affect the interior climate of your home. This may result in your heating or cooling appliances working twice as hard. This, in turn, may reflect in increased energy bills.

    Similarly, if your windows are letting in outside sounds, it is also an indication of poor installation or improper sealing.

    Therefore, if you feel your windows are letting in outside air (or sound) despite being closed, it is a clear sign that there is a need for window repairs.

    Trouble In Closing/Opening Windows

    Problems with opening or closing windows can be caused due to a number of reasons. Some examples include imbalances caused by improper installation and damage to the moving parts and hinges of the windows.

    Not being able to close or open the windows beats their whole purpose and also compromises the safety of your home. Hence, this problem must be dealt with at the earliest.

    Conclusion

    These were just some of the signs that may indicate there is something wrong with your windows. Did we forget to mention some signs of window damage that you have experienced before?

    Tell us about them in the comment section.

  • Top 10 Tips To Get Your Swimming Pool Ready For The Summer

    Top 10 Tips To Get Your Swimming Pool Ready For The Summer

    The scorching heat of summer is upon us and it’s the perfect time to dive into the pool to cool down. But just filling up & dipping in your backyard pool isn’t the right way to go. You have to take certain steps to make sure your swimming pool is ready for the summer.

    Opening a pool in the right way is equally important for both the swimmers & the pool. Making sure that the chemical components of your pool water are in a stable condition is crucial. By doing so, you will be omitting the chances of getting skin-prone diseases. Deciding to get your pool ready without proper arrangements most likely will cost you big time. You may end up having algae-infested water, musky white clouds, etc.

    If you’re wondering about drifting on your floaties, sipping a pina colada in your backyard pool, we will be glad to help you. So, without further ado, let’s jump right at some essential steps that you should consider taking before opening your pool for the summer.

    1. Clear Out the Debris

    Most of you might or not have kept your pool covered during the winter. Still, there can be plenty of debris. There’s always a good chance that a fair amount of dirt, twigs & debris may find its way into the pool.

    The first thing about preparing your pool is to clear them all out. A broom is always an excellent choice to sweep the debris. If you have a cover over your pool, the water probably has gathered on top of the cover. In that case, you can go for a mesh net to properly scoop out the water. 

    Over in the next points, we are going to be talking all about manual labor and how to get your hands dirty. Nowadays a lot of people even prefer robotic pool cleaners so they can just sit back and relax. To know more about them check out https://roboticpoolcleaner.org/

    2. Get Rid of the Pool Cover

    After clearing the surroundings of your pool, you need to remove the pool cover. 

    There may be debris, leaves, twigs, etc. So, be prompt in removing the covers. You can use a vacuum cleaner or a mesh net for this purpose. 

    Don’t worry if after removing the pool cover you find debris on the pool water. It’s natural. You don’t need to panic. You can always skim your pool to clear out all the debris. 

    3. Brush the Ladders, Steps & Walls

    We often overlook brushing the ladders, steps & walls. It is always preferable to brush them so that it won’t be slippery. It also ensures proper safety for elderly people & the younger ones. Besides, who doesn’t like a shiny pool? Brushing will give your pool a brand new look that you have always wanted. So, get on with it. 

    4. Use Vacuum Cleaning

    Vacuum cleaning is essential for an out-and-out circulation of your pool water. The debris & other unwanted particles that once were floating on the surface of the water usually falls down to the bottom. 

    And sometimes it’s hard to clear them out only by skimming. So, using a vacuum cleaner would be the most convenient thing. Along with cleaning the water, it will ensure the necessary circulation too. 

    5. Never Empty Your Pool

    This is a myth that has been speculating around for a long time. People often think that emptying the pool & then again refilling will solve most of the problems. But this is entirely wrong. Though emptying does little good,  instead it can create more problems in return. 

    For instance, if you have a vinyl liner in your pool, emptying it will leave the vinyl liner vulnerable. Eventually, it will get dried up & form leaks in the liner. Furthermore, it will open up cracks in the walls & liners. 

    One crucial point everyone forgets to consider is to determine the high water table. If you empty your pool without considering this option, it may just cost you big time.

    6. Install All Types of Pool Equipment

    Check if you have all the necessary equipment ready. You may need a skimmer to clean the debris from the surface of your pool water. You may require a vacuum pump to clean under the water. Brushes to clean the ladders, steps, etc. 

    That’s why it’s wise to prepare a checklist of all the necessary items that you will probably require. You’ll need the following

    • A Water Test Kit
    • Pool Skimmer
    • Pool Brush
    • Pool Opening Chemicals
    • A Telescopic Pole
    • A Pool Vacuum

    7. Run the Filtration System

    Before jumping straight into the pool water, make sure you’ve run the filter at least for 12 hours. The timing varies depending on the season. For summers, you need to continue filtration for 8-12 hours. It can be 4-6 hours for the wintertime. 

    Going in the water without proper filtration will cause skin issues due to the imbalance chemicals present in the water. So, carry-out the filtration for at least 12 hours. Choosing the night is a tactical option. Doing so, you won’t have to sit idly during the day.   

    8. Check the pH, Alkalinity, & Chlorine Level

    Testing the pool water is always vital before using the pool. But when it comes to a pool that hasn’t been used for a while, testing is a must. Generally, three chemical percentages are tested in the case of pool water. Without keeping these percentages in the optimum zone, it’s risky to use pool water. Therefore, be sure to check your pool’s alkalinity level, pH & chlorine level. You can follow the below-mentioned ranges: 

    pH: 7.2-7.6

    Alkalinity level: (100-150) ppm [parts per million]

    Chlorine level: (2.0-4.0) ppm

    9. Shock Your Pool to Stay on Top

    This is the last cleaning step you can take. Shocking is done by spattering highly concentrated chemicals all over the pool water. First, you need to stir the chemicals in a bucket & splatter them. Use precautions like wearing gloves, masks & eye protection while handling the highly concentrated chemicals. 

    Shocking is like restarting your desktop. As restart ends all the tasks of the applications & starts again, shocking also kill whatever unwanted elements are present in the water. Hence your pool water becomes entirely fresh again. 

    10.  Wait Till Water Becomes Clear

    It is imperative to give your pool some time after you have followed all the instructions. You may think it’s ok to dive in just because you have filtered all the water. But it is not. You may still need to add chlorine to your pool water to achieve the required balance. The trick is to wait till you think your pool has become crystal clear & you can see the bottom clearly. 

    Final Thoughts

    After following these tips, you can finally call it a day & start inviting your friends & family to your pool. You have knocked out all the hard parts & now you will have your pool completely ready.