The decision that ruins most bathroom tile projects happens weeks before any adhesive is mixed — it happens the moment someone picks a pattern without first measuring where every grout line will land at the toilet, the door, and the shower threshold. Good bathroom tile layout planning tips exist, but almost no one applies them before the tile is already ordered. By the time a tile setter is on their knees with a trowel, the outcome is already largely fixed. The planning stage is where the real skill lives, and almost nobody treats it that way.
Quick Answer
The decision that ruins most bathroom tile projects happens weeks before any adhesive is mixed — it happens the moment someone picks a pattern without first measuring where every grout line will land at the toilet, the door, and the shower threshold.
Why Most Tile Projects Go Wrong in the Planning Stage
In This Article
Somewhere along the way, tile planning became synonymous with scrolling Pinterest. A mood board gets assembled, a pattern gets selected, someone orders tile and — three weeks later — stands in a bathroom where the grout lines hit the toilet base at a 2-inch sliver and the doorway terminates on a cut so thin it cracks before the grout dries. I’ve seen this in brand-new gut renovations. Expensive ones.
The gap between a tile layout that looks good in a flat sketch and one that works in a dimensional room comes down to a single overlooked variable: grout lines are not decorative afterthoughts, they are structural reference points. Where those lines land relative to fixed obstacles — the toilet flange, the shower curb, the vanity base — determines whether a room looks intentional or improvised. A sketch on grid paper can’t tell you that your drain is 3 inches off the axis your symmetrical layout assumes.
There’s also a cost argument that most planning guides bury or skip entirely. Standard practice calls for ordering 10% extra tile to account for cuts and breakage on a straight lay. That buffer is fine — until you decide on a diagonal or herringbone pattern, at which point the industry-recognized overage climbs to 15–20% because of the dramatically higher cut frequency at every wall edge. On a 120-square-foot bathroom at $8 per square foot of tile, that difference is nearly $100 in material alone, not counting the added labor time. Order short, and you’re praying the dye lot matches.
The mental shift that changes everything: stop thinking of layout planning as a pre-step, and start treating it as the project itself. The installation is just executing a plan that already works on paper.
Pattern overages at a glance:
- Straight lay: Order 10% extra
- Brick or offset patterns: Order 10–12% extra
- Diagonal lay (45°): Order 15–20% extra
- Herringbone: Order 15–20% extra, more if tiles are small
- Versailles pattern or mixed formats: Order 20% extra minimum
- Any pattern in a room with many angles or niches: Add another 5% on top of the base overage
The mental shift that changes everything: stop thinking of layout planning as a pre-step, and start treating it as the project itself. The installation is just executing a plan that already works on paper.
Actionable takeaway: Before ordering a single tile, draw your bathroom to scale on graph paper — not digitally, on paper — and mark every fixed obstacle with its exact measurement from the nearest wall.
How Tile Scale Actually Works in a Bathroom Space
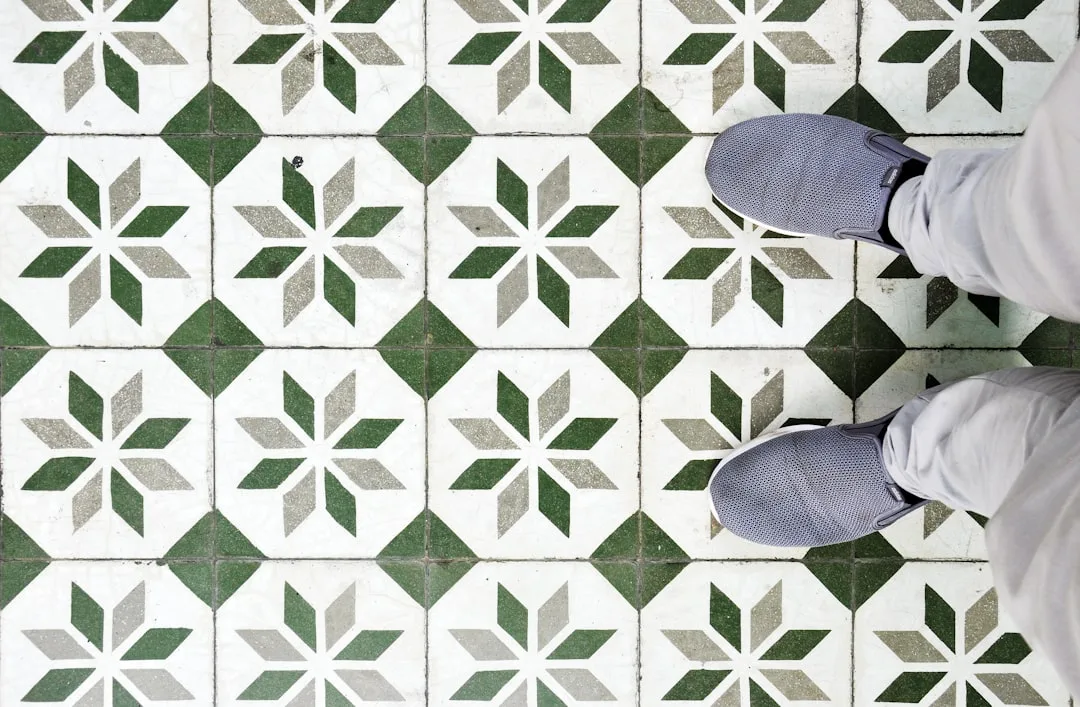
Most of what people “know” about tile scale in small bathrooms is wrong. The received wisdom — small room, small tile — gets passed around constantly, and it produces some of the most visually cluttered bathrooms I’ve ever walked into. A tiny mosaic tile in a 40-square-foot powder room doesn’t read as proportionate. It reads as noise.
The real relationship between tile size and perceived space is about grout line density, not tile dimension. More grout lines in a confined space create more visual interruption, which fragments the floor plane and makes it read smaller. Large-format tiles — 24×24 or larger — reduce the grout grid dramatically, which can make a cramped bathroom feel more continuous underfoot. I’ve installed 24×48 tiles in bathrooms barely big enough to turn around in, and the effect was consistently more open than the same space tiled in 4×4 subway.
Orientation matters as much as size. A 12×24 tile laid with its long dimension running horizontally across a narrow bathroom has a measurable widening effect — spatial perception research from retail floor planning suggests this can make a space read up to 30% wider visually. Lay the same tile vertically, and you emphasize ceiling height instead, which reads as more formal but also more cramped in width. Neither is wrong. But you have to know which problem you’re solving.
The rule of thirds is a useful check for proportion once you’ve selected your field tile:
- Field tile should occupy roughly two-thirds of any given wall or floor surface
- Accent rows or decorative bands work best at one-third height on a wall — not centered, not at the top
- Borders at floor perimeter should be proportional to the field tile, not chosen independently
Common scale mistakes to avoid:
- Choosing 1×1 or 2×2 mosaic for a floor smaller than 50 square feet — the grout grid overwhelms the space
- Using the same tile size on the floor and walls without varying the orientation — the room loses definition between planes
- Selecting an oversized tile (24×48 or larger) without confirming your subfloor is perfectly flat — large-format tiles bridge imperfections rather than conform to them, which causes lippage at tile edges
- Centering a decorative medallion in the floor without accounting for how furniture, the toilet, and the vanity will visually compete with it
- Mixing two different grout line widths in the same room — even a 1/16-inch difference reads as error rather than intention
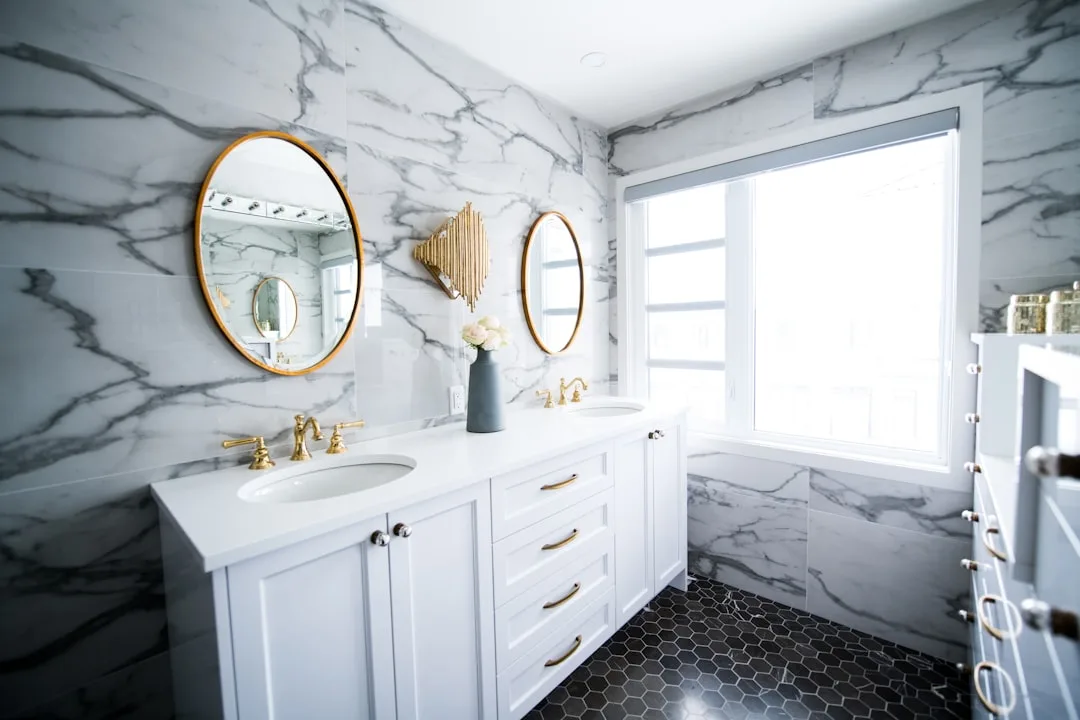
One thing I learned from a project in a Chicago high-rise: a 2-inch marble border around a 12×12 field tile in a 5×8 bathroom didn’t read as elegant — it read as a picture frame around something too small to frame. Scale has to cascade consistently through the whole room.
Actionable takeaway: Before committing to tile size, tape a piece of kraft paper cut to your tile dimensions onto the actual floor and step back to the doorway. Your brain will tell you immediately whether the scale is right.
Reading Your Room Before You Touch a Tile
Most tile planning guides start with measurements. That’s actually the second step. The first step is understanding what the room is doing visually before you impose a grid on it.
What I call a room audit — and what most contractors skip entirely in their excitement to start cutting — is a diagnostic pass through the bathroom that identifies where the eye goes, where it gets stuck, and which surfaces carry the most visual weight. The answers change everything about where a layout should start and where it should terminate cleanly.
Identifying the true focal wall is the first task. People assume this is the longest wall, or the wall behind the vanity. Often, it’s neither. The focal wall is the first surface fully visible from the doorway — the thing your eyes land on when you open the door. That is where your layout should terminate cleanly, meaning full tile or a deliberate design cut, never an accidental sliver. Every other wall answers to that decision.
From there, you map your fixed obstacles. These are not negotiable:
- Toilet flange center — typically 12 inches from the finished wall, but verify this; it’s often not
- Shower drain — if it’s off-center in the shower floor, a symmetrical layout will require custom cuts on every single course, a fact that plumbers and experienced tile setters consistently flag as the most overlooked constraint in bathroom tile layout planning
- Vanity base footprint — especially if it’s a freestanding vanity sitting on tile, the front edge will be visible and should fall on a full tile
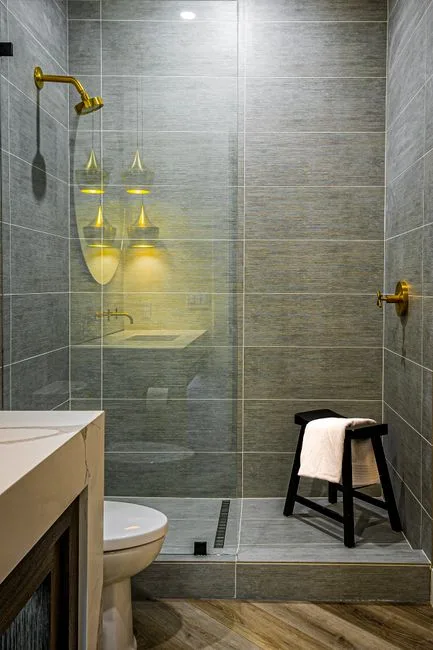
- Shower curb position — this is a transition point where tile meets tile at a height change, and it needs to be planned, not improvised
- Door swing radius — in tight bathrooms, the arc of the door often sweeps across a corner of the floor that is highly visible; plan a full tile or strong cut there, not a wedge
- Floor heating mat edges — if you’re installing radiant heat, the mat boundary affects where thinset depth changes, which can influence layout starting points
After mapping obstacles, do the sightline test. Crouch at door height — literally crouch, because that’s close to the perspective you’ll have when you open the door from a hallway — and look at where the grout lines will be most prominent at eye level. This is particularly useful for wall tile: the horizontal grout line that hits your eye level on the primary focal wall is the one that has to be level, plumb, and intentional. If it falls at 54 inches and your wall has any deflection, you’ll notice it every time you walk in.
What your room audit should document:
- The focal wall and its exact dimensions, including any interruptions (windows, niches, pipes)
- Every fixed obstacle with its distance from two perpendicular walls
- The location of existing plumbing rough-ins and whether they fall on or near your planned grout lines
- Any out-of-square corners — measure diagonally across the room; if both diagonals don’t match, your room isn’t square, and your layout needs to account for that before the first tile goes down
- The height of any existing features the tile will meet: window sills, wainscoting, existing wall ledges
Rooms that aren’t square — and most bathrooms in older homes aren’t — require a layout decision early: do you run parallel to one wall and let the other wall’s cuts widen gradually, or do you split the difference and accept slightly angled cuts on both sides? Neither approach is wrong, but leaving that decision to the installer after the tile is ordered is how projects go sideways.
The Dry Layout: The Step Almost Everyone Skips
There is one bathroom tile layout planning tip that separates experienced installers from everyone else, and it costs nothing except time: the dry layout. Before mixing any adhesive, before committing a single tile permanently, you pull a full dry run across the floor using the actual tiles.
This isn’t just about catching measurement errors. It’s about seeing things your drawing couldn’t predict:
- Tile variation within the box — natural stone and even some porcelain tiles vary in shade, veining, or surface texture from piece to piece; the dry layout lets you distribute variation intentionally rather than accidentally clustering all the darker tiles in one corner
- Cut frequency at walls — your scale drawing may show a 6-inch cut at the far wall, but when you see an actual 6-inch sliver of 12×24 tile sitting against the baseboard, you may decide to shift the whole layout 3 inches to make that cut 9 inches instead
- Pattern alignment at thresholds — if your bathroom connects to a hallway or adjoining room with tile, the dry layout reveals whether the grout lines align across the transition or create a jarring visual break
- Lippage at subfloor transitions — if your subfloor has a seam or height change that wasn’t obvious during the room audit, the dry-laid tiles will rock slightly at that point, catching it before the thinset does
How to do a proper dry layout:
- Snap your centerlines using a chalk line — find the center of the room, then adjust off-center if necessary to avoid small cuts at the most visible walls
- Lay tile out in both directions from that centerline without adhesive, using tile spacers to simulate your grout joint width
- Walk the entire perimeter and record every cut dimension on your scale drawing
- Evaluate every cut against the “half-tile rule” — no cut should be less than half a tile width; if it is, shift your centerline
- Check every threshold, transition, and obstacle intersection before you commit
- Photograph the dry layout from the doorway so you have a reference if tiles get disturbed during installation prep
The dry layout takes two to four hours on a standard bathroom floor. It catches problems that would otherwise cost a full day of demo and reinstallation. It is, without question, the highest-value step in the entire process.
Grout Line Width and Why It’s a Planning Decision, Not a Finishing Detail
Most people pick grout color weeks after the tile is ordered. Grout line width usually gets even less attention — it’s treated as a default, whatever the installer typically uses. That’s a mistake, because grout joint width has a direct effect on how pattern reads, how forgiving the layout is of subfloor imperfection, and how the room ages.
Grout joint width by tile type — what actually works:
- Rectified tile (machine-cut to precise dimensions): 1/16 to 1/8 inch — tight joints emphasize the tile face and minimize the grid
- Non-rectified tile (natural variation in dimension): 1/8 to 3/16 inch minimum — the wider joint absorbs the size variation between tiles
- Natural stone: 1/8 inch or wider, depending on how the stone was cut; tighter joints on natural stone cause edge chipping over time as the material expands and contracts
- Mosaic tile on mesh backing: typically 1/16 inch between tiles, but the grout grid is so dense that color becomes the dominant visual element — choose grout color before you order tile, not after
- Large-format tile (18×18 and above): minimum 3/16 inch is often recommended to allow for slight warpage in the tile itself, which is common in large-format pieces and causes lippage at very tight joints
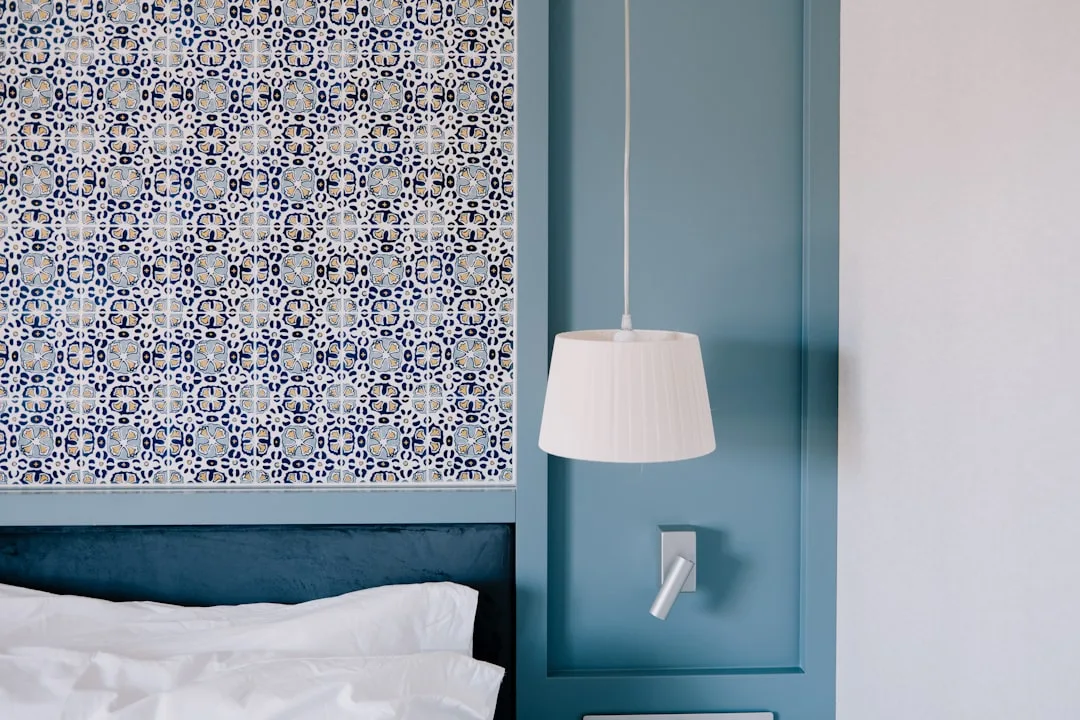
Grout color is a separate but equally loaded decision. A grout that closely matches the tile reads as continuous and makes the room feel larger. A contrasting grout reads as a geometric pattern and draws attention to the grid — which is exactly what you want in a subway tile kitchen, and exactly what you don’t want when the grid is hitting awkward cuts around your toilet.
Grout color decisions simplified:
- Matching grout color: use when you want the tile to read as a surface, not a pattern
- Slightly lighter grout than tile: brightens the grid subtly, good for dark field tile
- Contrasting grout: use only when every grout line is intentional and the layout is clean — contrast punishes bad cuts
- White grout in high-traffic areas: looks good at installation, requires sealing and regular maintenance; be honest about your cleaning habits before committing
FAQ
What is the first step in bathroom tile layout planning?
The first step is a room audit, not measurements. Before you touch a tape measure, walk the room and identify the focal wall — the first surface fully visible from the doorway — and map every fixed obstacle: toilet flange, drain, vanity base, and shower curb. Measurements come next, but they’re only useful once you know which surfaces and transitions are driving the layout decisions.
How do I know if my bathroom tile layout will look balanced before installation?
Do a dry layout using your actual tiles, without adhesive, across the full floor. Mark your centerlines with chalk first, then lay tile out in both directions using spacers. Walk the perimeter and record every cut. The half-tile rule is your benchmark: no cut at any visible wall or obstacle should be less than half a tile’s width. If it is, shift your centerline until cuts are balanced on opposing walls.
Does tile size really affect how big a small bathroom looks?
Yes, but not in the way most people assume. The effect comes from grout line density, not tile dimension itself. More grout lines create more visual interruption, which fragments the floor plane and makes a space read smaller. Large-format tiles — 24×24 or larger — reduce the number of grout lines significantly, which tends to make a small bathroom feel more open. Orientation matters too: running a rectangular tile’s long dimension horizontally across a narrow room can make it read measurably wider.
How much extra tile should I order for a herringbone or diagonal pattern?
For a herringbone or 45-degree diagonal lay, order 15–20% extra beyond your square footage. These patterns require cuts at every wall edge and at every obstacle, dramatically increasing cut frequency compared to a straight lay, which typically needs only 10% overage. In rooms with many angles, niches, or irregularities, add another 5% on top of that. Running short on a dye lot mid-project is one of the most common and avoidable tile installation problems.
What’s the most common bathroom tile layout planning mistake people make?
Choosing a pattern before measuring where grout lines will land relative to fixed obstacles. The most frequent result is a grout line hitting the toilet base at a sliver cut — sometimes less than 2 inches — which looks unplanned and is structurally weak. The second most common mistake is skipping the dry layout entirely, which means the first indication of a cut problem is after the adhesive has already cured. Both mistakes are entirely preventable with proper planning before a single tile is ordered.