The average renter spends $400 on décor in their first year — and replaces most of it within 18 months because it never looked the way they imagined. That’s not a taste problem. It’s a sequencing problem. Most renters shop before they audit, decorate before they plan, and accumulate before they edit. The result is a space full of stuff that somehow still feels unfinished. If you’re searching for budget rental apartment decorating ideas that actually work, the problem usually isn’t budget — it’s order of operations.
Quick Answer
The average renter spends $400 on décor in their first year — and replaces most of it within 18 months because it never looked the way they imagined.
These 9 fixes aren’t a random tip pile. They’re a decision sequence — each one builds on the last. Work through them in order and your $200 goes further than most people’s $800.
Why Most Renters Start Decorating in the Wrong Order
In This Article
- Why Most Renters Start Decorating in the Wrong Order
- Budget Rental Apartment Decorating Ideas: The 9-Fix Sequence Explained
- 1. Map Your Light Before You Buy a Single Thing
- 2. Use the 3-5-7 Rule to Stop Overcrowding Every Surface
- 3. Get the Rug Size Right — It’s the Anchor Most Renters Miss
- 4. Activate Vertical Space Without Touching the Walls
- 5. Layer Textiles to Shift a Room’s Feel Without Painting
- 6. Use Mirrors to Borrow Light and Space You Don’t Have
- 7. Use Plants as Living Anchors That Cost Under $15
- 8. Edit Color Before You Add More of It
- 9. The $200 Allocation Framework: Spend in the Right Order
Before you buy anything, you need to audit what you’re actually working with. Not what the listing photos showed, not what your last apartment looked like. This specific unit, right now, under your lease terms.
Most renters skip this step entirely. They see something on Instagram, buy it the same day, and figure out where it goes later. That impulse pattern costs renters an average of $300–600 per year in unused or ill-fitting décor — pieces that seemed right in a cart and wrong in a corner.
The constraints-first decorating sequence looks like this: audit → anchor → layer → accessorize. You’re not allowed to accessorize until the anchors are in place, and you can’t anchor intelligently until you’ve audited your actual constraints.
Your audit covers four things:
- Lease restrictions — can you paint, hang hooks, use adhesive strips on your wall surface?
- Natural light direction — which walls get morning light vs. afternoon shadow?
- Architectural non-negotiables — where are the outlets, the windows, the doors that swing inward?
- Floor plan anchor points — where does the eye land when you walk in?
According to a 2023 survey by Apartment List, 67% of renters say they’ve purchased décor items they later regretted because they didn’t fit the space or the lease restrictions. That number is high enough to be a structural problem, not a matter of personal style.
The other mistake renters make is treating each room as its own isolated project. Color decisions in the living room affect how the bedroom hallway reads. A rug choice in the entryway sets the material palette for everything past it. These rooms are connected. Your decorating decisions should be too.
The 9 fixes in this article follow the audit → anchor → layer → accessorize sequence. Fixes 1–2 are audit tools. Fixes 3–6 are anchoring decisions. Fixes 7–8 are layering strategies. Fix 9 is the financial framework that holds all of it together.
Actionable takeaway: Before buying anything, walk each room and answer the four audit questions above. Write them down. This 10-minute step replaces hours of returns.
Budget Rental Apartment Decorating Ideas: The 9-Fix Sequence Explained

Most budget rental apartment decorating ideas you’ll find online treat each tip as a standalone trick. Buy this lamp. Hang that mirror. Use removable wallpaper. The problem is that standalone tips don’t compound — you can execute all ten of them and still end up with a space that feels unresolved, because no individual fix addresses the underlying structure of the room.
This sequence is different. Each fix solves a specific problem and sets up the next fix to work better. That’s why the order matters as much as the fixes themselves.
Here’s the full map before we go fix by fix:
- Fix 1 — Light audit (understand before you spend)
- Fix 2 — Surface styling with the 3-5-7 rule (stop overcrowding)
- Fix 3 — Rug sizing (the anchor most renters get wrong)
- Fix 4 — Vertical space activation (walls without drilling)
- Fix 5 — Textile layering (the fastest way to shift a room’s feel)
- Fix 6 — Mirror placement (borrow light and space you don’t have)
- Fix 7 — Plant strategy (living anchors that cost under $15)
- Fix 8 — Cohesive color editing (subtract before you add)
- Fix 9 — The $200 allocation framework (how to spend in the right order)
Each one is detailed below. None of them requires a landlord’s permission. All of them are reversible.
1. Map Your Light Before You Buy a Single Thing
The most common complaint in rental decorating isn’t about furniture or color — it’s about light. Specifically, the absence of overhead fixtures that actually work. Most rentals come with one ceiling fixture per room (often a bare bulb or a builder-grade dome), and that single source creates flat, shadowless light that makes every space feel like a waiting room.
The fix isn’t a specific lamp. It’s understanding your light zones before you spend anything.
Walk your apartment at three specific times: 8am, 12pm, and 6pm. Photograph each room from the doorway at each interval. You’ll quickly see which corners are chronically dark, which walls get direct light that washes out color, and where the natural light actually dies after 4pm. This matters because a floor lamp placed in an already-bright corner adds nothing — placed in a dead zone, it transforms the room.
Once you know your zones, layer three tiers of lighting:
- Ambient — the room’s base illumination. A plug-in arc floor lamp ($40–80) handles this in most living rooms.
- Task — focused light for reading, cooking, working. Clip-on lamps and table lamps ($15–35 each) cover this without drilling.
- Accent — the detail layer. Battery-operated puck lights inside bookshelves, LED strip lights behind a TV console, or a small plug-in table lamp on a shelf.
Bulb temperature matters more than most renters realize. Warm bulbs in the 2700K–3000K range make budget furniture look more expensive — they soften edges, deepen colors, and create the kind of light you associate with restaurants that cost more than they should. Cool bulbs at 5000K and above are for task lighting only. Under that spectrum, cheap finishes look cheap.
A practical living room lighting setup that costs under $150: one arc floor lamp from Target or Amazon ($50–75), two table lamps from IKEA’s INGARED or TJ Maxx’s clearance shelf ($15–30 each), and a pack of 2700K LED bulbs ($8–12). That’s three sources, all plug-in, all moveable, no lease violations.
The International Association of Lighting Designers notes that layered lighting with three sources per room increases perceived square footage and comfort by reducing harsh shadows — and every single one of those sources can be plug-in in a rental context.
One underused option: plug-in pendant lights. Several retailers including IKEA and Schoolhouse Electric sell pendants with standard cord sets designed to plug into an outlet and hang from a ceiling hook. Command hooks rated for 5+ lbs hold the cord near the ceiling with zero damage. The result looks like hardwired pendant lighting and costs under $60 total. For a rental with no overhead fixture worth keeping, this is one of the highest-impact swaps available.
Actionable takeaway: Set a phone reminder for 8am and 6pm tomorrow. Photograph every room at both times. The dead zones you find are exactly where your lighting budget should go first.
2. Use the 3-5-7 Rule to Stop Overcrowding Every Surface
Here’s a rule that sounds arbitrary until you see what it does to a shelf. The 3-5-7 rule says you group decorative objects in odd numbers — clusters of 3, 5, or 7 — varying height, texture, and scale within each grouping. That’s the whole rule. The application is where most people get stuck.
Why do odd numbers work? Even groupings — two candles, four books stacked, a pair of matching vases — create visual symmetry that the eye resolves instantly and moves on from. Odd groupings create a slight visual tension that the eye engages with longer. The brain keeps looking, which reads as “interesting” rather than “decorative.”
For renters, this rule is particularly useful because it applies entirely to flat surfaces — shelves, coffee tables, console tables, kitchen counters, nightstands — all the areas where you can style without ever touching a wall.
Apply it like this:
- Shelf: group of 3 — one tall item (a plant or vase), one medium item (a book stack or small sculpture), one low item (a small tray or candle). Different heights, different textures, same general zone of the shelf.
- Coffee table: group of 5 — a tray (counts as one), a stack of 2–3 books, a candle, a small plant, and one unexpected object (a stone, a small bowl, a found object). The tray unifies them.
- Entryway console: group of 3 or 5 — a mirror above (wall-leaning counts), one table lamp, and a small plant or decorative object. Done.
The second half of this rule is just as important as the first: remove before you add. Most renters have too many objects already, arranged in even pairs or scattered without grouping logic. Before applying the 3-5-7 rule to any surface, clear it completely. Start from zero. Add back only what fits the grouping logic. What’s left over goes in a drawer, a closet, or out entirely. The edit is the work.
This principle also applies to bookshelves, which are usually the most chaotic surface in a rental. Books spine-out fill every shelf with visual noise. Try pulling every third shelf and replacing the books with a single object grouping — a plant, a candle, a framed photo. The alternating pattern of books and objects gives the eye a place to rest and makes the whole unit read as intentional rather than packed.
Actionable takeaway: Pick one surface right now. Clear it completely. Add back only items that fit a group of 3 or 5, varying height and texture. Leave the rest off.
3. Get the Rug Size Right — It’s the Anchor Most Renters Miss

If there’s one fix that transforms a rental living room faster than any other, it’s rug sizing — and nearly every renter gets it wrong in the same direction. Too small. A rug that floats in the middle of a room with all the furniture legs off it doesn’t anchor anything. It makes the room look like the rug is a mistake rather than a foundation.
The rule is straightforward: in a living room, your rug should be large enough that at least the front two legs of every seating piece sit on it. Ideally all four legs of the sofa sit on it. The rug defines the conversation zone — if furniture legs float off the edges, there’s no zone, just furniture on a floor with a small rectangle in the middle.
Common rental living room sizes and the rug dimensions that actually work:
- Small living room (under 150 sq ft): 6×9 minimum, 8×10 preferred
- Medium living room (150–250 sq ft): 8×10 minimum, 9×12 preferred
- Open plan living/dining combo: Use two rugs to define two zones rather than one rug trying to cover both
Budget rug sources that hold up: Ruggable (washable, $150–200 for an 8×10, frequently on sale), IKEA’s VINDUM or STOENSE lines ($79–150 for large sizes), and Wayfair’s sale section (check the “Clearance” filter and sort by customer rating, not price).
For renters concerned about rug-on-carpet situations, a thin rug pad with rubber backing keeps things in place. It adds $15–25 but prevents daily frustration.
Actionable takeaway: Measure your living room before buying any rug. Mark the dimensions on the floor with painter’s tape to visualize the footprint. Then size up from whatever you were originally planning.
4. Activate Vertical Space Without Touching the Walls

Rental walls feel like dead zones for good reason — most leases restrict what you can hang, and even the ones that allow adhesive strips have weight limits that rule out most real artwork. The result is a common rental look: furniture at floor level, blank walls above, a gap of empty space that makes every room feel smaller and less finished than it should.
The solution isn’t to ignore the walls. It’s to work with them using methods that don’t penetrate the surface.
Lean large pieces. A full-length mirror leaned against a wall does almost everything a wall-mounted mirror does, costs nothing extra, and leaves zero damage. A large-format print or canvas leaned against the wall rather than hung reads as intentional in a way that bare walls never do. Oversized leaning artwork (think 24×36 or larger) works best — anything smaller looks like you ran out of nails.
Use furniture as vertical scaffolding. A tall bookshelf, a ladder shelf, or an open shelving unit pulls the eye upward without touching a wall above furniture height. IKEA’s BILLY bookcase can be configured to nearly ceiling height in standard rentals and costs $80–130. Style the top shelves with larger objects and the bottom shelves with books to create a natural visual hierarchy.
Command strips, used correctly, hold more than you think. The standard failure mode is using wrong-sized strips for the surface type. 3M’s Command Large Picture Hanging Strips hold up to 16 lbs per pair when applied to smooth, painted drywall. Read the surface compatibility chart — they don’t perform the same on textured walls, wallpaper, or brick. For renters with smooth walls, correctly applied strips handle most lightweight artwork and about 80% of what you’d want to hang.
Actionable takeaway: Identify one blank wall that bothers you most. Before buying anything, lean something large against it — even a piece of cardboard the size of the art or mirror you’re considering. See if the scale works before spending.
5. Layer Textiles to Shift a Room’s Feel Without Painting
Paint is the fastest way to change a room — and the one thing most rental leases prohibit, or require you to reverse at your own expense. The alternative that renters underuse is textiles, which have nearly the same visual impact at a fraction of the commitment.
A room with a single throw blanket folded over a couch arm and one set of standard white sheets feels sparse regardless of how good the furniture is. A room with layered textiles — a textured throw, mixed pillow covers, a woven blanket draped over a chair back, a rug underfoot — reads as warm, considered, and complete even if the furniture is the same entry-level IKEA pieces.
The textile layering sequence:
- Base textiles first — the rug (Fix 3), the bedding, the sofa’s primary throw. These set the dominant color and texture.
- Mid layer — pillow covers in 2–3 complementary textures. Not the same fabric, not matching sets. Linen beside velvet beside a woven cotton is the combination. Matching pillow sets are the visual equivalent of a hotel room.
- Top layer — a second throw in a contrasting texture, a table runner, or a woven wall hanging that requires only a single adhesive hook.
Budget textile sources: IKEA for base pieces (GURLI throws at $8–12, SANELA velvet pillow covers at $7–10 each), H&M Home for mid-layer mixing (frequent 30–40% sales), and thrift stores for top-layer pieces where texture matters more than newness.
Actionable takeaway: Count the distinct textiles in your living room right now. If you have fewer than four different textures in the room, that’s the gap. Add one new texture at a time, starting with a throw or a pillow cover, before buying any furniture.
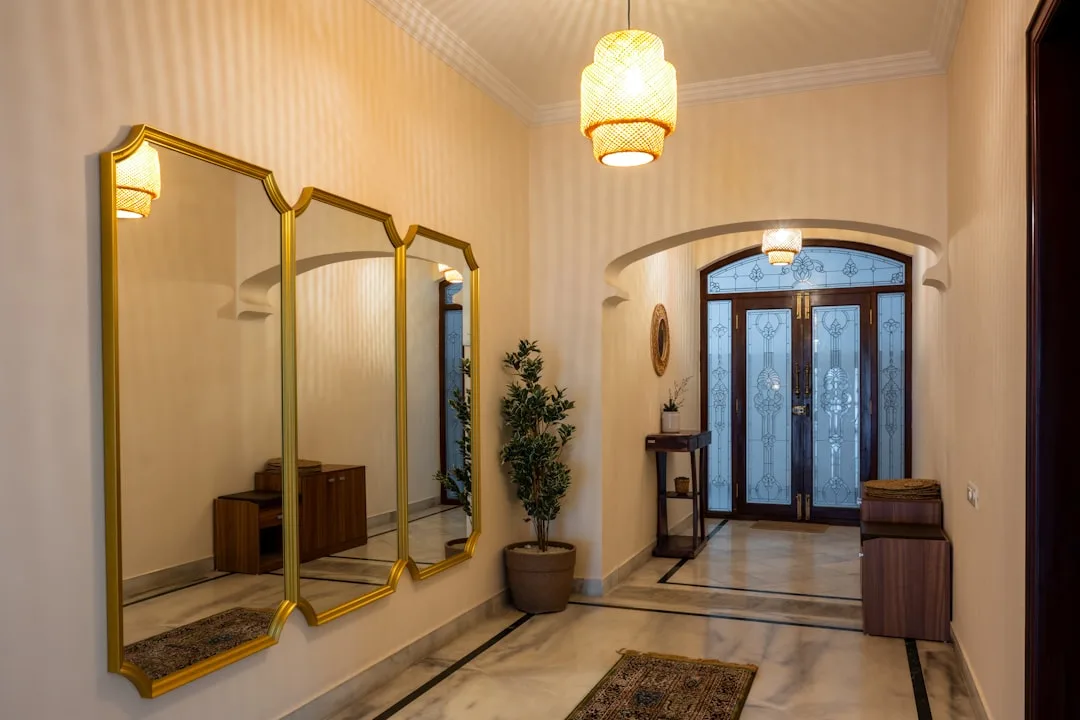
6. Use Mirrors to Borrow Light and Space You Don’t Have
Mirrors are the most reliable visual cheat in rental decorating — they double perceived light, expand the apparent size of a room, and fill a wall in a way that reads as deliberate without requiring any permanent installation.
The placement logic matters more than the mirror itself. A mirror placed opposite a window reflects natural light back into the room. This is especially valuable in north-facing rooms or any space that gets limited direct sunlight. A large leaning mirror in this position effectively doubles the light in the room and creates a sense of depth that makes the space feel 20–30% larger than it is.
Mirror sizing follows the same scale logic as rugs and artwork: bigger is almost always better in a rental context. A small decorative mirror on a large wall looks like an afterthought. A mirror that takes up a significant portion of a wall — or a large leaned piece — looks architectural.
Practical options by budget:
- Under $50: IKEA HOVET (full-length, 30×77 inches, designed to lean)
- $50–100: Threshold leaning mirrors at Target, frequently on sale
- $100–150: Vintage and thrift store finds — older mirrors often have better frame quality than new budget options at similar price points
For above-dresser or above-console placement without wall hanging, consider an oversized framed art-style mirror with a built-in easel back, or lean it against the wall behind the surface and let the furniture hold it in place.
Actionable takeaway: Identify your darkest room or corner. Before adding a lamp, try placing a large mirror opposite or adjacent to the nearest light source. Measure the light difference before and after — it’s usually significant enough to delay or eliminate a lamp purchase.
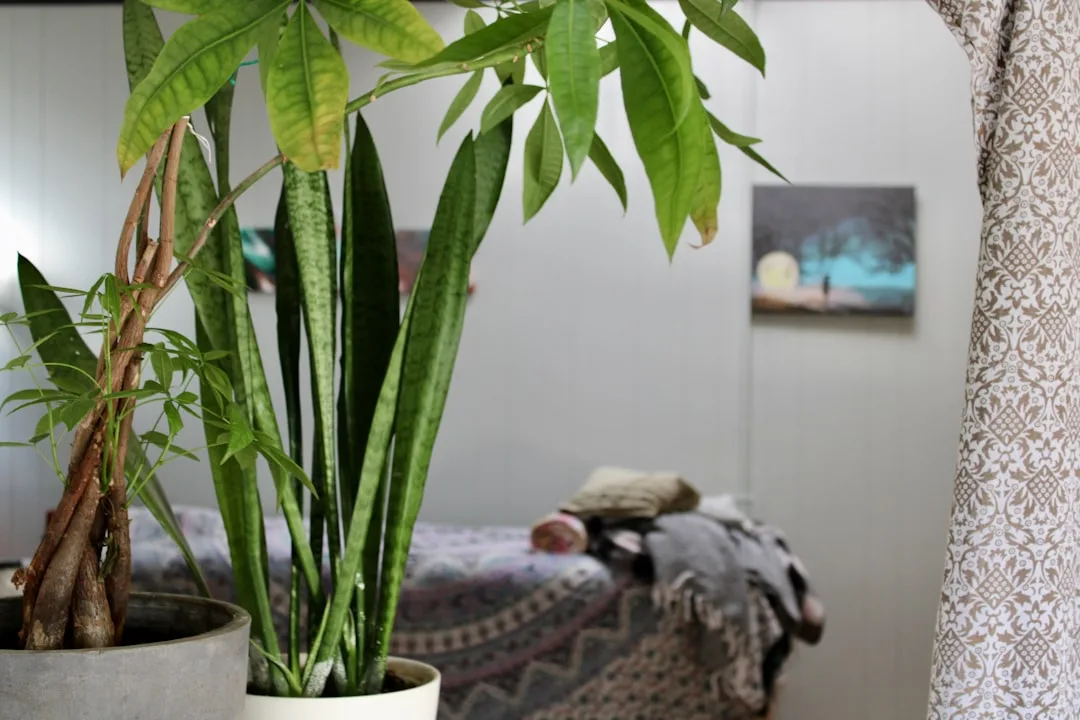
7. Use Plants as Living Anchors That Cost Under $15
Plants do something that no inanimate object can — they introduce organic shape, color variation, and a sense of life into a room without adding visual weight the way furniture does. A corner that reads as dead with a lamp and a side table reads as intentional with a floor plant in the same spot. The plant adds height and organic form that no manufactured object replicates at the same price point.
The mistake most renters make with plants is buying high-maintenance species that don’t match the actual light conditions of the apartment. After two failed attempts, most renters conclude they “can’t keep plants alive” — but the real issue is plant selection, not personal failure.
Match the plant to the light zone you mapped in Fix 1:
- Low light (north-facing rooms, interior corners): Pothos, ZZ plant, snake plant, cast iron plant. These survive in conditions that would kill most species.
- Medium indirect light (east-facing windows, rooms with filtered light): Peace lily, philodendron, spider plant, Chinese evergreen.
- Bright indirect or direct light (south or west-facing windows): Any succulent, aloe, rubber plant, bird of paradise for statement scale.
For renters who travel frequently or have inconsistent schedules: snake plants and ZZ plants can survive 3–4 weeks without water and still look good. They are the most forgiving plants available at any price point.
Budget plant sourcing: IKEA’s plant section ($4–15 for most small-to-medium species), local hardware stores like Home Depot and Lowe’s (often better selection than garden centers at lower prices), and Facebook Marketplace (renters frequently sell healthy plants when moving — you can often find large statement plants for $10–25).
Actionable takeaway: Buy one snake plant or pothos this week. Put it in the dead corner you identified in Fix 1. Reassess the corner after one week — the change is significant enough to inform every subsequent plant decision.
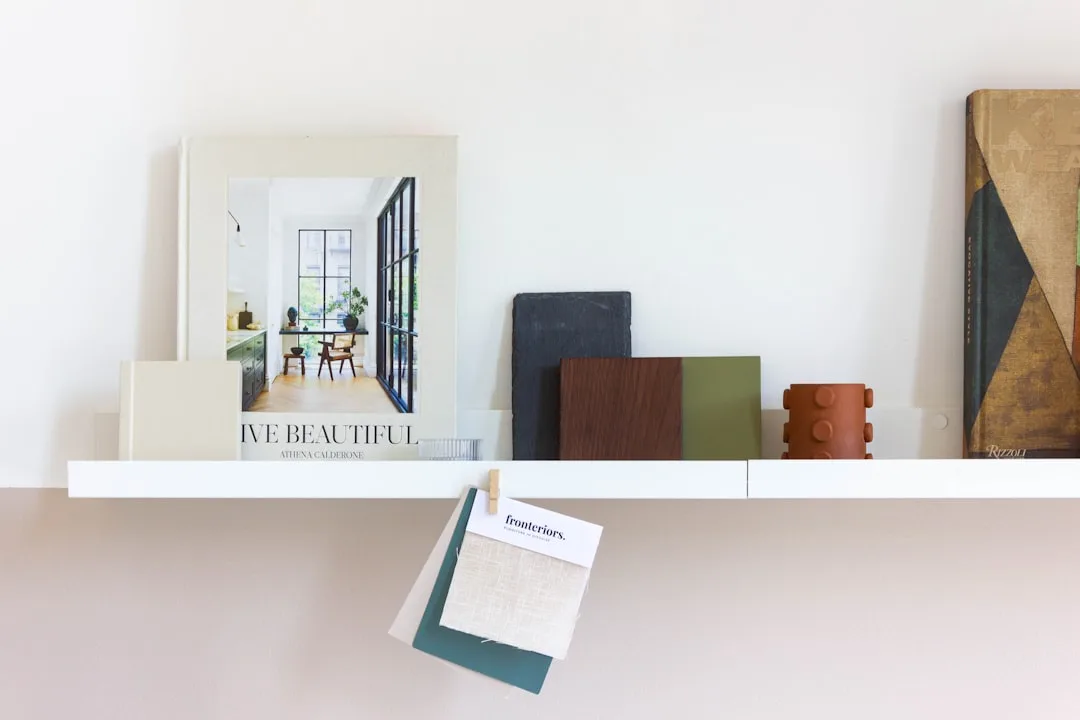
8. Edit Color Before You Add More of It

Most renters think their space needs more stuff when what it actually needs is less visual noise. Color editing — reducing the number of competing colors in a room before adding anything new — is the fix that costs nothing and unlocks the impact of every other fix.
Walk into your current living room and count the distinct colors present, including furniture, textiles, objects, and wall art. If the number is above six, the room reads as chaotic regardless of the quality of individual pieces. The brain processes rooms holistically before it processes individual items — a room with twelve competing colors registers as cluttered before anyone notices whether the furniture is good.
The practical color editing approach:
- Identify your dominant color — this is usually the sofa or the rug, whichever is largest.
- Choose two supporting colors — these should complement or neutralize the dominant, not compete with it.
- One accent color — a single punch of something unexpected. One warm-toned vase in an otherwise cool-toned room. One deeply colored pillow in a neutral scheme.
- Remove or relocate everything that doesn’t fit — this includes gifts you feel obligated to display, items from a previous decorating phase, and objects that are individually fine but collectively create chaos.
This is where the edit is financially valuable: removing items you already own and rearranging what’s left costs nothing, but it often produces a more visually resolved room than adding $200 worth of new objects would.
Actionable takeaway: Take a wide-angle photo of your living room. Count the distinct colors visible. If you’re above six, identify which two or three are disrupting the scheme and remove them for one week. See if the room reads better before buying anything new.
9. The $200 Allocation Framework: Spend in the Right Order

Having a $200 budget isn’t the constraint — spending it in the wrong order is. Most renters spread a small budget across many small purchases and end up with nothing that has real impact. This framework front-loads the budget toward high-impact fixes and leaves accessories for last.
The allocation:
- Lighting: $60–75 — one floor lamp or plug-in pendant, plus a pack of warm-spectrum bulbs. This is the single highest-impact purchase in the entire sequence because light affects how every other element in the room reads.
- Rug (if needed): $0–80 — if you already have a rug that’s the right size, reallocate this. If you don’t, prioritize it above textiles and décor.
- Textiles: $30–40 — two to three throw pillow covers in complementary textures, or one quality throw blanket in a texture you’re missing.
- Plants: $15–20 — two plants: one floor-level statement plant and one smaller shelf or table plant.
- Accessories and styling objects: $20–30 — this is last intentionally. After fixes 1–8, you’ll need far fewer accessories than you originally planned, because the structural elements are doing the work.
Total: $125–165, leaving $35–75 as a buffer for the specific needs of your particular apartment.
The framework also serves as a decision filter: if a purchase doesn’t fit one of these five categories, it waits until all five are covered. That single constraint eliminates most of the impulse buying that drains decorating budgets without producing visible results.
Actionable takeaway: Before your next décor purchase, assign it to one of the five categories above. If it’s in the accessories category and you haven’t addressed lighting or rug sizing yet, set it aside. The sequence matters.
Frequently Asked Questions
Q: Can I actually make a rental look good for $200, or is that unrealistic?
A: It’s realistic when the $200 is spent in the right order. The failure mode is spreading $200 across ten small purchases — a candle here, a small print there, a decorative tray, some throw pillows — and ending up with a collection of objects that don’t compound. When the budget goes toward lighting first, then anchoring pieces like a correctly sized rug or a large mirror, the impact per dollar is significantly higher. Most renters who feel like $200 isn’t enough have actually already spent $200 on accessories before fixing the structural issues.
Q: My lease says I can’t hang anything. What are my actual options?
A: More than most renters realize. Command strips and adhesive hooks, correctly matched to your wall surface type, handle a significant amount. Beyond adhesive options: lean large artwork and mirrors against walls rather than hanging them, use tall freestanding shelving units instead of wall-mounted shelves, activate vertical space with tall plants and lamps rather than wall décor, and use the backs of doors for hooks and organizers (over-door hardware doesn’t touch the wall surface at all). A room decorated entirely with leaning and freestanding pieces can look just as intentional as one with hung artwork — the key is scale. Lean pieces large enough to command the space.
Q: Which of the 9 fixes has the highest impact per dollar?
A: Lighting, consistently. A room with layered lighting from three plug-in sources in the right positions reads as designed even when the furniture is entry-level. The same room with a single overhead fixture reads as unfinished regardless of how good the furniture is. After lighting, correct rug sizing has the next-highest impact — the wrong rug size undermines every other element in the room, and the right size makes the furniture look more intentional than it is.
Q: How do I use these budget rental apartment decorating ideas if I’m only staying in this apartment for one year?
A: The sequence actually gets more valuable with shorter timelines, not less, because every purchase needs to be moveable and reusable. Every fix in this sequence is deliberately portable — plug-in lamps, freestanding rugs, leaning mirrors, potted plants, textile layers. Nothing is installed. When you move, everything moves with you and works in the next apartment without modification. The audit step (Fix 1) takes on extra importance with a short lease: understanding your specific light zones and architectural constraints means you don’t buy things that only work in this apartment’s layout.
Q: I’ve tried budget rental apartment decorating ideas before and the space still looks unfinished. What am I missing?
A: Almost always, it’s one of two things: the light is wrong or the scale is wrong. Light affects how every other element reads — budget furniture under warm layered lighting looks better than expensive furniture under a single flat overhead bulb. Scale issues (a rug that’s too small, artwork that’s too small for the wall, a lamp that’s too short for the room) signal “rental” even when individual pieces are quality. Before buying anything new, audit your current space for scale first. Pull the rug out of the room and see if the furniture arrangement makes more sense with a larger one. Hold up artwork against the wall and see if it’s the right size for the space. Most “something’s off” feelings in a rental resolve to a scale problem, not a style problem.
How to decorate a rented apartment on a budget?
Most budget rental apartment decorating ideas you’ll find online treat each tip as a standalone trick. Buy this lamp. Hang that mirror. Use removable wallpaper. The problem is that standalone tips don’t compound — you can execute all ten of them and still end up with a space that feels unresolved, because no individual fix addresses the underlying structure of the room.
What is the 3-5-7 rule in decorating?
This sequence is different. Each fix solves a specific problem and sets up the next fix to work better. That’s why the order matters as much as the fixes themselves.
How to decorate an apartment living room on a budget?
Here’s the full map before we go fix by fix:
What is the 3/4/5 rule in decorating?
Each one is detailed below. None of them requires a landlord’s permission. All of them are reversible.