Most fireplace built-ins fail before a single board is cut — because the wall was never measured for depth, the cabinetry was bought before checking heat clearance codes, or the proportions were eyeballed instead of calculated. I’ve watched clients spend $4,000 on flanking cabinetry that made their living room feel like a waiting room, not because the carpenter did bad work, but because nobody asked the right questions at the planning stage. Getting built in storage around fireplace walls right starts before anyone picks up a tape measure — it starts with understanding what the space actually demands. This article is about those questions. It is also about the specific decisions — depth, height, clearance, electrical, trim — that determine whether your built-in storage around a fireplace looks like a magazine spread or a staged model home nobody actually lives in.
Quick Answer
Most fireplace built-ins fail before a single board is cut — because the wall was never measured for depth, the cabinetry was bought before checking heat clearance codes, or the proportions were eyeballed instead of calculated.
What Is the Shelf or Structure Around a Fireplace Actually Called?
In This Article
- What Is the Shelf or Structure Around a Fireplace Actually Called?
- How Much Does Built-In Storage Around a Fireplace Cost — Honestly?
- The Real Reason Most Fireplace Alcoves Look Off (And How to Fix the Proportions)
- Heat Clearance: The Number Every DIYer Gets Wrong
- Depth, Wiring, and the Details That Separate Good From Great
Terminology here is not pedantic fussiness — it is the difference between ordering the right product and getting a callback from a contractor who has no idea what you want. So let’s be precise.
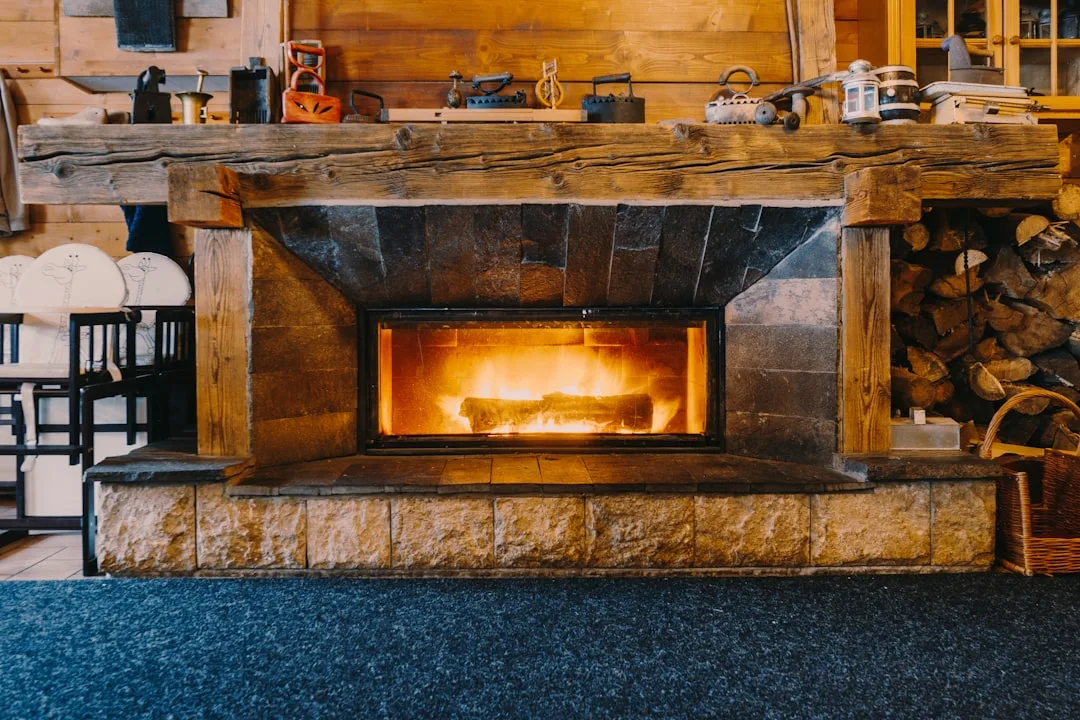
The mantel is the full decorative assembly surrounding the firebox opening. Most people use “mantel” and “mantel shelf” interchangeably, but they are not the same thing. The mantel shelf is specifically the horizontal projection at the top — the ledge where you put candles, a clock, or your kid’s school photos. The full mantel assembly includes the legs (called pilasters or mantel legs), the crosspiece above the firebox (the entablature or frieze), and the shelf itself.
The word “mantel” derives from a Latin root meaning cloak or covering — historically it referred to the hood structure that caught and directed smoke upward, not the decorative shelf most people picture today. That origin matters when you’re restoring an older home, because the proportions of period mantels were driven by function, not aesthetics.
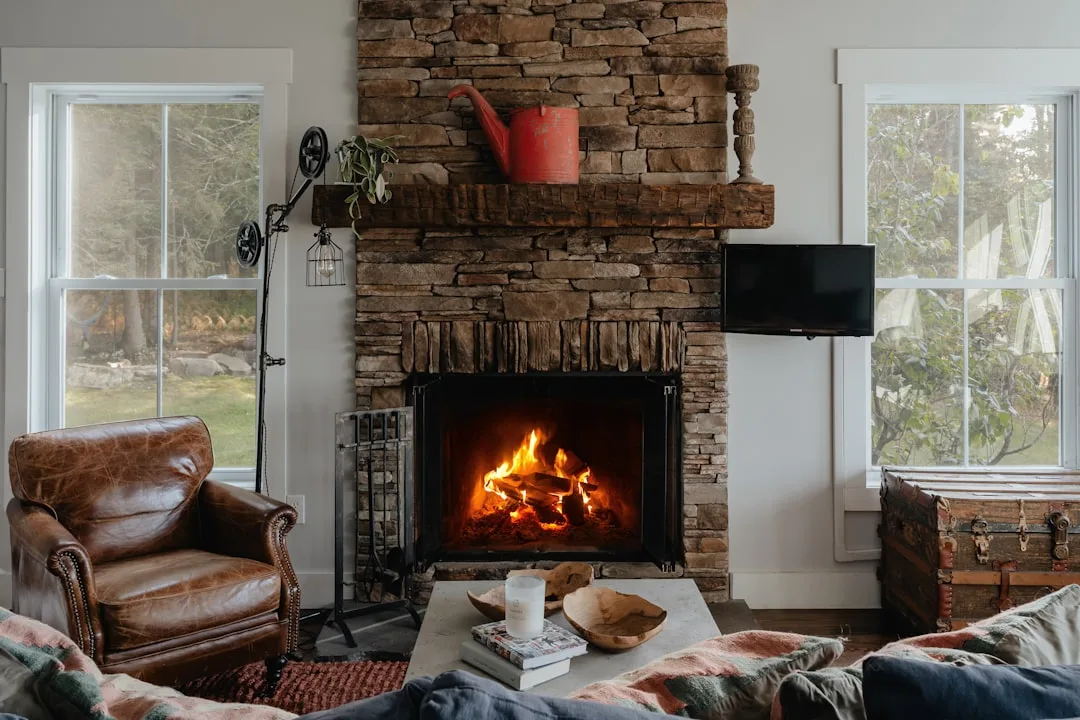
The overmantel is the zone directly above the mantel shelf — sometimes a mirror, sometimes a panel, sometimes a built-up frame extending toward the ceiling. The chimney breast is the structural wall projection that houses the flue; in older homes it often projects 12–18 inches into the room, creating natural flanking alcoves on either side.
Those flanking zones — and this is the part most content skips entirely — are technically called chimney breast alcoves or simply alcoves. When someone says “built in storage around fireplace,” they almost always mean cabinetry or shelving installed inside or built out from these alcoves. That is categorically different from the mantel surround itself, which frames the firebox opening. Conflating the two will send you to the wrong vendor, the wrong search query, and the wrong carpenter.
The surround — sometimes called the fireplace surround or firebox surround — is the non-combustible material (stone, tile, cast iron, brick) that immediately frames the firebox opening. It has nothing to do with the flanking storage zones, but it does dictate clearance distances for anything combustible you plan to install nearby.
Takeaway: Before you hire anyone or buy anything, use these terms specifically: alcove, chimney breast, mantel shelf, and surround. They describe four different things, and every contractor, tile supplier, and lumber yard will respond differently depending on which word you use.
How Much Does Built-In Storage Around a Fireplace Cost — Honestly?
I will not bury the bad news. Fireplace flanking built-ins cost more than standard bookcase installations because of two factors that rarely appear in competitor budget guides: heat clearance compliance and asymmetrical wall conditions. Both require more labor hours and more material flexibility than a standard wall of built-ins.
HomeAdvisor puts the national average for built-in bookcase installation at approximately $2,400 — but fireplace-flanking units consistently run above that baseline due to these complications. Here’s how the real tiers break down:
Tier 1 — DIY flat-pack and IKEA hack
- Materials: $300–$800 depending on cabinet count and trim complexity
- Tools (if starting from zero): add $100–$200
- Best for: renters building semi-permanent installs, homeowners with straight, symmetrical alcoves and basic carpentry skills
- Honest ceiling: this approach looks genuinely good when the alcoves are clean and square. It falls apart fast when they aren’t.
Tier 2 — Semi-custom carpentry using stock cabinetry with custom trim and paint
- Installed cost: $2,000–$5,000 for a standard 12–14 ft fireplace wall
- This is the sweet spot for most homeowners — you get professional results without the lead time of fully custom work
- Most of the cost is labor, not materials; a skilled finish carpenter can make $800 of stock cabinets look like $3,000 of custom work with the right trim package
Tier 3 — Fully custom built-ins
- Specialty wood, integrated lighting, concealed wiring, furniture-grade finishes
- Cost range: $6,000–$15,000+, varying significantly by region, material grade, and complexity
- Worth it for high-traffic living rooms where the built-ins are the architectural centerpiece of the home
Hidden costs that almost nobody mentions:
- Drywall patching after removing old shelving or chase covers — budget $200–$600 depending on scope
- Electrical relocation to position outlets inside or behind cabinetry — $150–$400 per outlet depending on your local electrician’s rates
- Permits — structural changes near a fireplace sometimes require a permit in jurisdictions with strict fire codes; always call your local building department before demolition
Takeaway: Know your tier before you open Pinterest. Tier 1 requires alcoves that are square, unobstructed, and at least 10 inches deep. If yours aren’t, you’re in Tier 2 territory whether you want to be or not.
The Real Reason Most Fireplace Alcoves Look Off (And How to Fix the Proportions)
Here is what I kept seeing across eleven years of client projects: homeowners would install perfectly competent cabinetry and then stand back and know something was wrong, but not be able to say what. Nine times out of ten, it was a proportion problem. Not a color problem, not a hardware problem. Proportion.
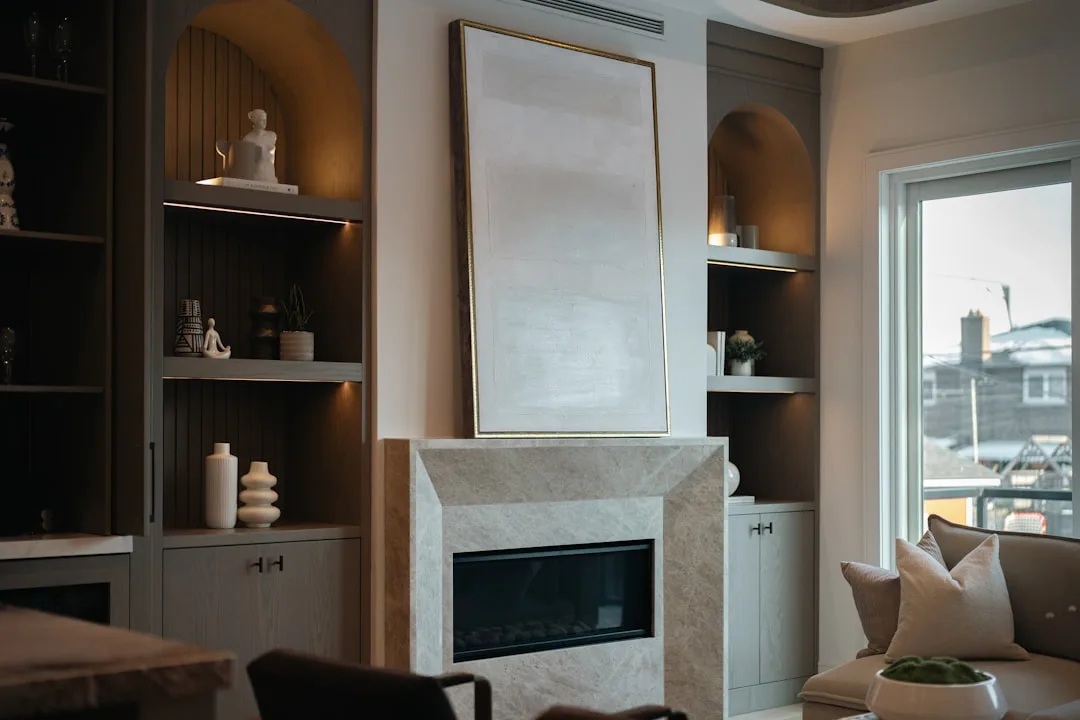
The fireplace surround is a dominant horizontal element. It has mass, it has symmetry, and it reads as an anchor in the room. Anything you put beside it has to either match its height or deliberately exceed it — because flanking units that stop six inches below the mantel shelf height create a visual float that makes the entire composition feel unresolved. The eye looks for alignment and doesn’t find it.
The proportion framework most designers work from: a 1:1.6 ratio when sizing flanking elements relative to the surround width. A 36-inch surround works best with flanking units approximately 22–24 inches wide each. This isn’t a rigid rule — asymmetrical compositions can work beautifully — but it gives you a defensible starting point when you’re standing in a room that doesn’t yet have walls covered in cabinetry and you need to commit to dimensions.
The second proportion mistake is vertical. Most stock cabinetry tops out at 84 inches, and most ceilings in older homes sit at 96 inches or higher. That 12-inch gap — sometimes bridged with a rough soffit, sometimes left open — is the single most common reason built in storage around fireplace walls looks unfinished. The solution is not always running cabinetry to ceiling height (sometimes that creates its own mass problems), but it is always intentional. Crown molding sized to fill the gap, a stepped cornice detail, or a deliberately oversized upper cabinet all work. What doesn’t work is the gap itself, unaddressed.
The horizontal break point matters too. Most well-resolved fireplace flanking units use a base cabinet zone (floor to roughly 36 inches), an open shelving zone (36 to 72 inches), and either closed upper cabinets or open display space above that. This three-zone breakdown mirrors how people actually use the space — heavier storage below, accessible display in the middle, overflow at the top. When all three zones are the same depth, the whole thing reads as a flat wall. Step the shelving back by two inches from the base cabinet face and the composition immediately gets more visual layering without any additional cost.
Heat Clearance: The Number Every DIYer Gets Wrong
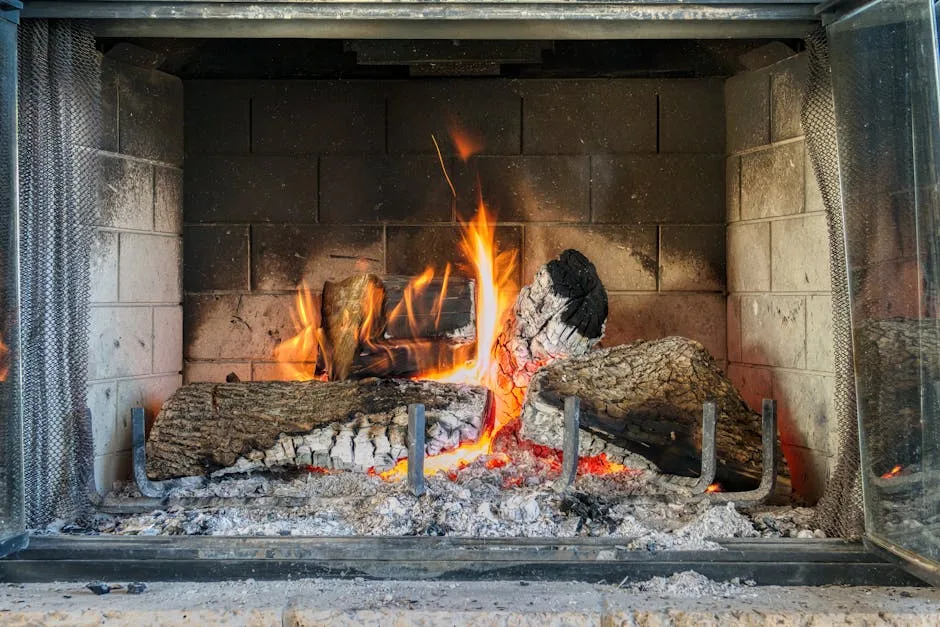
This is where projects go sideways, and it is rarely from carelessness — it is from using clearance numbers that apply to the wrong type of fireplace. The code requirements for a traditional wood-burning firebox, a gas insert, and an electric fireplace are substantially different, and mixing them up creates either a fire hazard or an unnecessarily conservative build that wastes usable alcove space.
For wood-burning fireplaces: The IRC (International Residential Code) requires that combustible materials maintain a minimum of 6 inches clearance from the firebox opening on sides and above. Mantels that project more than 1.5 inches from the face of the fireplace must clear the opening by at least 12 inches on each side. These numbers apply to the surround itself — your flanking cabinetry, if it’s positioned in true alcoves set back from the firebox face, typically has more clearance than this threshold anyway. But always measure from the firebox opening, not from the edge of the surround.
For gas inserts: Clearance requirements are set by the manufacturer, not just the IRC, and they vary significantly between units. Some high-efficiency gas inserts specify only 1–2 inch clearances to combustibles because their exterior surfaces stay relatively cool. Others require 6–12 inches depending on how the convection system vents heat. Pull the actual installation manual for your specific unit before framing anything.
For electric fireplaces: Clearance requirements are minimal — most manufacturers specify 1–3 inches — because there is no combustion and the unit’s heat output is directed intentionally. This is why built in storage around fireplace installations with electric units are significantly more forgiving to design and far easier to execute as DIY projects.
The practical step: call your local building department, give them the make and model of your fireplace insert, and ask whether your planned cabinetry layout requires a permit review. In jurisdictions that have adopted strict fire codes, this call can save you from a failed inspection after the work is done.
Depth, Wiring, and the Details That Separate Good From Great
Built in storage around fireplace walls that photograph well and live well have one thing in common: the details were resolved before construction started, not patched in afterward.
Depth: Standard base cabinets run 24 inches deep. Standard upper cabinets run 12 inches. In most fireplace alcoves, neither of these is actually the right answer — because the alcove depth is dictated by the chimney breast projection, which in older homes is often 14–16 inches. Building cabinetry that matches the alcove depth exactly, rather than defaulting to stock dimensions, is what makes flanking built-ins look architecturally integrated rather than inserted. If your alcoves are only 10 inches deep, build to 10 inches and use shallower shelving throughout — the visual continuity matters more than the storage volume.
Electrical: Plan for outlets inside lower cabinets if you’re storing anything that charges (game consoles, media equipment, small appliances). Plan for switched outlets at the back of upper shelves if you want accent lighting that runs from a wall switch rather than a plug. Both of these require a licensed electrician and should be roughed in before drywall closes. Retrofitting electrical into finished cabinetry is expensive, disruptive, and frequently looks amateurish no matter how carefully it’s done.
Lighting: Integrated lighting in built in storage around fireplace installations is the single highest-impact upgrade per dollar spent. LED strip lighting inside upper cabinet interiors, puck lights under shelves aimed at objects below, or small directional spots recessed into the top of the unit — any of these transforms how the wall reads at night, which is when a fireplace wall is doing its most important visual work. Budget $150–$400 for the lighting hardware depending on scope; this is almost always worth the spend.
Back panel material: Painted MDF back panels read flat and cheap. Wallpapered back panels — even using peel-and-stick — add immediate depth and visual interest. Beadboard back panels work well in traditional or cottage applications. Mirrored back panels expand perceived space in smaller rooms. None of these choices affect function, but all of them affect how the finished piece photographs and whether it looks like custom work or assembled furniture.
FAQ
Can I install built in storage around a fireplace myself, or do I need a professional?
It depends on your alcove conditions and your carpentry baseline. Symmetrical, square alcoves with no obstructions and a non-combustible fireplace type (gas insert or electric) are genuinely manageable DIY projects using stock cabinetry and a trim kit. Asymmetrical alcoves, wood-burning fireplaces with strict clearance requirements, or any project that involves moving electrical or patching significant drywall should involve at least a finish carpenter consultation, even if you’re doing most of the work yourself.
How deep do fireplace alcove shelves need to be?
Match the alcove depth rather than defaulting to a standard cabinet dimension. Most chimney breast alcoves in homes built before 1960 run 12–16 inches deep; in newer construction they’re often shallower. Shelves built to the actual alcove depth look intentional. Shelves built shallower than the alcove leave an awkward gap at the back. Shelves built deeper than the alcove protrude past the chimney breast face and immediately look added-on rather than built-in.
What’s the best way to make IKEA cabinets look like custom built in storage around a fireplace?
Three things do the most work: continuous crown molding at the top that runs wall to wall (not just across the cabinets), a consistent base that raises everything off the floor by 4–6 inches and is built from site lumber to match the room’s baseboard profile, and painting everything — cabinets, trim, and back panels — the same color in the same finish. The color unifies the components; the crown and base detail makes them read as architecture rather than furniture.
Do I need a permit for built-in shelving next to a fireplace?
In most jurisdictions, shelving and cabinetry that don’t involve structural changes or electrical work don’t require a permit. The exceptions are: relocating electrical outlets, making any changes to the firebox itself or its surround, framing in a gas line, or any work that a local inspector would classify as structural. When uncertain, a 10-minute call to your local building department is faster and cheaper than discovering a code violation after the fact.
How do I handle a fireplace wall where the alcoves are different sizes on each side?
Asymmetrical alcoves are more common than most guides acknowledge, particularly in homes where the chimney breast is not centered on the wall or where an old door or window was closed off on one side. The cleanest solution is not to force symmetry — it’s to acknowledge the asymmetry deliberately. Different width units, different heights, different functions on each side (closed cabinets on one side, open shelving on the other) can all work, provided the trim package, paint color, and hardware are consistent across both sides. Forced symmetry with filler panels almost always reads as a compromise; deliberate asymmetry reads as a design decision.