The most common reason cute diy room decor looks homemade instead of designed has nothing to do with skill — it’s that most people start making things before they decide what the room is supposed to feel like. They hot-glue a photo frame, hang some fairy lights, and wonder why the result looks like a dorm room instead of a styled space. The answer is almost always that the making came before the thinking. Fix that sequence, and everything else falls into place.
Quick Answer
The most common reason DIY room decor looks homemade instead of designed has nothing to do with skill — it’s that most people start making things before they decide what the room is supposed to feel like.
How Can I Decorate My Room With DIY (Without It Looking Cheap)?
In This Article
- How Can I Decorate My Room With DIY (Without It Looking Cheap)?
- What the 3-5-7 Rule in Decorating Actually Means (and How to Use It for DIY)
- Wall Treatments You Can Actually Make (That Replace Expensive Wallpaper or Art)
- DIY Textiles and Soft Furnishings That Do the Heavy Lifting
- How to Style Shelves and Surfaces So Your DIY Work Looks Collected, Not Crafted

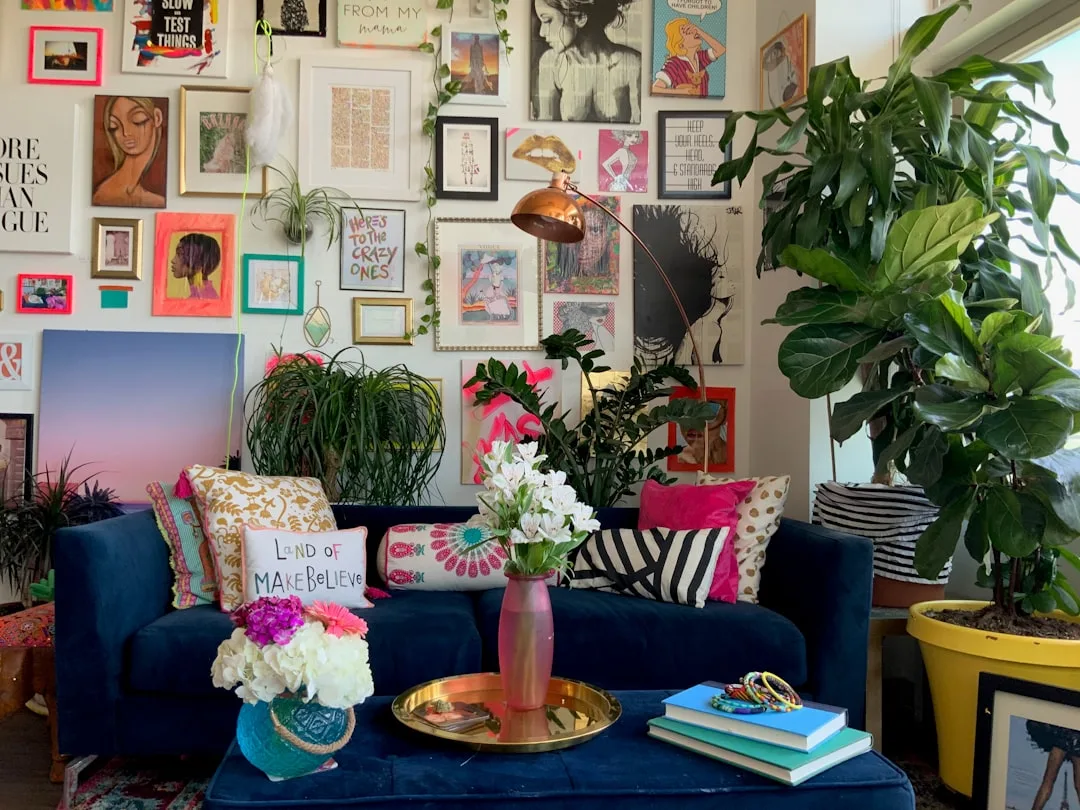
Cheap-looking DIY has a specific signature, and once you see it, you cannot unsee it. It’s not the materials — I’ve seen rooms decorated with Dollar Tree finds that looked genuinely editorial. The tell is randomness: a clay dish here, a macrame knot there, a string of fairy lights draped over something that doesn’t need draped. Nothing speaks to anything else.
The first thing to decide before you touch a glue gun is what the room is supposed to feel like. Not what it should look like — feel like. Warm and grounded? Light and airy? Moody and layered? That feeling becomes your filter. Every project you make either earns its place or it doesn’t.
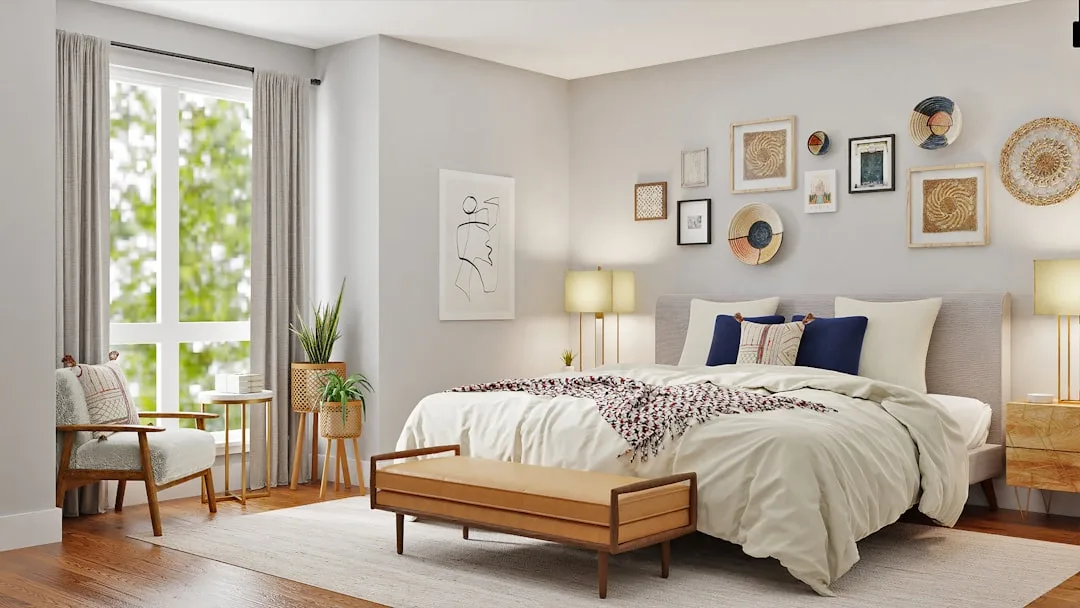
From there, I’d argue the single most effective strategy for DIY rooms is what I call the “one hero piece” approach. Instead of making ten small decorative objects that compete for attention, focus your time and budget on one large-scale DIY that anchors the space — a floor-to-ceiling fabric panel, a statement arch treatment on the wall above the bed, a fabric-wrapped headboard. One strong piece gives the room a focal point. Everything else serves it.
Before you make anything new, do a quick audit of what’s already there. DIY projects look dramatically better in edited spaces. Pull out anything that doesn’t belong to the feeling you defined, even temporarily, and see what the room tells you.
Then use the material echo principle: choose one material — rattan, linen, terracotta, raw wood — and repeat it in at least three places. Your DIY clay pot, a woven basket, a wooden shelf bracket. Suddenly those handmade pieces look like a collection instead of clutter.
Here are the most effective materials to anchor a cohesive cute diy room decor scheme, and what each one communicates visually:
- Rattan or cane: warmth, texture, a relaxed editorial quality — pairs well with cream, sage, and terracotta
- Raw linen: softness without sweetness, works in almost every aesthetic from minimal to maximalist
- Terracotta clay: grounded and organic, reads as intentional even in rough, hand-built forms
- Raw or whitewashed wood: versatile enough to lean rustic or Scandinavian depending on what surrounds it
- Dried botanicals: instant warmth and zero maintenance — pampas, dried eucalyptus, and bunny tail grass all photograph beautifully and cost almost nothing dried
Pick one as your anchor and let the others appear as accents. Three rattan pieces, two linen textures, one terracotta clay pot — that’s a material story.
Actionable takeaway: Write down three words describing how you want your room to feel before starting any project. Every cute diy room decor project you make should pass the test of those three words.
What the 3-5-7 Rule in Decorating Actually Means (and How to Use It for DIY)
Most decorating advice either skips the 3-5-7 rule entirely or mentions it in passing without explaining why it works. It’s more useful than almost any other framework I’ve given clients — and it takes about four seconds to apply.
The rule is this: group decorative objects in odd numbers — 3, 5, or 7 — with varying heights, textures, and scales. Never even-numbered pairs outside of intentional symmetry (two matching sconces flanking a mirror, for example, is intentional; two identical clay dishes next to each other is just default placement). The reason it works is that asymmetry reads as a deliberate choice. Even-numbered, same-height groupings look like you set something down and forgot to move it.
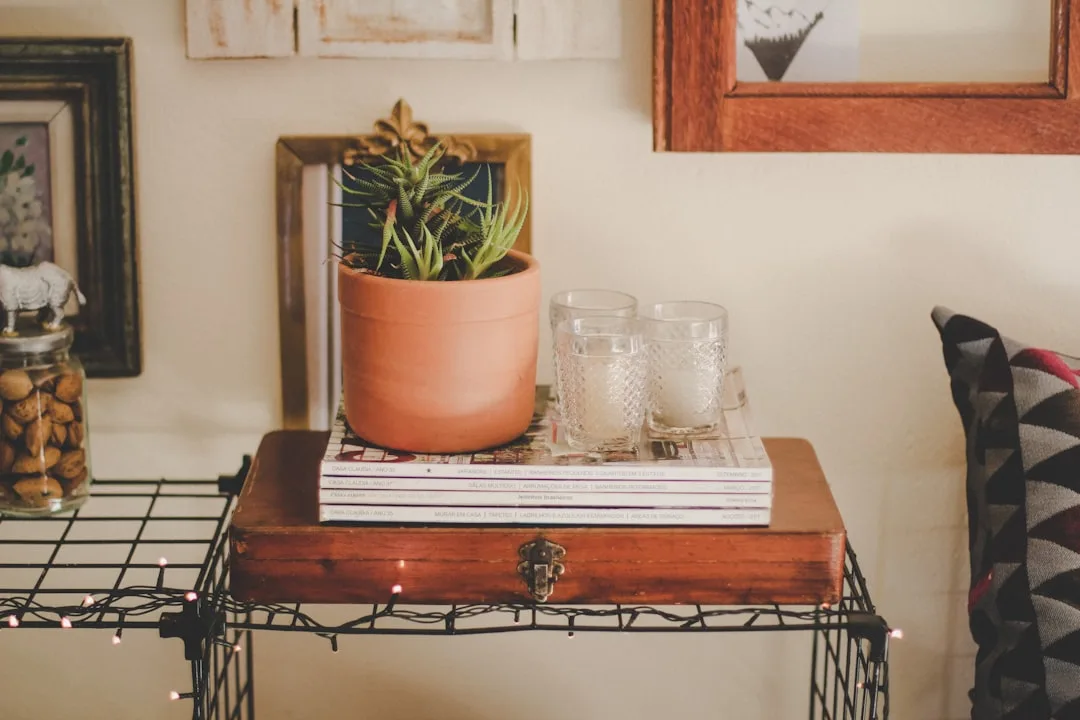
Here’s how to apply it to a DIY shelf vignette from scratch. You need three items at different heights: one tall (a macrame wall piece propped against the back of the shelf, or a ceramic vase you’ve painted), one medium (a small potted plant in a hand-painted terracotta pot), and one low (a folded linen square or a small stack of books with the pages facing out). Three objects, three heights, at least one natural texture. That’s it. Interior designers frequently cite this framework as one of the fastest ways to make any arrangement feel intentional — it’s not theory, it’s spatial logic.
Gallery walls trip people up for the same reason. The pattern I kept seeing with clients was that they’d buy matching frames in sets of four or six — because that’s how craft stores sell them — and then wonder why the result looked like a hotel corridor. Mix three different frame styles in odd quantities. Three of one style, two of another, one outlier. That spread feels curated.
Here’s the mistake I see most often with cute diy room decor specifically: someone makes five identical small clay dishes — same size, same finish — and lines all five up on a single shelf. The solution isn’t fewer dishes. It’s distributing them: a group of three on the shelf, one on the nightstand, one on the windowsill. Same five pieces, but now they’re threading through the room instead of sitting in a row.
The rule extends to color, too:
- Dominant (60%): your wall color, large textile, or floor — the background
- Secondary (30%): furniture, bedding, larger DIY pieces
- Accent (10%): the color you choose for painted clay, trim ribbon, or a single throw pillow
When you’re mixing paint colors or choosing fabric for a DIY project, assign it to one of those three categories first.
Actionable takeaway: Before displaying any DIY object, count how many are in the grouping and adjust to an odd number. Then check that at least two of the three items differ in height.
Wall Treatments You Can Actually Make (That Replace Expensive Wallpaper or Art)
Blank walls are the complaint I heard more than any other in eleven years of client work. And almost every time, the proposed solution was expensive — wallpaper, large-format art prints, gallery frames that cost $40 each. The DIY alternatives I’m about to walk through aren’t compromises. Some of them look better than the retail version.
Peel-and-stick wallpaper averages $50–$100 per roll, and a single accent wall typically needs 3–5 rolls — meaning you’re spending $150–$500 before you’ve touched anything else in the room. DIY paint techniques hit the same visual register for 70–80% less.
The limewash paint effect is the one I’d start with. You don’t need specialty paint. Mix standard latex wall paint with water at roughly a 1:1 ratio, dampen a clean rag, and apply the mixture in overlapping circular strokes, working in 2-foot sections. Let some patches be lighter, some heavier. The unevenness is the point — it’s what creates that aged, mineral-plaster look. Full accent wall cost: $15–30. Time: about two hours, including dry time between coats. The first time I showed this technique to a client who’d been quoted $400 for Venetian plaster, she made me show her three times because she didn’t believe the results came from a $12 can of paint and a rag.
Beyond limewash, here are four more wall treatments worth knowing:
- Fabric panel wall: Stretch a 2-yard piece of linen, bouclé, or printed cotton over a canvas stretcher frame (the kind sold for painting). Staple it to the back. Hang it oversized — ideally at least 24×36 inches — and it reads as intentional textile art. Cost: $20–40 depending on fabric choice.
- Painted arch or curved shape: Use a length of string tied to a pencil as a compass to draw a large arch or half-circle directly on the wall. Paint it in a contrasting matte color — dusty rose, warm terracotta, sage. No frame, no art, just shape. This is one of the most-searched cute diy room decor trends for a reason: it costs $10 and photographs as if a designer did it.
- Washi tape grid or geometric: Low-commitment, renter-safe, and completely removable. A floor-to-ceiling grid in a single color of wide washi tape looks like grasscloth wallpaper from across the room. Measure carefully — precision is what separates this from a craft project.
- Stenciled repeat pattern: Buy a single reusable stencil ($8–15) and a small foam roller. Use it with the secondary color from your 60/30/10 palette. A half-wall stenciled pattern below a painted chair rail reads as wallpaper to anyone who isn’t standing six inches from it.
The common thread across all of these: they work because they commit to a large surface area. Small DIY art on a large blank wall looks like an afterthought. Treatments that address the whole wall — or a significant portion of it — look like decisions.
DIY Textiles and Soft Furnishings That Do the Heavy Lifting
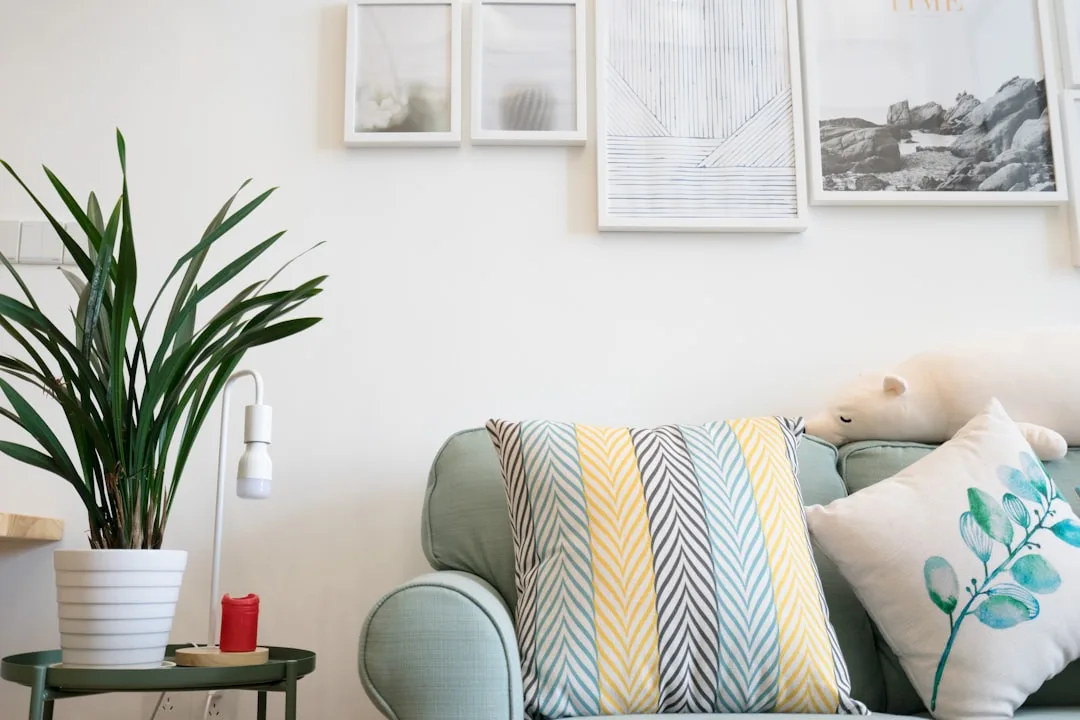
Textiles are the fastest way to change the perceived temperature and mood of a room, and they’re also the category where DIY has the most legitimate advantage over retail. A store-bought lumbar pillow in a specific linen color costs $35–60. The same cover made from a half-yard of fabric costs $6–10 and can be sized and proportioned exactly to your sofa or bed.
No-sew pillow covers are the entry point. Cut fabric to size, use iron-on hem tape along three edges, fold and press, insert the pillow form, and fold the fourth edge shut with a tuck or a few stitches. Total time: twenty minutes. The key upgrade most tutorials skip is sizing: cut your cover 1 inch smaller than the pillow form on each side. The slight tension makes the pillow look full and intentional rather than loose and sad.
For cute diy room decor that actually changes how a room feels, focus on these textile projects in order of impact:
- Oversized floor cushions: Two yards of canvas or heavy linen, sewn or taped into a square, stuffed with polyfill. Stack two or three in a corner and the room gains a lounging zone that feels designed rather than improvised. Cost per cushion: $12–18.
- Knotted macrame wall hanging: The basic square knot is the only technique you need for 80% of macrame patterns. A wall hanging that spans 18–24 inches wide and 30+ inches long reads as a statement piece. Material cost for that size: $8–14 in cotton rope.
- Dip-dyed curtains: Buy inexpensive white cotton curtain panels (IKEA’s RITVA panels are $15 each). Prepare a dye bath with fabric dye and hot water in a large bucket. Dip the bottom third of each panel and let the color graduate upward naturally. Hang while slightly damp to let gravity even out the transition. The result looks like custom ombré drapes.
- Gathered fabric headboard: Cut fabric 2.5x the width of your mattress to allow for gathering, then staple it to a horizontal wooden dowel or curtain rod mounted above the bed. The gathered fabric falls in soft folds and looks like an upholstered headboard silhouette without any actual upholstery. Cost: $20–35 depending on fabric.
One principle that applies to every textile project: wash and dry your fabric before working with it. Pre-washing removes the sizing finish that makes fabric look stiff and slightly shiny in photographs. Post-wash fabric has that softened, lived-in quality that makes professional interiors look approachable rather than staged.
How to Style Shelves and Surfaces So Your DIY Work Looks Collected, Not Crafted
The display is a separate skill from the making. I’ve seen genuinely beautiful handmade objects look terrible on a shelf and I’ve seen imperfect DIY pieces look like carefully sourced collectibles — the difference was entirely in how they were arranged and what was around them.
The single biggest surface-styling mistake in cute diy room decor is over-filling. Every surface gets loaded with everything that was made, as if displaying all of it proves the effort was worthwhile. The opposite is true. Editing is what makes the displayed pieces feel valuable.
The rule I give clients for shelves: fill no more than 70% of the available surface. The 30% that’s left empty isn’t wasted space — it’s what your eye rests on between the objects, and it’s what makes each object readable on its own terms.
For a standard bookshelf styled to look designed rather than stored, work in sections:
- Section one: Books spine-out, stacked horizontally, topped with one small object — a DIY clay dish or a single dried stem in a bud vase
- Section two: One tall item (vase, candle, small plant) flanked by books standing vertically, with one or two leaning framed pieces
- Section three: A deliberate gap or a single decorative object with clear space around it
Alternate these section types across the shelves so no two adjacent shelves look identical. The variation is what makes it look like a stylist did it.
For nightstands and dressers, apply the same 70% rule and limit yourself to five objects maximum — fewer is almost always better. A lamp, one plant, one DIY object, one functional item (a small tray, a dish for jewelry), and one stack of books is a complete nightstand. Adding a sixth or seventh item collapses the arrangement.
Trays are the secret weapon of surface styling. Group three or four small DIY objects inside a tray — a simple wooden or woven one — and they read as a single intentional vignette rather than scattered clutter. The tray creates a visual boundary that tells the eye “this is a collection.” Outside the tray, those same objects would look like they were set down and forgotten.
Frequently Asked Questions About Cute DIY Room Decor
How do I make my DIY room decor look expensive on a very small budget?
The two highest-impact changes are paint and textiles, in that order. A limewash paint effect on one wall costs under $30 and changes the entire character of the room. After that, a single large textile — an oversized throw, dip-dyed curtains, or a gathered fabric headboard — does more for a room than ten small decorative objects. Budget-conscious cute diy room decor almost always looks better when the money is concentrated in one or two large-scale elements rather than spread across many small ones. Also: edit aggressively. Removing things costs nothing and consistently makes rooms look more designed.
What’s the easiest DIY project for someone who has never made anything before?
Painted terracotta pots are genuinely beginner-proof. Buy inexpensive terracotta pots from any garden center or dollar store. Sand lightly, wipe clean, and apply chalk paint or regular matte acrylic in any color. Two coats, no primer needed on raw terracotta, no sealing required for indoor use. The porous surface grabs paint beautifully. From there, the slight imperfections in handmade application look intentional rather than amateur — terracotta is forgiving in a way that smooth ceramic is not. Total cost for three pots: $5–12.
How many DIY projects should a room have before it looks overdone?
There’s no fixed number, but there is a useful test: if you can name every handmade object in the room in under ten seconds, you’re probably fine. If it takes longer, you’ve likely crossed into visual noise. The better question is how many categories of DIY are represented — wall treatments, textiles, surface objects, and lighting are four distinct categories. Having one or two strong pieces in two or three categories almost always looks more designed than having eight pieces in a single category. Mix the scale, not just the quantity.
Can you do cute DIY room decor in a rental without damaging anything?
Yes, with a few specific approaches. Painted arch shapes on walls can be painted over when you leave — use the same wall paint with just enough contrast to read in photos, and a single coat of the original color will cover it on move-out. Fabric panels hung from tension rods leave no holes. Washi tape wall treatments are completely removable. Command strips rated for the weight of what you’re hanging work for frames and lightweight shelves. The one thing I’d avoid in rentals is limewash — the texture can be hard to paint over cleanly depending on the existing wall surface.
Why does my DIY room decor look good in person but terrible in photos?
Almost always a lighting issue, and sometimes a styling density issue. Natural light from a single window creates the soft, directional quality that makes rooms photograph well — if you’re shooting with overhead lights on, turn them off and open every window before you take a single photo. For the styling issue: rooms tend to look more cluttered in photos than in person because the camera flattens depth. Before photographing, remove one or two objects from every surface — what felt edited in person will look right on screen. Shoot from corner angles rather than straight-on to give the image depth, and shoot at approximately eye level rather than tilting the camera up or down.