The most expensive mistake in a DIY basement finish isn’t bad drywall work or crooked framing — it’s starting construction before the concrete floor has been tested for moisture, a 48-hour check that costs nothing and can save you $11,000 in water damage repairs down the road. I’ve watched homeowners skip this step. I’ve seen what it costs them. And I’ve never once seen a how-to article explain it with enough specificity to actually change behavior — so let’s fix that.
Quick Answer
The most expensive mistake in a DIY basement finish isn’t bad drywall work or crooked framing — it’s starting construction before the concrete floor has been tested for moisture, a 48-hour check that costs nothing and can save you $11,000 in water damage repairs down the road.
Can a Homeowner Actually Finish Their Own Basement?
In This Article
- Can a Homeowner Actually Finish Their Own Basement?
- The Moisture Problem Nobody Warns You About Until It’s Too Late
- How Cheaply Can You Actually Finish a Basement? (Real Numbers, Not Ranges)
- Is It Hard to Finish a Basement Yourself? A Skills-Honest Breakdown
- The Specific Things That Turn a DIY Basement Into a Costly Redo
- A Sequence That Actually Works: Phasing Your Project to Avoid Rework
- Design Decisions That Are Much Harder to Change Later
Yes. But not in the way most people mean when they ask that question.
What’s genuinely DIY-able: framing non-load-bearing partition walls, hanging and finishing drywall, installing luxury vinyl plank flooring, painting, demo work, and basic insulation. These are learnable skills that don’t require a license and don’t carry catastrophic downside risk if you make a mistake on the first attempt. A competent, patient homeowner can do all of them. What isn’t DIY-able — legally, in most U.S. municipalities — is any work that touches the electrical panel, ties into existing HVAC trunk lines, or modifies gas supply lines. Not because the skills are necessarily beyond a capable person, but because these are inspectable trades that require licensed contractors to pull permits in most jurisdictions. Getting caught with unpermitted electrical work doesn’t just fail inspection; it can void your homeowner’s insurance.
The pattern I kept seeing across years of working on renovations in Chicago and New York was a third category nobody names: the hybrid DIY. You do the demo, the prep, the framing, the insulation, the drywall, and the flooring. You sub out the electrician for rough-in and panel work, the HVAC tech for any duct extension, and you pay for the inspections. Your labor savings are enormous and your final product is legal. This is the model that actually works.
On timeline: a solo DIYer finishing a 1,000 square foot basement is looking at 3–6 months of weekends. Not the “4–6 week” timelines that circulate in renovation content. Those timelines assume two experienced people working full days, every day, with no inspection delays. Real life doesn’t look like that.
The ROI case is real — the National Association of Realtors reports that a finished basement recoups roughly 64–70% of its cost at resale — but that number assumes permitted work that passes inspection. Unpermitted finishes don’t just fail to add value; they can reduce an appraised value or freeze a sale entirely when a buyer’s lender requires permits as a condition of the mortgage. The permit fee is not optional. It’s insurance.
Actionable takeaway: Before buying a single stick of lumber, call your county building department and ask what trades require licensed contractors and what the permit timeline looks like. That one phone call shapes every decision that follows.
The Moisture Problem Nobody Warns You About Until It’s Too Late
Here’s the thing about moisture in a basement — it always looks like moisture. Wet concrete, dark spots, condensation on pipes. It all reads as “damp basement,” but the cause determines the fix, and the two causes require completely different responses.
Condensation is a humidity and ventilation problem. Warm, humid interior air hits a cold concrete surface and deposits water. You see it most in summer. It’s solvable with a dehumidifier, better air circulation, and sometimes vapor barrier work. True water intrusion is a grading, drainage, or foundation crack problem — groundwater is physically migrating through or under your foundation. No amount of interior finishing fixes this. You address it from outside or with a perimeter drainage system, and it costs real money before framing begins.
They look identical on a Tuesday afternoon.
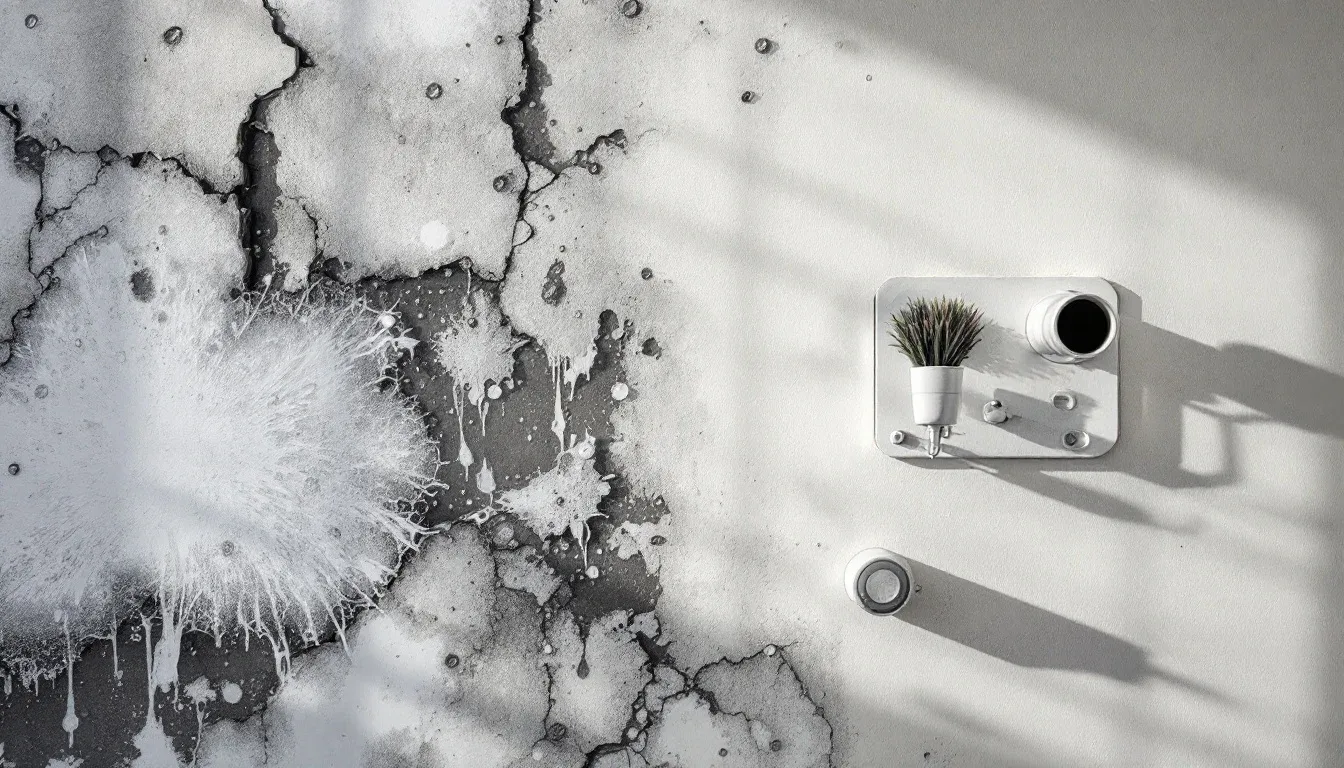
The way to distinguish them is the plastic sheet test — a check I’ve recommended to every homeowner I’ve worked with who was considering a basement project. Tape a 12-by-12-inch square of plastic sheeting flat against the bare concrete floor, seal all four edges with duct tape, and leave it for 48–72 hours. Moisture on the underside of the plastic — between the sheet and the concrete — means groundwater intrusion. Moisture on the top means condensation from interior air. Run the same test on the below-grade walls. Write down what you find.
Then wait. Run the test again in a different season.
This is the part that nobody wants to hear. One season of data is not enough in any climate with freeze-thaw cycles or significant seasonal rainfall variation. A basement that tests dry in February can show active intrusion in April when snowmelt saturates the soil. I’ve seen homeowners skip the second test, frame in October, and find standing water behind their new walls by March. HomeAdvisor data puts water damage repair in a finished basement at $4,500–$11,000 — costs that are entirely avoidable if you resolve moisture before framing begins.
Even in basements that test clean, code in many states now requires a drainage plane — a physical gap or moisture barrier — behind any framing on below-grade walls. This isn’t paranoia. It’s acknowledgment that ground conditions change.
- Complete the plastic sheet test on both floor and walls
- Test in two different seasons before making any framing decisions
- If moisture appears on the underside of the sheet, stop and consult a waterproofing contractor before proceeding
- Check your state’s building code for drainage plane requirements on below-grade walls — many now mandate it regardless of test results
Actionable takeaway: Do the plastic sheet test this weekend. Mark the date, photograph the result, and calendar a reminder to repeat it in 60–90 days in different weather conditions. This costs you nothing and determines whether you’re building a finished basement or an expensive mold incubator.
How Cheaply Can You Actually Finish a Basement? (Real Numbers, Not Ranges)
The $15,000–$75,000 range that appears in every basement finishing article is useless. It doesn’t help you plan. It doesn’t help you make decisions. It’s a hedge that protects the writer from being wrong.
What actually helps is a cost-per-decision framework — breaking your budget into five buckets you control independently:
1. Permits and inspections: $200–$1,500 depending on municipality and scope. Non-negotiable. Don’t skip this line item.
2. Framing materials for 1,000 square feet: $800–$1,400 in dimensional lumber, treated bottom plates, and fasteners. Pressure-treated lumber for any plate touching concrete is required by IRC and adds maybe $80 to the total. Worth every cent.
3. Insulation: $600–$1,200 depending on method. Rigid foam board runs higher upfront but performs better on below-grade walls. More on this in the mistakes section.
4. Drywall material and finishing supplies: $1,200–$2,200 for a 1,000 square foot basement, including joint compound, tape, corner bead, and screws.
5. Flooring: The single highest variable in any basement budget. Luxury vinyl plank starts around $0.89 per square foot on the low end and runs $3–$4 for mid-grade products. Engineered hardwood hits $8 per square foot and above — and in a basement, it’s a risk I wouldn’t take unless moisture is completely resolved and a subfloor is installed.
Add those buckets together for a competent DIYer doing their own labor and you’re looking at $7,000–$12,000 in materials for a livable, finished 1,000 square foot basement. Contractor quotes for equivalent work run $45,000–$57,500 — the 2023 Cost vs. Value Report by Remodeling Magazine pegs a midrange basement finish at $57,500 for full contractor execution. DIY material costs represent roughly 15–20% of that figure when labor is removed. The labor savings are real and significant.
What most budget articles never mention:
- Dumpster rental for demo debris: $300–$600
- Tool rental (drywall lift, miter saw if you don’t own one): $150–$300 per weekend
- Primer and paint for a full basement: $400–$700 — people always underestimate paint
- Egress window if code requires it for bedroom use: $2,500–$5,000 installed, not a DIY item in most cases
- Subfloor materials if installing over bare concrete: add $1.50–$2.50 per square foot
And the silent budget killer — project abandonment. If a DIY basement stalls at the framing or rough drywall stage and sits for six months, materials that weren’t stored correctly absorb humidity. OSB sheathing warps. Unfaced insulation sags. Drywall that got wet once has to come out. Starting over costs more than starting right.
Actionable takeaway: Build your budget using the five buckets above, add 15% contingency, then add the hidden costs line by line. If the number scares you, that’s information — it’s better to know now than after the dumpster is in your driveway.
Is It Hard to Finish a Basement Yourself? A Skills-Honest Breakdown

Difficulty is relative, but the question deserves a real answer — not “it depends” — so here’s a task-by-task breakdown organized by honest skill tier.
Beginner-safe: Demo, cleaning, painting, and LVP flooring installation. These tasks are forgiving. Mistakes are correctable. The learning curve is a weekend, not a month.
Intermediate: Framing non-load-bearing partition walls and hanging drywall on walls. Framing is geometry and patience. Drywall on vertical surfaces is manageable with a helper. The skills are learnable in a single project.
Advanced-DIY: Recessed lighting rough-in on existing circuits (not new circuits, not panel work), basic HVAC register extension from an existing run. These require understanding of how the existing system works and willingness to read your local code carefully.
Hire out, no exceptions: New circuit breaker installation, egress window cutting and installation, load-bearing wall modifications, and any plumbing rough-in for a basement bathroom. The risk of error is too high, the code requirements are too specific, and the inspection failure consequences are too expensive.
The drywall ceiling is where most first-time basement finishers underestimate what they’re getting into. A 1,000 square foot ceiling is a two-person minimum job — holding a 4×8 sheet of drywall overhead while driving screws is not a solo operation, even with a rented drywall lift. More critically, mudding horizontal seams overhead is a genuinely difficult skill that most people need 2–3 attempts to get paint-ready. A survey by This Old House found that 67% of first-time DIYers needed to sand and re-mud at least one wall section before achieving a paint-ready surface — and that’s walls. Ceilings are harder.
Permit reality also affects timeline in ways most articles don’t acknowledge. Framing, electrical rough-in, and insulation often require separate inspections in most U.S. counties. Wait times between inspections run 2–4 weeks in many jurisdictions. Your “4-weekend project” has calendar gaps built in that you can’t work around — so plan finish work and secondary tasks to fill those windows.
On tools: a first-time DIYer who buys rather than rents everything upfront — miter saw, drill, level, drywall lift, mud mixer, pole sander — spends $800–$1,500. These tools have real resale value and will be used again. But they must be counted in first-project cost comparisons if you’re deciding between DIY and a contractor quote.
Actionable takeaway: Be honest with yourself about the ceiling. If you’ve never mudded drywall before, practice on a scrap piece or a closet wall before touching the ceiling. The ceiling sets the tone for the whole space and it’s the hardest thing to redo.
The Specific Things That Turn a DIY Basement Into a Costly Redo

I’ve walked through enough finished basements — both before and after problems surfaced — to know that most catastrophic failures trace back to one of five specific decisions made early in the project.
Framing directly against the concrete wall. Walls built flush to concrete with no gap trap moisture between the framing and the foundation. The bottom plate rots. Mold grows in a cavity nobody can see. This fails inspection in any state that requires a drainage plane, and it fails your family’s air quality long before an inspector ever shows up. The fix is simple — maintain a minimum 1-inch air gap between framing and the concrete wall, or apply closed-cell spray foam directly to the concrete before framing goes up. Not optional. Non-negotiable.
Using kraft-faced fiberglass batt insulation on below-grade walls. This is the mistake that makes me most impatient, because the product itself gives you the wrong instructions. The kraft paper vapor barrier is meant to face toward the living space — the warm side — in above-grade wall applications. In a below-grade application, the thermal and moisture dynamics are reversed, and the International Residential Code Section R702 requires vapor retarders in below-grade applications to be installed on the warm-in-winter side. Kraft-faced batts installed the standard way create a moisture trap inside the wall cavity. Use rigid foam board against the concrete, or use unfaced batts with a separate poly vapor barrier on the room side.
Skipping the subfloor on concrete. Direct-to-concrete LVP or carpet installation feels completely acceptable — until the first humid August. Concrete transmits cold and moisture upward. A ¾-inch plywood subfloor on sleepers, or even a dimple mat with plywood on top, adds $1.50–$2.50 per square foot but eliminates cold-floor complaints, reduces moisture transmission dramatically, and makes the space feel like a room rather than a parking structure with rugs.
Installing recessed lights before confirming insulation clearance. IC-rated fixtures — insulation contact rated — are required anywhere insulation will contact the light housing. Non-IC cans are a fire hazard and will fail inspection. Check the fixture label before purchasing, and check it again before installation. A $12 difference at the hardware store is not worth the inspection failure.
Finishing walls before rough-in inspections are approved. This is the most demoralizing and expensive mistake in the process. Drywall goes up after electrical and plumbing rough-ins are inspected and signed off — not before, not simultaneously. Closing walls before inspection forces tear-out. Tear-out damages the surrounding drywall. You buy more materials, spend more hours, and lose confidence in the project. Wait for the sign-off. Always.
Actionable takeaway: Before framing a single wall, print the IRC sections relevant to your project and mark the vapor barrier and drainage plane requirements. Your local code may be stricter than the IRC baseline — confirm with your building department.
A Sequence That Actually Works: Phasing Your Project to Avoid Rework
The reason most “step-by-step” basement guides fail in practice is that they’re organized by task category rather than by inspection dependencies. If you do things in the wrong order, you don’t just waste time — you pay to undo work. Here’s the sequence that actually prevents rework.
Phase 0 — Pre-construction (non-negotiable before anything else):
- Moisture testing, minimum 30 days and ideally two seasons
- Permit application submitted and approved
- Utility lines marked (call 811 before any penetration work)
- Ceiling height verified — IRC requires 7 feet finished height for habitable space; measure before you plan
- Egress assessment for any room intended as a bedroom — this affects window placement, exterior grading, and budget significantly
Phase 1 — Mechanicals before framing locks in walls. Any HVAC duct work, plumbing rough-in for a bathroom, or electrical panel additions must happen before partition walls go up. This sounds obvious. It isn’t — the pattern I kept seeing was homeowners framing first because framing feels productive, then discovering the HVAC contractor needs to run a line through exactly where a wall now sits. Relocation costs run $1,500–$3,000 and generate significant frustration.
Phase 2 — Framing and rough framing inspection. Frame all partition walls. Install blocking now — for future TV wall mounts, stair handrails, and any planned shelving — because retrofitting blocking into a finished wall costs three times what it costs to do it during framing. Call for rough framing inspection before insulation goes in.
Phase 3 — Insulation and second inspection. Complete all insulation after framing inspection passes. Some jurisdictions require a separate insulation inspection before drywall. Call your building department.
Phase 4 — Drywall, ceiling first. Hang ceilings before walls. Finish ceilings before walls. Ceiling compound drips during sanding and lands on wall surfaces — if those walls are already finished, you’re re-sanding. Sequence matters here.
Phase 5 — Flooring, trim, and paint. Paint before trim installation. Cutting in along unpainted baseboard takes more time than painting the wall first and then nailing trim over the edge. Small optimization, real time savings across a 1,000 square foot space.
Phase 6 — Final inspection and occupancy. Required before legally using the space as habitable. The National Association of Home Builders reports that permitted and inspected basement finishes appraise on average 8–10% higher than equivalent unpermitted work. The final inspection isn’t a bureaucratic inconvenience — it’s what makes the project’s value real.
Actionable takeaway: Map your phases against your permit’s inspection requirements before you start Phase 1. Write the inspection sequence on your wall with a marker. When you’re tired and tempted to skip ahead, the sequence written in your own handwriting will remind you why it matters.
Design Decisions That Are Much Harder to Change Later
Most how-to basement content ignores the design layer entirely, which is strange — because the decisions that feel most aesthetic are often the most structurally permanent.
The ceiling choice is the most consequential design decision in the entire project. A drywall ceiling gains 12–18 inches of visual height compared to a drop ceiling and looks cleaner, more finished. But it permanently conceals every mechanical system running through the ceiling cavity — ductwork, plumbing, electrical conduit. When something needs repair five years from now, someone is cutting into drywall. Drop ceilings and exposed-painted-black ceilings preserve access completely, and they’ve shed the dated stigma they carried in the 1990s. Choose based on how you’ll actually use the space, not which option photographs better.
Lighting layout cannot be an afterthought. Recessed light placement relative to where furniture will actually sit, the number of circuits for distinct zones — task lighting, ambient lighting, a dedicated circuit for media equipment — and 3-way switch configurations for the stairwell are all decisions that become extremely expensive to modify once drywall is up. I once worked with a homeowner who installed nine recessed cans in a tight grid, then placed a sectional sofa that put two of them directly in the center of where people would look while sitting. Glare, forever. Plan furniture placement before you plan lighting — not after.
Steel beam columns don’t disappear if you ignore them. Every basement with a steel beam has columns, usually one or two, somewhere in the middle of the floor plan. The instinct is to hide them — build a wall around them, tuck them into a corner. But columns fought with walls create awkward spaces that interrupt natural flow. The better instinct — the one I’ve seen work — is to make them features. Wrapped in wood, tiled, or left as exposed steel depending on the aesthetic, a column treated as a design element anchors the room. Plan your furniture layout around the columns first. Everything else follows.
Natural light strategy shapes whether the space feels livable or merely finished. Window well size, cover type (solid vs. grate vs. bubble dome), and egress window placement all determine how much borrowed light reaches interior zones. This isn’t a minor comfort consideration — it’s the difference between a basement that feels like an extension of the house and one that feels like a room you’re trying not to think about. Decide on window strategy before framing walls, because walls determine where light travels.
Actionable takeaway: Before drawing a single wall on your basement floor plan, sit in the empty space for twenty minutes with the lights off. Note where natural light enters, where the columns sit, where the mechanicals run. The constraints you’re working around are the design brief. Let them lead.
Frequently Asked Questions
Is it hard to finish a basement yourself?
It depends entirely on which part you’re asking about. Framing walls, painting, and installing LVP flooring are genuinely beginner-accessible skills — the learning curve is measured in hours, not months. Hanging drywall on walls is manageable with a helper and some patience. The ceiling is where difficulty spikes significantly: holding 4×8 panels overhead, running horizontal seams, and getting mudded joints paint-ready without ridges or cracks is a learned skill that most first-timers need two or three attempts to get right. According to a This Old House survey, 67% of first-time DIYers needed to re-mud and sand at least one surface before it was paint-ready. Factor in 2–4 week inspection wait times between project phases, and what feels hard isn’t always the physical work — it’s the patience required to do things in the right order.
Can a homeowner finish their own basement without a contractor?
For most of the work, yes — framing, insulation, drywall, flooring, and paint are all legally DIY in most jurisdictions. But electrical panel work, HVAC tie-ins, and plumbing rough-ins require licensed contractors in the majority of U.S. municipalities, regardless of your skill level. The smarter framing is “hybrid DIY”: do all the labor-intensive finish work yourself, sub out the licensed trades, pull permits for everything. This model captures most of the labor savings while keeping the work legal and inspectable. Unpermitted basement finishes can reduce appraised value or freeze a sale when a buyer’s lender requires permits as a loan condition — a risk that makes the hybrid approach worth every dollar of sub work.
How cheaply can you finish a basement as a DIY project?
A competent DIYer finishing a 1,000 square foot basement to a livable-but-not-luxury standard — framing, insulation, drywall, LVP flooring, paint — can expect to spend $7,000–$12,000 in materials. That range assumes you’re doing all the finish labor yourself and pricing materials at current big-box retail. Add egress window installation if code requires it for bedroom use ($2,500–$5,000), dumpster rental ($300–$600), tool rental for a drywall lift and miter saw ($150–$300 per working weekend), and primer and paint ($400–$700), and the realistic total for most projects lands between $10,000 and $15,000. Compare that to contractor quotes — the 2023 Cost vs. Value Report pegs a midrange contractor-built basement finish at $57,500 — and the labor savings are substantial. The floor and ceiling choices are where costs vary most widely; LVP at $0.89/sq ft versus engineered hardwood at $8+/sq ft is a $7,000 swing on a 1,000 square foot floor alone.
What should you not do when finishing a basement?
Five things cause the majority of costly redos, and all five are avoidable:
- Don’t frame walls directly against concrete. No air gap means trapped moisture, rotted bottom plates, and failed inspections. Maintain at least one inch of clearance or apply closed-cell spray foam to the concrete face first.
- Don’t use kraft-faced fiberglass batts on below-grade walls. The vapor barrier faces the wrong direction in below-grade applications and traps moisture inside the wall cavity. Use rigid foam board against concrete or unfaced batts with a separate poly vapor barrier on the warm side.
- Don’t skip the subfloor. Direct-to-concrete flooring transmits cold and moisture. A dimple mat with plywood on top adds $1.50–$2.50 per square foot and transforms the comfort of the finished space.
- Don’t close walls before inspections are signed off. Covering rough-in work before an inspector approves it forces tear-out. Wait for the approval stamp, every time.
- Don’t start construction before resolving moisture. Run the plastic sheet test on both floor and walls, in two seasons if possible, before framing begins. The HomeAdvisor data on water damage repair ($4,500–$11,000) represents real money spent by real people who skipped this step.
The thing you can do right now: Tape a piece of plastic sheeting to your basement floor. Seal the edges. Set a reminder on your phone for 72 hours from now. That single test will tell you more about whether your basement is ready to finish than anything else you could read today.