Most people decorate their living room in the exact wrong order — and the furniture return rates, the rugs that never quite fit, and the rooms that look busy no matter what you remove are all symptoms of the same sequencing problem.
It’s not a taste problem. It’s a sequence problem.
The decorating advice you’ll find almost everywhere skips over this entirely. You get lists of “tips” — add throw pillows, layer your lighting, try an accent wall — as if decoration is a bag of tricks you can scatter over a room in any order. It isn’t. Every decision you make in a living room either opens or closes the decisions that follow it. Buy the wrong rug size before your sofa is placed and you’ll spend the next two years wondering why the room feels off. Lock your furniture layout before you’ve mapped your traffic flow and you’ll end up with a beautiful arrangement that forces everyone to squeeze past the armchair every time they walk to the kitchen.
The sequence below is the one professional interior designers actually use — it’s just rarely written down anywhere. Work through it in order and each step makes the next one obvious.
Why the Order You Decorate In Changes Everything
Most decorating mistakes aren’t taste mistakes. They’re sequencing mistakes. The proof is in what people actually regret: not the style of a piece, but where it ended up, what size it was, or how it clashes with something they bought three weeks earlier. Experienced interior designers consistently report that roughly 70% of living room redesign regrets trace back to purchasing accent pieces before the furniture layout was finalized — not poor taste.
That statistic reframes the whole problem. You don’t need better taste. You need a better order of operations.
Think of decorating as a dependency chain — a sequence where each decision gates the next, the way code dependencies work in software. You can’t responsibly choose a rug until you know your sofa’s exact position. You can’t finalize paint color until you know your lighting conditions. You can’t layer accent colors until you’ve established your texture palette. Try to jump ahead and you’ll make decisions in a vacuum that won’t survive contact with the finished room.
There’s also a governing principle that runs through every step of this sequence, not just the color phase. It’s called the 70/30 rule: 70% of the room should speak in one clear visual language — dominant tone, dominant material, dominant style — while 30% introduces contrast, variation, and personality. This isn’t just a color tool. It applies to pattern distribution, texture mixing, furniture style, and even the ratio of filled to empty space on your shelves. You’ll see it surface at nearly every step below.
Here’s the practical implication of all this: if a decision you’re about to make doesn’t follow logically from the decision before it, you’re skipping a step. Stop, go back, and lock in what you skipped. Every shortcut here costs money downstream.
The single most expensive error first-time decorators make is buying a rug before the sofa placement is finalized. You’ll see exactly why in Step 3.
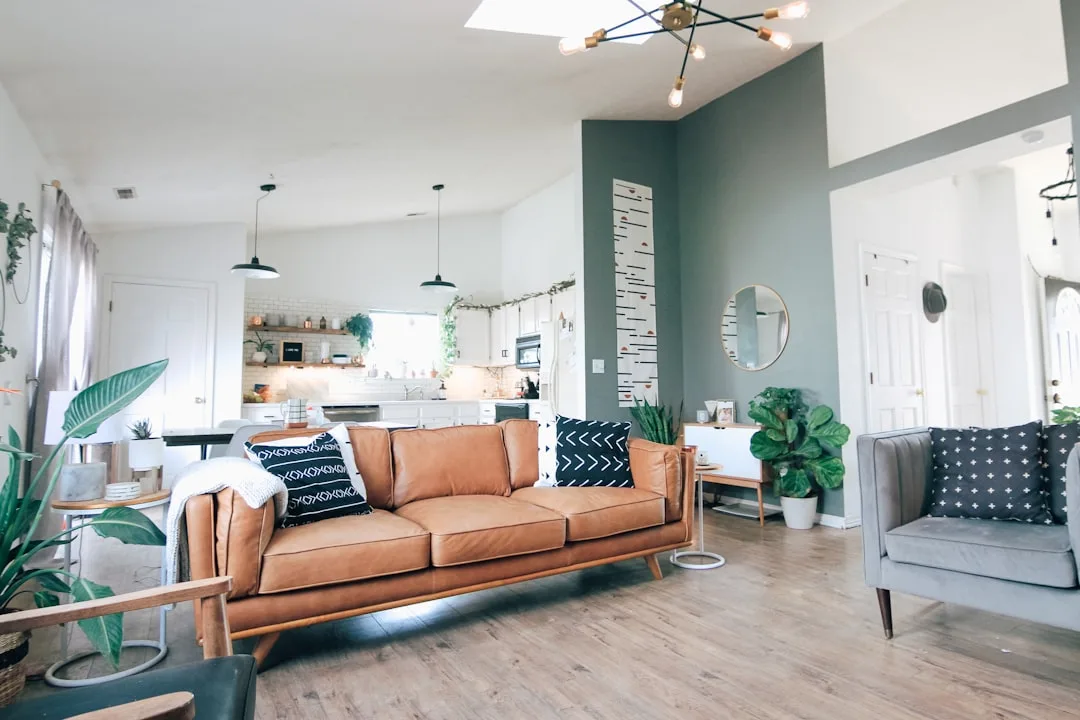
1. Anchor the Room With Your Largest Furniture Piece First
Everything in a living room orbits the sofa. Traffic flow bends around it. The rug size is defined by it. The focal wall is determined by which direction it faces. The lighting zones emerge from where people will sit on it. This is why the sofa — or your primary seating unit, if your room is built differently — gets placed before a single other decision is made.
Before you move anything, identify your room’s natural focal point. This is the architectural feature that draws the eye first when you walk in: a fireplace, a bank of windows, a well-positioned TV wall. The sofa should face the focal point directly, not angle toward it, not share the wall with it.
Once you know the focal point, you face the floating vs. wall-hugging question. Most first-time decorators press the sofa against the wall, usually because it feels safe or because it seems to create more floor space. It almost always does the opposite — it makes the room feel like a waiting room. Floating the sofa at least 12–18 inches from the wall creates a conversational zone that feels intentional rather than cautious. It also frees up the perimeter for circulation, which matters enormously in Step 2.
Scale is the other variable. A standard living room sofa runs 72 to 96 inches wide — and knowing your exact wall clearance before you shop is what separates a confident purchase from a furniture return. Measure the wall your sofa will face, not the wall it’ll sit against, and apply this rule: the sofa should occupy no more than two-thirds of the width of the wall it faces. A sofa that spans the full wall looks crammed. One that spans two-thirds looks considered.
Key decisions to make at this step:
- Identify your focal point before placing anything
- Float the sofa rather than wall-hugging whenever ceiling height and room depth allow
- Measure both the sofa itself and the clearance around it — allow at least 18 inches between the sofa and the coffee table
- Confirm the sofa occupies no more than two-thirds of the facing wall’s width
Actionable takeaway: Before you buy or move your sofa, write down the exact width of the wall it will face and multiply by 0.66. That number is your sofa’s maximum width. Don’t exceed it.
2. Map Your Traffic Flow Before You Place Anything Else
Traffic flow is the step that most decorating guides skip entirely, which is exactly why so many beautifully decorated rooms feel awkward to actually live in. You’ve been to those rooms — lovely to look at, uncomfortable to navigate. A chair angled in a way that forces you to turn sideways. A coffee table placed so that getting off the sofa requires a small choreography. These aren’t style failures. They’re flow failures.
The 36-inch rule governs every primary pathway in the room. Any route that people use regularly — from the entry to the sofa, from the sofa to the kitchen, from the hallway to the TV — needs at least 36 inches of unobstructed clearance. The Americans with Disabilities Act uses this same standard for residential accessibility, and experienced designers apply it as a baseline for livable circulation regardless of accessibility considerations. Secondary paths — the route from the sofa to a side table, between a chair and the wall — need a minimum of 18 to 24 inches.
The most practical tool at this stage costs about four dollars: painter’s tape. Use it to outline your furniture footprints on the floor before you move a single thing. Tape out the sofa, the coffee table, the secondary chairs, the entry path, the TV path. Then walk through it. Stand at the entry and walk to the sofa. Sit down on the floor where the sofa would be and stand up again. See where you naturally want to walk and whether your taped layout blocks it.
Common traffic flow mistakes that are easy to avoid once you’re looking for them:
- Blocking the natural entry path with a chair or console table positioned for aesthetics rather than circulation
- Creating furniture islands that force visitors to navigate around rather than through the seating zone
- Placing the coffee table so close to the sofa that standing up requires moving it first (the standard is 18 inches of clearance between sofa edge and coffee table edge)
- Ignoring secondary exits — windows with window seats, French doors to a patio, or hallway entries that people actually use
Once your painter’s tape map is down and you’ve walked every path, your secondary furniture positions become much clearer. The chairs, the console table, the side tables — they can only live where the flow allows. This constraint is useful, not limiting.
Actionable takeaway: Before buying any secondary furniture, tape out your sofa footprint on the floor and walk every natural path in the room. If you have to redirect your walk to avoid the tape, the layout isn’t working yet.
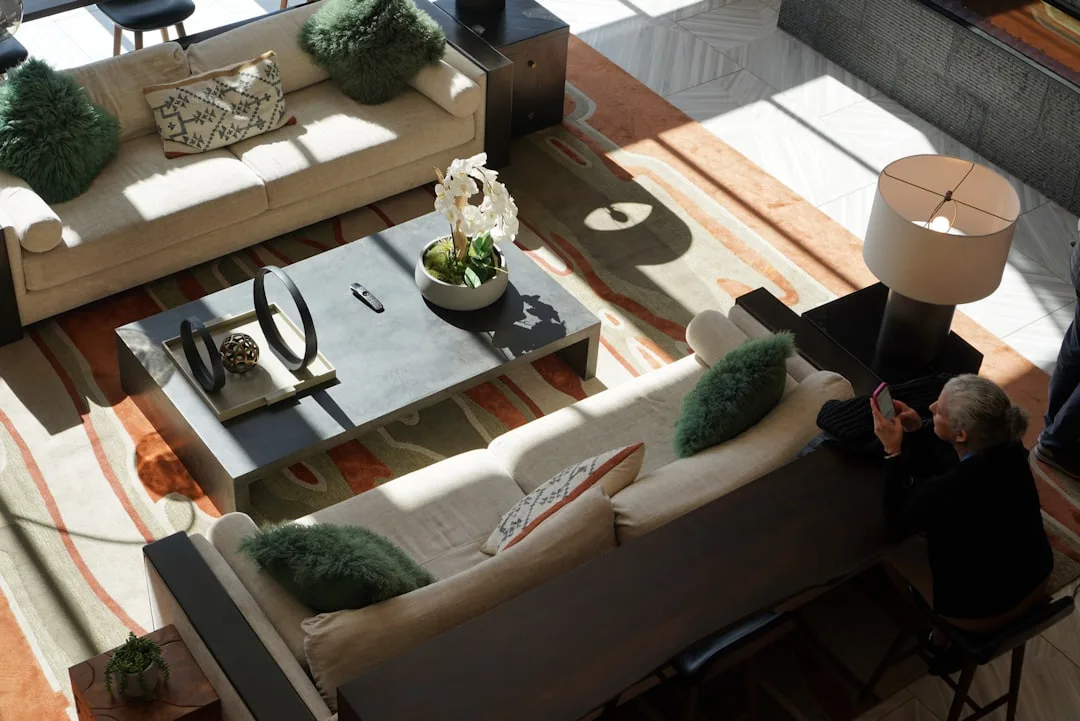
3. Lock In Your Rug Size and Placement (This Gates Your Entire Layout)

The rug is a layout device, not a decorative accessory. This distinction changes how you shop for one entirely. The right rug defines the conversational zone, creates a visual boundary that tells the eye where the seating area begins and ends, and makes every piece of furniture within it feel like it belongs together. The wrong rug size — and most people buy the wrong size — visually disconnects the furniture from the floor and makes even a well-chosen room feel like the pieces are floating, unrelated.
The most commonly purchased living room rug size is 5×8. Most interior designers consider it too small for nearly every living room. An 8×10 is the true minimum for a standard-sized living room, and in any open-plan space or room above roughly 300 square feet, a 9×12 is more appropriate. Sizing up feels counterintuitive — a bigger rug sounds like it’ll overwhelm the space — but it does the opposite. It anchors the room and makes it feel larger and more unified.
There are three placement configurations, and each works for different room situations:
- All legs on: Every piece of seating has all four legs on the rug. This works best in larger rooms with a 9×12 or bigger rug, and creates the most cohesive, defined zone.
- Front legs on: The front two legs of each sofa and chair sit on the rug, back legs off. This is the most versatile configuration and the one most designers default to — it connects the furniture to the rug without requiring a very large rug.
- All legs off: All furniture sits around the rug, which floats in the center. This works in very small rooms or in specific design contexts, but it’s the configuration most likely to look wrong. Avoid it unless you know exactly what you’re doing.
Once the rug is placed, your secondary furniture positions lock in. The coffee table lives in the center of the rug. Side tables live at the ends of the sofa and chairs. The boundaries of the conversational zone are drawn. You’re not guessing anymore — the rug makes the layout honest.
Actionable takeaway: Before shopping for a rug, measure from the back of where your sofa will sit to the front of where your secondary seating will sit. Add 24 inches on each end. That’s your minimum rug length. Don’t let a too-small price point talk you into a too-small rug.
4. Define Your Lighting in Three Layers Before Choosing a Single Bulb
Lighting is almost always the last thing people think about and the first thing that makes a finished room feel wrong. A room that looks polished in design-plan stage can feel flat, cold, or institutional when the lighting hasn’t been planned deliberately. More importantly: you cannot responsibly finalize your paint color until you know your lighting conditions. These two decisions are linked, and they need to be made in this order — lighting first, paint second.
The three-layer framework is the structural tool experienced designers use, and each layer has a specific job:
Layer 1 — Ambient lighting sets the room’s base illumination. This is your overhead or recessed lighting, and it should be on a dimmer. Fixed-brightness overhead lighting is one of the most common and most correctable mistakes in residential design. Dimmers cost $15–40 to install and they transform a room’s flexibility entirely.
Layer 2 — Task lighting handles the functional zones: the reading chair, the sofa end where someone habitually reads or scrolls, the desk area if the living room doubles as a workspace. Floor lamps and table lamps do this work. Their positions should follow directly from your traffic flow map in Step 2 — they live in the zones where people sit and stay, not in the zones where people pass through.
Layer 3 — Accent lighting creates depth. Picture lights draw the eye to art. LED strips behind a media console or underneath floating shelves add dimensionality at night. Uplighting behind a tall plant or in a corner where ceiling height needs visual emphasis lifts the room’s perceived volume.
Environmental psychology research suggests that lighting accounts for roughly 20% of a room’s perceived size and warmth — a finding that explains why two identically decorated rooms can feel completely different at 7 PM. It also explains the paint color problem: the same Benjamin Moore Chantilly Lace on a north-facing wall under cool fluorescent overhead lighting looks almost blue-gray. Under a warm 2700K incandescent bulb in the same room, it reads correctly as white. Sample paint under your actual installed lighting, in the actual room, at different times of day.
Actionable takeaway: Install a dimmer on your overhead lighting before sampling any paint color. Then sample paint on a 12×12 board you can move around the room at different times of day and under different lighting conditions — not directly on the wall.
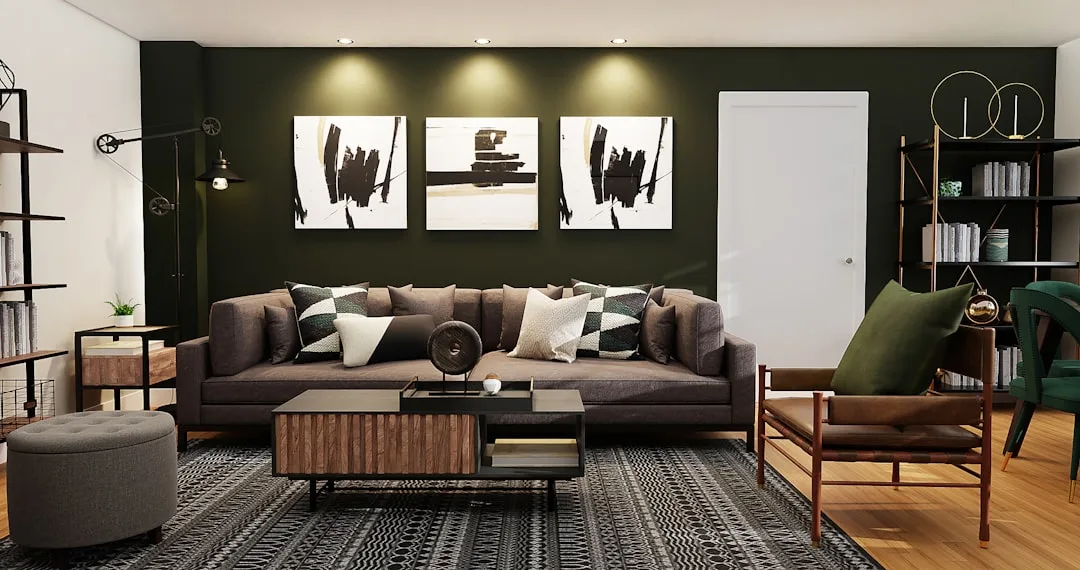
5. Apply the 70/30 Rule to Build Your Color and Pattern Framework

You’ve probably heard of the 60/30/10 color rule — 60% dominant color, 30% secondary color, 10% accent. It’s been repeated in decorating content for decades, and it traces back to fashion design principles from the 1950s that were adapted (somewhat loosely) for interior use. The rule isn’t wrong, but it consistently fails beginners for one specific reason: it requires three-color coordination decisions simultaneously, which overwhelms most people and leads to over-buying accent pieces in an attempt to hit that 10% target.
The 70/30 rule, borrowed from visual art composition, is more forgiving and more accurate to how well-designed rooms actually work. The principle: 70% of the room should speak in one visual language — a dominant tone, a dominant material, a dominant level of visual complexity — and 30% introduces contrast, variation, and personality. This is a structural rule, not just a color rule.
Here’s how it applies across the full room, not just to walls:
- Color: 70% neutral or dominant tone (walls, sofa, rug base), 30% contrast (pillows, art, a single bold chair)
- Pattern: 70% solid or low-pattern surfaces, 30% pattern — and within that 30%, vary the scale (a large geometric and a small floral read better together than two patterns of similar size)
- Furniture style: 70% cohesive design era or style (all mid-century, all transitional), 30% intentional departure that creates interest
- Texture: see Step 6, but the same ratio applies
The practical sequence matters here too. Choose your 70% first: your wall color, your sofa color, your rug’s base tone. These three elements dominate the room’s square footage. Get them working together before you introduce the 30%. Most decorating mistakes happen because people build the 30% before the 70% is locked — they fall in love with a bold pillow, buy it, and then try to build a room around it. It rarely works.
Actionable takeaway: Before buying anything in the accent-piece category — throw pillows, art, vases, candles — confirm that your sofa, rug, and wall color form a coherent 70%. Write them down as a reference. Every accent purchase should either deepen that 70% or deliberately contrast it.
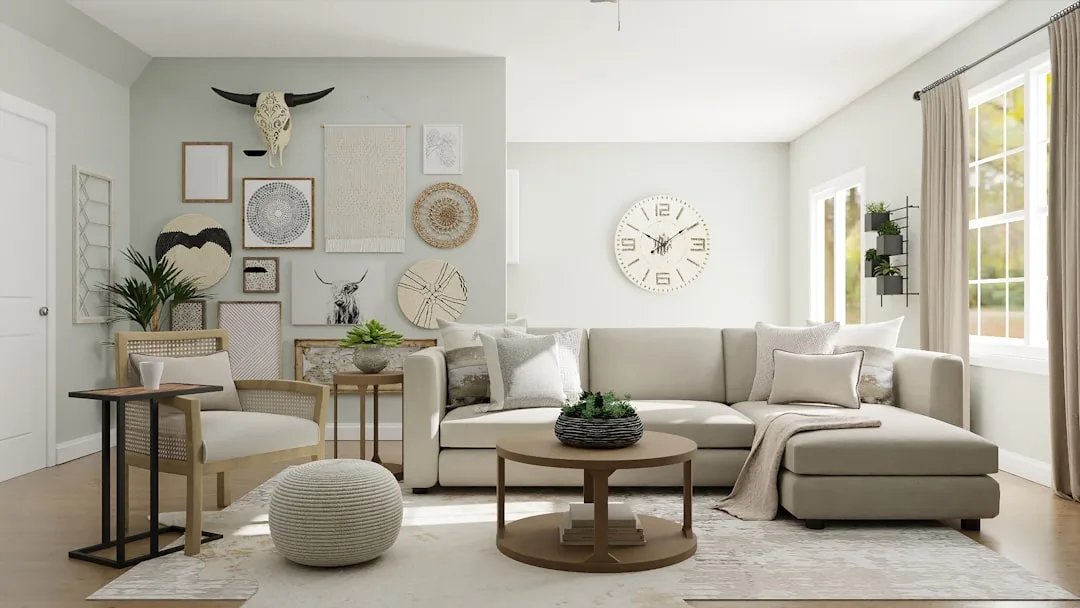
6. Layer Texture and Materials Before Adding Color Accents
A room that’s correctly colored but poorly textured looks flat in person and worse in photographs. Texture is what creates the sense of richness and depth that makes people walk into a room and say, without knowing exactly why, that it feels expensive. It’s not furniture cost. It’s material variation — and it needs to come before color accents are introduced, or you’ll end up layering color onto a surface-level room that no amount of pillows will fix.
There are five primary texture families, and a well-layered room draws from at least three of them:
- Soft textures: velvet, linen, wool, cotton — your sofa upholstery, throw blankets, pillow covers
- Rough textures: jute, rattan, reclaimed wood, sisal — a jute rug, a rattan side chair, a weathered wood coffee table
- Smooth textures: glass, lacquer, polished metal — a glass coffee table top, a brass lamp base, a lacquered tray
- Organic textures: stone, terra cotta, ceramics, unfinished clay — a stone bowl, a terracotta pot, a ceramic table lamp
- Structured textures: leather, canvas, woven leather — a leather chair, a canvas storage basket, a woven-leather ottoman
A well-textured room includes at least three of these families. Mixing more than four or five without a dominant neutral as a visual resting point risks chaos — everything competes and nothing reads.
The 70/30 rule applies within texture too: 70% of your surfaces should belong to one or two dominant texture families, with 30% introducing contrast. If your room is built primarily on soft textures (linen sofa, wool rug, cotton curtains), the 30% contrast might be a brass lamp (smooth), a jute side table (rough), and a ceramic vase (organic). That combination creates depth without overwhelm.
Texture before color accent is the correct sequence because texture creates the depth that color alone cannot replicate. Smooth surfaces reflect light; matte and rough surfaces absorb it. The interplay between them is what makes a room photograph the way professional interiors do — that quality of dimensionality where every surface feels like it has a distinct presence.
Actionable takeaway: Before adding any color accent pieces, audit your room’s texture. Write down which of the five families are currently present. If you have fewer than three, identify the missing families and look for functional pieces (a lamp, a side table, a throw) that fill the gap before buying purely decorative items.
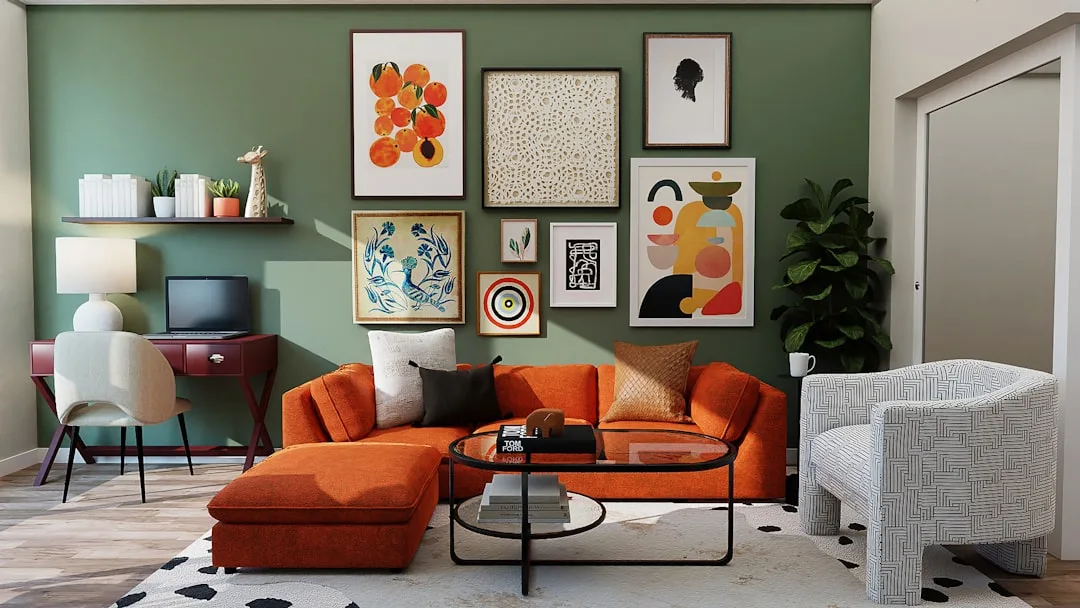
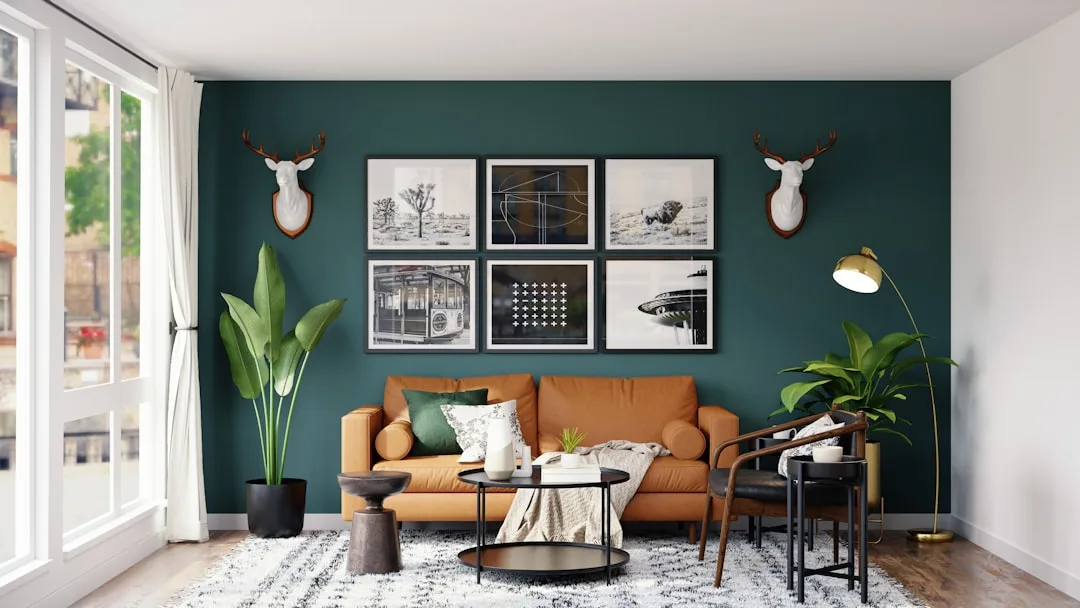
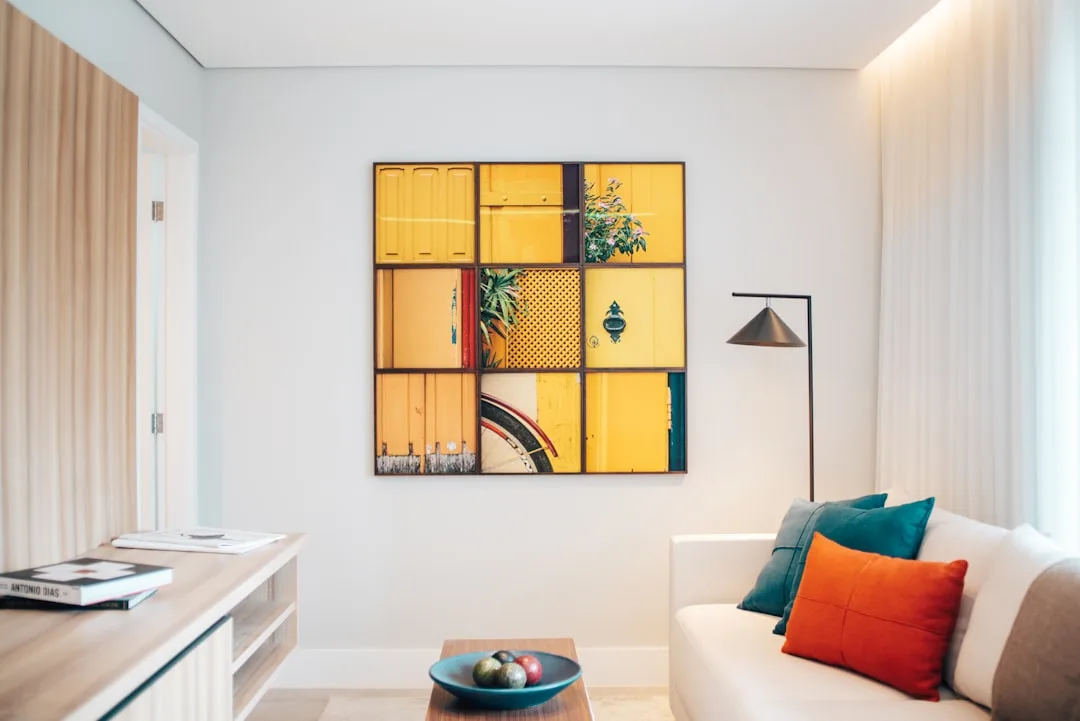
7. Place Art and Vertical Elements to Activate the Walls
At this point in the sequence, your layout is locked, your lighting is layered, your color and texture frameworks are in place. The room has a floor plane and a horizontal presence. What it likely doesn’t have yet is vertical activation — the quality of drawing the eye upward, of making the walls feel inhabited rather than empty or, worse, randomly decorated.
Art placement has a standard that most people either don’t know or ignore: the center of the artwork should hang at 57 to 60 inches from the floor. This comes from the average human eye level and is the centering standard used by nearly every major museum worldwide. Designers apply it in residential spaces for the same reason museums do — it puts art where eyes naturally land, not above eye level where you have to tilt your head to see it.
The most common art mistake in living rooms is hanging pieces too high. The second most common is choosing art that’s too small for the wall it’s on. Art above a sofa should span 50 to 75% of the sofa’s width for visual balance. A 90-inch sofa with a 24-inch canvas above it will always look awkward, regardless of the art itself.
Beyond art, every room needs at least one vertical activation element — something that draws the eye upward and uses the vertical space between furniture height and ceiling height. Options include:
- Drapery panels hung close to the ceiling (even if the window is standard height — the curtain rod goes near the ceiling, not above the window frame)
- A tall fiddle-leaf fig, olive tree, or Monstera deliciosa in the 5–7 foot range
- Floor-to-ceiling built-in shelving or a tall freestanding bookcase
- A series of vertically oriented artworks in a gallery arrangement
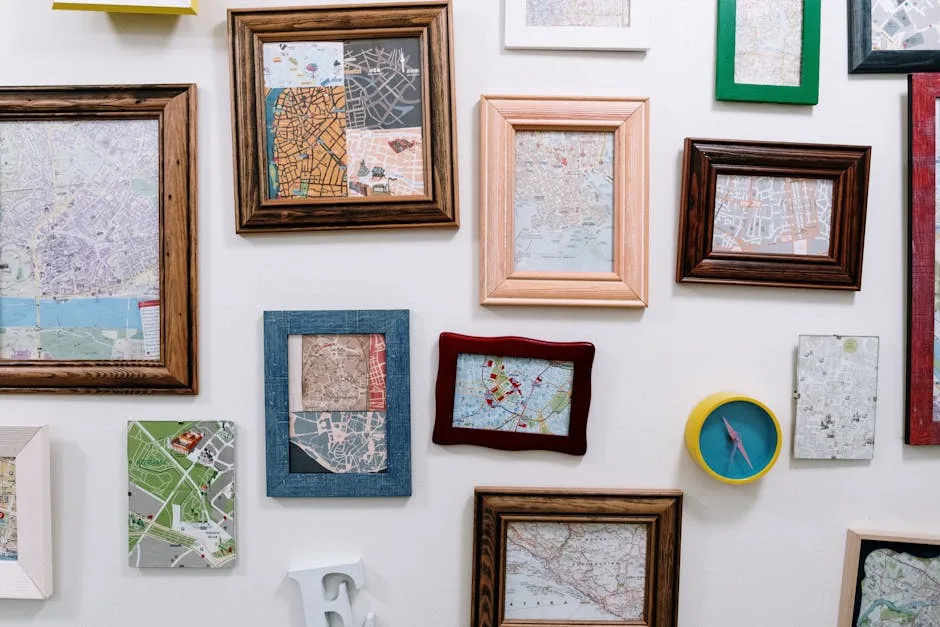
Gallery wall logic deserves its own note: establish the full layout on paper or on the floor before putting a single nail in the wall. Trace each frame on paper, cut out the silhouettes, and arrange them on the floor first. Then transfer to the wall using painter’s tape outlines. The only walls that should have nail holes in them are the ones you’ve already decided on.
Actionable takeaway: Measure the sofa or primary furniture piece below your intended art placement. Multiply that width by 0.60. That’s the minimum width for a single piece or gallery grouping above it. If your planned art is narrower, either find a wider piece or plan a gallery wall that hits the target width collectively.
8. Edit, Remove, and Finalize With the Subtract-First Rule
Here’s the part that almost no decorating guide covers, because it requires telling you to undo some of what you’ve just done. After completing Steps 1 through 7, the instinct is to step back and decide what else the room needs. A professional designer’s instinct is the opposite: step back and decide what the room doesn’t need.
The subtract-first rule is simple to state and surprisingly difficult to execute because it requires letting go of pieces you like. The rule: after completing the full sequence, remove one item from every surface and one item from every furniture grouping. Then stand at the room’s entry and reassess before adding anything back.
Professional home stagers routinely remove 30 to 40% of a homeowner’s existing decor before listing a property — not because those pieces are bad or poorly chosen, but because visual restraint is the single fastest way to make a room read as intentional and designed. A shelf with seven objects and a shelf with four objects will almost always photograph differently, feel differently, and land differently with guests. The four-object shelf looks curated. The seven-object shelf looks full.
How to identify the visual noise pieces — the ones that are candidates for removal:
- Anything that competes with the room’s focal point (if your fireplace is the star, a large mirror on the opposite wall that reflects competing information is noise)
- Anything that breaks your 70% dominant visual language — a piece you love in isolation that simply doesn’t speak the room’s language
- Duplicate function pieces — three throw blankets on a sofa, four candles on a coffee table, two floor lamps in the same corner
- Filler pieces — things that ended up somewhere because there was space, not because they were chosen for that spot
The 72-hour rule closes the sequence: live with the room for three full days before making any final purchasing decisions. What feels wrong on day one is often just unfamiliar. What still feels wrong on day three is genuinely wrong — and removing it is almost always the right call.
If you’re working through all eight steps, a room planning checklist is an invaluable tool for tracking each decision gate before moving forward. Treat each step as a checkpoint you sign off on before proceeding to the next, the way a contractor walks through a punch list before a project is considered complete.
Actionable takeaway: Today, before adding anything to your living room, remove one object from every surface that has more than two things on it. Live with that version for 72 hours. The surfaces that still feel empty after three days are the ones that genuinely need something. The rest were just full.
Frequently Asked Questions
What should you decorate first in a living room?
Start with your largest furniture piece — the sofa. Its placement determines the traffic flow, the focal point, the rug size, and the conversational zone. Nothing else in the room can be finalized responsibly until the sofa’s position is locked. After the sofa, map your traffic flow (Step 2), then place the rug (Step 3). These three decisions form the room’s structural skeleton. Everything else — lighting, color, texture, art — layers onto a foundation that’s already stable.
What is the 70/30 rule in interior design?
The 70/30 rule is a composition principle that states 70% of a room should speak in one clear visual language — a dominant tone, dominant material, or dominant style — while 30% introduces contrast, variation, and personality. It applies to color distribution, pattern mixing, texture layering, and even furniture style. It’s a more forgiving alternative to the 60/30/10 color rule because it requires you to coordinate only two zones rather than three. In practice: lock your 70% first (sofa, rug, wall color), and let the 30% emerge from accessories, art, and accent pieces chosen after the dominant framework is established.
How do I know what size rug to get for my living room?
The most commonly purchased living room rug size is 5×8, and it’s too small for most living rooms. For a standard living room, 8×10 is the practical minimum. For larger or open-plan spaces, 9×12 is more appropriate. To calculate the right size for your specific room: measure from the back of your sofa’s intended position to the front of your secondary seating. Add 24 inches on each end of that measurement — that’s your minimum rug length. Then apply one of the three placement configurations (all legs on, front legs on, or all legs off) based on your room’s scale. When in doubt, size up. A larger rug almost always looks better than a smaller one.
How do you decorate a living room on a budget without it looking cheap?
Sequencing discipline is the most effective budget tool there is. Most budget decorating fails because money gets spent on accent pieces before the foundational decisions are locked — you end up with expensive throw pillows in a room that doesn’t have a working layout. Apply the 8-step sequence and allocate budget in this priority order: sofa first (buy the best quality you can afford here, it’s the room’s anchor), rug second (size matters more than price), lighting third (a $40 dimmer switch and a good floor lamp do more than most $200 decorative objects). Texture is largely free — move pieces from other rooms, shop secondhand for organic and rough-texture objects like wood trays and ceramic pots, use what you already own in new arrangements. Art can be framed prints, your own photography, or inexpensive posters in good frames. The frame quality matters more than the art cost. And apply the subtract-first rule from Step 8: a room with 60% of the objects removed and edited reads more expensively than the same room at full capacity.
The eight steps above work in sequence for a reason. The best thing you can do today isn’t buy anything — it’s measure. Measure the wall your sofa faces, measure the clearance around your current furniture layout, measure the dimensions of your room against the rug size chart. Get your numbers on paper before your next purchase. That’s what separates a room that comes together from one that almost does.