Most dark hallways aren’t suffering from a lack of light — they’re suffering from light that’s been placed in exactly the wrong spots, at the wrong angles, with no surface left to catch it. You can max out every bulb in the fixture and still end up with a space that feels like a service corridor. The problem is geometric, not electrical. Fix the geometry, and learning how to light a dark hallway properly becomes a matter of understanding surfaces and angles rather than simply adding more wattage.
Why Your Hallway Feels Dark (And Why Paint Alone Won’t Fix It)
Your hallway is failing on three fronts simultaneously, and most quick fixes address only one of them — if any.
First, there’s no natural light source. Unlike kitchens, living rooms, or bedrooms, interior hallways exist without windows by design. They’re connective tissue, not destinations, so architects don’t prioritize them for glazing. Second, the proportions work against you. Interior hallways average just 3–4 feet wide, which means light scatter is severely limited compared to standard rooms — a fixture that would comfortably illuminate a 12-foot-wide room has almost no horizontal surface area to bounce from in a hallway. Surfaces need to work harder at every angle, not just overhead. Third, ceiling shadow zones form naturally in spaces where the ceiling height is normal but the width is dramatically narrowed. Light pools directly below a fixture and drops off fast.
Here’s where homeowners go wrong:
- Buying brighter bulbs — A 100-watt-equivalent LED in a narrow hallway still creates a single hotspot with dark shoulders. Intensity isn’t distribution.
- Painting everything white — White walls help, but a flat white paint with a Low Reflectance Value still absorbs significant light. And white walls can’t fix a ceiling shadow or a dark floor zone.
- Adding one overhead fixture — One ambient source with nothing else creates a single lit zone surrounded by gradient darkness. The hallway looks worse in comparison to the bright center point.
The difference between a dim hallway and a well-lit one is the layered interaction between surface materials, fixture placement, and light temperature working together. Change one without the others and you’ll wonder why it still feels wrong.
Surface finish is a detail most homeowners skip entirely. A satin or eggshell paint finish on hallway walls reflects measurably more light than flat or matte — the sheen catches ambient light from fixtures and redistributes it horizontally, which is exactly what a narrow corridor needs. The same principle applies to flooring: a polished hardwood or light-toned tile will bounce ceiling light back upward, brightening the lower third of the space passively. Dark-stained floors and matte carpet absorb that light entirely. If you’re committed to a dark floor, you’ll need active lighting at the baseboard level to compensate — which is doable, but adds cost and complexity.
Actionable takeaway: Before buying anything, identify which of the three failure points — no bounce surfaces, poor fixture placement, or missing light layers — is your primary problem. The diagnosis determines the fix.
Mapping Your Hallway’s Light Zones Before Buying Anything
Experienced lighting designers don’t walk into a space and start hanging fixtures. They map it first. You should do the same — and it costs nothing.
Walk your hallway at three different times of day: morning, midday, and evening. Photograph it each time from both ends. This sounds simple and it changes everything. Morning light from an adjacent bedroom door might be eliminating a shadow zone you’d otherwise try to solve with electrical work. An evening photo will reveal exactly where your current fixtures are failing after dark — which is when hallway lighting matters most.
What you’re looking for in those photos:
- Ceiling shadow zones — dark areas near the ceiling that make the space feel lower than it is
- Mid-wall dead zones — a band of darkness roughly 3–5 feet from the floor where no fixture currently reaches
- Floor darkness — the lower third of a hallway is almost always the darkest, and almost always ignored
- Doorway light opportunities — every door that opens into your hallway is a potential light source during daylight hours
Mark where doorways open into the hallway. A bedroom or bathroom with a window that faces the hallway can be kept partially open during the day to borrow natural light — most homeowners close every door and then wonder why the hallway is dark at noon.
Once you’ve photographed the space, identify your anchor problem: the single most dominant failure. Is it ceiling shadow? Wall absorption? Floor darkness? The anchor problem determines your primary investment. Everything else layers on top.
Lighting designers use a 30-60-90 rule for light layering: 30% ambient, 60% task or accent, 10% decorative. Most hallways fail because they operate at 100% ambient with a single overhead source. There’s no accent layer grazing the walls, no floor-level light pulling the eye along the corridor, no decorative element adding warmth at eye level. Once you see it, you can’t unsee it.
One practical mapping exercise that designers use on-site: hold a white piece of paper flat against the wall at three heights — near the ceiling, at eye level, and near the floor — and photograph it in place. The paper acts as a neutral reference point, showing you exactly how much light is actually hitting each zone versus how much your eye is compensating. The difference between the three photos is usually striking, and it tells you immediately where your accent lighting needs to go.
Actionable takeaway: Photograph your hallway tonight with your phone. The flat image removes your brain’s ability to compensate for darkness the way your eyes do in person — you’ll see the dead zones clearly.
Ceiling Lighting That Actually Works in Narrow Spaces
Recessed lighting gets recommended constantly for hallways, and it’s good advice — but only when the math is done correctly. Most homeowners install two recessed lights in a hallway and wonder why it still looks uneven. Here’s why: spacing and beam angle are doing more work than wattage.
Recessed downlights in hallways should be spaced at a distance equal to half the ceiling height. In a hallway with standard 8-foot ceilings, that means one fixture every 4 feet. In a 10-foot ceiling hallway, every 5 feet. Most people space them at 6–8 feet and create distinct bright spots with dark gaps between them.
Beam angle is the detail no one talks about in the home improvement aisle:
- 40-degree beam angle — creates a tight, concentrated circle of light. In a narrow hallway, this means bright spots directly below fixtures and darkness everywhere else.
- 60-degree flood beam — spreads light in a wider cone, creating more even wash coverage across walls and floor. This is what you want in a corridor.
- Wide-flood at 90+ degrees — typically too diffuse for hallways, but useful as supplemental ambient when combined with other fixtures.
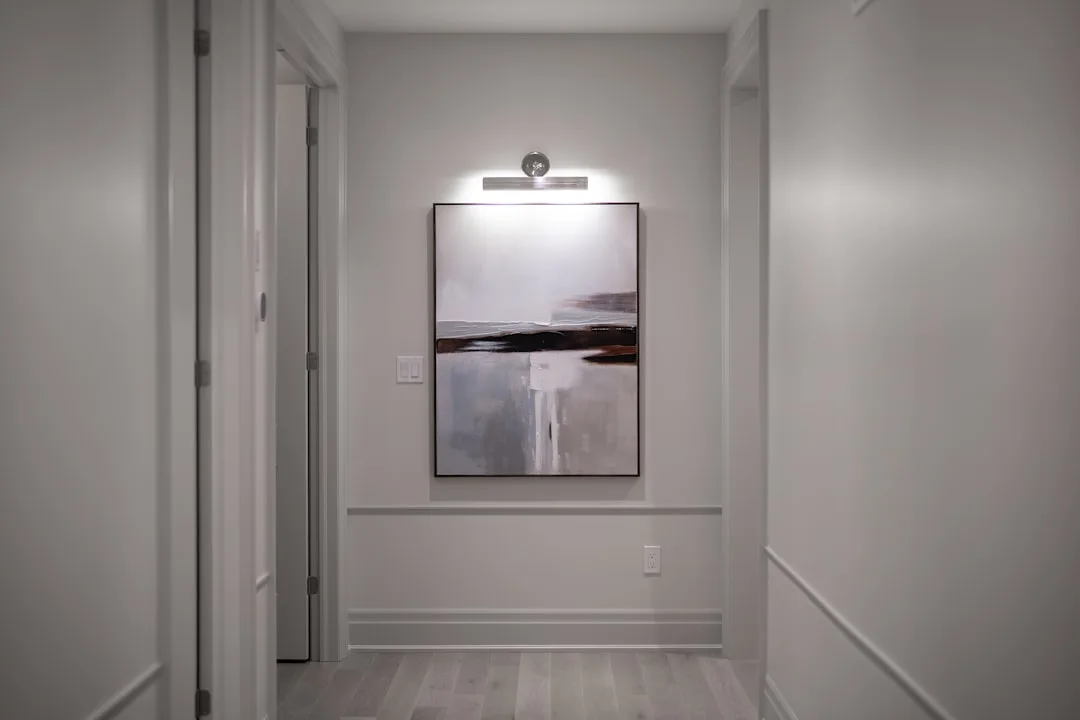
Semi-flush and flush-mount fixtures with frosted glass diffusers outperform open-shade pendants in hallways because they scatter light in all directions rather than directing it downward only. A Hinkley Congress or a Progress Lighting Goodwin semi-flush in brushed nickel with an opal glass diffuser will light a hallway more evenly than a pendant twice its price.
Color temperature matters here more than most guides acknowledge. LED bulbs rated at 2700K–3000K render skin tones and wood finishes warmly, and they make a hallway feel like part of the home. Bulbs at 4000K and above — the cool white range — push the space toward clinical regardless of how good the fixture looks. If your hallway currently feels cold and unwelcoming even when it’s lit, check the bulb box. Cool white bulbs in a narrow space are a common culprit.
It’s also worth paying attention to the CRI rating on your bulbs — Color Rendering Index, which measures how accurately a light source renders colors compared to natural daylight. A CRI of 90 or above makes wall colors, artwork, and wood tones look rich and intentional. A CRI of 80 or below flattens everything into a slightly washed-out version of itself. Most builder-grade hallway fixtures come with 80 CRI bulbs as standard. Swapping to 90+ CRI LEDs at the same color temperature costs roughly the same and makes an immediate, visible difference in how finished the space looks.
Knowing how to light a dark hallway at the ceiling level is only the first layer — it sets the baseline brightness, but it doesn’t create depth, warmth, or visual interest on its own. That’s where wall-mounted and low-level lighting take over.
Wall Lighting, Sconces, and the Art of Grazing Light
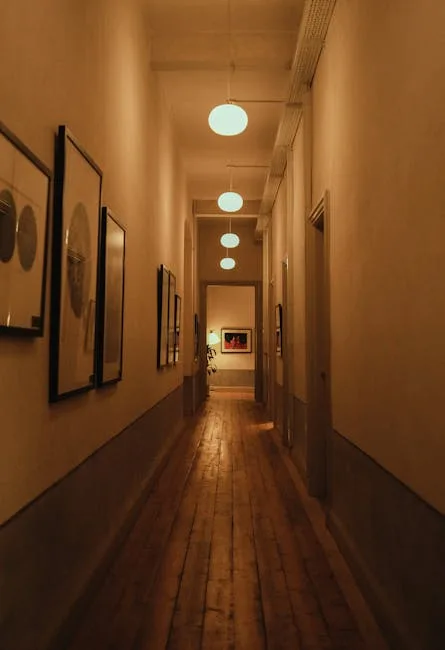
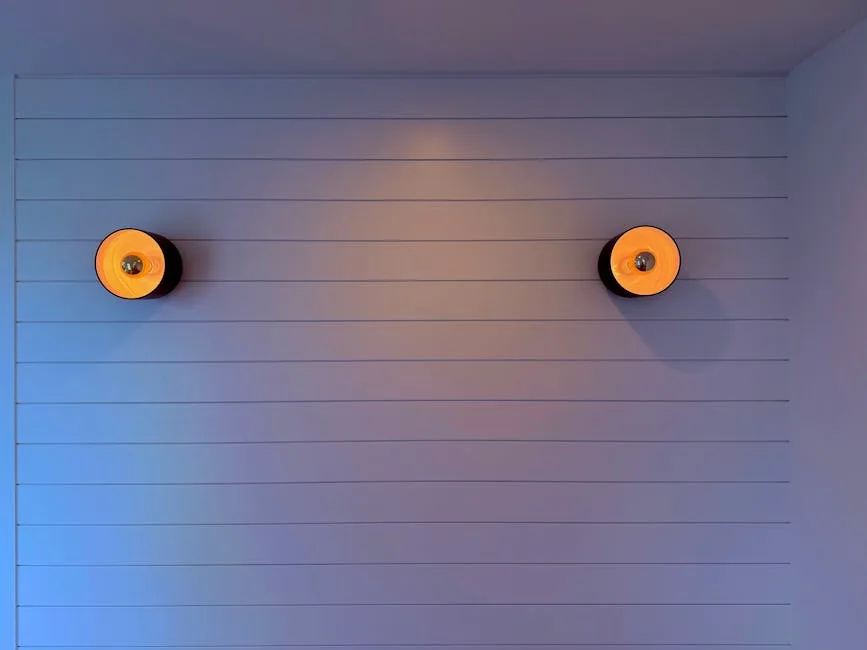
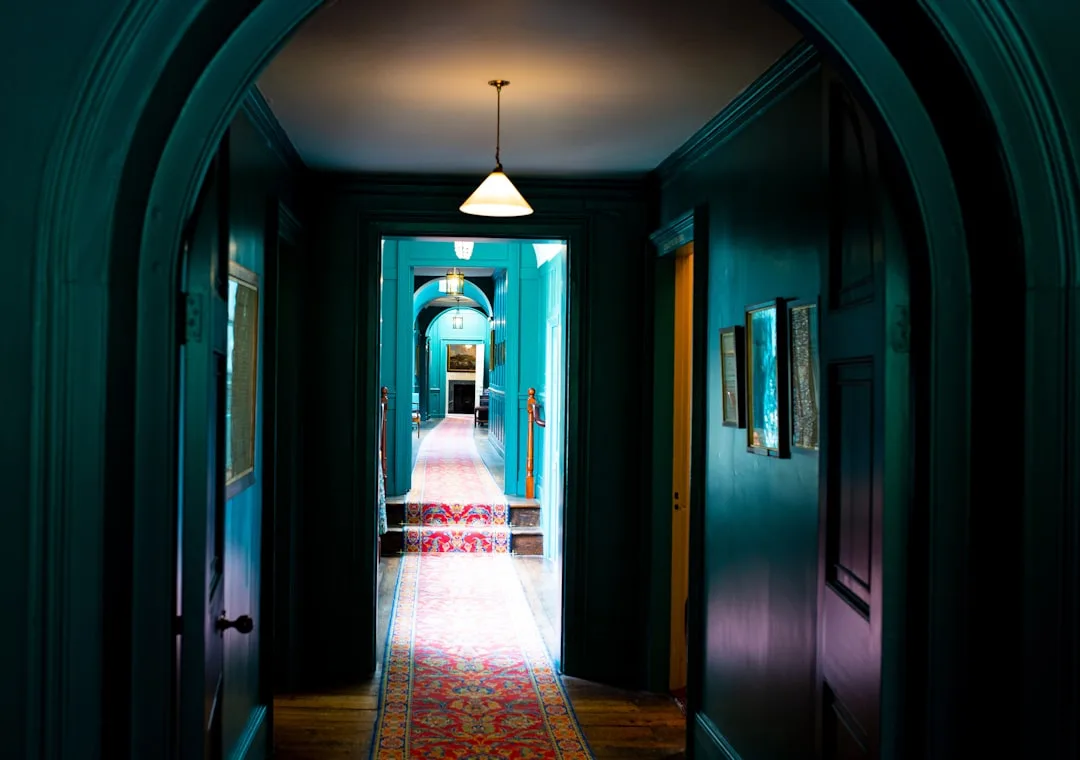
Wall sconces in hallways serve a different function than they do in dining rooms or bedrooms. In a narrow corridor, a sconce isn’t primarily a decorative statement — it’s a surface activator. When a sconce is mounted correctly, it throws light both upward and downward along the wall plane, creating what lighting designers call a grazing effect: light that skims across the wall surface, catching texture, revealing depth, and making the space feel wider than it is.
The mounting height for hallway sconces matters considerably. Install sconces at 60–66 inches from the floor to the center of the fixture — this puts the light source just above eye level, which feels natural and avoids the flat, institutional quality of fixtures mounted too high or too low. In a long hallway, sconces spaced every 6–8 feet along one or both walls will create a rhythm that draws the eye forward, making the corridor feel like an intentional space rather than a gap between rooms.
For hallways narrower than 36 inches, wall-mount sconces that project less than 4 inches from the wall plane are essential — otherwise the fixture becomes a physical obstacle. Slim-profile ADA-compliant sconces work well here. In hallways with more width, a sconce that projects 5–7 inches can be used effectively on one wall without creating a hazard.
Picture lights and directional wall washers are worth considering if your hallway has artwork or an architectural feature — a niche, a textured plaster wall, or a console table with objects on it. A single picture light aimed at a framed piece at the end of a hallway accomplishes two things simultaneously: it illuminates the artwork, and it gives the eye a destination, which makes the hallway feel purposeful rather than transitional.
Floor-Level and Low Lighting: The Layer Most People Skip
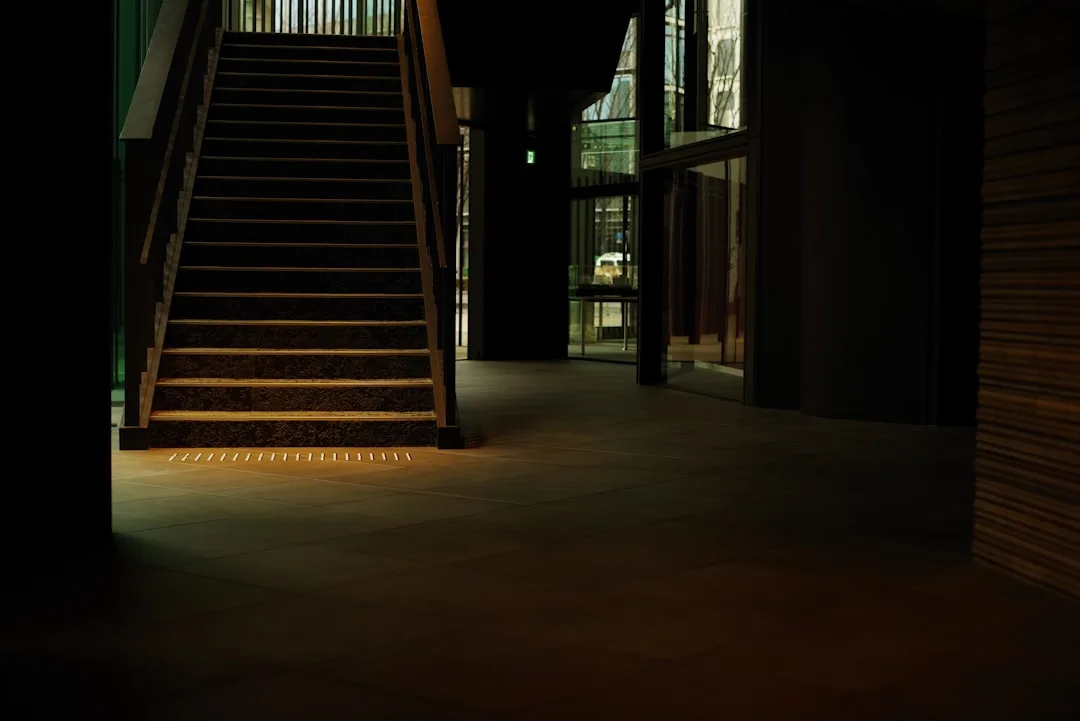
The bottom third of any hallway is where darkness accumulates most aggressively, and it’s the zone that almost every basic lighting guide ignores. Addressing it doesn’t require major electrical work — and the effect on how the space reads is disproportionate to the effort.
Plug-in LED strip lighting under a console table or floating shelf creates a soft wash of light at floor level that anchors the space and adds genuine warmth. This works particularly well in entry hallways where a console or bench is already present. The light doesn’t need to be bright — 200–400 lumens along the floor is enough to eliminate the dark-floor effect without creating glare.
Low-voltage step lights or in-wall night lights mounted near the baseboard serve double duty: they address the floor darkness problem and function as safety lighting for nighttime navigation, which matters in family homes and becomes increasingly important for older residents. Lutron and Legrand both make recessed step lights that sit flush with the wall and can be wired to a separate dimmer circuit from the overhead fixtures, giving you independent control of each lighting layer.
If your hallway connects to a staircase, low-level lighting becomes a safety concern as much as an aesthetic one. Stair riser lights — small LEDs mounted into the vertical face of each step — eliminate the leading-edge shadow that makes stairs dangerous in low light. They’re available in hardwired and battery-operated versions, and most can be linked to a motion sensor so they activate automatically after dark.
Frequently Asked Questions About How to Light a Dark Hallway
How many lumens do I need to properly light a dark hallway?
A general starting point is 50 lumens per square foot for a hallway. For a typical 4-foot-wide, 12-foot-long corridor — 48 square feet — that’s roughly 2,400 lumens total. However, that number assumes the light is distributed evenly across layers. A single 2,400-lumen bulb in one overhead fixture will still produce a dim hallway because nearly all the light pools in one spot. Distribute the same total lumen output across three or four fixtures at different heights and the difference is dramatic.
Can I light a dark hallway without any electrical work?
Yes, more effectively than most people expect. Battery-operated LED sconces with motion sensors mount to the wall with adhesive strips and require no wiring. Plug-in wall sconces with cord covers work in hallways where an outlet is accessible. LED strip lights under furniture or along baseboards can be powered from nearby outlets. For a hallway that’s currently completely dark, this approach won’t match a fully designed lighting system — but it can take a failing space to functional without a single hole in the wall.
What paint finish is best for a dark hallway?
Satin or eggshell finishes consistently outperform flat and matte in hallways because the slight sheen reflects ambient light horizontally rather than absorbing it. For maximum light reflection, look for paints with a Light Reflectance Value (LRV) of 70 or above — Benjamin Moore’s Chantilly Lace (LRV 92) and Sherwin-Williams Extra White (LRV 86) are frequently used by designers specifically for light-limited spaces. A high-LRV paint in a satin finish on all four walls and the ceiling can increase the perceived brightness of a hallway without adding a single fixture.
Should hallway lighting be on a dimmer switch?
Yes, almost always. Hallways serve different functions at different times of day — a bright, fully lit corridor makes sense for morning routines and daytime traffic, but the same brightness level at 2 a.m. is disorienting and harsh. A dimmer switch on the overhead circuit, ideally paired with a separate circuit for low-level or accent lighting, gives you full control. Lutron Caseta dimmers are compatible with most LED bulbs and don’t require a neutral wire, which makes them workable in older homes where the wiring doesn’t include one.
Why does my hallway still feel dark after I added more lights?
Usually because the new lights are the same type as the old ones — more overhead ambient sources layered on top of existing overhead ambient sources. Adding a third recessed downlight to a hallway that already has two doesn’t solve a layering problem; it just intensifies the existing single-layer approach. If the space still feels dark after adding fixtures, the fix is almost always changing the type of light rather than increasing the quantity. Add a wall-mounted sconce, introduce floor-level lighting, or swap flat-finish paint for a higher-LRV satin finish — any of these will do more than another overhead fixture.