
The wall separating your kitchen from the living room looks like a weekend project — until your contractor finds a steel I-beam inside it and the estimate jumps by $14,000 before lunch. That is not a hypothetical. That is a Tuesday in this industry, and it happens to people who did everything right except one thing: they didn’t understand what they were actually buying when they decided to open up their floor plan.
Quick Answer
The wall separating your kitchen from the living room looks like a weekend project — until your contractor finds a steel I-beam inside it and the estimate jumps by $14,000 before lunch.
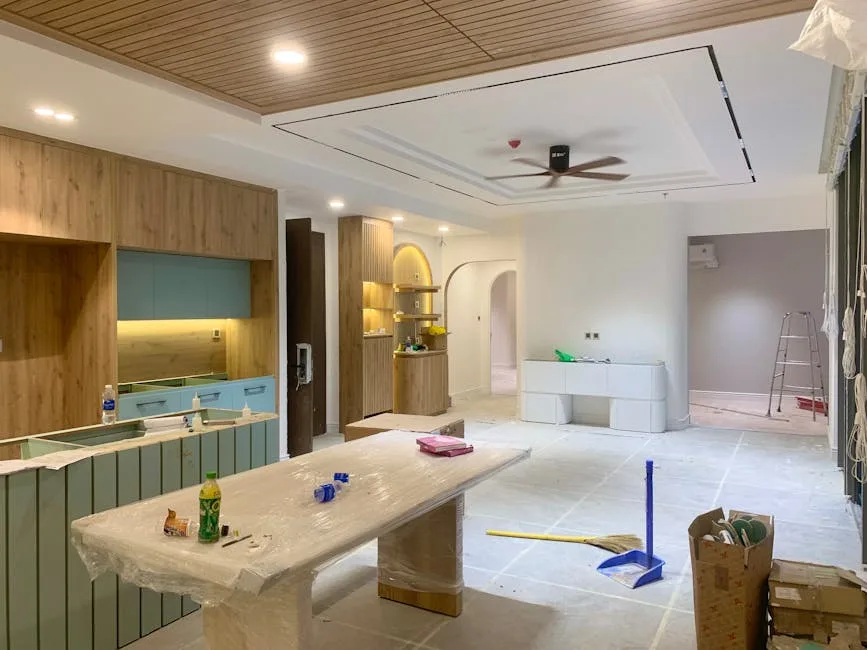
An open concept kitchen remodel is one of the most structurally complex residential projects a homeowner can undertake. It touches framing, electrical, plumbing, HVAC, permits, and finish work simultaneously — often in a space you need to live near, if not in, while work is happening. The renovation shows make it look sequential and tidy. It is neither.
What You’re Really Signing Up For Before Demolition Day
In This Article
- What You’re Really Signing Up For Before Demolition Day
- How to Know If Your Wall Is Structural (And Why Getting This Wrong Is Expensive)
- The Layout Decisions That Determine Whether Your Remodel Succeeds or Fails
- Ventilation, Noise, and Smell: The Problems No One Warns You About Until It’s Too Late
- Where the Budget Actually Goes (And Where Homeowners Consistently Overspend)
- How to Choose the Right Contractor for Structural Kitchen Work
- The Finishing Decisions That Make an Open Layout Feel Intentional, Not Unfinished

Most homeowners budget for what they can see: drywall coming down, maybe some new cabinets, fresh flooring to tie the rooms together. What they don’t budget for — because no one tells them until it’s too late — is everything that comes after the first swing of the sledgehammer.
The full scope of an open concept kitchen remodel is almost always larger than the initial estimate. Here’s what the numbers actually look like:
- Total project range: $20,000–$75,000 depending on structural complexity, kitchen size, and finish level
- Structural beam installation alone: $3,000–$15,000, not including permits or inspections
- Timeline: 6–16 weeks for full completion — not six days, not a long weekend
- Storage loss: You will likely sacrifice 20–30% of your upper cabinet storage when a shared wall disappears, because that wall was almost certainly holding cabinets on one or both sides
Permits are not optional. In most U.S. jurisdictions, removing a wall — especially a load-bearing one — requires a structural permit and an inspection before drywall closes back up. Homeowners who skip this step sometimes don’t discover the problem until they list the house for sale and a buyer’s inspector pulls the permit history. Unpermitted structural work can kill a sale or force a seller to escrow funds for remediation. I’ve watched it happen.
The National Association of Realtors reports that kitchen remodels recoup roughly 67% of their cost at resale — but that figure assumes quality finishes and structural integrity. A poorly executed open concept remodel with no permits and a sagging beam above the island doesn’t recoup 67% of anything.
One more thing most articles won’t tell you: your life will be disrupted for longer than you expect. Cooking happens elsewhere — microwave in the bedroom, takeout three nights a week, dishes in the bathroom sink. Budget for that, too, both financially and emotionally. It accumulates.
Actionable takeaway: Before you call a contractor, pull the permit history for your home through your local building department’s online portal. It costs nothing and tells you whether any prior work was done legally — which directly affects what your contractor will need to document before starting.
How to Know If Your Wall Is Structural (And Why Getting This Wrong Is Expensive)

Here is what no article explains clearly enough: the question isn’t just whether your wall is load-bearing. The question is what it’s carrying, how that load transfers to your foundation, and what a contractor has to install to replace that structural function before the wall comes out. Those are three different questions with three different price tags.
Three DIY clues that a wall is likely structural:
- It runs perpendicular to your floor joists — you can usually determine joist direction from the basement or attic; structural walls almost always cross joists rather than run parallel to them
- It sits directly above a basement beam or below a roof ridge — load paths tend to stack vertically through a house; if something substantial is directly above or below the wall in question, treat it as structural until proven otherwise
- The same wall appears on multiple floors — a wall that exists on both the first and second floor is very likely carrying load from above
None of these clues is definitive on its own. That’s exactly why a structural engineer’s report — which typically runs $300–$700 — is worth every dollar before you hire anyone. Not an architect’s opinion, not your contractor’s gut feeling. A licensed structural engineer who stamps a document with their professional seal. That stamp protects you legally if something goes wrong and gives your contractor a precise specification to build to.
When structural work is required, the cost range is wide. HomeAdvisor data shows that structural beam installation averages $3,900 nationally — but in urban markets like New York or San Francisco, costs regularly exceed $12,000 due to labor rates, access constraints, and more stringent inspection processes. The installation itself involves building temporary support walls to carry the load while the permanent beam goes in, which requires space, time, and its own materials.
Non-load-bearing walls are cheaper to remove, but they’re never free. Expect $1,000–$3,500 for drywall repair on adjacent surfaces, electrical rerouting, and flooring patching where the wall’s footprint was. That floor patch, specifically, is where I’ve seen homeowners get blindsided — matching existing hardwood after 15 years is often impossible, which means refinishing the entire floor.
The red flag that should end a contractor conversation immediately: anyone who quotes wall removal without asking to see your home’s original blueprints, or who suggests skipping a permit to “keep costs down,” is telling you everything you need to know about how they work. Walk away. The permit isn’t bureaucratic overhead — it’s the mechanism that ensures someone with credentials verifies the beam is sized correctly before it’s hidden inside your ceiling.
Actionable takeaway: Contact your county recorder or building department and request the original blueprints for your home. Many municipalities have these on file for houses built after the 1950s. If they don’t, a structural engineer can assess the framing through an attic or basement inspection.
The Layout Decisions That Determine Whether Your Remodel Succeeds or Fails
I once helped a client in Lincoln Park gut her kitchen and open it completely to the living room. The wall came out perfectly. The beam went in on schedule. And then we looked at where the island was going and realized the refrigerator door, when fully open, would block the only path between the kitchen and the dining table. Three feet of clearance where there should have been six. The layout had looked fine on paper.
This is the part of an open concept kitchen remodel that kills otherwise well-funded projects. The spatial planning — not the demolition, not the finishes — is where most layouts either earn their keep or create daily misery.
The work triangle is non-negotiable. Sink, stove, refrigerator — these three points define the functional core of any kitchen, and the distances between them must remain workable even as walls disappear and the visual footprint expands. The pattern I kept seeing in failed open-concept layouts was that homeowners relocated the range or refrigerator to take advantage of new sightlines, then discovered they’d created a 14-foot run between the stove and the sink. Nobody wants to walk that far holding a pot of boiling water.
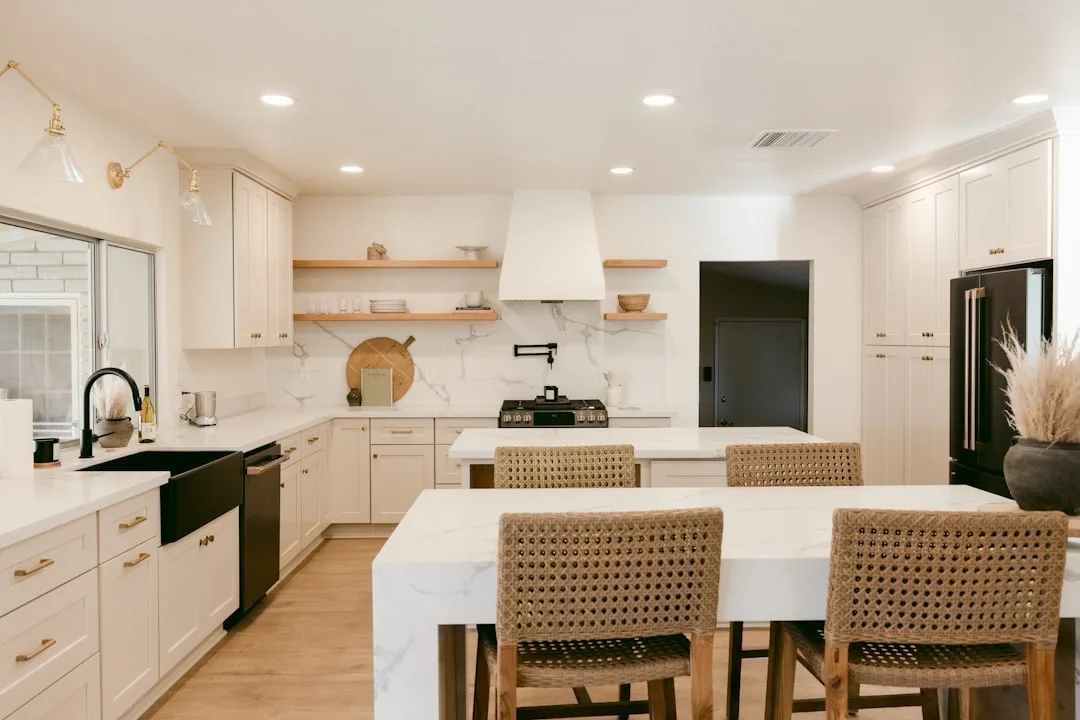
Island sizing has rules, and they’re not suggestions:
- 42 inches of clearance on all working sides for a single-cook household
- 48 inches of clearance for households where two people cook simultaneously
- Islands smaller than 4 feet long provide almost no useful prep space once a cutting board and a mixing bowl are on the surface
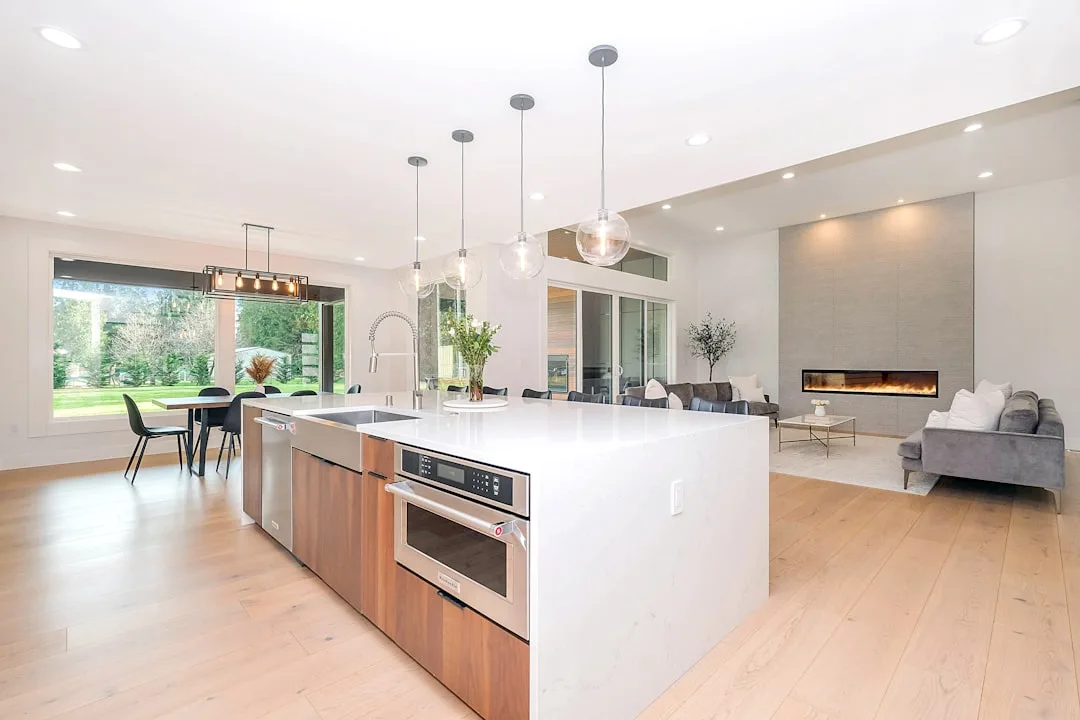
Zone definition becomes critical when walls disappear. The kitchen, dining area, and living space now share one visual field, and without physical boundaries, they blur into an undifferentiated room that feels neither cozy nor purposeful. Flooring transitions, pendant lighting clusters positioned directly above key zones, and area rugs anchored under furniture groupings are the tools that do what walls used to do — without blocking light or sightlines.
One placement trap I see constantly: the dining area gets pushed too close to the cooking zone, usually because the square footage makes it feel logical. But a dining table six feet from a gas range means your guests are sitting in ambient heat every time you’re searing something, and the noise from the exhaust fan competes with conversation during dinner. Pull the dining zone toward the living space instead and let the island act as the buffer.
Actionable takeaway: Before finalizing any layout, walk through it physically with painter’s tape on the floor marking every appliance, island, and clearance zone. Open every door — refrigerator, dishwasher, lower cabinets — while standing in the marked layout. You will find at least one conflict that wasn’t visible on the floor plan.
Ventilation, Noise, and Smell: The Problems No One Warns You About Until It’s Too Late
Nobody thinks about this until they’re hosting Thanksgiving and the entire open floor plan smells like rendered turkey fat by 10 a.m. Then they think about it very intensely.
Removing a wall between your kitchen and living space doesn’t just change the visual layout — it fundamentally changes how air, sound, and particulate matter move through your home. And the solutions to all three problems are significantly cheaper to build in during construction than to retrofit afterward.
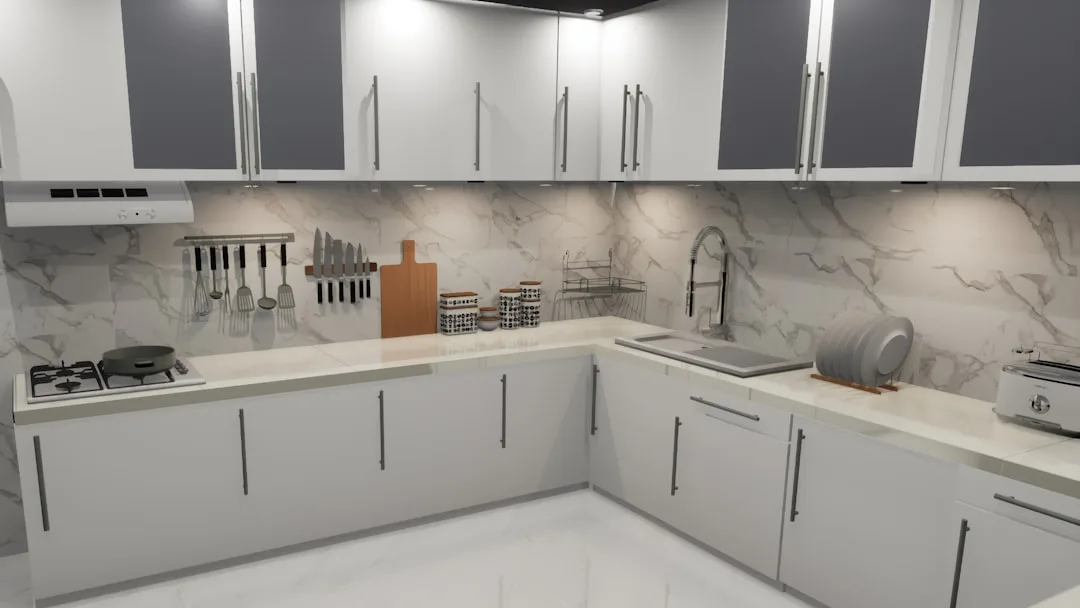
Ventilation is the most urgent issue. The CFM requirements — cubic feet per minute, the measure of how much air a range hood moves — change dramatically in an open layout. An enclosed kitchen can function adequately with a 300 CFM hood. An open plan kitchen cooking the same volume of food needs a minimum of 600 CFM, and serious home cooks who use high-BTU burners regularly should be looking at 900–1,200 CFM. The physics are simple: there are no walls to contain rising grease particles and steam, so they disperse into a much larger air volume, and a hood that was adequate in an enclosed kitchen is now playing catch-up.
Ductless recirculating range hoods — the kind that filter air through charcoal and push it back into the room — are insufficient for open-plan cooking. Full stop. They remove some odor molecules but leave grease particles, moisture, and particulate matter in the shared air. The EPA has documented that indoor air quality in residential spaces can be two to five times worse than outdoor air, and cooking without adequate ventilation in an open layout is one of the primary residential contributors to elevated indoor particulate levels. Only a ducted system — one that moves air completely out of the building — actually solves the problem.
Sound is the second problem, and it’s underestimated almost universally. Dishwashers, garbage disposals, and exhaust fans all produce noise that, in an enclosed kitchen, stays relatively contained. Open the floor plan and that noise bleeds directly into every conversation happening in the adjacent living area. When selecting appliances for an open concept remodel, look for dishwasher decibel ratings of 44 dBA or lower — anything above 50 dBA will be audible and irritating during a movie. Same principle applies to exhaust fans: a quieter motor is worth the cost premium when your living room is eight feet away.
After construction closes up, acoustic ceiling treatments, upholstered furniture, and area rugs are the most effective tools for absorbing sound that’s already in the space. Hard surfaces — concrete floors, plaster ceilings, glass and metal throughout — create reverberation that makes the room feel loud even when nothing dramatic is happening.
The white sofa problem is real and nobody mentions it. Light-colored upholstered furniture placed near an open kitchen will absorb airborne grease particles over time, particularly if ventilation is inadequate. This isn’t a design opinion — it’s what grease does when it becomes airborne and floats. Fabric selection for furniture in the adjacent living zone should factor in cleanability, and placement should keep upholstered pieces as far from the cooking zone as the layout allows.
Actionable takeaway: Specify your range hood before you finalize the kitchen layout. The duct run — where it exits the building, how long and how many turns it makes — affects both performance and installation cost. A hood that needs to duct 18 feet with two 90-degree elbows before it exits the soffit will underperform even at rated CFM. Get this locked in early.
Where the Budget Actually Goes (And Where Homeowners Consistently Overspend)
Here’s where the money actually flows in a structural open concept remodel:
- Structural work — beam, temporary support walls, permits, inspections: $4,000–$18,000. This is non-negotiable and non-skippable. Every dollar here is load-bearing in the literal sense.
- Flooring continuity: Often the most visually impactful line item and almost always underbudgeted. Matching existing hardwood — if your floors are more than a decade old — can cost $8–$22 per square foot installed, and that’s before you factor in refinishing adjacent sections to match sheen level.
- Electrical rerouting: Removing a wall almost always means moving outlets, switches, and sometimes entire recessed lighting circuits. Budget $800–$3,000 depending on complexity and how many runs need to be extended.
- Ventilation ducting: If a proper duct run wasn’t there before — and in most enclosed kitchens, it wasn’t — cutting a new path through cabinetry, soffits, and exterior walls adds $500–$2,500 to mechanical costs.
Where you can save without consequences:
Cabinet interiors, basic pull-out hardware, and backsplash tile are all areas where a budget choice today doesn’t compromise the structural or functional success of the project — and all three can be upgraded later without touching framing.
Where saving money will cost you more later:
Ventilation ducting quality, structural beam specification, and subfloor leveling. These are all systems that get buried inside walls and ceilings. Once drywall closes, accessing them again means reopening finished surfaces — which means labor and material costs that dwarf whatever you saved. I’ve seen homeowners save $600 on a beam specification and spend $4,200 two years later when deflection caused cracking in the ceiling drywall above it.
Actionable takeaway: Ask every contractor to provide a written cost breakdown that separates structural and mechanical line items from cosmetic ones. If they can’t or won’t do this, they don’t understand the project well enough to price it accurately.
How to Choose the Right Contractor for Structural Kitchen Work
The Better Business Bureau consistently ranks home improvement contractors among the top five most-complained-about business categories in the country. The two most frequent issues in kitchen remodel disputes specifically: unlicensed work and permit avoidance. Which means the two things most likely to go wrong with your open concept remodel are also the two things that are easiest to screen for before you sign anything.
General contractor vs. kitchen-specific remodeler: For a project involving structural wall removal, a licensed general contractor with documented structural experience is almost always the better choice over a kitchen-only specialist. Kitchen remodelers are excellent at cabinets, countertops, and appliance installation. Structural beam work, temporary support walls, and coordination with a structural engineer sit outside the core competency of most kitchen-focused firms. You need someone who manages subcontractors across multiple trades — framing, electrical, sometimes plumbing — and understands how those trades sequence on a structural project.
Credentials to verify before anyone starts work:
- General contractor license (verify through your state’s licensing board — takes five minutes online)
- Liability insurance with a minimum of $1 million in coverage
- Workers’ compensation coverage for all employees and subcontractors
- Pull-your-own-permit capability in your specific municipality — some contractors are licensed in adjacent jurisdictions but not yours, which creates problems immediately
The three-bid rule still applies, but the lowest bid on structural work is a red flag, not a deal. Ask each bidder to itemize structural and cosmetic costs separately. A contractor who can’t break those apart hasn’t actually priced the structural work — they’ve estimated it and buried it.
Questions to ask in every interview:
- Have you installed LVL beams or steel I-beams in residential projects? Can I see permit documentation from one?
- Who is your structural engineer, and are they willing to speak with me directly before the project starts?
- What happens if the beam spec changes after demolition reveals something unexpected? How do you handle change orders?
- What is your communication protocol during the project — how often will I get updates, and through what channel?
Design-build firms — companies that handle both design and construction under one contract — tend to reduce coordination errors because the architect or designer is talking to the framing crew directly rather than through a phone game of subcontractor relays. That integration comes at a cost: typically 10–15% more upfront than a contractor-plus-separate-designer approach. Whether that premium is worth it depends on your tolerance for managing multiple relationships while your kitchen is a construction site.
Actionable takeaway: Before signing any contract, verify your contractor’s license number directly on your state licensing board’s website. Don’t rely on the license number they hand you — look it up yourself and confirm it’s active, not expired or suspended.
The Finishing Decisions That Make an Open Layout Feel Intentional, Not Unfinished

Here’s the thing about open concept spaces that the design content ecosystem gets completely wrong: the finishes aren’t decoration. They’re doing structural work — visual structural work — that the walls used to do. Without them, you don’t have one beautiful room. You have two rooms that someone forgot to separate.
Material continuity is the single most important principle for making an open floor plan read as intentional rather than accidental. The rule I used consistently across eleven years of client work: no more than three primary materials across the entire visible floor plan. Flooring, countertop surface, and one dominant cabinet or wall finish. Everything else is secondary. Homeowners who collect materials — four different tile patterns, two different wood tones, three countertop surfaces — end up with spaces that feel chaotic regardless of how much they spent.
Lighting is where most open concept remodels fall short at the finish line. The kitchen needs two things: task lighting directly over prep surfaces, and ambient lighting that doesn’t make the rest of the open space feel like a surgical suite. The dining area needs a statement pendant or chandelier that creates a visual ceiling in a zone that may not have a physical boundary. The living area needs warm ambient sources — table lamps, sconces, or low-voltage recessed lighting on a separate dimmer circuit — that can coexist with the brighter kitchen without one zone washing out the other. These three lighting systems must be on independent controls. If they’re not, you’re permanently compromising at least one zone every time you turn a light on.
Color strategy in open layouts follows the 60-30-10 principle — dominant color across 60% of surfaces, secondary across 30%, accent across 10% — but the mistake most people make is applying it to the kitchen alone. In an open floor plan, the 60-30-10 ratio applies to the entire visible space. Your dominant wall color must look intentional from the couch, from the kitchen island, and from the dining table simultaneously.
The transition ceiling detail deserves more attention than it gets. When a soffit or wall comes down, there’s almost always a ceiling junction where the old structure met the new — a seam, a height difference, an exposed beam. How you treat that junction becomes the visual centerpiece of the entire space. Painted to match the ceiling, it recedes. Clad in shiplap or wrapped in plaster detail, it becomes a designed element. Left raw or patched poorly, it announces that something was removed. Make a deliberate choice.
Mixing metals in hardware and fixtures is acceptable — but requires a hierarchy. One dominant finish, used consistently on cabinet pulls, faucets, and light fixtures throughout the shared space. One accent finish used sparingly. Brushed brass as dominant with matte black as accent, for example, creates cohesion even across kitchen and living zones. Three or four competing metal finishes read as indecision.
A Zillow analysis found that open floor plan homes sell for up to 7.4% more than comparable closed-plan homes — but only when listing descriptions use language like “well-finished” or “seamless.” Poorly finished open plans don’t just fail to command that premium. They actively signal to buyers that there’s work left to do. The finishing phase is not where you run out of budget.
Actionable takeaway: Before selecting any finish material, pull it into the adjacent room and look at it in the context of that room’s existing materials and light. A backsplash tile that looks clean and modern in the kitchen showroom can fight with the living room’s warm-toned flooring from 15 feet away. Buy samples. Live with them for a week.
Frequently Asked Questions
How much does it cost to remove a load-bearing wall for an open concept kitchen?
The realistic range for load-bearing wall removal — including the structural beam installation required to replace its function, temporary support walls during construction, permits, and inspections — runs between $8,000 and $20,000 for most residential projects. That number climbs significantly in urban markets with high labor costs. In cities like New York or San Francisco, the structural portion alone can exceed $15,000. The beam specification — whether you’re installing an LVL engineered lumber beam or a steel I-beam — affects both cost and installation complexity. Steel I-beams are heavier and require more labor to maneuver into position, which adds cost but may be structurally necessary depending on the span. Get a structural engineer’s report before you get contractor bids. It’s the only way to know which category your project falls into.
Do I need a permit to remove a wall between my kitchen and living room?
In the vast majority of U.S. jurisdictions, yes — especially if the wall is load-bearing. Even non-load-bearing wall removal frequently requires a permit because electrical wiring runs through nearly every interior wall, and rerouting electrical work is a permitted activity in virtually every municipality. The consequences of skipping the permit range from a fine if an inspector notices work in progress to a serious problem at resale, when a buyer’s home inspector or the title company pulls permit history and finds unpermitted structural work. Some lenders will refuse to close on a home with open permit violations. The permit process also includes a structural inspection before drywall closes — which is the mechanism that catches beam installation errors before they’re hidden inside a finished ceiling. Don’t skip it.
Will an open concept remodel add value to my home?
It can — but not automatically, and not without conditions. The National Association of Realtors puts kitchen remodels at roughly 67% cost recoupment at resale, and Zillow’s data shows open floor plans command up to a 7.4% price premium over comparable closed-plan homes. But both figures come with a caveat: the execution has to be quality. Unpermitted structural work, mismatched flooring, poor ventilation, and visually disconnected spaces actively reduce value rather than add it. The resale case for an open concept remodel is strongest in markets where closed floor plans are the norm and buyers are actively looking for more open layouts — and weakest in older neighborhoods where buyers expect and prefer the original layout. Know your market before you commit to this scope of project.
How do I control cooking smells in an open floor plan?
This one has a clear answer and a complicated answer. The clear answer: a properly sized, properly ducted range hood — minimum 600 CFM for open-plan cooking, ducted to the exterior, not a recirculating filter system. That is the only solution that actually removes grease, moisture, and odor from the shared air space rather than filtering and recirculating it. The complicated answer involves the secondary measures that help when ventilation alone isn’t enough: keeping upholstered furniture as far from the cooking zone as the layout allows, choosing performance fabrics that resist absorbing airborne particles, and using the exhaust hood at the correct setting for the actual cooking happening (most home cooks underpowered their hoods). An HRV — heat recovery ventilator — added to the HVAC system improves whole-house air exchange and helps in open layouts where cooking odors can linger long after the burners are off. Build the ventilation right the first time. Retrofitting a proper duct run after walls are closed is expensive and disruptive.