
Nearly 40% of basements in the U.S. have a moisture problem — which means the single most important thing to do before pinning a single inspiration photo is check whether your floor is trying to tell you something. If you’ve been scrolling through pictures of finished basements and wondering why your own space feels so far away from what you’re seeing, the answer is almost never aesthetic. Tape a 12-inch square of plastic sheeting to your concrete slab, seal the edges with painter’s tape, and leave it for 24 hours. If there’s condensation on the underside when you peel it up, you have moisture coming through the slab. That test costs nothing, takes thirty seconds to set up, and has saved more than a few of my former clients from burying $30,000 in drywall and LVP on top of a problem that was never going anywhere. The gap between the pictures of finished basements you’re saving and the raw space you’re standing in is almost always structural — not a matter of taste or budget alone.
Quick Answer
Nearly 40% of basements in the U.S. have a moisture problem — which means the single most important thing to do before pinning a single inspiration photo is check whether your floor is trying to tell you something.
This article is not a mood board. It’s a planning framework — one that will make every picture of a finished basement you look at afterward actually useful instead of just aspirational.
What Finished Basements Actually Look Like in Real Homes (Not Staged Showrooms)
In This Article
- What Finished Basements Actually Look Like in Real Homes (Not Staged Showrooms)
- What a Partially Finished Basement Looks Like — and When That’s Enough
- The Best Colors for a Finished Basement (Based on the Light You’re Working With)
- Flooring, Ceilings, and the Details That Separate Photos from Reality
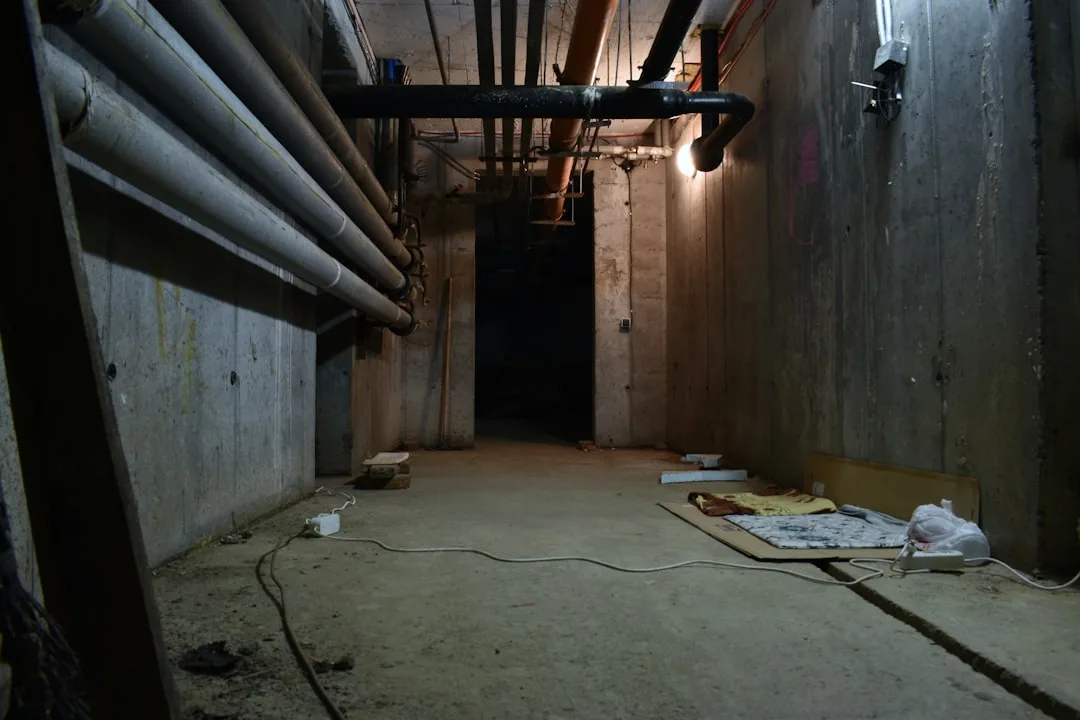
Here’s what the photo galleries won’t show you: the column in the middle of the room. The mechanical chase that eats three feet off one wall. The 7’2″ ceiling that the photographer somehow made look like a Manhattan loft by shooting from one very specific corner with a wide-angle lens. I spent eleven years working in real apartments and real homes, and the gap between what people expect from inspiration photos and what they find when they frame out their actual basement is the single most reliable source of mid-project panic I’ve ever witnessed.
The single most useful thing you can do with pictures of finished basements is identify which cost tier they represent — because the aesthetic distance between a $20K finish and a $100K finish is enormous, and most galleries mix them without context.
Here’s how the tiers actually break down in practice:
- Entry-level finish (~$20K for 800–1,000 sq ft): Open-ceiling treatment painted black or dark gray, LVP flooring, basic recessed lighting on one circuit, no bathroom, minimal trim. Looks intentional if executed with consistency. Does not look like HGTV.
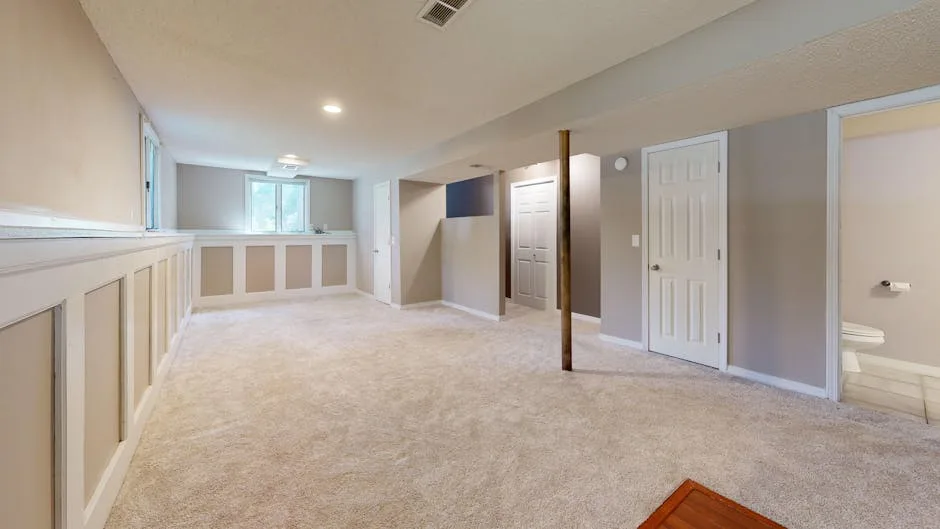
- Mid-range finish (~$50K): Drywall ceiling, drop ceiling, or coffered treatment; LVP or carpet; a half-bath or full bath if rough-in existed; a wet bar area; basic millwork around windows and doors. This is the finish that most buyers notice and most homeowners aspire to.
- Full renovation (~$100K+): Custom built-ins, radiant floor heat, full bathroom with tile shower, home theater or dedicated office suite, full egress upgrade. The staged photos you’re saving to Pinterest are almost always in this tier.
According to HomeAdvisor, finishing a basement runs roughly $25–$50 per square foot — meaning a 1,000-square-foot basement lands between $25,000 and $50,000 for a complete finish. That range assumes no major waterproofing surprises, which is a significant assumption.
Ceiling height and existing mechanicals shape what’s visually possible more than any design decision you’ll make. An 8-foot floor-to-joist measurement with a clear footprint is a genuinely different project than a 7-foot ceiling with a beam running through the center and a mechanical room that bisects the space. Neither is hopeless. But they require different solutions, and looking at pictures of finished basements from the wrong cost tier only makes that harder to accept.
When you’re comparing pictures of finished basements online, here’s what to look for before you let any image influence your planning:
- Ceiling treatment: Open joists, drop ceiling, drywall, or coffered? Each one carries a different cost and height penalty.
- Column handling: Are structural columns hidden in walls, wrapped in drywall, or left exposed? Hiding them costs money and sometimes square footage.
- Window depth: Basement windows sit in wells or deep sills. How the photo handles that sill — built-in shelving, a bench, ignored entirely — tells you a lot about the budget.
- Lighting placement: One recessed fixture every 6 feet on a single circuit is entry-level. Multiple circuits, under-stair lighting, and cove lighting indicate a mid-range finish or higher.
- Flooring transitions: A single material throughout is cheaper and cleaner. Multiple materials — tile in the bathroom, LVP in the main space, carpet in a media nook — signal a more considered and more expensive finish.
Actionable takeaway: Before you save another photo, write down your ceiling height, your square footage, and your ceiling type (open joists vs. drop ceiling vs. drywall). Then only look at photos that match those constraints. Everything else is noise.
What a Partially Finished Basement Looks Like — and When That’s Enough
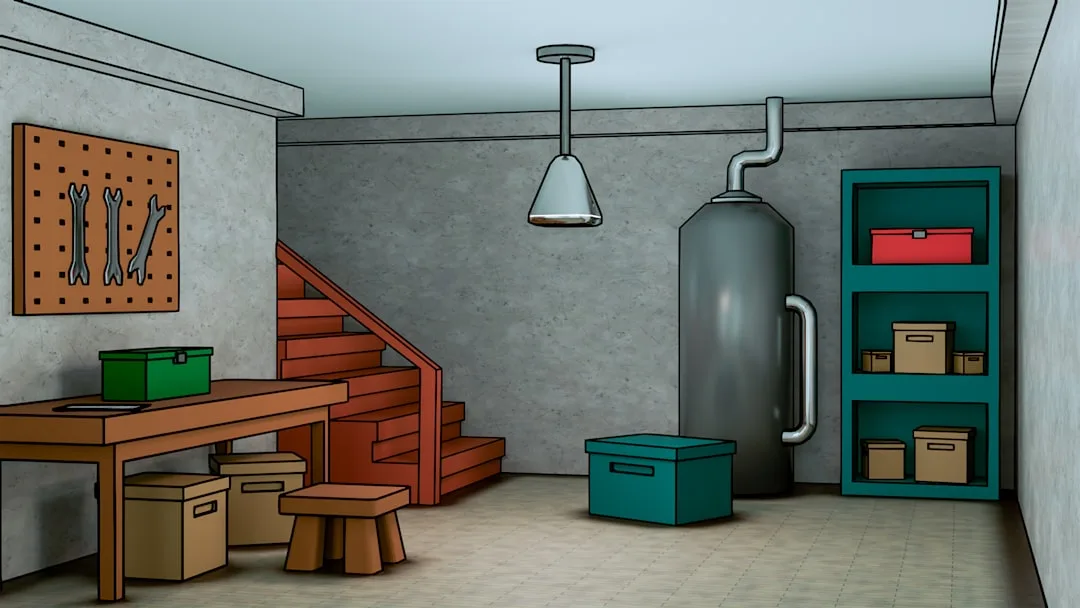
Most people treat a partially finished basement like an apology — as if leaving the utility zone exposed is evidence that they ran out of money or ambition. The reality is that a deliberate partial finish, executed with some basic visual logic, can look more considered than a rushed full finish done on a tight budget. I’ve seen both, and the rushed full finish is almost always the one that looks bad five years later.
Structurally, a partial finish means exactly what it sounds like: drywall on the walls and ceiling of your living zone, flooring in that zone only, and everything else — mechanicals, utility area, storage — left exposed but treated. The key word is “treated.”
Painting exposed joists, ducts, and pipes a single dark color — flat or eggshell black, or a dark charcoal — is not a shortcut. It’s a design decision that has been used in industrial and loft-style interiors for decades, specifically because it makes all that visual complexity disappear. Your eye doesn’t know where to rest, so it stops trying to resolve the ceiling and moves on. The effect is genuine. I’ve used it in high-end projects and budget projects and it reads the same way in both.
A partial finish works best when:
- The utility zone and living zone have a logical spatial separation — different areas of the footprint, or separated by the stair landing
- The transition between zones is marked deliberately — a change in flooring material, a short wall, even just a painted threshold line
- Storage in the utility zone is organized rather than stacked. No amount of good design survives a mountain of random boxes.
- Lighting in the utility zone is functional and intentional — a shop light on a switched circuit looks planned; a single bare bulb on a pull-chain does not
- Any exposed pipe or duct work that isn’t being painted is at minimum cleaned and consistent in direction — random spaghetti runs undermine the industrial aesthetic entirely
The partial finish approach also has a sequencing advantage that most guides don’t mention. When you leave the mechanical zone open and finish only the living zone, you preserve easy access to your HVAC, plumbing, and electrical panel without opening walls later. That access has real dollar value. I’ve worked on projects where the homeowner fully enclosed mechanicals in a tight drywall chase, then needed to run a new circuit two years later — what should have been a half-day job became a three-day demolition and repair. Leaving a planned utility corridor is not a compromise. It’s a decision.
One thing most content skips entirely: partial finishes may still require permits, depending on your scope and municipality. Adding or moving electrical, framing walls, or adding a bathroom always triggers a permit requirement regardless of how much of the space you’re finishing. Check with your local building department before framing a single wall.
Actionable takeaway: If your budget is under $15,000, consider a strong partial finish over a weak full one. Spend the money on flooring, lighting, and one treated focal wall — and leave the mechanical zone open but painted. The result will look better than a budget full finish and give you something to build on.
The Best Colors for a Finished Basement (Based on the Light You’re Working With)
Standard paint advice breaks down below grade. The light is different — not just less of it, but a different quality entirely. Above-grade rooms get some portion of daylight, which shifts color temperature throughout the day and gives your eye a reference point. Basements running on recessed LEDs at 5 PM look exactly the same as they do at noon on a cloudy Tuesday. That consistency is actually an advantage, but only if you choose colors that work under artificial light rather than against it.
Cool whites — the crisp, blue-leaning whites that look clean and modern in a well-lit kitchen — go flat and faintly clinical in basements. I learned this the expensive way with a client’s 900-square-foot basement in Wicker Park. We painted the entire space in a color that looked like a sophisticated warm white on the chip and in the upstairs hallway. Under basement LED lighting at 3000K, it read as the color of old copy paper. We repainted. The color that actually worked was a greige with clear yellow undertones that I would never have chosen above grade — it looked almost orange on the chip. Under artificial light with no daylight competition, it read as warm, neutral, and clean.
Colors that consistently work in basements:
- Warm whites with yellow or red undertones: Benjamin Moore White Dove (OC-17), Sherwin-Williams Antique White (SW 6119). Both hold their warmth under artificial light without going yellow.
- Greiges with warm bases: Benjamin Moore Revere Pewter (HC-172), Sherwin-Williams Accessible Beige (SW 7036). These read as neutral in basement light rather than muddy.
- Dark anchors for accent or full walls: Benjamin Moore Hale Navy (HC-154), Sherwin-Williams Tricorn Black (SW 6258). In a basement, dark colors don’t shrink the space the way they can upstairs — the space is already enclosed and the drama works in your favor.
- Muted sage and olive greens: These absorb warm light well and feel intentional rather than trendy. Sherwin-Williams Rosemary (SW 6187) specifically performs well under 3000K recessed lighting.
What to avoid:
- Cool grays with blue or purple undertones — they go cold and institutional fast
- Bright whites, especially with blue bases — they emphasize the artificial nature of the light
- Saturated colors at full strength — they look different enough between your phone screen and your actual basement that you’ll regret not sampling first
The lighting specification matters as much as the paint color. For basement recessed lighting, use bulbs rated at 2700K–3000K (warm to neutral white) at a minimum of 90 CRI. Lower CRI bulbs flatten colors significantly, which is why a color that looked reasonable in the store appears dead on your walls at home. This is not a minor detail — it’s the reason most basement paint jobs disappoint.
Sampling protocol that actually works:
- Buy sample pots of your top three colors
- Paint 12×12-inch sections on at least two different walls — including one near the darkest corner
- Evaluate at three different times: mid-morning, evening with all lights on, and evening with only one lighting zone active
- Don’t decide based on the best-case reading; decide based on the worst-case one
Flooring, Ceilings, and the Details That Separate Photos from Reality
When people look at pictures of finished basements and feel like their own space will never measure up, the gap is almost never the big decisions — it’s the finishing details that most budget guides treat as afterthoughts.
Flooring:
Luxury vinyl plank is the dominant choice for finished basements for legitimate reasons — it handles moisture and temperature swings better than solid hardwood, costs less than tile, and has improved dramatically in visual quality over the past decade. But the installation decisions matter more than the product choice.
- Direction of planks: Run planks parallel to the longest wall or toward the primary focal point. Running them perpendicular to the main sightline shortens the apparent space.
- Underlayment: In basements, use an underlayment with a built-in vapor barrier rather than foam alone. This is particularly important if you haven’t done a full waterproofing treatment.
- Transitions: If you have a bathroom or utility zone with different flooring, use a flush transition strip rather than a T-molding where possible. The height difference is visually disruptive.
- Baseboards: Install them. Skipping baseboards is the single detail that most clearly signals an unfinished job, even when everything else is done correctly.
Ceilings:
The three primary options — open painted, drop ceiling, and drywall — each have a specific use case, and the pictures of finished basements that look best usually commit fully to one approach rather than mixing them.
- Open painted ceilings work at 8 feet and above, or in spaces being used as recreation rooms, workshops, or home gyms. They don’t work well in bedrooms or formal media rooms — the aesthetic reads as unfinished rather than industrial in those contexts.
- Drop ceilings have improved. Modern grid systems with 2×2 acoustic tiles and recessed-style lighting panels look genuinely good and preserve full access to mechanicals. The stigma is outdated.
- Drywall ceilings give the cleanest look but cost the most, lower your ceiling height by at least 3–4 inches for framing and board, and eliminate access to anything above them without cutting.
The details most pictures of finished basements don’t show clearly enough:
- Egress window wells, and how the interior sill is treated (built-in bench, deep shelving, or just painted — each reads differently)
- Stair treatment — open-back stairs with a floating tread look entirely different from enclosed stairs with risers and a painted skirt board
- The junction between the finished wall and the concrete foundation — this is where moisture problems telegraph themselves first, and where cheap finishes visibly fail
- Outlet and switch plate consistency — matching all plates to the wall color, or upgrading to a single hardware style, takes less than an hour and makes a visible difference
FAQ
How do I find realistic pictures of finished basements that match my budget?
Search by project cost rather than by aesthetic. Houzz and Reddit’s r/DIY and r/HomeImprovement communities tag projects with actual spend fairly consistently. When you find a photo you like, look at the full project post rather than the single image — cost breakdowns and constraint descriptions appear in the write-ups, not the photos.
Do finished basements actually add home value?
According to Remodeling Magazine’s Cost vs. Value report, a midrange basement finish recoups roughly 70–75% of project cost at resale. That number varies significantly by region — in markets where finished square footage is at a premium, the return is higher. The finish also affects how long your home sits on the market, which has a value that doesn’t show up in the percentage calculation.
What should I fix before I start finishing my basement?
In order of priority: moisture problems first (test before anything), then any active structural cracks in the foundation walls, then HVAC capacity (your existing system may not be sized for the additional conditioned space), then electrical panel capacity. None of these are glamorous. All of them will cause problems if skipped.
How long does it take to finish a basement?
A professional crew finishing 800–1,000 square feet typically takes 4–8 weeks depending on scope and subcontractor scheduling. DIY projects in the same size range typically run 3–6 months when done on weekends. Permit approval timelines vary by municipality and can add 2–6 weeks to either scenario.
Can I finish my basement myself, or do I need contractors?
It depends on scope and local code requirements. Framing, painting, flooring, and basic trim are accessible DIY tasks with moderate skill. Electrical work beyond basic fixture swaps, plumbing for a bathroom, and structural modifications require licensed contractors in most jurisdictions — and attempting them without permits creates title problems when you sell. A hybrid approach — DIY the finishes, hire out the mechanicals — is how most successful budget basement projects get done.
Why do pictures of finished basements always look bigger than my actual basement?
Wide-angle lenses and corner shots. A 14mm or 16mm lens on a full-frame camera makes a 12×20-foot room look like a 20×30-foot room. Professional real estate and interior photographers know exactly which corner to shoot from and which focal length exaggerates depth. Your space is probably not as small as it feels when you’re standing in the middle of it — but it’s also probably not as large as the photo makes it look. Sketch the actual footprint on graph paper and it will look more workable than your gut impression.
How do I find realistic pictures of finished basements that match my budget?
Search by project cost rather than by aesthetic. Houzz and Reddit’s r/DIY and r/HomeImprovement communities tag projects with actual spend fairly consistently. When you find a photo you like, look at the full project post rather than the single image — cost breakdowns and constraint descriptions appear in the write-ups, not the photos.
Do finished basements actually add home value?
According to Remodeling Magazine’s Cost vs. Value report, a midrange basement finish recoups roughly 70–75% of project cost at resale. That number varies significantly by region — in markets where finished square footage is at a premium, the return is higher. The finish also affects how long your home sits on the market, which has a value that doesn’t show up in the percentage calculation.
What should I fix before I start finishing my basement?
In order of priority: moisture problems first (test before anything), then any active structural cracks in the foundation walls, then HVAC capacity (your existing system may not be sized for the additional conditioned space), then electrical panel capacity. None of these are glamorous. All of them will cause problems if skipped.
How long does it take to finish a basement?
A professional crew finishing 800–1,000 square feet typically takes 4–8 weeks depending on scope and subcontractor scheduling. DIY projects in the same size range typically run 3–6 months when done on weekends. Permit approval timelines vary by municipality and can add 2–6 weeks to either scenario.
Can I finish my basement myself, or do I need contractors?
It depends on scope and local code requirements. Framing, painting, flooring, and basic trim are accessible DIY tasks with moderate skill. Electrical work beyond basic fixture swaps, plumbing for a bathroom, and structural modifications require licensed contractors in most jurisdictions — and attempting them without permits creates title problems when you sell. A hybrid approach — DIY the finishes, hire out the mechanicals — is how most successful budget basement projects get done.