The average UK bathroom is 4.4 square metres — and a wet room will make it feel either twice the size or like a building site, depending almost entirely on one decision made before a single tile is laid. That decision isn’t the tile size. It isn’t the grout colour. It’s the drainage placement — and most homeowners don’t find that out until the floor is already screeded wrong.
Quick Answer
The average UK bathroom is 4.4 square metres — and a wet room will make it feel either twice the size or like a building site, depending almost entirely on one decision made before a single tile is laid.
I spent eleven years helping people fix bathrooms in cities where space is treated like gold bullion. The wet rooms that worked weren’t the ones with the most expensive finishes. They were the ones where someone — a good installer, an informed homeowner, occasionally me — made smart calls before the first pipe was moved.
What Actually Makes a Wet Room Feel Spacious (It’s Not the Tile Size)
In This Article
- What Actually Makes a Wet Room Feel Spacious (It’s Not the Tile Size)
- The Minimum Size for a Wet Room — and When Going Smaller Actually Works
- 7 Layout Configurations That Work for Tight Footprints
- How to Make a Small Wet Room Look Nice Without Copying Every Other Bathroom on Pinterest
- Current Wet Room Design Trends Worth Following (and Two to Ignore)
- The Real Downsides of a Wet Room — What Installers Don’t Lead With
- Waterproofing, Drainage, and Ventilation: The Technical Trifecta You Can’t Skip
- Storage Solutions for Wet Rooms That Don’t Get in the Way
- How Much Does a Small Wet Room Cost — and Where to Spend vs. Save
Most bathroom content will tell you to use large-format tiles to reduce grout lines and make the floor read as one continuous surface. That advice isn’t wrong exactly — but it addresses the symptom, not the cause. Visual flow is the actual mechanism. The eye follows lines, not surfaces, which means the direction those lines run matters far more than the tile dimensions themselves.
Here’s what I mean. A 600x600mm tile laid with grout lines running parallel to the longest wall will make that wall recede. The same tile laid on the diagonal creates movement and — counterintuitively — often makes a small floor feel busier, not bigger. Diagonal layouts are one of those trends that look brilliant in showroom photographs and feel chaotic in a 1.8m x 1.8m en-suite.
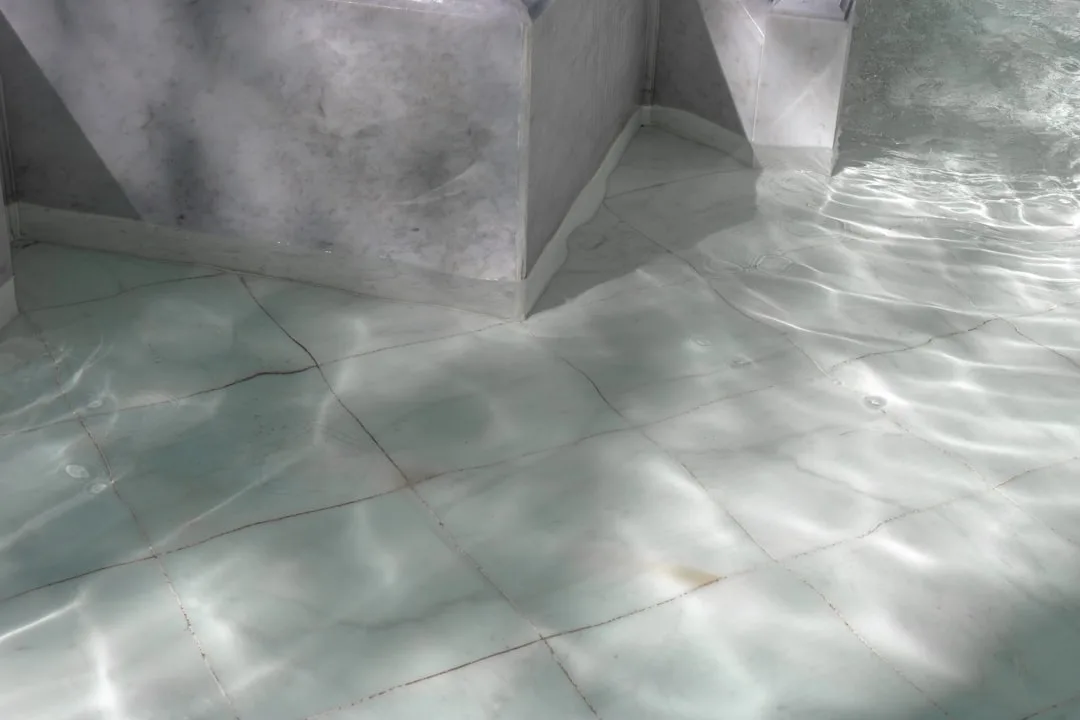
Drainage placement is where the real spatial logic lives. A linear channel drain positioned along one wall allows the entire floor plane to slope in a single direction toward that wall. The floor reads as a clean, uninterrupted surface. A centre-point drain requires a four-way gradient fall, which means every tile plane slopes slightly inward — and your eye registers that movement even if your brain can’t name it. In a small wet room, that visual noise adds up.
Ceiling height is another underused lever. Tall recessed niches, floor-to-ceiling tile lines, or even a vertical strip of contrast tile at the far end of the shower zone all draw the eye upward and create the impression of a taller room. It’s the same principle as a vertical stripe in clothing. Obvious in theory, underused in practice.
The single spatial mistake I saw most often — and corrected more than once after the fact — was positioning the shower zone opposite the entry point. When you walk in and face the shower directly, the wet zone dominates your entire first impression of the room. Place it beside the entry wall instead, and the eye travels the length of the room before landing on the shower. The room reads larger. Every time.
According to NHBC standards, a wet room shower zone requires a minimum 700mm x 700mm usable area, but functional comfort starts at 900mm x 900mm. Knowing that boundary helps you plan the surrounding circulation space intelligently — not just squeeze in fixtures and hope.
Actionable takeaway: Before any tiling decisions, draw the sightline from your door to the far wall. Everything you see in that first glance determines how large the room feels. Design that view first.
The Minimum Size for a Wet Room — and When Going Smaller Actually Works

The question comes up constantly: what’s the smallest a wet room can actually be? The honest answer is that it depends on what you’re fitting in it. A shower-only wet room — no WC, no basin — can work from approximately 900mm x 900mm for the shower zone itself, though the full room including circulation space will typically need to reach at least 1200mm x 900mm before it stops feeling punishing to use.
Full wet rooms that include a WC and basin need more considered planning. You’re not just fitting fixtures — you’re fitting movement between them. I’ve seen a 2.1m x 1.5m en-suite function beautifully as a wet room once the shower was pushed into the far corner and the basin was wall-hung with no vanity unit below. I’ve also seen a 2.4m x 2m space feel genuinely unusable because the installer positioned the drain in the centre and left nowhere for the toilet roll holder that didn’t get soaked.
Awkward geometry can actually work in your favour. Loft conversions with sloped ceilings, alcove rooms off a master bedroom, or the end of a galley corridor — these shapes suit a wet room better than a traditional shower enclosure because there’s no door swing to accommodate and no rigid rectangular zone required. The irregularity becomes part of the design logic rather than fighting against it.
Part M of the UK Building Regulations sets a minimum shower area of 1500mm x 1500mm for accessible wet rooms — a specification worth knowing even if accessibility isn’t your current priority. If there’s any chance the property will need to accommodate a wheelchair user, or if you’re conscious of resale value to older buyers, designing to Part M from the start costs almost nothing extra at the planning stage and can add meaningful value later.
Building regulations also require adequate ventilation regardless of room size — more on that in the technical section — and a wet room below a certain floor area may trigger a building control notification depending on what structural work is involved. Check with your local authority before assuming a small conversion flies under the radar.
Actionable takeaway: If your proposed wet room is under 1500mm in any direction, sketch it with a 900mm circulation arc around each fixture. If the arcs collide, something needs to move before you commit to drainage positions.
7 Layout Configurations That Work for Tight Footprints
Wet room layout advice tends toward the decorative — magazine spreads of walk-in rainfall showers in converted Victorian terraces — when what most people actually need is a configuration they can use on a 4.2m² floor. These seven layouts are the ones I’ve seen work in constrained real-world spaces.
1. Corner entry with angled drain
The shower zone occupies one corner, a single glazed screen runs diagonally across the corner mouth, and a linear drain sits along the back wall. This eliminates the dead corner problem entirely and maximises usable floor. Best in square or near-square rooms.
2. Galley-style wet room
Narrow elongated spaces — think 800mm x 2000mm or similar — suit a pure galley layout where the shower head is at one end, storage at the other, and a linear drain runs the full length of one long wall. The single-direction floor fall is structurally clean.
3. Alcove conversion
A structural niche — a former airing cupboard, a redundant storage alcove — turned into a full wet room with one glazed screen across the opening. Often the most underused square footage in a house, and one of the more satisfying transformations I’ve worked on.
4. Wet room pod within a larger bathroom
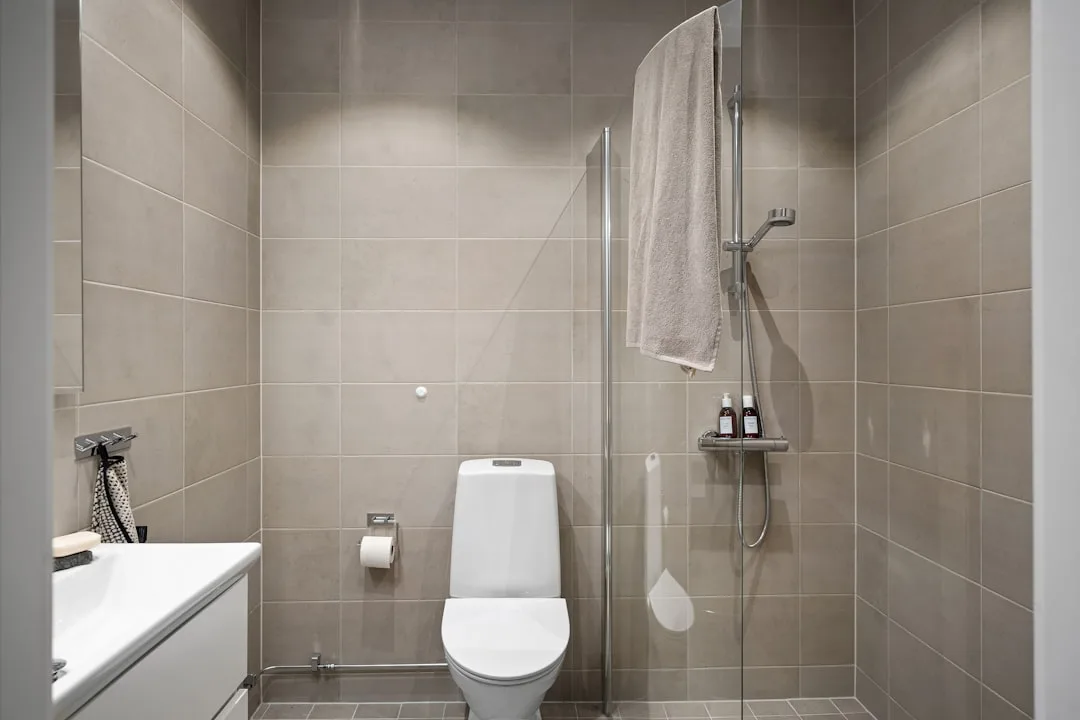
Rather than waterproofing the entire room, this approach defines a distinct wet zone with a screen or low threshold, leaving the rest of the bathroom conventionally dry. Practical for ensuite upgrades where full tanking isn’t cost-justified.
5. Loft en-suite with sloped ceiling
The sloped ceiling isn’t the problem people assume — it just means low-profile drain covers, wall-mounted thermostatic controls positioned below the slope, and a handheld shower head rather than a fixed overhead. Done right, the angled ceiling adds character.
6. Former airing cupboard or utility room
Approximately 1m x 1.5m of space that’s already plumbed, already insulated, and already ignored. Wet rooms from these conversions are small by definition — but they’re functional, private, and add a second bathroom to a house that previously had one. Worth every penny when families share a single bathroom.
7. Open-plan wet room adjoining a bedroom
This one requires the most planning. Tanking strategy must address the floor junction between the wet room and the bedroom, ventilation must run independently of the bedroom air, and the entire layout must account for splash travel across what is now a shared surface.
Actionable takeaway: Identify which configuration matches your room’s geometry before thinking about finishes. Layout logic determines whether the room works. Finishes determine whether it looks good.
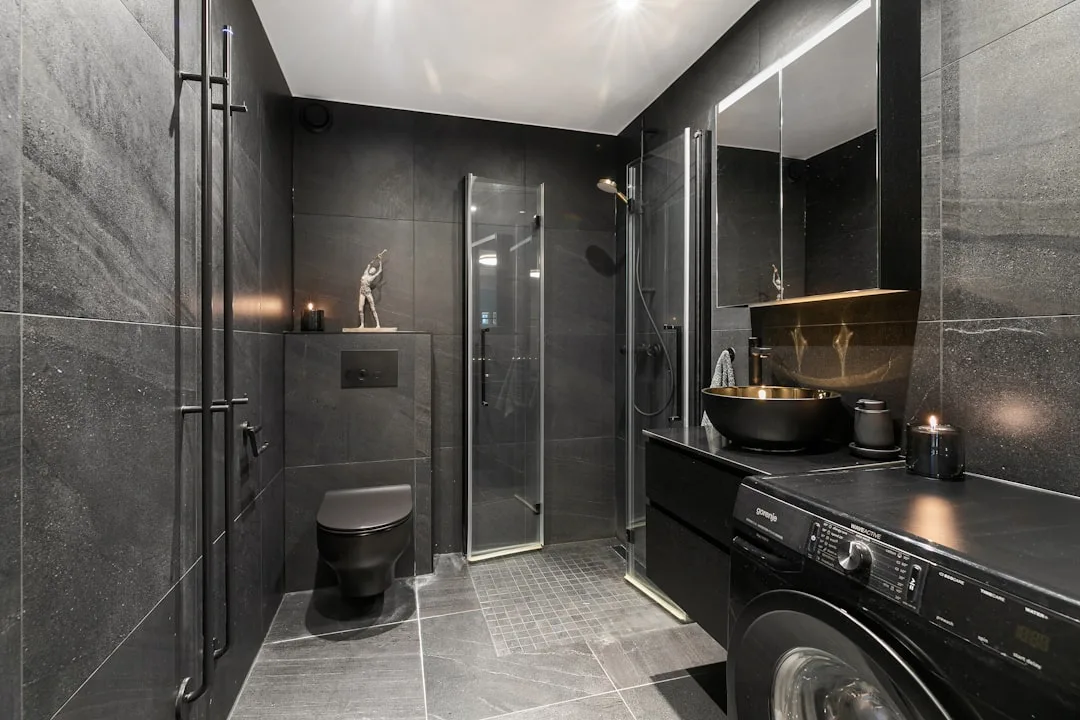
How to Make a Small Wet Room Look Nice Without Copying Every Other Bathroom on Pinterest
Pinterest small wet rooms have converged on a single aesthetic: grey large-format tiles, brushed brass rainfall head, a single white towel folded with forensic precision. It’s a beautiful look. It’s also completely saturated, and in an actual lived-in space it tends to look like a show home that nobody washed their hair in.
Tone-on-tone texture layering is the approach that consistently produces the most interesting results without requiring statement tile or a designer budget. The principle is simple: use the same colour family across the entire room — wall, floor, ceiling — but vary the finish. A matte wall tile, a polished or honed floor tile in the same tone, and a limewash or microcement ceiling creates depth that’s felt rather than immediately named. The room doesn’t shout about itself. It just feels considered.
The case against feature walls in small wet rooms is stronger than most bathroom content will admit. A single accent wall in a 1.8m x 2m space doesn’t create a focal point — it creates a visual collision. The eye bounces between the feature tile and the surrounding tile and reads the whole room as smaller, not larger. Continuous material wrapping — the same tile, the same colour, the same finish on every surface — reads as intentional and calm. I convinced a client in a Shoreditch flat to drop her planned metro-tile feature wall in favour of a single continuous stone-effect porcelain wrap. She called me three months later to say it was the best decision in the project. It was.
Hardware does more compositional work per square centimetre than most people realise. Matte black fixtures against a warm stone tile creates a clean, grounded contrast. Unlacquered brass develops a patina that reads as warmth rather than age. The choice between these two finishes does more for the overall feel of a small wet room than any tile pattern.
Grout colour is a design decision that most homeowners make last and shouldn’t. Dark grout on light tile creates a grid energy — the joints read as part of the pattern, and the tile becomes secondary. Matching grout creates a seamless, continuous surface where the tile itself carries the design. Neither is wrong. But treating it as an afterthought — just picking what matches the tile — produces results that look unfinished rather than chosen.
Google Trends data shows searches for ‘japandi bathroom’ and ‘wabi-sabi bathroom’ have grown consistently since 2023. Whether you use those words or not, the underlying shift they represent is real: quieter, more textural interiors, matte over gloss, natural materials over synthetic sheen. Small wet rooms benefit from this direction more than any other room type.
Actionable takeaway: Before specifying a single tile, decide what material you want the room to feel like — stone, plaster, concrete, wood — and then select everything to reinforce that one material language. Resist adding a second.
Current Wet Room Design Trends Worth Following (and Two to Ignore)
The renovation industry has a vested interest in making all trends sound like trends worth following. They’re not. Here’s an honest read on what’s actually worth your money right now — and what looks good on Instagram but makes a small wet room worse to live in.
Worth following:
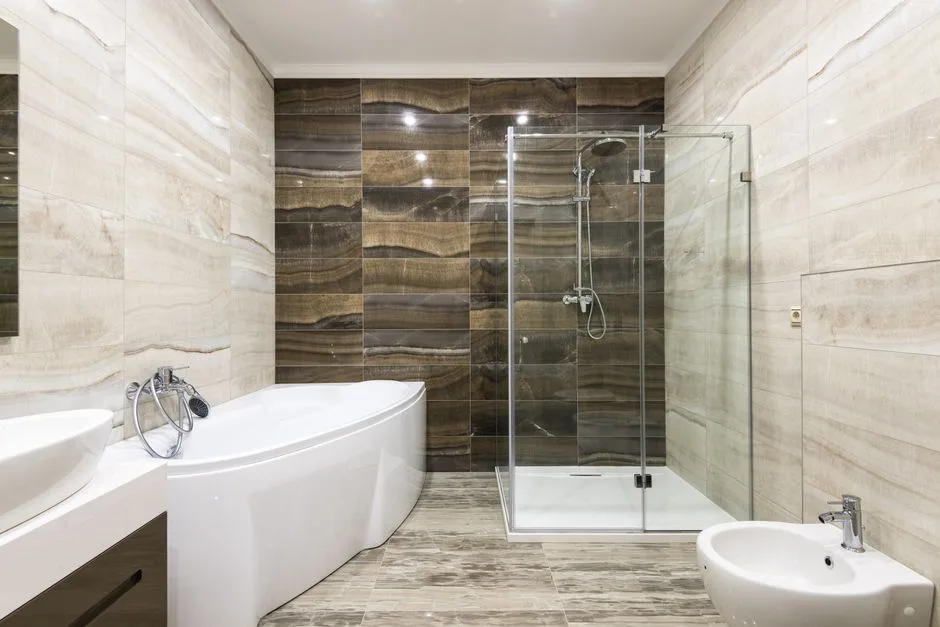
- Earthy, limescale-resistant stone-effect porcelain. Natural travertine and sandstone look extraordinary for about six months, after which limescale in hard water areas turns them into a maintenance project. Modern stone-effect porcelain — particularly from Porcelanosa, Tile Giant, or CTD Tiles — now mimics these materials convincingly while resisting both limescale and water absorption.
- Integrated shelf systems replacing carved niches. Recessed niches require cutting into the tanked wall, which introduces a waterproofing risk at every junction. Modular stainless or powder-coated steel shelving systems built directly onto the tanked wall surface — there are now several well-designed options from brands like Vado and Crosswater — offer more flexibility and zero structural compromise.
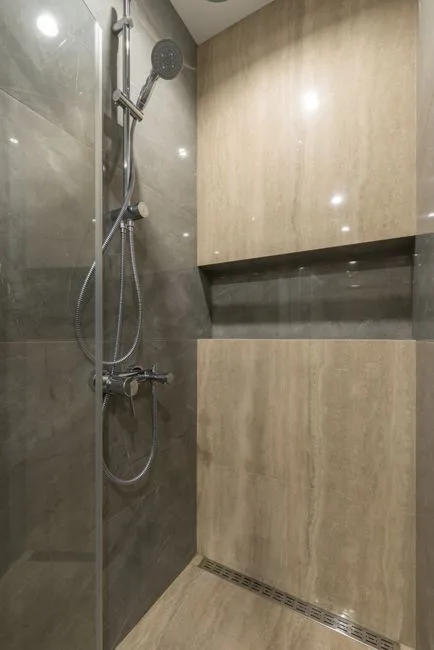
- Thermostatic bar valves. The sleek horizontal bar format replaces bulky separate controls, occupies less visual real estate, and delivers genuinely consistent temperature. In a small wet room where every surface element competes for space, the reduction in visual noise matters.
- Microcement and concrete-effect seamless finishes. No grout lines. Every visual break in a small wet room is a line that interrupts the floor or wall plane. Microcement eliminates all of them. The maintenance conversation is more complex — it needs sealing — but the spatial result is the cleanest possible surface.
Ignore these:
- Backlit mirror walls in small wet rooms. In a large spa bathroom, a backlit mirror wall creates drama. In a 2m x 1.5m wet room, it creates glare and a clinical feel that no amount of warm accessories will fully counteract.
- Freestanding elements inside the wet zone. Teak stools, bamboo bath racks, freestanding soap dishes — these all look intentional in the product photography and chaotic in a wet room that someone actually uses. They get wet. They block the floor drain. They move underfoot. Leave them out.
Mintel’s 2025 Bathroom Market Report noted that homeowners are prioritising durability and ease of cleaning over aesthetic novelty — a direct signal that low-maintenance materials like microcement and large-format porcelain will continue to dominate renovation choices for the foreseeable future.
Actionable takeaway: Apply a simple filter to every trend you’re considering: does this make the room easier to live in, or just better to photograph? The former is always worth following.
The Real Downsides of a Wet Room — What Installers Don’t Lead With

Nobody who is trying to sell you a wet room installation is going to open with this section. That’s exactly why you need to read it before you sign anything.
Tanking failure is the single most damaging and most common wet room problem. A wet room floor and walls must be completely waterproofed — tanked — before any tile is laid. When this is done incorrectly, or when junctions between floor and wall are missed, water migrates into the subfloor and structure. The result is timber rot, crumbling plaster, and — in the worst cases I’ve seen — structural damage that requires removing the entire floor. The Association of Plumbing and Heating Contractors reports that bathroom water damage claims, many linked to inadequate wet room tanking, account for approximately 20% of all domestic insurance claims in the UK annually. That number should settle the question of whether to cut corners on waterproofing.
The whole room gets wet. By design. This sounds obvious, but the practical implications are things people don’t think through until they’re standing in a soaked towel. Toilet roll, bathroom mats, non-waterproof storage, and anything you’d normally leave on a bathroom shelf — all of it needs a designated dry zone or a waterproof solution. A wet room without a coherent splash zone plan is just an expensive source of wet towels.
Heating costs more in an open wet room than in an enclosed cubicle. The absence of a door or full enclosure means warm air dissipates faster. Underfloor heating or a large heated towel rail isn’t a luxury in a wet room — it’s functionally necessary, and it needs to be budgeted accordingly.
Resale perception is an underacknowledged complication. In London, Manchester, and other cities where wet rooms are common, buyers understand what they’re looking at. In suburban and rural markets, some buyers read an open wet room as an unfinished bathroom. It’s not a dealbreaker, but it’s worth considering if your property is in a market where buyers are more conservative.
Drainage maintenance. Linear channel drains and point drains both require regular cleaning. The hair and soap scum that collects in a linear drain trap is not difficult to remove, but it’s less convenient than a standard shower trap — and if you skip it, blockages build gradually and the flood risk grows.
Actionable takeaway: Before committing to a wet room, walk through each of these drawbacks and confirm you have a specific plan for each one. If any of them feels unresolvable, a shower enclosure might genuinely serve you better.
Waterproofing, Drainage, and Ventilation: The Technical Trifecta You Can’t Skip
This is the section that separates a wet room that lasts twenty years from one that becomes a building project again in five. It’s less photogenic than tile selection. It matters far more.
Tanking systems fall into two broad categories: liquid-applied membranes and sheet membranes. Liquid-applied systems — BAL Tanking Slurry, Mapelastic, and similar products — are brushed directly onto the substrate and are particularly effective at covering complex geometries and penetrations. Sheet membranes like Schluter Kerdi are laminated to the substrate and provide highly consistent thickness across flat surfaces. The better choice depends on your substrate and the complexity of the room geometry — but whichever system is used, the corners and floor-to-wall junctions are where failures happen. Reinforcement tape at every internal angle is not optional. NHBC Foundation research indicates that approximately 1 in 6 wet room installations in the UK show evidence of water ingress within five years, with the majority traced to inadequate substrate preparation rather than product failure.
Floor gradient cannot be retrofitted. The floor must slope toward the drain at a minimum of 1:80 — meaning for every 80mm of horizontal distance, the floor drops 1mm. In a 1.5m x 1.5m wet room, that means the floor at the furthest point from the drain is roughly 18mm higher than the drain. This needs to be built into the screed before any waterproofing is applied. Tilers who promise to create the fall in the adhesive layer alone are making a promise that adhesive cannot reliably keep.
Linear drains along one wall require a single-direction floor fall — far simpler to execute cleanly, and far more forgiving in tight footprints. Centre point drains require the floor to fall toward the centre from all four directions simultaneously. In a small wet room, achieving this cleanly and without visible dish-bowl distortion requires a skilled screeder. It’s possible. It’s harder. The linear drain is the better engineering choice for small spaces.
Ventilation requirements under UK Building Regulations Part F specify a minimum intermittent extract rate of 15 litres per second for bathrooms. For wet rooms specifically — where steam production is higher and the open layout allows moisture to travel further — continuous low-rate ventilation at 8 l/s is increasingly recommended in addition to the intermittent extract. A damp wet room isn’t just unpleasant to use. It’s a mould incubator behind every tile.
Subfloor matters enormously. Concrete slabs are the simplest substrate for a wet room — stable, rigid, and non-absorbent. Timber joist floors require a rigid overlay board such as Wedi, Hardie Backer, or a similar cement-based product before any tanking is applied. The overlay board prevents flex, which is the primary cause of membrane cracking over time.
Actionable takeaway: Ask your installer to specify exactly which tanking system they’re using, how they’ll treat the floor-to-wall junctions, and how the floor gradient will be created. If they can’t answer all three clearly, keep looking.
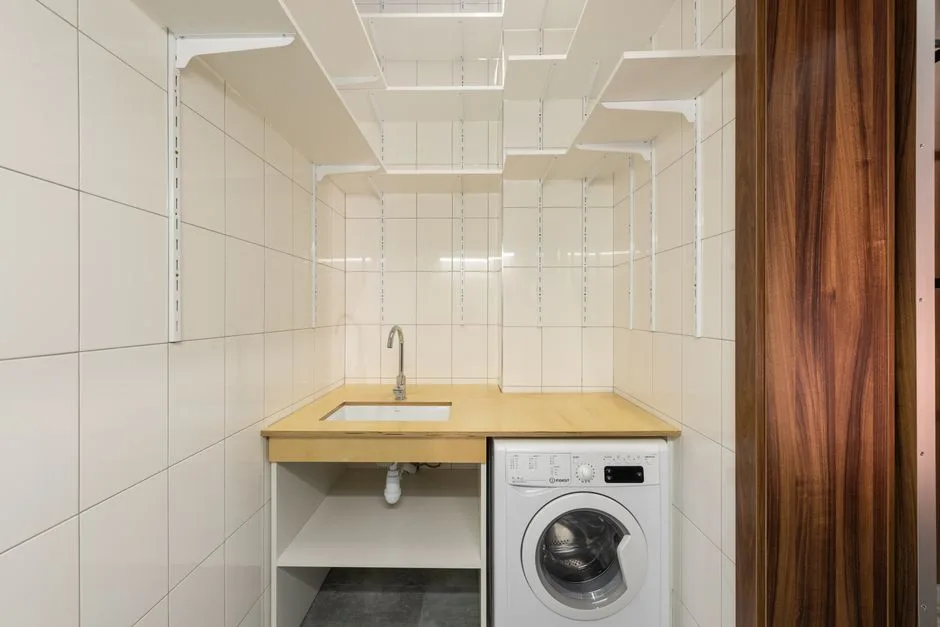
Storage Solutions for Wet Rooms That Don’t Get in the Way
Storage in a wet room is a problem that gets solved in the showroom and ignored in real life. The showroom solution is always the recessed niche — one perfect shelf, one bar of artisanal soap, zero clutter. Real life involves a household of two or more people with shampoo, conditioner, body wash, a razor, two different face washes, and a loofah that nobody admits to owning.
Wet zone vs. dry zone storage is the organising principle that makes everything else coherent. Anything within the splash zone — typically 1200mm radius from the shower head in an open wet room — must be made from waterproof materials. Stainless steel, powder-coated aluminium, and solid surface materials are the realistic options. Chrome-plated zinc, painted MDF, or untreated timber will deteriorate. Not slowly. Quickly.
Recessed wall niches work well when they’re positioned correctly. Elbow height — approximately 1200–1400mm from the floor — is the ergonomic sweet spot. More importantly, the niche width should align with your tile module. A niche cut to 300mm between two 300mm tiles requires no tile cuts and no exposed raw edges. A niche cut to 450mm requires cuts on both sides, which means exposed edges that need precise finishing and create additional waterproofing junctions. Plan the niche dimensions at the same time as the tile layout, not afterward.
The wall above the wet room door is almost always wasted. A slim floating shelf at door-head height — say 2100mm from floor — keeps toiletries completely dry, doesn’t intrude on the wet zone, and uses space that would otherwise be empty. It’s not a glamorous solution. It works every time.
Magnetic rail systems and suction-mount shelves on glazed screens are a more flexible alternative to fixed niches for people who rent, who move frequently, or who simply want to avoid cutting into their tanked wall. The load capacity is limited — don’t hang a full-size shampoo collection from a suction mount — but for small items they’re both practical and visually clean.
Actionable takeaway: Before tiling, mark the dry zone and wet zone on your floor plan. Then design storage specifically for each zone using materials appropriate to the moisture exposure. Decide on niche dimensions before tile layout is finalised.
How Much Does a Small Wet Room Cost — and Where to Spend vs. Save
Cost is the question everyone arrives with and most bathroom content handles with maddening vagueness. “Prices vary widely” is not useful. Here’s a realistic breakdown.
An installed small wet room in the UK — approximately 2m x 1.8m, including tanking, drainage, tiling, and basic fixtures — currently runs between £3,500 and £8,000 depending on material specification, location, and whether structural work is involved. London pricing will sit at the upper end. Smaller towns, lower. Properties with timber subfloors requiring overlay boards add £300–£600 to the substrate preparation cost.
Where to spend without compromise:
- Tanking system and its installation. This is not the line item to reduce. A failed tanking job costs more to fix than the original installation — Checkatrade’s 2025 cost data puts the average water damage repair from failed wet room tanking at £4,200.
- Drainage quality. A cheap drain cover warps. Cheap drain traps block faster and are harder to clear.
- Thermostatic valve. A non-thermostatic valve produces water at inconsistent temperatures that no rainfall head makes up for.
Where to save without apology:
- Tile brand. Own-brand stone-effect porcelain from Topps Tiles or Tile Giant performs identically to premium-branded equivalents for approximately 40–60% less per square metre. The manufacturing origin is frequently the same factory.
- Towel rail specification. A mid-range heated towel rail heats towels identically to a premium one. Buy the one you like the look of in the mid-price bracket.
- Accessories. Hooks, toilet roll holders, and soap dispensers can all be replaced later without touching the waterproofing. These are the easiest items to upgrade incrementally.
Hidden costs that derail budgets:
Building control notification fees if structural work is involved. Skip hire for demolished fixtures and tiles — easily £200–£400 and frequently forgotten. Contingency. In older properties — pre-1960 particularly — subfloor surprises are not uncommon once the existing floor is lifted. Budget 15–20% contingency from the start and treat it as a success if you don’t spend it.
The waterproofing stage is categorically not appropriate for DIY. Most tanking product warranties are voided if the membrane is not applied by a qualified installer. One missed junction — a pipe penetration, an internal corner — and the warranty is worthless. Given that the repair cost can exceed the installation cost, this is not a calculated risk worth taking.
Actionable takeaway: Get three itemised quotes. Not just a total number — itemised, so you can see exactly what each installer is specifying for the tanking system, the drain, and the substrate preparation. The cheapest quote that skimps on these three items is the most expensive option in the long run.
Frequently Asked Questions
What is the smallest size a wet room can be?
A shower-only wet room — no toilet, no basin — can function from approximately 900mm x 900mm for the shower zone itself, though the full room including circulation space typically needs at least 1200mm x 900mm before it’s comfortable to use daily. For a full wet room that includes a WC and basin, 1500mm x 1800mm is a realistic minimum for a functional layout. Part M of UK Building Regulations specifies 1500mm x 1500mm as the minimum shower area for an accessible wet room — worth building to even if accessibility isn’t your current need, since it future-proofs the space and doesn’t cost significantly more at the planning stage.
How do you make a small wet room look good without it feeling clinical?
Avoid hard contrasts, high-gloss surfaces, and the instinct to add a feature wall. Instead, use tone-on-tone material layering — same colour family across floor, walls, and ceiling in different finishes — which creates depth without visual noise. Matte finishes, natural stone effects, and warm hardware tones (unlacquered brass, warm brushed nickel) all move a wet room away from the clinical end of the spectrum. Integrated recessed lighting at floor level or warm LED strips rather than overhead downlights alone will change the atmosphere of the room entirely. The goal is a room that feels chosen rather than assembled from a showroom catalogue.
What are the biggest downsides of installing a wet room?
Tanking failure is the most serious — inadequate waterproofing can lead to structural water damage costing £3,000–£10,000 or more to remediate. Beyond that: the whole room gets wet by design, which requires advance planning for towel storage, toilet roll placement, and anything non-waterproof; heating costs more because the open layout loses heat faster than an enclosed cubicle; drainage maintenance is a regular requirement that many people underestimate; and in some markets, resale perception among buyers unfamiliar with wet rooms can complicate a sale. None of these are reasons to avoid a wet room — but all of them need a specific plan before installation begins.
What wet room design trends are worth following right now?
Earthy stone-effect porcelain that mimics travertine and sandstone without the maintenance burden of natural stone. Thermostatic bar valves that reduce visual clutter on the shower wall. Microcement and concrete-effect seamless finishes that eliminate grout lines entirely — the cleanest possible surface in a small space. Integrated modular shelf systems on wet walls rather than carved recessed niches. The broader direction — confirmed by consistent growth in searches for japandi and wabi-sabi aesthetics since 2023 — is toward quieter, more textural interiors: matte over gloss, warmth over drama, durability over novelty. Trends worth ignoring: backlit mirror walls in small wet rooms (too much glare, clinical feel) and any freestanding elements within the wet zone.
The single most useful thing you can do today — before any of the aesthetic decisions, before the tile samples arrive, before the contractor quotes — is draw your room to scale on paper and mark the drain position, the sightline from the door, and the wet zone radius. Those three marks will tell you more about whether your wet room will work than any mood board ever will.