The average home office in the US measures just 100 square feet — smaller than most walk-in closets — yet most layout advice is written for rooms twice that size, which is exactly why your setup still isn’t working. You’ve read the articles. You’ve seen the Pinterest boards. And you’re still sitting in a chair that’s too close to the wall, squinting at a monitor positioned directly in front of a window, wondering why six hours at your desk leaves you feeling like you’ve been wrung out. The problem isn’t your taste. It’s that almost every piece of small home office layout advice prioritizes how a space looks in photographs over how it actually functions when you’re trying to think in it for eight hours straight.
Quick Answer
The average home office in the US measures just 100 square feet — smaller than most walk-in closets — yet most layout advice is written for rooms twice that size, which is exactly why your setup still isn’t working.
I spent eleven years designing interiors in Chicago and New York — which means I spent eleven years watching people make the same spatial mistakes in different zip codes. Small home office layout ideas are everywhere. Good ones are rare.
What Is the Ideal Layout for a Small Home Workspace?
In This Article
- What Is the Ideal Layout for a Small Home Workspace?
- 1. The Corner-First Rule: Why Your Layout Should Start With the Room’s Geometry
- 2. Is an 8×8 Room Big Enough for a Home Office?
- 3. How to Arrange a Small Home Office Without Wasting Any Square Footage
- 4. The Floating Shelf Stack: Replacing Floor Storage With Vertical Architecture
- 5. Light Placement Is a Layout Decision — Not a Decorating Afterthought
- 6. What Are the Most Common Small Home Office Design Mistakes?
- 7. The Dual-Function Layout: When Your Office Has to Be Something Else Too
- 8. The Cable and Equipment Layout Nobody Plans For (Until It’s Too Late)
- 9. The One Square Footage Move Most People Never Try
- Start Here, Today
Most people hear “ideal layout” and immediately think about desk shape. L-shaped, corner, floating, built-in. That’s the wrong starting point — and it’s the root mistake I watched clients make constantly, including one who bought a $1,400 L-desk before measuring her door swing and then couldn’t fully open the door to her own office.
The ideal layout isn’t a desk shape. It’s a relationship. Specifically, the relationship between your chair, the door, and natural light. Get those three elements oriented correctly, and almost any desk will work. Get them wrong, and no amount of clever storage or Instagram-worthy accessories will fix the underlying dysfunction.
Here’s the framework I use — even in spaces as small as 60 square feet:
- Active work zone: The area directly around your chair and monitor where the actual work happens. This is sacred. Nothing enters it that doesn’t serve your focus.
- Storage zone: Vertical real estate above and beside the desk. The moment storage bleeds onto the floor, your active zone shrinks.
- Cognitive reset zone: Even a small visual break — a clear corner, a window sill, a plant that isn’t dying — gives your eyes somewhere to go that isn’t a screen. In tiny rooms, this is often overlooked entirely, and it shows in how people feel by 3pm.
The desk-first approach fails because it treats furniture as the anchor. Layout should be anchored by behavior — what you need to do, and what spatial conditions allow you to do it well.
A Cornell University ergonomics study found that proper workstation setup reduces musculoskeletal discomfort by up to 45%. That number matters because it reframes layout decisions as health decisions. The height of your monitor, the clearance behind your chair, the angle of your light source — these aren’t decorating choices. They’re physiological ones.
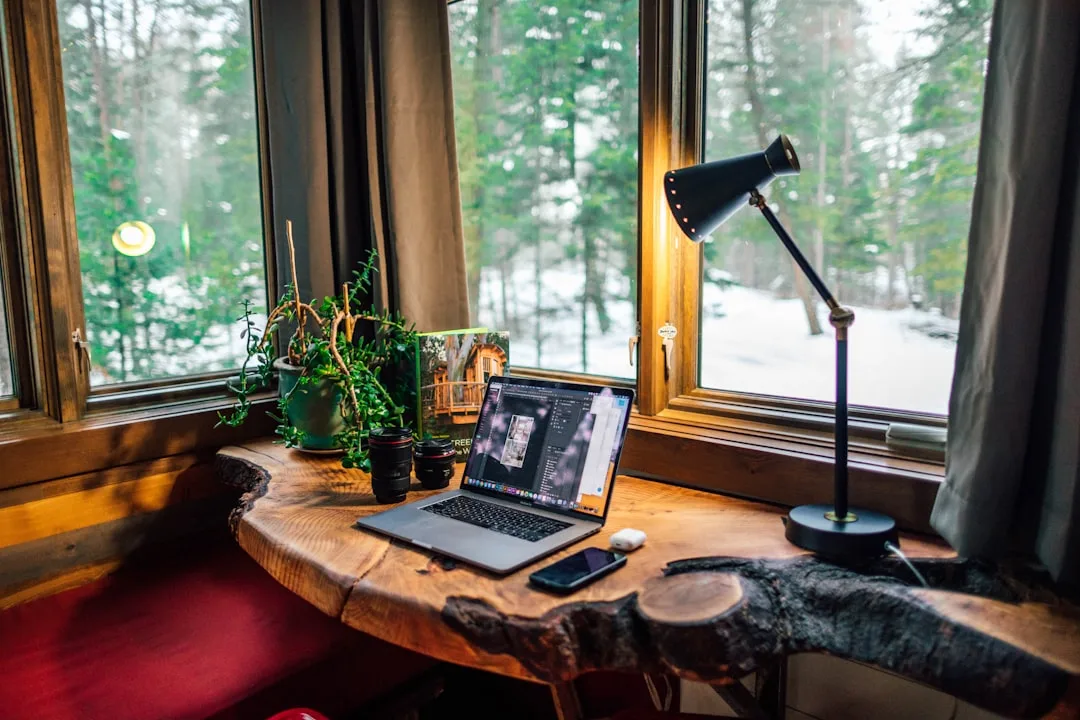
The desk-faces-window question comes up constantly, and the answer is almost never “face the window.” A window behind your monitor creates glare that forces your pupils to constantly readjust, which is exhausting in a way that’s hard to trace back to its cause. A window behind you creates reflections on your screen. A window to your side — ideally to the left if you’re right-handed — gives you natural light without interference.
Takeaway: Before you move a single piece of furniture, decide where your chair will be. Everything else is logistics.
1. The Corner-First Rule: Why Your Layout Should Start With the Room’s Geometry
Before you open a single furniture tab, walk into your office and look at the corners. All four of them. This is where your layout actually begins — not at a store, not in a catalog.
Corners are where the room tells you what it can and can’t do. A corner with an outlet and no window interference is a candidate for your primary workstation. A corner that gets hit by the door swing is dead space — but it might be perfect for a floor-to-ceiling shelving unit. A corner with a window sill at exactly desk height is a gift. Most people walk past all of this and default to centering their desk on the longest wall, which is — in my experience — almost always the wrong call.
Map these four things before touching any furniture:
- Every outlet location and its distance from potential desk positions
- Your door swing radius — which direction it opens and how far
- Load-bearing walls (relevant if you’re planning to mount anything heavy)
- Window sill heights and which direction the windows face
That door swing is more significant than people realize. A standard interior door claims 8–12 square feet of usable floor space when open. In an 8×8 room — 64 square feet total — that’s up to 19% of your floor gone before a single chair rolls in. I’ve seen people lose a full desk footprint to door clearance because they never measured it.
Corner setups behave differently depending on room size. In rooms under 100 square feet, a corner-mounted or corner-adjacent desk creates a natural territorial boundary — your back is to the room, the walls form a three-sided enclosure, and your brain registers it as a dedicated work position. There’s a psychological component here that I don’t think gets enough credit: when the space signals “this is where work happens,” the transition into focus is faster. In rooms between 100 and 150 square feet, you have more flexibility — a floating desk pulled slightly away from the wall can work because there’s enough surrounding space to prevent the setup from feeling cramped.
How to measure usable floor area: take your room dimensions and subtract the door swing arc, the area immediately in front of any closet or built-in you need daily access to, and the minimum 36-inch chair clearance you’ll need behind the desk. What remains is your actual working floor plan. It will be smaller than you expect. That’s okay. Working with accurate numbers is always better than working with optimistic ones.
Takeaway: Sketch your room’s constraints — outlets, door swing, window placement — before considering any furniture. The room’s geometry is the first design decision, not the last.
2. Is an 8×8 Room Big Enough for a Home Office?
Yes. With conditions that are specific and non-negotiable.
An 8×8 room — 64 square feet — can absolutely function as a home office, but only if you’re honest about what it can and cannot hold. I’ve set up workable offices in smaller spaces. I’ve also watched people try to cram a full L-desk, a filing cabinet, a bookshelf, and a printer into 64 square feet and end up with a room that induces mild panic every time they walk into it.
The math matters here. OSHA recommends a minimum of 50 square feet per person in a commercial office. Residential spaces have no mandated minimum, but ergonomics researchers generally suggest 35–40 square feet of clear working area as the functional floor — meaning space that isn’t occupied by furniture. In an 8×8 room, after accounting for a wall-mounted desk and a chair with proper clearance, you’re hovering right at that threshold. It works. Barely. And only if every other square foot is managed with precision.
What will not fit in an 8×8:
- A two-person workstation
- A standing desk with a treadmill base
- A full filing cabinet positioned alongside a large L-shaped desk
- A sofa or daybed (this is a workspace, not a multipurpose suite — at 64 square feet, you don’t get both)
What will fit — what I’d actually recommend — is what I call the 8×8 survival stack:
- A wall-mounted desk at 18 inches deep (standard floating desks are 24 inches; 18-inch models exist and the 6-inch difference is meaningful at this scale)
- Pegboard mounted directly above the desk surface for tool and accessory storage
- A single under-desk drawer unit on locking casters that slides out only when needed
- A chair with a compact footprint — task chairs without armrests, or a saddle-style chair, free up lateral movement
The 36-inch push-back clearance behind the desk chair is the number most people sacrifice first. Don’t. It’s the clearance you need to stand up without hitting a wall, to reach behind you for a cable, to pivot when someone knocks. Eighteen inches of lateral movement on each side of the chair is the secondary minimum. Going below either of those isn’t creative space planning — it’s just uncomfortable.
Takeaway: Measure for the chair, not just the desk. In an 8×8, a wall-mounted desk at 18 inches deep plus proper chair clearance is the equation that actually works.
3. How to Arrange a Small Home Office Without Wasting Any Square Footage
Here’s the sequence I follow when setting up a small office — and the sequence matters, because doing these steps out of order is how people end up with a beautiful desk positioned directly under an outlet-free wall with a cable running across the floor.
Step 1: Floor plan first, furniture second. Use graph paper or a free app like RoomSketcher or Planner 5D to map your space to scale before moving anything. This takes 20 minutes and saves you from rearranging furniture three times. I have never once regretted doing a floor plan. I have absolutely regretted skipping it.
Step 2: Place the desk relative to the light source, not the outlet. Extension cords are $12. Eye strain treatment is significantly more expensive, and the fatigue it creates compounds invisibly over months. Light orientation comes first; outlet access is a logistics problem you solve afterward.
Step 3: Assign vertical real estate in layers. Eye level and just below: active reference materials, the monitor, things you reach for multiple times per day. Above eye level: archive storage, boxes, things you access monthly. Below the desk: equipment and hardware — printer, hard drives, power strips. Anything that doesn’t fit cleanly into one of these layers probably doesn’t belong in the office at all.
Step 4: Protect the 30-inch path. The walkway from your door to your desk needs a minimum of 30 inches of clearance. Anything narrower creates what I think of as a corridor effect — the brain reads it as constrained, and constrained spaces trigger a low-level stress response that accumulates over a workday. Interior designers work with a principle sometimes called the 60-30-10 floor principle: in a functional small room, 60% of floor area stays clear, 30% holds primary furniture, and 10% holds storage. In a 10×10 room, that means keeping 60 square feet completely open. Most people’s instinct is to fill space. Fight it.
Step 5: Test before you commit. Arrange everything temporarily and do one full work session — real work, not a 20-minute experiment — before wall-mounting anything or buying additional furniture. You will notice things during hour three that you never noticed during setup.
Takeaway: Run through this sequence in order. Skipping to furniture placement before finishing steps one and two is the reason most small office arrangements fail.
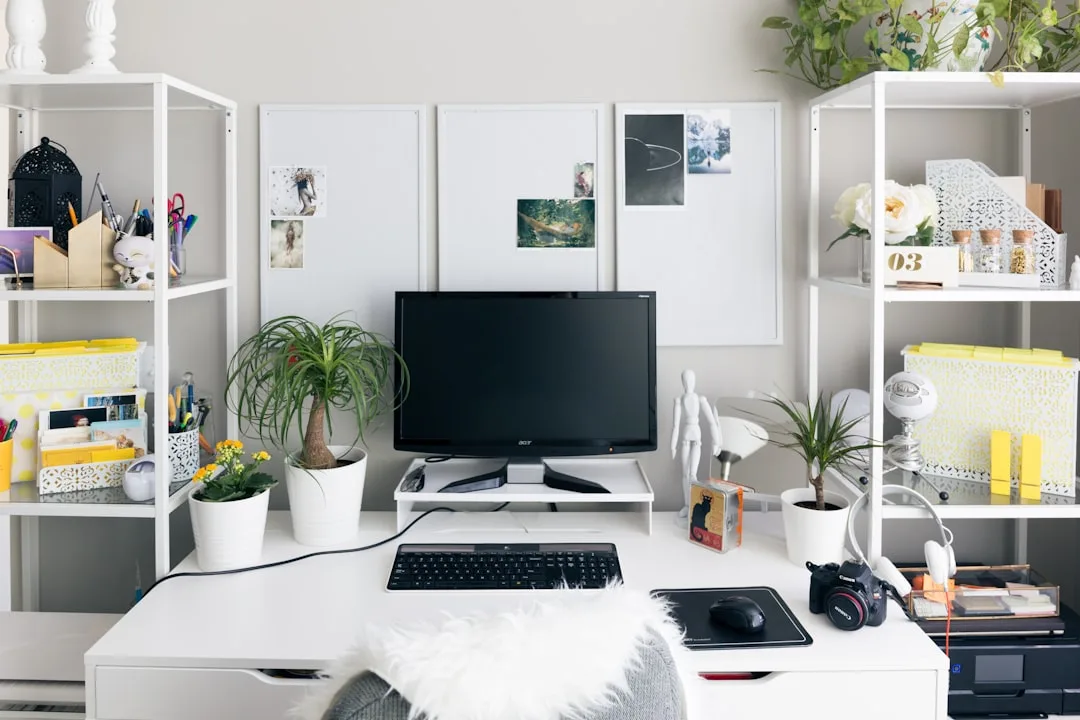
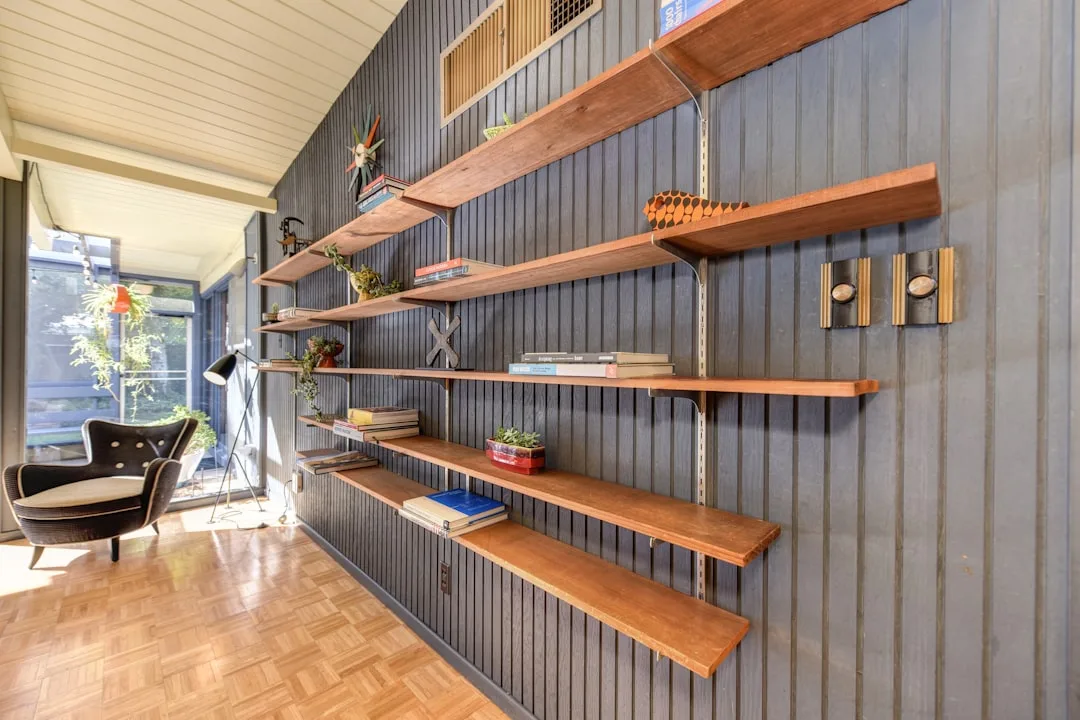
4. The Floating Shelf Stack: Replacing Floor Storage With Vertical Architecture
The moment you accept that floor space is your most finite resource in a small home office, vertical storage stops being an option and becomes a structural requirement. Most articles tell you to “use shelves.” That’s not useful. The specific configuration of those shelves — depth, spacing, anchor method, and placement relative to the desk — determines whether they actually solve the problem or just add visual chaos at eye level.
Wall-mounted shelves at 10 inches deep are the sweet spot for above-desk storage. Deep enough to hold binders, small bins, and speakers without feeling precarious; shallow enough that you won’t brain yourself on the corner when you stand up. The 12-inch shelves sold at most hardware stores are just slightly too deep for directly above a desk — use those at standing height and above. Reserve anything deeper than 12 inches for closets and floor-level storage.
Shelf spacing matters more than most people account for:
- 18 inches between lower shelves (positioned at or just above monitor height): accommodates binders standing upright, small monitors used as secondary screens, or speaker setups
- 12 inches between upper shelves (above eye level): books, labeled bins, archive boxes, items you’re not reaching for daily
- The zone directly above the monitor should stay clear — mounting a shelf at exactly head height creates a shadow on your screen and a low-grade sense of enclosure that wears on you
Pegboard panels installed between shelf runs create what I think of as a command wall — a responsive, reconfigurable surface where hooks hold headphones, clips manage cables, and small accessory shelves can be repositioned as your workflow changes. The pegboard costs almost nothing and eliminates an entire category of desk-surface clutter.
IKEA’s workspace planning guidance suggests that users who store 80% of their materials vertically report fewer interruptions during work sessions due to reduced desk clutter — the logic being that visual clutter on a desk surface creates constant micro-decisions about where to look and what to move. A clear desk surface is not an aesthetic preference. It’s a cognitive one.
One note on installation: find the studs or use toggle bolts rated for the load. A loaded 48-inch shelf carries 30–50 pounds easily — more if you’re storing binders or equipment. Drywall anchors alone are not sufficient, and I have seen what happens when they fail. It is not a small problem.
Takeaway: Install shelves at 10 inches deep, stagger the spacing at 18 and 12 inches, and add pegboard in the gaps. Your desk surface will thank you by the end of the first week.
5. Light Placement Is a Layout Decision — Not a Decorating Afterthought
Lighting almost never appears in layout discussions. It gets shunted off to a “finishing touches” section alongside throw pillows and cable organizers. This is a serious mistake — one that has measurable consequences for how long you can sustain productive work in a small space.
Your primary task light should sit 90 degrees to your dominant hand. Right-handed? Light comes from the left. This eliminates the hand shadow that falls across your work surface when you write or use a mouse, a small annoyance that compounds into genuine fatigue over a full workday. It sounds obvious. Almost no one does it.
The Illuminating Engineering Society recommends 300–500 lux of task illumination for sustained reading and computer work. A single 60-watt incandescent equivalent produces roughly 150–200 lux at desk level. That means most home offices are operating at roughly half the recommended light level for the cognitive work being performed in them — and the deficit shows up not as obvious darkness but as low-grade fatigue and headaches that seem to come from nowhere.
The window placement question has a clear hierarchy:
- Best: Window to the side of the desk, neither behind the monitor nor behind your head
- Acceptable: Window behind you, with monitor adjusted for angle to eliminate reflections
- Problematic: Window directly behind the monitor — the brightness differential forces constant pupil adjustment
- Worst: Windowless room with a single centered overhead fixture, which creates a shadow directly over the desk surface in almost every configuration
In windowless offices — and I’ve worked in several — a daylight-spectrum overhead fixture at 5000K–6500K, producing a minimum of 400 lux at desk surface, is not a luxury. It’s basic infrastructure for sustained cognitive performance. Pair it with a bias light behind the monitor: a 6500K LED strip mounted behind the screen reduces the contrast between the bright display and the darker wall behind it, which makes the room feel larger and reduces eye strain simultaneously. The cost is under $20. The difference is significant.
Takeaway: Before your next workday, check your task light position relative to your dominant hand and measure your room’s lux output if you can — or simply notice whether your eyes feel strained by mid-afternoon. That’s your baseline.
6. What Are the Most Common Small Home Office Design Mistakes?
I’ve walked into enough small offices — client offices, my own past offices, the converted closet a colleague swore was “totally workable” — to know that the same mistakes appear in different rooms with different budgets. What’s interesting is that most of them aren’t aesthetic mistakes. They’re spatial reasoning mistakes.
Mistake 1: Buying the desk before measuring the chair clearance. Desk dimensions in product listings almost never include the space the chair occupies when pushed back. A desk that looks compact on paper can consume an entire 8×8 room once you account for a chair at full extension. Measure chair clearance first — 36 inches minimum — then work backward to the desk dimensions that fit.
Mistake 2: Defaulting to the longest wall as the desk wall. The longest wall in a room is usually the one with the most foot traffic passing in front of it, which makes it the worst possible anchor for sustained focused work. It’s also often interrupted by doors, closets, or heating vents. The longest wall is not automatically the best wall. It’s just the most obvious one.
Mistake 3: Buying a matching furniture set. I feel strongly about this — matching sets are designed for showrooms, not for inhabited rooms. Everything is the same depth, the same height, the same visual weight. Real rooms have architectural irregularities that matching sets ignore entirely, and the resulting layout is always slightly off. Mixing pieces of different depths and heights creates more usable geometry and looks more considered than anything pre-packaged.
Mistake 4: Ignoring acoustic layout. Two hard surfaces facing each other — an unadorned desk surface opposite a bare wall — create echo that degrades video call quality and accumulates as cognitive noise during the workday. One upholstered element or a textile panel on the wall breaks the reflection path. It doesn’t have to be expensive. It has to be present.
Mistake 5: Installing the overhead light centered on the room, not on the desk. A centered ceiling fixture creates a shadow directly over the desk surface in almost every non-centered desk configuration — which is most of them in small rooms. A 2023 Leesman Index workplace survey found that adequate lighting and sufficient desk space were the top two factors affecting home office productivity satisfaction, outranking internet speed, chair comfort, and decor. Yet overhead light positioning remains an afterthought in almost every small office setup I’ve encountered.
Takeaway: Run through these five mistakes before your next setup change. Chances are at least two apply to your current arrangement.
7. The Dual-Function Layout: When Your Office Has to Be Something Else Too
Most people reading this don’t have a dedicated office. They have a guest room that doubles as an office, or a bedroom corner they’ve claimed, or a living room section that technically becomes a workspace between 9am and 5pm. This is the real condition most small home office layout ideas need to address — and almost none of them do honestly.
The guest room office is the most forgiving hybrid. A Murphy bed with an integrated desk panel is the cleanest solution at this scale — when the desk is deployed, the bed is flush against the wall; when guests arrive, the desk folds up and the bed folds down. Look specifically for models with a minimum 24-inch desk depth; anything shallower makes monitor placement awkward and forces you to sit too close to the screen. The ones I’ve seen with 18-inch desk depths are essentially unusable for full-day work.
The living room office requires a visual zone break more than anything else. A secretary desk or a console desk — something with a small footprint and a defined work surface — positioned perpendicular to the sofa creates a spatial division that a desk pushed against the same wall as the TV never achieves. The desk should face away from the television. This sounds obvious. It is not, in practice, how most people set it up.
The bedroom office is the most complicated, and I want to be direct about why. Sleep researchers have documented that working in view of your bed disrupts sleep onset — the brain begins to associate the bedroom with alertness and reduces its melatonin response accordingly. This isn’t a vague wellness concern. It has a physiological mechanism. The desk should never face the bed. Position it so your back is to the bed while working, reinforcing the separation between the two behavioral zones that share the room.
When a physical door doesn’t exist between your work zone and your rest zone, a visual divider — an open bookshelf, a curtain panel on a ceiling track, a folding screen — serves a functional psychological purpose. It signals zone transition to the brain in a way that simply having a desk in the corner does not.
Takeaway: For bedroom offices specifically, position the desk so your back is to the bed and add at least one visual divider, even a simple curtain panel. The sleep benefit alone is worth the effort.
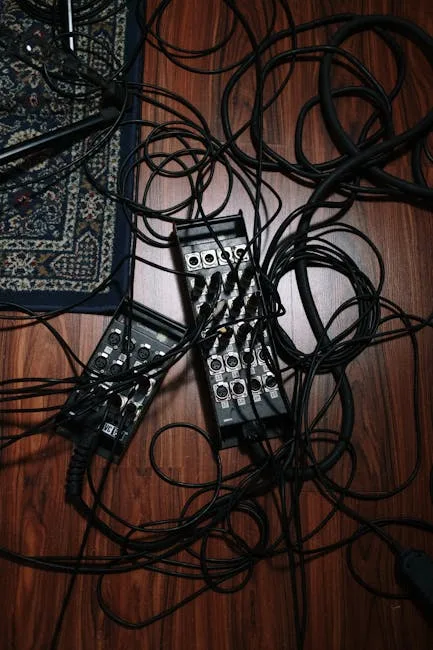
8. The Cable and Equipment Layout Nobody Plans For (Until It’s Too Late)

This section exists because no one writes it. Cable and equipment planning is the unglamorous infrastructure of a functional home office, and it gets ignored until the day you realize your power strip is running across the only walking path in the room and your router is sitting inside a cabinet because it “looked messy” and your WiFi performance dropped by 40% as a result.
Map every outlet location before you finalize the desk position. Your primary outlet needs to be within six feet of your most power-hungry equipment — monitor, desktop, external drives — without requiring a power strip cable to cross a foot traffic path. A desk positioned two feet from the nearest outlet with a power strip tucked underneath is a clean setup. A desk positioned across the room with an extension cord taped to the baseboard is a hazard and looks like one.
Cable trays mounted under the desk surface — horizontal cable management channels that cost under $30 — keep floor and desk surfaces clear and eliminate the visual noise that makes small spaces feel cluttered beyond their actual size. This is the single most impactful $30 improvement available for a small home office, and it almost never appears in any article that calls itself a guide to small home office organization.
Router and modem placement: position it at or above desk height, in open air, never inside a cabinet. Never behind a metal filing cabinet, which degrades signal measurably. The router should be treated as functional equipment with spatial requirements, not an eyesore to be hidden.
Monitor arm planning is where I see the most preventable mistakes. A monitor arm requires 3–4 inches of rear desk clearance — space between the back of the desk surface and the wall — plus a surface edge at least ¾ inch thick to accept the clamp. On an 18-inch wall-mounted desk, you may not have either. Know this before you buy. A 2024 Owl Labs State of Remote Work report found that 62% of remote workers say technical setup quality — camera angle, audio, connection stability — affects how seriously they are perceived in meetings. The layout decisions governing equipment placement directly affect professional perception. That is not a small thing.
Takeaway: Before finalizing any desk position, draw a line from every outlet to every piece of equipment and check whether a cable running that path would cross a walking surface. If it would, move the desk, not the equipment.
9. The One Square Footage Move Most People Never Try
Everything else on this list is about working within your space. This one is about fundamentally redefining what your space contains.
Audit what’s actually in your office and ask whether it needs to be there at all. This sounds obvious. It is not how most people approach a small office layout. They start by arranging what they have. They should start by questioning whether what they have is what they actually need in that specific room.
The printer is the clearest example. Most home workers print fewer than 15 pages a week — often fewer than five. A full-size printer occupying 2–3 square feet of floor or desk space for that output is a poor trade. A compact photo-size printer on a shelf, or a shared printer in another room, or simply eliminating printing almost entirely, frees up space that no shelving solution or layout trick can recover once the printer is there.
Filing cabinets follow the same logic. A full two-drawer lateral filing cabinet occupies roughly 3 square feet of floor and 30 inches of wall span. Most of what lives in them hasn’t been touched in two years. Digitize what you can, shred what you don’t need, and make the filing cabinet earn its floor space before it gets it.
The other move nobody tries: the over-door organizer on the inside of the office door. A solid-panel door with an over-door organizer can hold office supplies, headphones, chargers, notebooks, and small reference materials in a space that currently holds absolutely nothing. It costs $25 and uses dead space that exists in every single room with a door. I’ve installed these in offices ranging from 60 to 400 square feet and they’ve been useful in all of them.
Furniture on casters deserves mention here — not as a novelty, but as a functional flexibility tool. A single under-desk unit on locking casters can serve as a side table when pulled out, a printer stand, or additional workspace during heavy-load days. It earns its footprint multiple times over in a small space in a way that fixed furniture rarely does.
Takeaway: Before adding anything new to your small office, remove one thing. The spatial math almost always improves faster from subtraction than from any layout rearrangement.
Frequently Asked Questions
What is the ideal layout for a small home office?
The ideal layout prioritizes three relationships: your chair to the door, your monitor to the light source, and your storage to the floor. In practical terms, this means positioning your desk so natural light enters from the side (not behind the monitor or behind your head), ensuring a minimum of 36 inches of push-back clearance behind the chair, and keeping at least 60% of your floor area completely clear of furniture. The desk shape itself — L-shaped, corner, floating, wall-mounted — matters less than these three spatial conditions. Get the relationships right first; choose the desk second.
How do you arrange a small home office efficiently?
Start with a to-scale floor plan before touching a single piece of furniture. Place the desk based on light source orientation, then assign vertical storage in layers (active reference at eye level, archive above, equipment below). Protect a minimum 30-inch path from door to desk. Test the arrangement through one full work session before committing to any wall-mounting or permanent installation. The sequence matters — most inefficient arrangements result from skipping the floor plan step and positioning furniture based on what looks right from the doorway rather than what functions correctly from the chair.
What are the most common small home office design mistakes?
The five I see most consistently: buying the desk without accounting for chair push-back clearance; defaulting to the longest wall as the desk wall when it’s usually the highest-traffic wall; using a matching furniture set instead of mixing pieces with different depths and heights; ignoring acoustic layout, which allows hard surfaces to create echo that degrades focus and call quality; and installing overhead lighting centered on the room instead of on the desk, which creates shadows directly over the work surface in most small-room configurations.
Is an 8×8 room big enough for a home office?
Yes, with specific constraints. An 8×8 room (64 square feet) requires a wall-mounted desk at 18 inches deep rather than a standard 24-inch desk, vertical storage via pegboard and shelving rather than floor-based storage, and strict protection of the 36-inch chair clearance behind the desk. After accounting for door swing (up to 12 square feet of lost usable area) and chair clearance, the remaining functional floor is right at the 35–40 square foot minimum that ergonomics researchers consider workable for one person. What won’t fit: a two-person workstation, a filing cabinet alongside a large desk, or any floor-based storage that encroaches on walking paths.
Start Here, Today
You don’t need to overhaul your entire office to see an improvement. Right now — before this tab closes — do one thing: measure the clearance between the back of your chair and the nearest wall or object behind it. If it’s under 36 inches, that single constraint is probably responsible for more daily physical discomfort than everything else in your setup combined.
Fix that first. Move the desk forward, remove whatever’s behind the chair, reconfigure. Then work through the rest of this list in sequence. The floor plan, the light source, the vertical storage, the cable routing — each one compounds on the last. But the chair clearance comes first, because without it, nothing else you do in that room will ever feel quite right.
What is the ideal layout for a small home office?
The ideal layout prioritizes three relationships: your chair to the door, your monitor to the light source, and your storage to the floor. In practical terms, this means positioning your desk so natural light enters from the side (not behind the monitor or behind your head), ensuring a minimum of 36 inches of push-back clearance behind the chair, and keeping at least 60% of your floor area completely clear of furniture. The desk shape itself — L-shaped, corner, floating, wall-mounted — matters less than these three spatial conditions. Get the relationships right first; choose the desk second.
How do you arrange a small home office efficiently?
Start with a to-scale floor plan before touching a single piece of furniture. Place the desk based on light source orientation, then assign vertical storage in layers (active reference at eye level, archive above, equipment below). Protect a minimum 30-inch path from door to desk. Test the arrangement through one full work session before committing to any wall-mounting or permanent installation. The sequence matters — most inefficient arrangements result from skipping the floor plan step and positioning furniture based on what looks right from the doorway rather than what functions correctly from the chair.
What are the most common small home office design mistakes?
The five I see most consistently: buying the desk without accounting for chair push-back clearance; defaulting to the longest wall as the desk wall when it’s usually the highest-traffic wall; using a matching furniture set instead of mixing pieces with different depths and heights; ignoring acoustic layout, which allows hard surfaces to create echo that degrades focus and call quality; and installing overhead lighting centered on the room instead of on the desk, which creates shadows directly over the work surface in most small-room configurations.
Is an 8×8 room big enough for a home office?
Yes, with specific constraints. An 8×8 room (64 square feet) requires a wall-mounted desk at 18 inches deep rather than a standard 24-inch desk, vertical storage via pegboard and shelving rather than floor-based storage, and strict protection of the 36-inch chair clearance behind the desk. After accounting for door swing (up to 12 square feet of lost usable area) and chair clearance, the remaining functional floor is right at the 35–40 square foot minimum that ergonomics researchers consider workable for one person. What won’t fit: a two-person workstation, a filing cabinet alongside a large desk, or any floor-based storage that encroaches on walking paths.