
The strip of wall beneath your window is almost certainly the least useful 20 inches in your entire home — and with one structural decision, it can become the most. Window seat storage bench ideas have quietly become one of the most effective space-recovery strategies in residential design, and once you understand why, the blank wall beneath your sill will never look the same again.
Quick Answer
The strip of wall beneath your window is almost certainly the least useful 20 inches in your entire home — and with one structural decision, it can become the most.
Why the Space Beneath a Window Is the Most Underused Square Footage in Your Home
In This Article
- Why the Space Beneath a Window Is the Most Underused Square Footage in Your Home
- The Four Functional Types of Window Seat Storage — and How to Choose Yours
- Sizing a Window Seat Bench That Actually Fits — the Measurements Most Guides Skip
- Room-by-Room Window Seat Storage Bench Ideas That Actually Match the Space
- Materials, Finishes, and the Decisions That Affect Durability More Than Aesthetics
Most apartments I worked in had the same problem. Residents had under-bed storage boxes, floating shelves stacked to the ceiling, a coat closet so stuffed it barely closed — and then a completely blank 24-inch band of drywall running along every window, doing nothing except collecting dust and making rooms feel smaller than they were.
Here’s why it happens: the average window sill sits 18–24 inches from the floor, and that dimension is too low for a sofa, too narrow for a dresser, and too shallow for a bookcase. Standard furniture wasn’t designed to occupy it. So it stays empty, year after year, in apartment after apartment, while homeowners pay good money for storage ottomans and closet organizers that work around the problem instead of solving it.
Under-bed boxes became mainstream once people started treating the floor clearance beneath a bed frame as recoverable cubic footage rather than dead space. Floating shelves did the same thing for walls above eye level. The under-window zone is the last frontier of residential storage — and unlike under-bed boxes, a built-in window seat bench recovers that footage without adding anything to your floor plan footprint.
The National Association of Home Builders consistently identifies storage as the number one requested feature in remodels. Yet in my eleven years working on residential projects, I almost never heard a client say “I want to do something with that space under the window” — not because they didn’t need the storage, but because they hadn’t seen it framed as a storage opportunity. They thought of window seats as a luxury feature. Decorative. Optional.
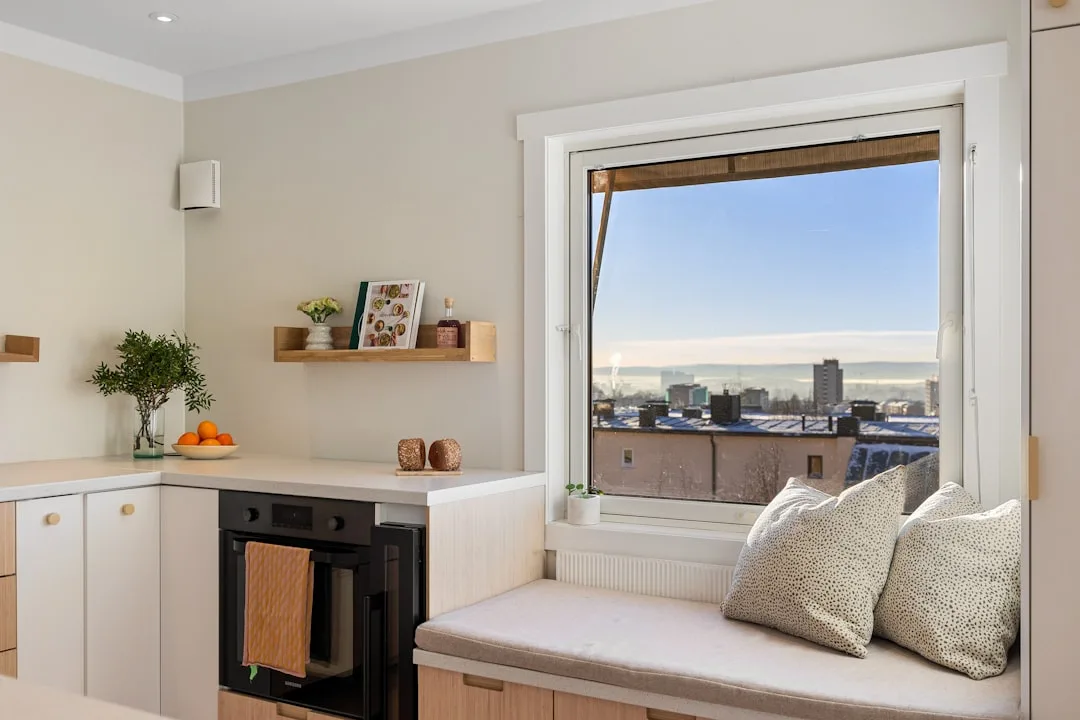
They’re not. A 72-inch window seat bench with lift-top or drawer storage can hold the equivalent of a mid-sized dresser’s worth of contents — without adding a single square foot to your room’s furniture footprint.
That reframe is what everything else in this guide builds on. Before you think about cushion fabric or trim color, understand that you’re not decorating. You’re recovering space.
Takeaway: Walk your home and measure the distance from floor to window sill in every room. Write the number down. That measurement is the ceiling height of your potential storage — and most of those numbers are bigger than you think.
The Four Functional Types of Window Seat Storage — and How to Choose Yours

Most people pick a storage type based on a photo they saved. That’s how you end up with a beautiful lift-top bench you can never actually open because the window’s deep casing blocks the lid. Start with function, then work backward to aesthetics.
There are four configurations worth understanding before you commit to anything:
1. Lift-top hinge bench
The simplest construction and the most storage volume. A single lid opens to reveal an unobstructed interior — no drawer slides, no face frames eating into the cavity. Lift-top benches typically offer 3–5 cubic feet of storage per 4-foot section, which is substantial. Best use: seasonal items like extra blankets, pillows, holiday table linens, anything you access a few times a year rather than weekly. The limitation is physical: you have to lift the cushion, prop or hold the lid, and reach down. Anything you need daily will annoy you within a week.
2. Pull-out drawers
More hardware, more complexity, but the superior choice for frequently accessed contents. No lifting involved — you pull, you grab, you push closed. I’ve seen this work brilliantly in kids’ rooms where toys need to be reachable without a parent’s help, and in home offices where files need to be accessed without moving anything. Similar total volume to lift-top but distributed in shallower, more accessible pulls. The tradeoff is that drawer slides require precise installation and add cost.
3. Open cubby base
No doors, no lids, no hardware. Pull-out baskets, shoes, or bins sit directly in the cavities. This configuration works best in high-traffic zones — mudrooms and entryways specifically — where concealment matters less than the ability to grab something in three seconds. Open cubbies look great in photos and become chaotic in real life unless the household is disciplined about what goes in each one. Know your household before you build this.
4. Combination drawer-plus-cabinet
Reserved for long bay window installations — typically 96 inches or more — where the storage needs legitimately differ across the length of the bench. A center section of drawers flanked by cabinet doors with adjustable shelving handles multiple categories without forcing a single system onto everyone who uses the space.
Choosing between these isn’t about style. It’s about who uses the bench, how often, and what they’re storing in it.
When you’re gathering window seat storage bench ideas for a specific room, sorting them by configuration type first — rather than by aesthetic — will save you from building something beautiful that doesn’t work for your daily routine.
Takeaway: Before anything else, list exactly what you plan to store in the bench. If more than half the items are things you access daily or weekly, drawers beat lift-top — every time.
Sizing a Window Seat Bench That Actually Fits — the Measurements Most Guides Skip
I once watched a client spend three weekends building a beautiful bench only to discover — after the face frame was glued and nailed — that her window’s deep colonial casing prevented the hinge lid from opening past 60 degrees. The cushion tipped forward every time she tried to access storage. She ended up drilling piano hinges into the back wall just to give the lid somewhere to stay.
Measure everything. Twice. In this order.
Seat height sits at the ergonomic core of the project. The comfort zone for most adults is 17–19 inches from finished floor to the top of the seat cushion. If your window sill is 22 inches off the floor, you’re building a bench box of roughly 18 inches (accounting for a 4-inch cushion on top). If your sill is lower — closer to 14 or 16 inches, which happens in older homes — you either accept a bench that feels low or you add a thicker cushion and live with a visual gap between the sill and the bench surface.
Seat depth determines comfort versus practicality. At 20–24 inches deep, a window seat functions as a genuine lounging surface — you can sit cross-legged, tuck your feet under you, lean against pillows at the window. Below that, at 16–18 inches, the bench reads more as a perch: functional for putting on shoes, sitting briefly, or adding visual interest, but not for curling up with a book. Traffic zones — hallways, entryways — should use the shallower depth to avoid blocking flow.
Cushion thickness affects lid clearance in ways that catch people off guard. A 4-inch foam cushion on a hinge-top bench needs roughly 8 inches of clearance between the back of the bench box and the window casing — enough room for the lid and cushion to arc back without catching on the trim. Measure this before you finalize your hinge placement. If clearance is tight, you have three options:
- Switch to a front-hinge lid that opens toward the room rather than toward the window
- Use a thinner 2-inch cushion and compensate with a softer foam grade
- Build the bench box forward enough from the wall that the lid clears the casing at full open
Width follows the window, with margin. The bench should extend 2–3 inches beyond the window casing on each side at minimum. This creates the visual impression that the bench belongs to the room, not just to the window. For bay windows, measure each angled face independently — the center panel and the two flanking panels will almost never be identical widths, and treating them as if they are is the single most common framing mistake in bay window bench builds.
Critical measurements to record before purchasing any materials:
- Floor to window sill (determines box height)
- Window casing depth (determines lid clearance)
- Window width plus casing (determines minimum bench width)
- Room depth from window wall to nearest obstruction (determines maximum bench depth)
- Distance to nearest electrical outlet, baseboard heater, or vent (determines whether you have a conflict to resolve before framing)
That last item stops more projects than any other. Baseboard heaters in particular are a recurring issue — a sealed bench box directly over a baseboard heater is a fire hazard, and the solution isn’t to cap the heater, it’s to reroute it or choose an open-front bench configuration that allows heat to circulate.
Takeaway: The measurement that most commonly breaks a window seat bench project isn’t the height or the width — it’s the clearance between the window casing and the back edge of the lid at full open. Measure it first, before you buy hardware.
Room-by-Room Window Seat Storage Bench Ideas That Actually Match the Space

The same bench configuration that works perfectly in a bedroom will feel wrong in a kitchen nook and actively inconvenient in a hallway. The room shapes what the bench needs to do — and the bench should be designed around that reality, not retrofitted into it after the fact.
Here is how the calculus changes across the most common rooms:
Bedroom
The bedroom bench has the most storage freedom of any room in the house. Traffic is low, visual noise is tolerable, and the person using the bench is almost always the same person — which means you can optimize for one set of habits rather than designing for a household.
What works:
- Lift-top configuration storing off-season clothing, spare bedding, or luggage
- Full-width upholstered cushion in a fabric that coordinates with bedding
- Flanking built-in bookshelves on either side of the window, connected to the bench as one unit
- Integrated reading light mounted to the window casing or ceiling directly above
What to avoid:
- Drawers that face toward the bed — you’ll have to get up and walk around to open them
- Open cubby bases in a bedroom that lacks a closet (the visual clutter will dominate the room)
- Bench depth under 20 inches if the goal is to use it as a reading perch
The bedroom is also where window seat storage bench ideas intersect most naturally with the window treatment — blackout curtains that pool onto a cushioned bench read as intentional, and that detail alone can make a mid-range bedroom feel considered rather than assembled.
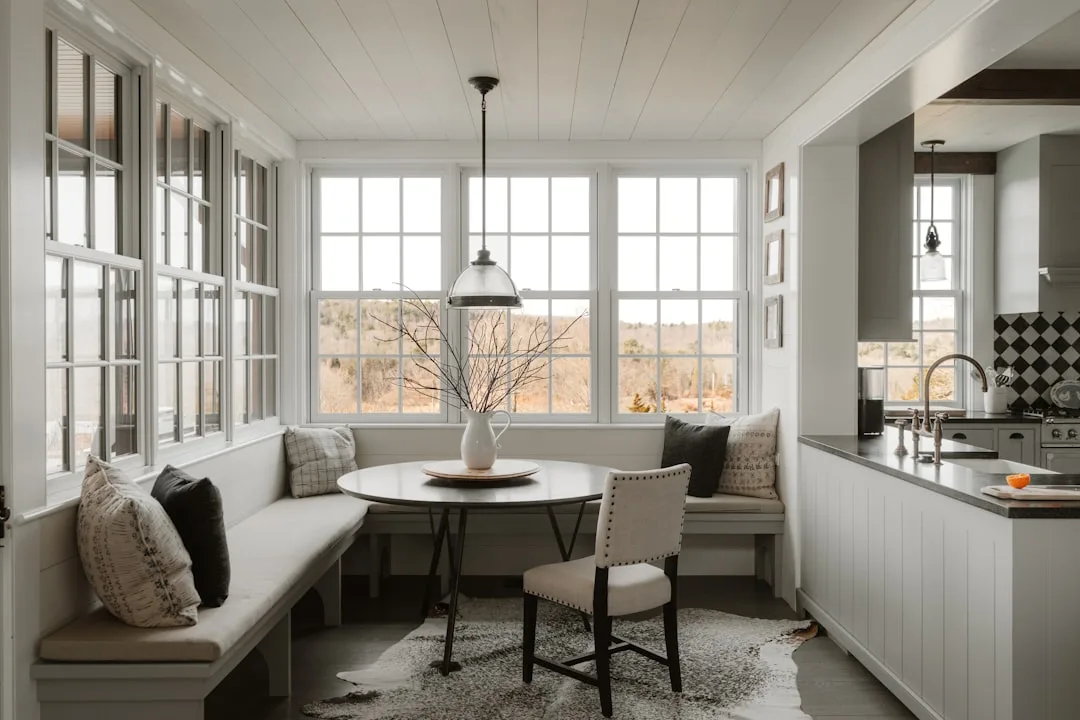
Living Room and Bay Windows
Living rooms present the longest possible bench runs, especially in homes with bay windows. A 10-foot or 12-foot bay window installation has the cubic footage of two full dressers — and in most living rooms, that storage doesn’t exist anywhere else.
What works:
- Combination configuration: center drawers for frequently accessed items, flanking cabinets for bulkier storage
- Cushion broken into three sections (one per bay panel) for easier removal and replacement
- Built-in upholstered back panels against the window jamb to create a true seating alcove
- Pull-out trays or wine storage in cabinet sections for living rooms that double as entertainment spaces
What to avoid:
- Single-piece cushions on angled bay installations — they won’t lie flat
- Stained wood finishes on the bench base if the rest of the room is painted — the material contrast rarely resolves well
- Hardware-heavy drawer pulls that date quickly; simple recessed pulls or touch-latch mechanisms age better
Kids’ Rooms
Kids’ rooms benefit more from window seat storage bench ideas than almost any other space, because the storage problem in a child’s room is almost always a toy and book problem — and both categories are perfectly suited to a bench.
What works:
- Front-facing drawers at child height, accessible without adult assistance
- Open cubby base with labeled fabric bins — one per category, one per child if the room is shared
- Durable, washable cushion covers in a pattern that hides wear (solid light colors will not survive)
- Built-in low bookshelf on one end of the bench run, continuous with the storage base
What to avoid:
- Lift-top lids in a young child’s room — lid-drop injuries are a real concern, and soft-close hinges add cost but don’t eliminate the hazard entirely
- White painted interiors — they show every crayon mark and scuff within a semester
Specific storage categories that fit naturally into a child’s room bench:
- Art supplies and craft materials
- Board games and puzzles (flat items that stack well in a shallow drawer)
- Sports equipment that doesn’t belong in a closet — shin guards, knee pads, swim gear
- Extra school supplies and backpack overflow
- Stuffed animals and dress-up items in open cubby sections
Entryway and Mudroom
The entryway bench is the most functional of all configurations and the most punishing of poor design decisions. It needs to handle daily abuse, wet items, and a rotating cast of users who will not be careful.
What works:
- Open cubby base with removable bins — easiest to clean, easiest to reorganize
- Bench surface with a water-resistant or leather-wrapped cushion, not fabric
- Hooks mounted directly above the bench run, at two heights if children use the space
- One drawer per household member for keys, small essentials, and items that vanish in open cubbies
What to avoid:
- Upholstered fabric cushions in any color light enough to show dirt
- Lift-top storage in an entryway — you won’t use it, and it creates a surface where coats and bags pile up instead
Materials, Finishes, and the Decisions That Affect Durability More Than Aesthetics

The frame material determines longevity. The finish determines maintenance. Most guides reverse that priority.
Frame materials, ranked by durability:
- Plywood (birch or cabinet-grade): The standard for built-ins for good reason. Holds screws better than MDF, resists moisture better than particleboard, and doesn’t sag under weight over time. Use 3/4-inch for the box and 1/2-inch for the interior dividers.
- MDF (medium-density fiberboard): Excellent for painted surfaces because it takes primer and paint without grain telegraphing through. Poor choice for any surface that might see moisture — it swells irreversibly. Don’t use it for the bench top or any horizontal surface in a mudroom or bathroom.
- Solid wood: Reserved for face frames, trim details, and exposed edges. Expensive for box construction and unnecessary — the storage cavity doesn’t need solid wood.
- Particleboard: Avoid for structural components. Fine for interior shelving in a cabinet that won’t be moved, but it fails at screw holes over time.
Finish decisions that affect daily life:
- Painted vs. stained: Paint wins in most built-in applications because it matches trim, looks intentional, and is easier to touch up. Stain reads as furniture, which works against the goal of making the bench look like it grew out of the room.
- Cushion fabric: The hierarchy for durability runs — performance fabric (Sunbrella or equivalent) > microfiber > linen blends > cotton. For any bench that will see daily use, performance fabric is worth the premium. It cleans with a damp cloth and resists fading near window light.
- Hardware finish: Matte black and brushed brass have both had extended runs in residential design and show no signs of becoming dated quickly. Polished chrome ages faster. Satin nickel is the safe, neutral choice if you want something that reads neither trendy nor dated.
Frequently Asked Questions About Window Seat Storage Bench Ideas
These are the questions that come up in almost every project conversation — not the ones that make good captions, but the ones that determine whether the bench actually works.
How much does it cost to build a window seat storage bench?
The range is wide, and it depends almost entirely on whether you’re building it yourself, having a carpenter build it on-site, or ordering a semi-custom unit. A basic DIY lift-top bench using plywood and a pre-made cushion runs $200–$500 in materials. A carpenter-built version in the same configuration typically lands at $800–$1,500 depending on finish complexity and your market. Full custom built-ins with drawers, integrated shelving, and painted finish can reach $3,000–$6,000 for a bay window installation. The finish work — sanding, priming, painting, caulking — often costs as much as the carpentry.
What’s the best window seat storage bench idea for a small room?
In a small room, the bench earns its place by replacing furniture, not supplementing it. A 48-inch bench with two drawers can replace a nightstand and part of a dresser in a small bedroom. The key constraint is depth — keep the bench at 18–20 inches in a room where floor space is tight, and don’t add flanking bookshelves unless the wall genuinely has the length for them without crowding doorways or other furniture.
Can I add a window seat storage bench to a rental apartment?
Yes, but the approach changes. Freestanding bench units — essentially storage ottomans or console benches designed to sit flush against the wall below a window — achieve 70–80% of the visual effect without any construction. IKEA’s KALLAX and BESTA systems are frequently used as bench bases with custom cushions added on top. The storage volume is real, the footprint is zero, and the unit leaves with you when you move. The tradeoff is that freestanding units don’t lock into the room the way a built-in does — they can shift, the cushion can slide, and the gap between the unit and the wall collects debris.
How do I keep the inside of a lift-top bench from smelling musty?
Ventilation. A sealed plywood box will trap moisture and develop a stale odor within months if it’s storing fabric items like bedding or clothing. The fix is simple: drill a row of 1-inch holes along the back panel of the bench, inside the storage cavity, hidden from view. This allows air circulation without compromising the bench’s structural integrity or visual finish. Cedar lining helps with odor and acts as a mild moth deterrent, but it doesn’t replace ventilation — it supplements it.
What’s the right cushion thickness for a window seat bench?
For a bench used primarily as a seat — putting on shoes, sitting briefly — 2–3 inches of medium-density foam is sufficient. For a bench intended as a reading or lounging surface, 4 inches is the minimum for comfort, and 4–5 inches with a softer foam grade is better for extended sitting. Anything thicker than 5 inches starts to raise the seat surface above the ergonomic comfort zone unless you’ve deliberately built the box lower to compensate. Always add the cushion thickness to your bench box height before finalizing dimensions.
How do I handle a window with a radiator beneath it?
This is the most common structural conflict in older homes. You have three real options: relocate the radiator (requires a plumber and is expensive but gives you a clean slate), use an open-front bench configuration that allows heat to flow out freely through the front face, or build the bench to either side of the radiator and leave a gap in the center with a decorative grille. Never seal a radiator inside a closed bench box — it’s a heat retention and safety issue, and it will cause the wood to warp within one heating season.
The bench beneath your window is the most recoverable square footage in your home — not because it’s large, but because it’s completely unused and structurally ready to be claimed. The best window seat storage bench ideas share one characteristic: they start with what the space needs to hold and work backward to what the bench should look like. Get that sequence right, and the aesthetics tend to follow.