Nearly 60% of remote workers say their living space actively undermines their productivity — not because they lack gear, but because they never actually designed for it. If you’re trying to build a work from home setup in a rental apartment, you’re already working within a set of constraints that most WFH advice completely ignores. They bought a desk. They found a corner. They called it a home office. And then they wondered why they couldn’t focus, why their back hurt by noon, why every video call felt like they were broadcasting from a storage closet. The problem isn’t the equipment. It’s that renting introduces constraints that, when ignored, lead to expensive mistakes.
Quick Answer
The average American renter spends more time in their home than ever before — yet nearly 60% of remote workers say their living space actively undermines their productivity, not because they lack gear, but because they never designed for it.
I made one of those mistakes early in my design career, before I understood that advising a renter was categorically different from advising a homeowner. A client wanted a home office in her 680-square-foot Chicago one-bedroom. I helped her pick out a gorgeous L-shaped desk. It arrived, we got it upstairs, and it ate the entire bedroom. She slept next to her monitor for eight months before she finally sold it at a loss on Facebook Marketplace. The desk was fine. The plan was broken.
This article is the plan.
Why Most Renters Get Their WFH Setup Backwards
In This Article
Furniture-first is the trap. Someone decides they need a dedicated workspace, they open a browser tab, and forty minutes later they’ve got a desk in their cart — before they’ve measured their square footage, re-read their lease, or thought for ten seconds about what “dedicated workspace” actually requires to function. The desk arrives. It fits. Barely. And then it turns out the only outlet nearby is behind the radiator, the lease prohibits wall anchors, and the natural light hits the monitor screen from 10am to 2pm like a spotlight.
A work from home setup in a rental apartment is a design problem, not a shopping problem. That distinction changes everything about how you approach it. Shopping problems have shopping solutions: spend more, buy better. Design problems require you to understand a set of constraints before a single dollar leaves your wallet.
Renters face three constraints that homeowners simply don’t:
- No-drill or no-modification clauses in standard leases, which eliminate the majority of “easy” storage and lighting solutions marketed to remote workers
- Square footage limits that are not just about comfort but about functional zoning — you cannot mentally separate “work” from “home” if both happen in the same 450 square feet with no visual boundary
- Deposit risk, meaning that every hole in the wall, every scuff from a floor-standing unit, every adhesive residue left on painted drywall has a dollar figure attached to it at move-out
A Stanford study found that remote workers are 13% more productive when they have a designated, distraction-minimized workspace. What that study doesn’t tell you — because it wasn’t designed to — is that most renters try to carve out that designated space after the furniture is already in place, which means they’re retrofitting a design solution onto a spatial reality they never interrogated. The sequence is backwards.
Start with constraints. Then budget. Then furniture.
There’s a fourth constraint worth naming that almost nobody talks about: impermanence. The average American renter moves every two to three years. That timeline should directly shape every purchase decision you make for your work from home setup in a rental apartment. A wall-mounted monitor arm is a great solution until you’re loading a U-Haul and patching drywall at midnight. A clamp-mount arm you can remove in thirty seconds is a mediocre solution that survives seventeen moves without costing you a dime of your deposit. Impermanence isn’t just a lifestyle reality — it’s a design constraint with a direct dollar value attached.
Actionable takeaway: Before you look at a single product, pull out your lease and search for the words “modification,” “alterations,” and “drilling.” Write down exactly what’s prohibited. That document is the first design brief you’re working within.
How Much Should a Work From Home Setup Actually Cost You?

Most WFH cost guides are written for homeowners or people who work for companies that reimburse equipment. Neither of those people is you. You’re a renter, probably without a stipend, probably with a lease that expires in 12 months, which means anything you buy needs to be portable, durable, and worth carrying to the next place. That changes the calculus significantly.
Aggregated data from remote work surveys puts a functional but modest WFH setup somewhere between $500 and $1,200. A fully ergonomic, professional-grade setup can reach $3,000 or more. The biggest cost variable is almost always the chair — not the desk. That surprises people every single time I say it, because desks are visible and chairs are something you sit on and stop seeing.
Here’s how the three tiers actually break down for renters:
Starter Tier: $300–$600
- A secondhand or entry-level desk (IKEA LINNMON + ADILS runs under $80)
- A basic task chair — the bare minimum here is lumbar support, adjustable height, and seat depth you can actually change
- A clamp-mount monitor arm instead of a stand (saves desk space, no wall hardware)
- Plug-in task lighting, a power strip with surge protection, and cable clips
Mid-Range Tier: $600–$1,500
- A purpose-built desk with built-in cable management
- An ergonomic chair in the $350–$600 range (Branch Ergonomic Chair, used Steelcase Leap, or a refurbished Herman Miller)
- External monitor, noise-cancelling headphones, and a clamp-mount arm
- Plug-in sconce or LED light bar for ambient fill light
Invested Tier: $1,500–$3,500
- Sit-stand desk (Flexispot or Uplift — both disassemble reasonably well for moves)
- Quality ergonomic chair, full peripheral set, acoustic panel on a floor stand
- Upgraded webcam, USB-C hub, and intentional cable routing with adhesive raceways
The secondhand sourcing strategy changes all of this. Facebook Marketplace, OfferUp, and local university surplus sales routinely yield $800 chairs for $150–$200. I’ve sourced a near-mint Steelcase Think for $120 from a startup that closed. That’s not luck — that’s a search alert and forty-eight hours of patience.
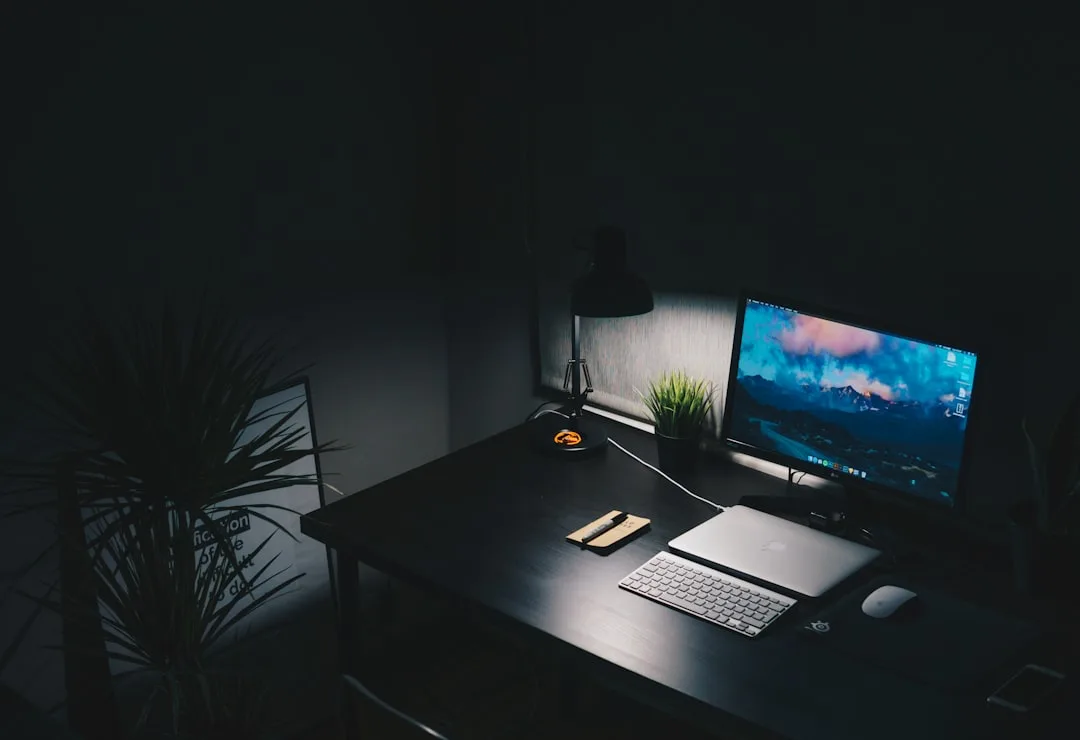
One category that rarely appears in WFH guides but matters enormously in a rental apartment context is lighting. Most apartments come with overhead fixtures that cast downward shadows across your face on video calls, produce the kind of flat, unflattering light that reads as unprofessional on camera, and do nothing to reduce eye strain during eight-hour screen sessions. A plug-in ring light on an adjustable arm costs $35–$60 and eliminates all three of those problems simultaneously. At the Mid-Range tier, a pair of plug-in LED panels positioned at 45-degree angles to your monitor — one slightly brighter than the other to create depth — will make your video calls look like you’ve hired a lighting director. Neither solution requires a single anchor, drill, or landlord conversation.
Actionable takeaway: Set your tier first, then build your shopping list from the chair down. If you can only afford Tier 1 right now, spend 60% of that budget on the chair. You can upgrade the desk in six months. You cannot upgrade your spine.
The 30% Rule for Apartments — And What It Has to Do With Your Desk
The 30% rule has a specific origin that most people don’t know. It was codified in the 1969 Brooke Amendment to the U.S. Housing Act, which originally capped public housing rent contributions at 25% of income — later raised to 30% in 1981. It was never meant to be a universal consumer guideline. It was a policy ceiling for subsidized housing. But it migrated into general personal finance advice and stuck, which means renters now use it to benchmark their own spending against a standard designed for a completely different context.
Here’s what makes it relevant to your WFH setup: nearly 49% of American renters are cost-burdened, meaning they spend more than 30% of gross income on housing. In high-cost cities, “cost-burdened” is practically the baseline. Renters in New York, San Francisco, and Austin routinely spend 40–50% of gross income on rent alone — before utilities, before food, before anything resembling a work from home setup in a rental apartment.
That financial reality has a direct design implication: when housing costs are already stretched, your WFH setup budget is competing with margin that doesn’t exist. This is why the furniture-first trap is especially dangerous for renters. An impulse desk purchase at $400 doesn’t just cost $400 — it potentially costs you the chair budget, the lighting budget, and the flexibility to upgrade anything for the next eighteen months.
The practical reframe: treat your WFH setup as infrastructure spending, not discretionary spending. Infrastructure has a return. A chair that keeps you out of a chiropractor’s office pays for itself. A lighting setup that makes your video calls look credible has professional value. A desk surface large enough to spread out reference materials without moving your keyboard is the difference between focused work and constant low-grade frustration. When you’re cost-burdened and every dollar is accounted for, the case for buying less but buying better becomes even stronger — not weaker.
There’s also a move-cost calculation that almost nobody runs. If you’re spending 40% of income on rent and moving every two years, the cost of transporting a large, heavy desk across a city — whether in a rented truck or paid movers — is real money. A 200-pound executive desk that costs $600 new might cost you $150 to move, twice, over four years. A $400 desk that flat-packs into four boxes you can put in a sedan costs you nothing to move. The total-cost-of-ownership math over a renter’s typical timeline frequently favors the lighter, more modular option even when the upfront price is similar.
Actionable takeaway: Before any purchase over $200, run a three-question check: Can I move this without renting a truck? Will it work in a different floor plan? Does it require any modification to the apartment to function properly? Three yeses and it belongs in your cart. One no and it needs a second look.
Zones, Not Rooms: How to Create Separation in a Small Apartment
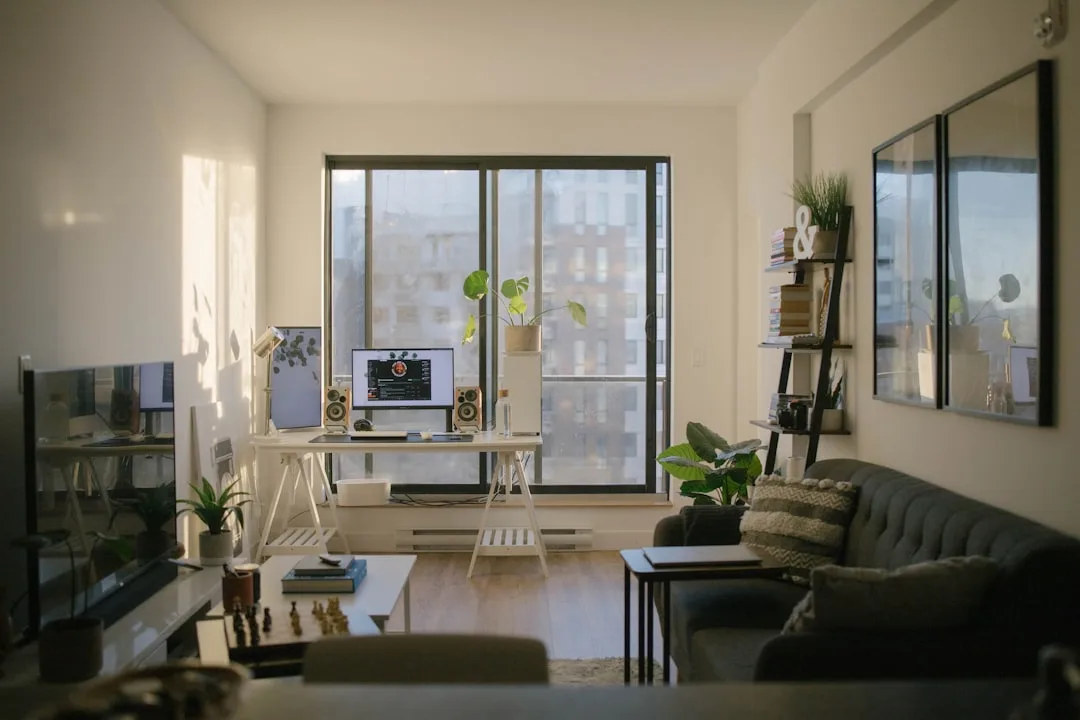
The most common request I get from renters building a work from home setup in a rental apartment is some version of: “I don’t have a separate room. How do I make it feel like I’m not working where I sleep?” The answer is never a room divider from Amazon. The answer is zone design — the practice of using physical anchors, sightlines, lighting, and furniture orientation to create psychological separation within a single continuous space.
Zone design works because the brain doesn’t actually require walls. It requires consistent environmental cues. When you sit in a specific chair, at a specific surface, with a specific lighting configuration, facing a specific direction — your brain begins to associate that configuration with work. Conversely, when you close the laptop, change the lighting, and physically move to a different area of the apartment, the brain gets a legible signal that work is over. The zone doesn’t need to be walled off. It needs to be distinct.
Here are the specific tools that accomplish this without touching your walls:
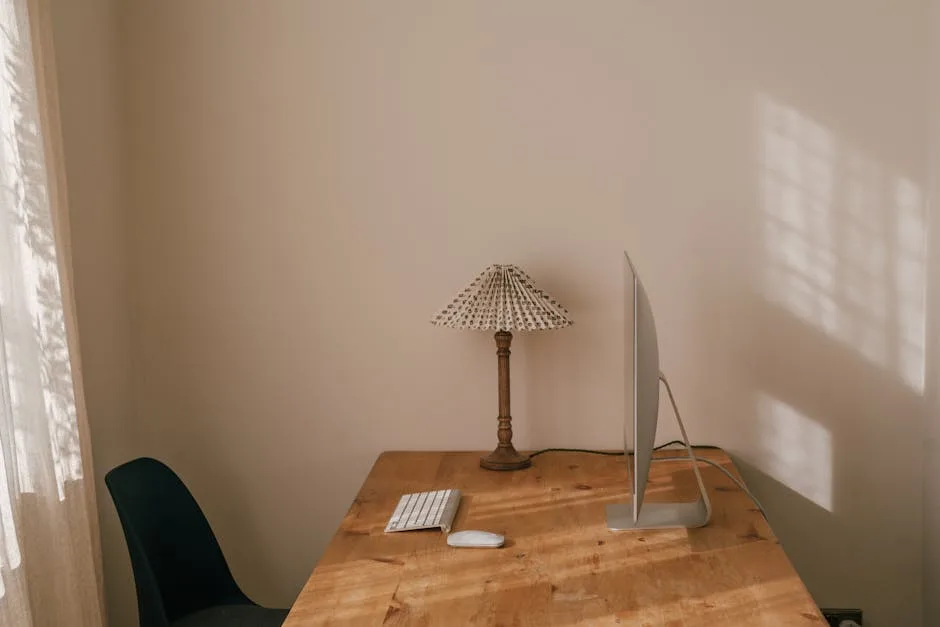
Orientation. Desk placement is the highest-leverage decision in a small apartment. Facing a wall creates a work zone by elimination — everything behind you is not-work space. Facing into the room does the opposite: your back is to the living space, but your eyes are in it, which means every movement in your peripheral vision is a potential distraction. If you only change one thing about your current setup, change where you’re facing.
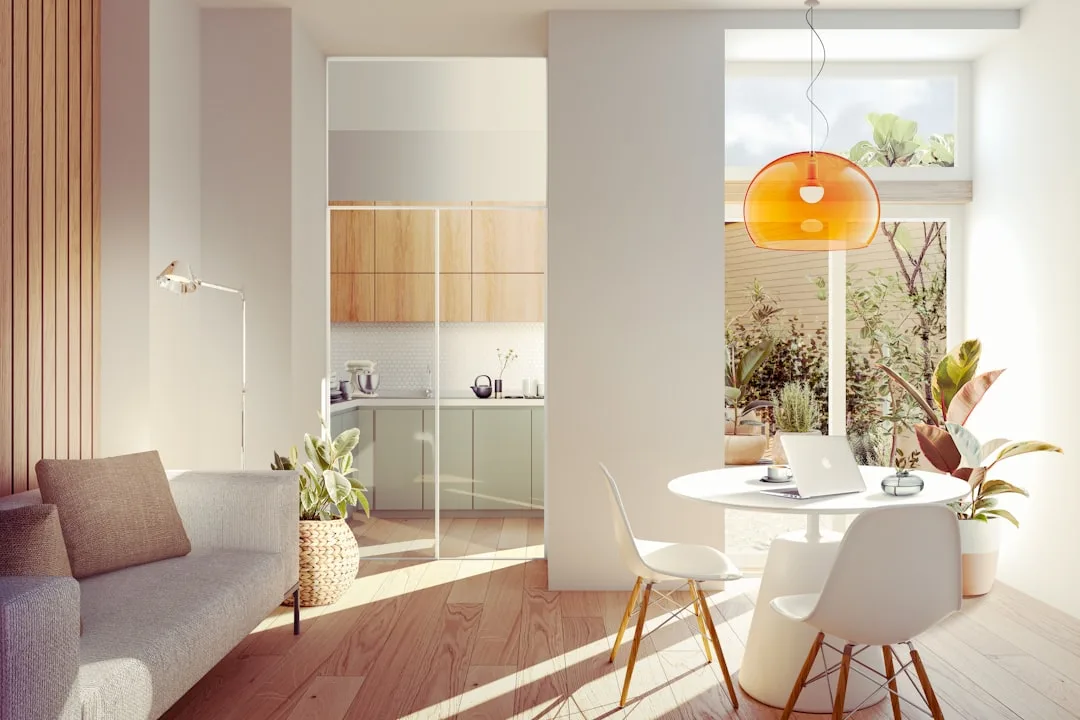
Rugs. A rug under your desk creates a defined zone with zero installation. The visual boundary is immediate. A 5×7 rug costs $80–$150 and communicates “this area is different from that area” more clearly than most furniture arrangements can. In a studio or open one-bedroom, a rug under the desk and a separate rug in the living area creates two functionally distinct zones in the same room.
Lighting temperature. Daylight-temperature bulbs (5000–6500K) in your task light and warmer bulbs (2700–3000K) in your living area creates a sensory shift when you move between zones. This is one of the most underused tools in small-space design. It costs under $20 to implement and has a measurable effect on how quickly your brain transitions between work and rest modes.
Acoustic signals. Noise-cancelling headphones serve double duty: they block distraction during work and their removal signals the end of the workday to anyone else in the apartment (and to your own nervous system). Paired with a specific playlist or ambient sound profile that you only use during work, they become part of a reliable zone-entry and zone-exit ritual.
Visual containment. Everything work-related should have a home within the zone when work is done. A monitor that sits on the desk is fine. A monitor that dominates the sightline from the couch is not — it keeps the brain in partial work-mode during off hours. Cable management, storage solutions that close, and a physical “end of day” ritual (closing the laptop, putting on the monitor’s dust cover, stacking the notebook) all contribute to the zone’s psychological effectiveness.
Actionable takeaway: Map your apartment on a piece of paper and draw a circle around the area you’ve designated as your work zone. If that circle overlaps with where you eat, sleep, or relax — not just physically but visually — you haven’t created a zone. You’ve created a corner. Adjust the orientation or add one visual anchor (rug, bookshelf, lighting change) until the zones are legible from across the room.
FAQ
Can I really build a functional work from home setup in a rental apartment without drilling any holes?
Yes, and this is one of the most important things to understand before you spend a dollar. The no-drill constraint feels limiting until you realize how many high-quality solutions are specifically designed around it. Clamp-mount monitor arms attach to desk edges with no wall hardware. Tension-mounted shelving units use pressure between floor and ceiling rather than anchors. Freestanding pegboards on weighted bases provide vertical storage without touching the wall. Command strips rated for 5–16 pounds handle most cable management and lightweight shelving needs. The category of no-modification WFH products has grown substantially since 2020 — almost everything that used to require installation now has a freestanding or clamp-mount equivalent.
My lease is up in eight months. Is it even worth investing in a proper setup now?
Yes, with one condition: buy portable. The ROI on a good ergonomic chair is realized in weeks, not years — reduced back pain, better focus, fewer end-of-day headaches. Those benefits don’t require a twelve-month lease to pay off. The key is to buy things that move easily. Chairs are inherently portable. Flat-pack desks reassemble in a new apartment in forty minutes. Clamp-mount arms and freestanding shelving travel without special handling. The only WFH purchases I’d defer until you’re in a longer-term situation are large, heavy desks and anything that requires permanent installation.
What’s the single most impactful upgrade for an existing work from home setup in a rental apartment?
If you already have a desk and a chair, the answer is almost always lighting. Most renters are working under overhead ceiling fixtures that create harsh downward shadows, cause eye strain over long sessions, and look terrible on video calls. A single $40–$60 plug-in LED panel positioned to your left (or right, depending on which side your window is) at roughly monitor height will immediately improve both your visual comfort and how you appear on camera. It requires no installation, no lease negotiation, and no significant budget. The impact-to-cost ratio is higher than almost any other single upgrade you can make.
How do I handle a landlord who says “no modifications” but I need better internet connectivity?
Ethernet over power adapter (also called a powerline adapter) is your answer. You plug one unit into a wall outlet near your router and another near your desk — the signal travels through your apartment’s existing electrical wiring, no drilling or cable routing required. Performance varies by building wiring quality, but most powerline adapters deliver 200–500 Mbps in practice, which is more than sufficient for video calls, large file transfers, and simultaneous device use. It’s a $40–$80 solution that sidesteps the entire connectivity problem without touching a wall, running a cable through a door frame, or having any conversation with your landlord at all.
Is there a tax benefit to having a dedicated work from home setup in a rental apartment?
Potentially, but the rules changed significantly after 2017. The home office deduction for employees was eliminated by the Tax Cuts and Jobs Act — if you’re a W-2 employee working remotely, you generally cannot deduct home office expenses at the federal level, even if your employer requires you to work from home. If you’re self-employed or run a business as a sole proprietor, the deduction is still available, and it applies to a percentage of your rent, utilities, and directly purchased equipment proportional to the square footage used exclusively for work. The word “exclusively” matters: a desk in your bedroom that you also use for personal computing likely doesn’t qualify. A dedicated corner used only for work may. Consult a tax professional for your specific situation — the IRS rules here are detailed enough that general advice is limited in its usefulness.