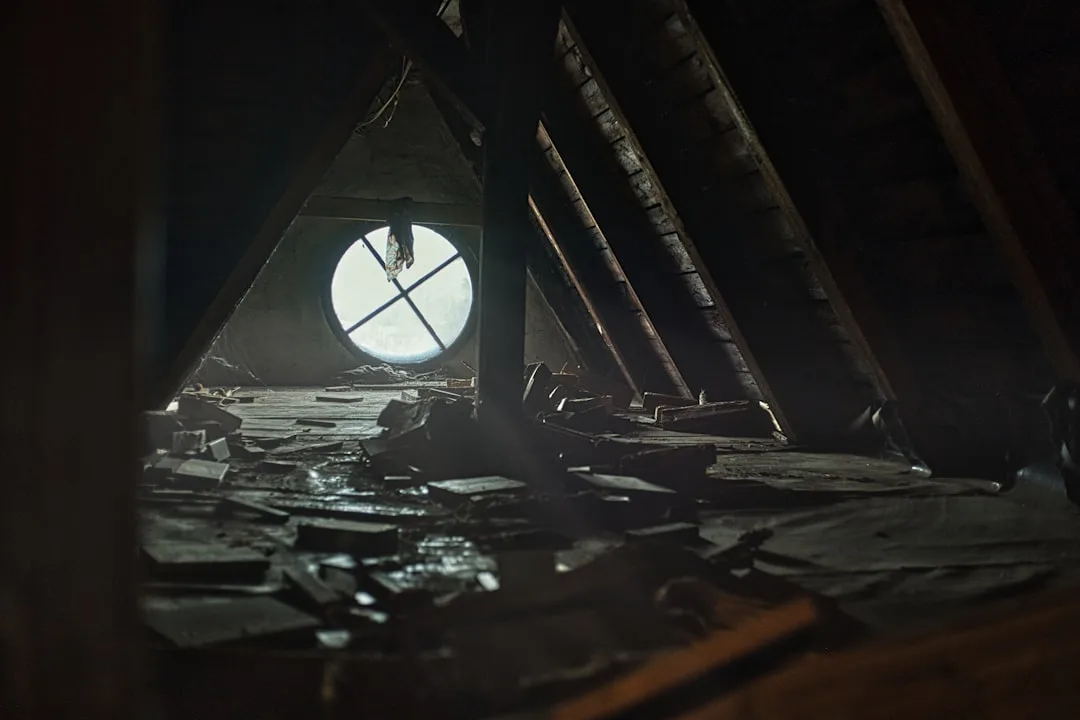
The attic above your head may already meet the structural minimums for a legal bedroom — but the gap between “technically possible” and “actually livable” is where most conversions quietly fail, and where the real planning begins.
Quick Answer
The attic above your head may already meet the structural minimums for a legal bedroom — but the gap between ‘technically possible’ and ‘actually livable’ is where most conversions quietly fail, and where the real planning begins.
Most people approach an attic to bedroom conversion backwards. They start with Pinterest boards and paint swatches, then encounter the egress window requirement, then discover their floor joists are rated for boxes of holiday decorations and not a sleeping human, and then — three months in — realize they’ve budgeted for a room that cannot legally or safely exist. I watched this exact sequence unfold with a client on the North Side of Chicago, a brilliant woman who had already purchased a bed frame before anyone had looked at the joists. The structural reinforcement alone added $9,000 to a project she’d mentally capped at $30,000.
This guide starts where the planning should: before the excitement. Before the contractor calls. Before anything is purchased.
What Actually Makes an Attic Livable (And What Most People Get Wrong First)
In This Article
- What Actually Makes an Attic Livable (And What Most People Get Wrong First)
- Is It Legal to Turn Your Attic Into a Bedroom? Permits, Codes, and the Egress Question
- How Much Does an Attic to Bedroom Conversion Actually Cost — With the Numbers Competitors Won’t Break Down
- The 7 and 7 Rule Explained — And Why It Is Only the Starting Point
- Designing Around the Constraints: Light, Ventilation, and the Slope as a Feature
- Mistakes That Turn a Dream Loft Into a Miserable Room — And How to Avoid Each One
- What to Ask Every Contractor Before Signing Anything
Ceiling height is the first filter, and it eliminates more attics than any other single factor. Per the International Residential Code, a habitable room must have a ceiling height of at least 7 feet 6 inches over at least 50% of its floor area — a threshold many attics fail before a single nail is driven. Your local jurisdiction may interpret this differently, may enforce it more strictly, or may use an older code edition entirely. But the IRC minimum is a reliable starting benchmark, and if your attic doesn’t clear it over a meaningful portion of the floor, you’re looking at either a dormered addition or a different project altogether.
The second filter is structural. Attic floor joists — in most houses built before 1980, and many built after — are sized for storage loads, not human occupancy. The difference matters in engineering terms: storage loads are static and predictable, while live loads from people, furniture, and movement require a higher design threshold. A structural engineer will typically specify sister joists or a new subfloor assembly to bring the floor up to residential live load requirements. This is not a contractor call. Only a licensed structural engineer can certify it.
The third filter is thermal. And this is where I’ve seen the most post-project misery. Attics are the worst-performing thermal zone in most houses — they accumulate heat in summer, bleed it in winter, and without a properly designed thermal envelope, the finished bedroom will be uncomfortable six months out of twelve. Spray foam insulation on the roof deck is the most effective solution, but it costs significantly more than batt insulation installed between rafters. The homeowners who skip or downgrade this line item almost always regret it.
Before any money changes hands, calculate what I call the livable footprint — not the gross square footage of the floor, but the area where your ceiling clears 7 feet 6 inches. That number is almost always smaller than people expect. Knee walls, pitch transitions, and HVAC chases eat into it fast.
Start here: measure your ridge height, your attic width, and your roof pitch before calling a single contractor.
Is It Legal to Turn Your Attic Into a Bedroom? Permits, Codes, and the Egress Question
Legality in this context has two layers, and they are not the same thing: what the code requires, and what actually gets enforced. Plenty of attic bedrooms exist in American homes that were never permitted. Some of them are fine. Some of them are a liability waiting to surface — and that surface is almost always the real estate transaction or, worse, an insurance claim.
A room cannot legally be called a bedroom without a code-compliant egress window. The minimum opening size under most adopted building codes is 5.7 square feet of net clear opening, at least 24 inches in clear height, at least 20 inches in clear width, with the sill no higher than 44 inches from the finished floor. In an attic, meeting these dimensions often requires a dormer, a gable-end window enlargement, or an operable roof window — none of which are minor carpentry. Each of those modifications requires its own structural detailing and permit.
The permit question is not optional. Unpermitted conversions can void homeowner’s insurance coverage for any incident in that space, trigger mandatory deconstruction orders during resale, and — in the event of a fire or injury — create personal liability for whoever did the work. According to the National Fire Protection Association, bedrooms without compliant egress are among the top code violations flagged during home sales inspections, and correcting them after the fact can cost 30–50% more than addressing them during initial construction. The after-the-fact cost is higher because you’re reopening finished walls, potentially rerouting structural modifications, and paying for two rounds of inspections.
Some municipalities require an architect’s stamped drawings for attic conversions — not just a contractor’s plan. This is most common in cities with active code enforcement and older housing stock. Your building department will tell you exactly what’s required if you call and ask. Most will. Do that before you engage a contractor.
One more thing worth naming clearly: the distinction between a “bonus room” and a legal bedroom is not just semantic. Appraisers and buyers’ lenders are trained to identify the difference. A room listed as a bedroom that lacks egress, a closet, or a permit trail will either be challenged on the appraisal or flagged by a home inspector — and the renegotiation it triggers typically costs more than the compliance would have.
Pull your local jurisdiction’s adopted building code version today — it takes five minutes and tells you exactly which egress dimensions apply to your project.
How Much Does an Attic to Bedroom Conversion Actually Cost — With the Numbers Competitors Won’t Break Down

The “$20,000–$95,000” range that floats around every cost article is technically accurate and practically useless. A number that wide doesn’t help you budget. It doesn’t help you evaluate a bid. It doesn’t tell you which line items are negotiable and which aren’t. Here is what a realistic cost breakdown actually looks like, component by component.
Structural reinforcement — sistering floor joists, adding collar ties, or modifying the ridge beam — runs $3,000–$12,000 depending on span, existing framing condition, and whether your engineer specifies minor reinforcement or a full subfloor rebuild. This line item cannot be estimated without an engineer’s assessment and should never be skipped to hit a budget number.
Insulation and air sealing is the most skipped and most regretted line item in attic conversions. Closed-cell spray foam applied to the roof deck runs $2,500–$8,000 for a typical attic, depending on square footage and rafter depth. Batt insulation costs less but performs significantly worse in attic environments, where thermal bridging through rafters, air movement through gaps, and condensation risk all compound. The thermal performance difference between spray foam and batt in an attic environment is not marginal. It’s the difference between a room that works and one that doesn’t.
Egress window installation, including structural framing and any roofline modification, runs $2,500–$6,500 per window. Dormers are at the high end. Gable-end enlargements and operable skylights are typically lower, assuming the site geometry allows them.
HVAC — either extending an existing system or installing a dedicated mini-split — costs $1,800–$5,500. Attics are thermally extreme. Almost every existing system that “reaches” an attic via extended ductwork is undersized for the demand. A ductless mini-split, sized correctly by a mechanical contractor, is often the more reliable solution.
Staircase replacement — converting a pull-down ladder to a code-compliant permanent stair — runs $4,000–$12,000 and almost always requires surrendering 35–45 square feet of floor area on the level below. This is the surprise that derails more attic conversion budgets than any other single item.
Drywall, flooring, electrical, and finish work runs $15,000–$40,000 depending on room size and finish level. The range is wide because finish choices — plumbing for a bathroom, built-in joinery, hardwood versus LVP — drive dramatic cost variation.
Homeowners who receive three contractor bids on attic conversions see a price spread of up to 40% for the same scope. The lowest bid most often excludes insulation upgrades or assumes existing HVAC capacity that does not exist. Get itemized bids. Then compare line items, not totals.
Build your own cost estimate before you talk to any contractor — know what each component should cost so you can spot what’s missing from a lump-sum bid.
The 7 and 7 Rule Explained — And Why It Is Only the Starting Point
The 7-and-7 rule is informal shorthand that most building professionals recognize: 7 feet of ceiling height over at least 7 feet of horizontal floor width. It’s not a code citation. It’s a practical heuristic that emerged from blending IRC minimums with the spatial logic of furniture clearance — you need at least 7 feet of width to place a queen bed perpendicular to the ridge and still walk around it without turning sideways.
But here’s where the rule misleads people. A room that passes 7-and-7 on paper can still feel unlivable if the 7-foot height zone is a narrow corridor pinched between two steep slopes. Roof pitch is everything. A 12/12 pitch (45 degrees) on a 28-foot wide house produces roughly 10 feet of usable width at 7-foot height — more than enough for a real bedroom layout. A 6/12 pitch on the same house yields only about 6 feet of standing-height space. Same house, same floor area. Completely different rooms.
The number I work with when planning attic layouts is the 5-foot line, not the 7-foot line. Any zone with less than 5 feet of clearance is not livable square footage — most adults cannot stand, sit upright in bed, or use a dresser in that zone. It doesn’t get counted in the furniture plan, and it shouldn’t be counted in the listing. What it can become is something else entirely.
- Built-in storage behind knee walls — drawers and cabinets that slide into the slope are bespoke, space-efficient, and add real value to the room
- Low platform beds extended into the slope, where the ceiling descends over the mattress rather than over the circulation path
- Reading alcoves built into the knee wall with cushions and lighting — genuinely useful, and a design feature you’d pay extra for in new construction
- Wardrobe runs along the low side, topped with a continuous shelf that follows the roofline
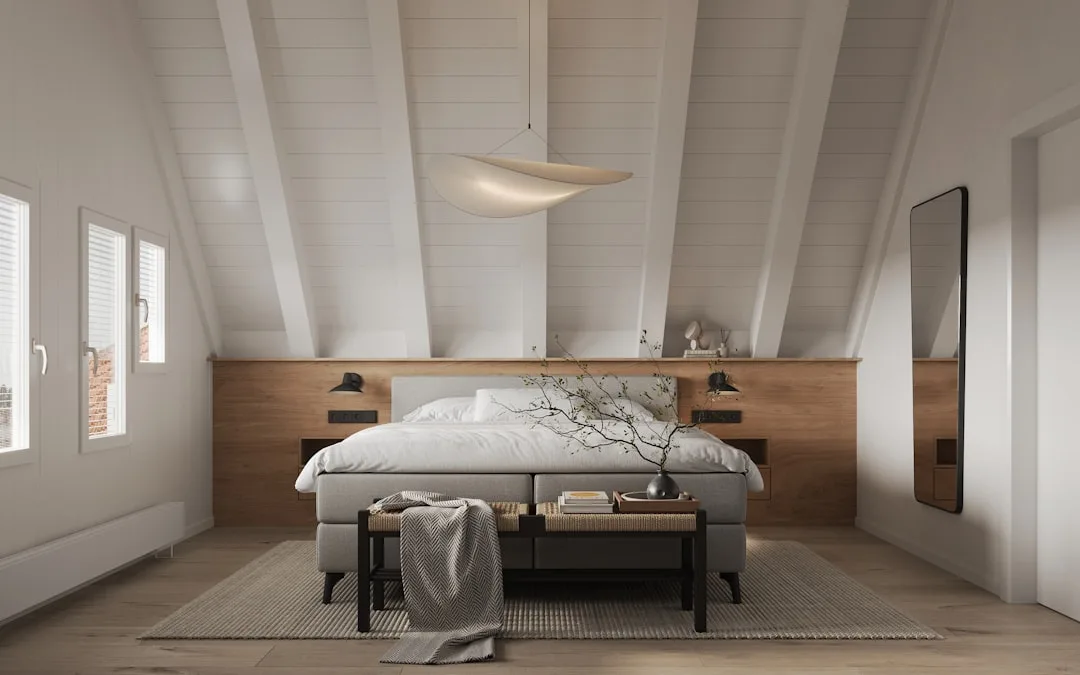
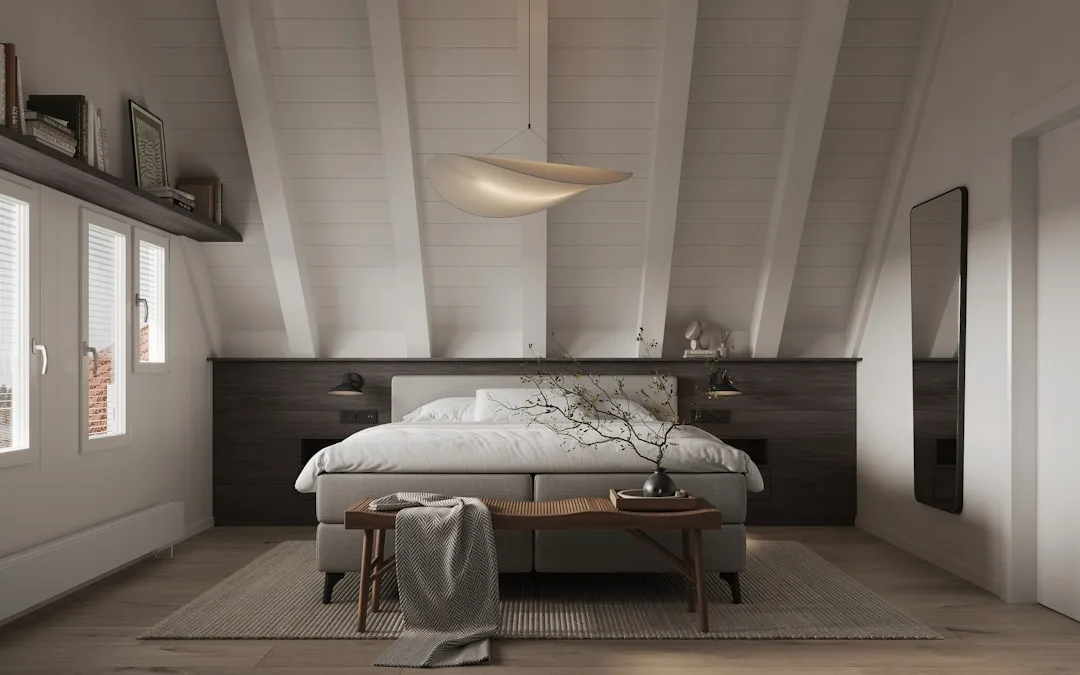
The slope is not the enemy. Treating it like unusable leftover space is the design failure — and I’ve seen it in a lot of attic conversions that technically met code but felt like afterthoughts. The rooms that work are the ones where the geometry is engaged rather than apologized for.
Draw your floor plan with the 5-foot clearance line marked before you design anything — it immediately shows you where furniture can live and where storage can go.
Designing Around the Constraints: Light, Ventilation, and the Slope as a Feature

Most attic bedrooms don’t fail because of structural problems. They fail because the designer — or the homeowner acting as their own designer — treated the unusual geometry as a limitation to work around rather than a vocabulary to design with. Sloped ceilings, exposed rafters, and angular walls are characteristics you’d pay a premium for in a boutique hotel. The difference is intention.
Light is where intention shows most clearly. Skylights outperform dormers for light-per-dollar in most attic conversions — a fixed-glass skylight runs $800–$2,500 installed and delivers more natural light than a comparably priced dormer window, which also introduces thermal complexity and additional structural framing. Operable skylights — roof windows that open — serve a secondary function worth flagging: in some jurisdictions, they qualify as code-compliant egress if they meet size and sill-height requirements. That’s a genuine two-for-one worth confirming with your local building department before you spec the window.
Paint matters more in attic bedrooms than in almost any other room I’ve worked in. Dark ceilings in a height-challenged space don’t feel cozy — they feel oppressive. The finish choice I’ve seen work consistently at the higher end of the market is limewash or matte plaster in warm whites, applied continuously from ceiling to knee wall so the geometry reads as one unified surface rather than a series of awkward planes meeting at wrong angles. It removes visual clutter at exactly the scale where visual clutter causes the most damage.
A pattern I’ve seen consistently across well-executed attic bedrooms: the built-in joinery is what separates a room that feels architecturally resolved from one that feels like a finished attic. Shelving, drawer runs, and wardrobe units built along the knee walls convert structural dead space into the most functional storage in the house. Custom joinery costs more than freestanding furniture, but it’s also the one investment that genuinely can’t be replicated by anything sold in a flat-pack box.
Lighting in a sloped ceiling room requires three things. Recessed cans must be specified for sloped ceiling applications — standard housings don’t angle correctly and create glare. Wall sconces at headboard height solve the bedside lighting problem without competing with ceiling clearance. Task lighting at any desk or vanity zone should be independent of the ceiling entirely. A room that fails on lighting in an attic will feel dark and claustrophobic regardless of how well everything else was done.
Decide on skylight placement before drywall — it’s the single light decision that can’t be revisited cheaply later.
Mistakes That Turn a Dream Loft Into a Miserable Room — And How to Avoid Each One

Every one of these mistakes is something I’ve seen happen. Not heard about. Seen.
Skipping the structural engineer’s assessment is the most consequential. A contractor can frame walls and sister joists, but only a licensed engineer can certify that the existing floor assembly is adequate for residential live load — and only that certification protects you legally if something goes wrong. Floor bounce in the finished room and cracked ceilings on the floor below are the symptoms. They appear months after the project closes, and at that point, remediation is brutal.
Underestimating the staircase sacrifice comes second. A code-compliant permanent stair requires a floor opening of roughly 35–45 square feet on the level below. Homeowners who realize this mid-project — after framing has started — end up with a landing that eliminates a closet, bisects a bedroom, or removes a hallway linen cabinet. The stair location must be planned at the very beginning, modeled in plan view, and verified against the floor below before any permits are filed.
Standard-height doors in low knee walls are a detail failure that looks minor and causes maximum irritation. A 6-foot-8-inch door in a 7-foot knee wall leaves 4 inches of clearance above — not enough for a door casing, and not enough to feel finished. Low-clearance custom doors, arched openings, or doors with transom panels above need to be specified in the drawings, not improvised on site.
The HVAC mistake — treating it as an afterthought and simply extending the existing system — is the one that generates callbacks. Attics without proper insulation and dedicated conditioning reach 140°F in summer. A room that becomes unusable for six months of the year is not a bedroom. It’s an expensive mistake. An analysis of post-completion complaints in attic conversions by the National Association of Home Builders found that HVAC-related issues were the most common problem — occurring in roughly one in three conversions where the existing system was extended without modification.
Flooring before subfloor verification. Attic subfloors are notoriously uneven — decades of joist movement, humidity cycling, and uneven loading produce a surface that will telegraph every imperfection through hardwood or rigid LVP. Self-leveling compound and a flatness check before any finish flooring is installed costs almost nothing relative to the floor itself. Skipping it and then watching planks gap and squeak is the kind of problem that doesn’t announce itself until the furniture is in.
Before signing any contract, ask your contractor to walk you through each of these five failure modes specifically — their answers will tell you a great deal about whether they’ve done this before.
What to Ask Every Contractor Before Signing Anything
The hiring process for an attic conversion is not the same as hiring someone to remodel a kitchen. The structural, thermal, egress, and spatial challenges are specific enough that general remodeling experience doesn’t fully transfer. Here’s what to ask — and why the answers matter.
Ask for references specifically from attic conversion projects. Not renovations generally. Attic projects specifically. Ask those references whether the project came in on budget, whether there were HVAC problems in the first year, and whether they’d hire the same contractor again. The answer to the last question is the only one that matters.
Ask who pulls the permit and whose license it is pulled under. Some GCs operate using unlicensed subcontractors and pull permits under a license that won’t be present on site. If the work is inspected and something is wrong, the accountability gap that creates is yours to resolve. You want the person whose license is on the permit to be the person supervising the work.
Ask how they handle unexpected structural discoveries mid-project — and get the answer in writing before the contract is signed. Attic framing surprises happen: undersized ridge beams, deteriorated rafters, prior amateur modifications. A contractor who gives you a clear written change-order protocol before work begins is a contractor who has encountered these situations before. One who says “we’ll figure it out when we get there” is telling you more than they realize.
Ask for a line-item bid. Never accept a lump-sum number for a project of this complexity. You cannot compare two bids without itemization, and a lump sum is the primary mechanism by which insulation upgrades, engineering fees, and egress compliance get quietly excluded. If a contractor won’t provide line-item pricing, that’s your answer about how they operate.
Ask about their approach to thermal bridging at the roof deck. This is a technical question that reveals immediately whether a contractor understands attic performance or is simply applying wall-assembly logic to a different context. Thermal bridging through rafters — where the wood conducts heat through even a well-insulated assembly — is a real phenomenon with real solutions, including continuous rigid insulation above or below the rafter plane. A contractor who looks at you blankly when you raise it is one who has probably never insulated an attic correctly.
According to Angi’s contractor data, the average attic conversion involves at least one significant scope change after work begins. Homeowners who establish a written change-order process before work starts report substantially higher satisfaction than those who negotiate mid-project — when the subfloor is open, leverage is gone, and urgency works against you.
Before signing anything, ask for three attic-specific references and the line-item bid — everything else can be negotiated once you’ve confirmed these two things.
Frequently Asked Questions
How much does it cost to convert an attic into a bedroom?
A realistic cost range for a full attic to bedroom conversion — including structural reinforcement, insulation, egress window, HVAC, staircase, and finish work — falls between $40,000 and $120,000 for most projects. The national average floated by various sources ($20,000–$95,000) captures the range but obscures the distribution: most conversions that include all required components land closer to $60,000–$85,000 for a single bedroom without a bathroom. Projects on the low end of published ranges almost always exclude one or more major components — typically insulation upgrades, structural engineering, or staircase replacement. Get an itemized bid. That is the only number that means anything for your specific project.
Is it legal to turn an attic into a bedroom?
Yes — with conditions. A converted attic can be legally classified as a bedroom if it meets your local jurisdiction’s requirements for ceiling height, floor load capacity, egress, electrical, and HVAC. The egress requirement is the most commonly missed: the room must have a code-compliant window or door that allows emergency exit, with a minimum net clear opening of 5.7 square feet, at least 24 inches high and 20 inches wide, and a sill no higher than 44 inches from the finished floor. The project must also be permitted and inspected. An unpermitted attic bedroom can void homeowner’s insurance, trigger remediation orders at resale, and create liability in the event of fire or injury. Contact your local building department before any contractor does any work.
What is the 7 and 7 rule for attics?
The 7-and-7 rule is an informal planning heuristic — not a code citation — that says an attic bedroom should have at least 7 feet of ceiling height over at least 7 feet of horizontal floor width to be genuinely usable. It blends IRC minimums (7 feet 6 inches of ceiling height over 50% of floor area) with practical furniture clearance logic. A queen bed with nightstands requires roughly 7 feet of width to allow circulation on at least one side. The rule is a useful first filter, but it’s only the starting point. Roof pitch, knee wall depth, and the location of structural elements all affect how much of the floor area actually functions for living. Use the 5-foot clearance line to map your real furniture zone — anywhere below 5 feet is storage territory, not livable space.
How much does it cost to convert an attic to a room?
The cost varies based on whether you’re creating a legal bedroom, a bonus room, or a functional but unpermitted space — and those are meaningfully different projects. A “room” without egress or full code compliance can sometimes be completed for $25,000–$45,000 if structural reinforcement is minimal and the existing HVAC has capacity. A legal bedroom with all required components typically runs $55,000–$100,000+. The biggest cost variables are structural reinforcement, staircase replacement, HVAC strategy, and insulation specification. Before any estimate is meaningful, you need a structural engineer’s assessment, your local code requirements, and your roof pitch and ridge height — without those three inputs, any number you receive is a guess.
Measure your ridge height and attic width today — with those two numbers and your roof pitch, you can calculate your 7-foot clearance zone before you talk to anyone. That single calculation will tell you more about what your project actually is than any article, any contractor’s sales call, or any estimate based on square footage alone. Start there. Everything else follows from it.