Author: ION

  • How To Make Your House Smarter

    How To Make Your House Smarter

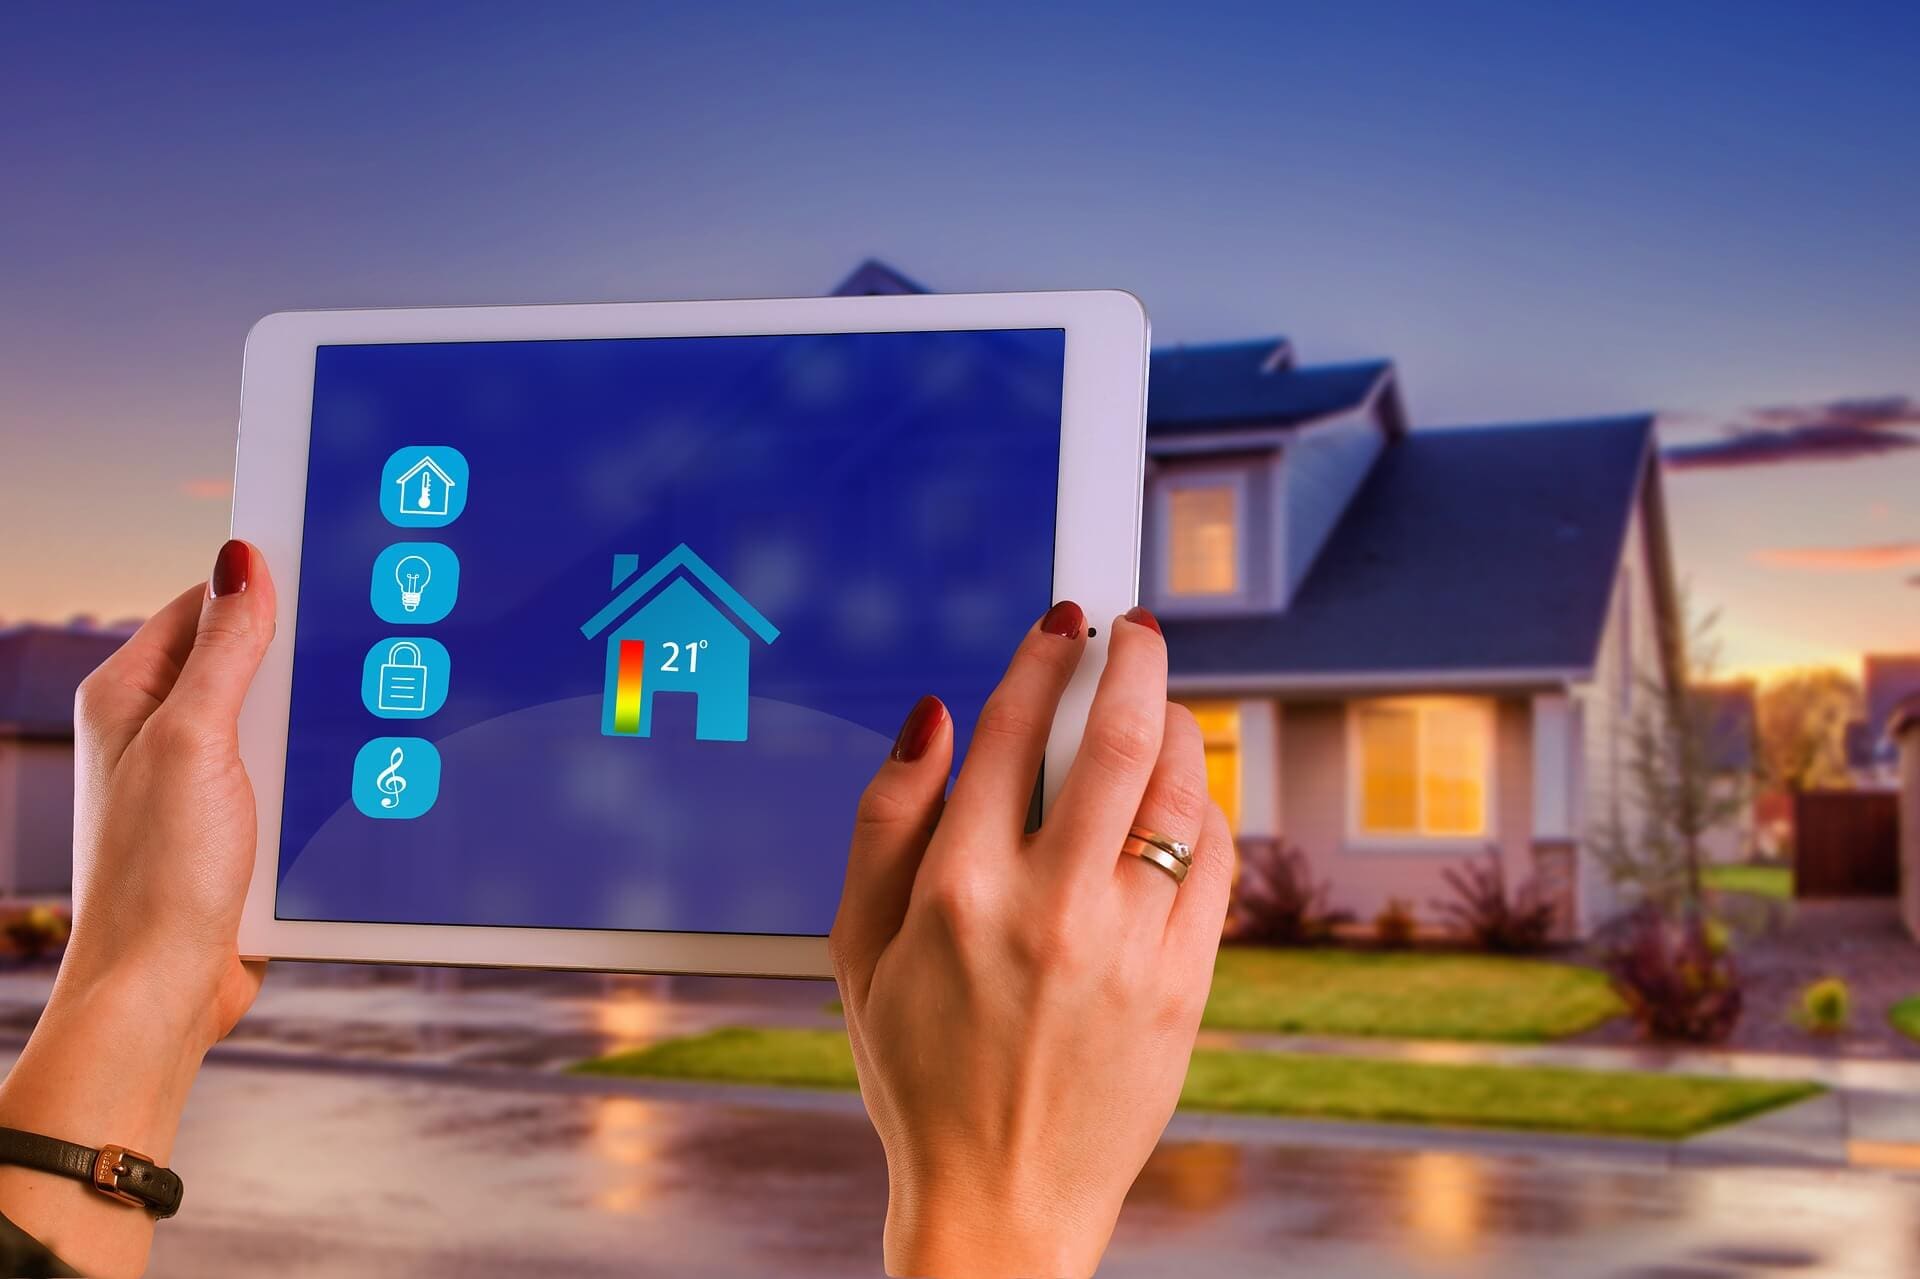
    We’ve come a long way in the world of smart home technology. While having a smart home might feel like something out of a sci-fi movie, it’s quickly becoming a new reality of life today. Luckily, these smart home tools help us live safer, more efficient lives.

    Just about everything in your home today can be linked to the WiFi and controlled virtually. With so much to choose from, it’s easy to get overwhelmed. Here are the easiest ways to make your house smarter one device at a time.

    Image via Pexels

    1. Alarm Systems

    First, you want to use this smart technology to protect yourself and your home. Smart alarms of today connect with your WiFi network and have a lot of new features we haven’t seen before. From video doorbells to one-click door unlocks, it’s now possible to monitor your home security no matter where you are.

    There are around 327,000 robberies every year, many of which result in major losses. No matter how safe your neighborhood is, you never know what will really happen. Linking your Amazon account to your home security has never been easier. This is an investment you can’t afford to overlook.

    2. Smart Televisions

    Who doesn’t love streaming your favorite shows and movies any time? With the rise of smart TVs, we’re seeing a shift in the way people watch television. In 2018, the number of people who unsubscribe from traditional cable rose by 32% or around 33 million adults.

    Smart TVs are a new way to watch all of your favorites. By integrating with streaming services like Netflix, Hulu, and Amazon Video, you don’t have to spend time scrolling through channels looking for something to watch.  

    3. Smart Thermostat

    A smart thermostat might be a bigger investment, but it’s one that pays back in a big way. It’s easy to run up your electric bill with too much heating or cooling if you aren’t careful. A smart thermostat allows you to customize your home temperature remotely, and it can even learn your habits to shift automatically.


    This is an effective way to learn more about your energy usage and reduce your own home energy costs. The next time you forget to turn off your A/C on your vacation, you can simply pull up your smartphone app to get the job done.

    Image via Pexels

    4. Home Lights

    We’ve all wanted to turn off our lights from the comfort of our bed, and now smart home lights make that possible. Smart bulbs are likely the easiest things to install from this list, and you only need a few pieces of tech to get started. From there, you’ll have access to features that save you both time and money. From automatic color changes to remote control via a smartphone app, you’re in charge of everything.

    5. Smart Outlet

    Finally, the last thing you need to complete your smart home is a smart outlet. These outlets allow you to control your appliances and devices all through an app or voice controlled device. From turning off lamps to starting your coffee brew in the morning, this is the most customizable of all the smart home devices.

    Smart outlets help you turn your regular home into a smart home in a few simple steps. There’s no complicated, expensive process. You just swap out your regular plugs and cords for smart outlets and viola! Your home does it all.

    Are you ready to turn your home into a smart oasis? From maximizing control to lowering energy costs, there are a lot of benefits of making the switch once and for all.

  • How Much Do Retractable Awnings Cost

    How Much Do Retractable Awnings Cost

    The one question that holds back most people from buying. At this point, you know that you need a retractable awning on your patio or outside your house.

    You can visualize it after installation and how much better your house is going to look after this new addition. You know all the benefits that come with owning one of these bad boys.

    The aesthetic appeal of a complimentary exterior room to your house. The protection from harmful UV rays that they provide to you and your family. The effortless showcasing of your personality through beautifully crafted craftsmanship. The differentiating factor that makes your house looks way better than any house in your neighborhood.

    You know all of that. But, how much will it cost you?

    Do you need to take out a loan just to add this cosmetically pleasing awning? Here I’ll be sharing with you how much do retractable awnings cost and if there are any extra costs regarding it. There are two main types of retractable awnings that you can get for your home.

    You can either get a drop-arm retractable awning or lateral-arm retractable awning. Most contractors use the drop-arm awnings for doors and windows and they tend to install lateral-arm awnings just for your decks and patios. When it comes to manual installation of a drop-arm retractable awning, the price ranges between $700 and $2,600 which is fairly affordable in comparison to other awnings.

    If you want to install a lateral-arm retractable awning, the price for it ranges between $1,500 to $6,000. If that is way far out of your budget, I got good news. There are motorized versions of these retractable awnings that are way more affordable. These motorized retractable awnings with remote controls usually vary slightly in the range of $700 to $1,000.

    Unfortunately, there really isn’t anything less than that. When thinking about price, remember that this is a long-term investment in yourself and your house. It upgrades the aesthetic appeal, saves you a ton of sunlight AND provides you with a nice shaded area for you to hang out with your family and friends.

    When it comes to retractable awnings, people always wonder about the maintenance cost associated with having one as well. Honestly, there really aren’t any maintenance costs that will require you to invest an insane amount of money every month.

    However, if the fabric of the awning gets dirty, you might want to clean it off but apart from that you should be good to go! The reason why retractable units require way less maintenance than fixed ones is because they’re constantly exposed to the elements you’re putting them into.

    And now you’re good to go! Now that you know the benefits of having a retractable awning and the investment necessary to get one of your likings, all you need to do is find the right company for the job without needing to ask them “how much do retractable awnings cost”.

  • 5 Ways To Prevent An Infestation In The Workplace

    5 Ways To Prevent An Infestation In The Workplace

    Anyone who has shared office space with others has experienced this at least once during their working relationships. While everyone gets along, the caveat is that the office is too comfortable and the habits that might be fine at home interfere with keeping the office clean. Worse yet, these habits have created infestations of a variety of pests.

    Most buildings have a process for taking care of infestations, as most companies contract with commercial pest control services to make sure their buildings are pest-free. In the meantime, office workers can be proactive in their own daily habits in preventing unwanted intruders from showing up at the office. In fact, employees can pretty much develop a program for making sure that the office remains free from pests and rodents, and by doing so, can guarantee that when pest control comes it is for routine visits.

    Keep reading to learn a few simple ways to decrease the incidence of infestations in the workspace.

    Do Not Invite Pests In

    Depending on the workplace location, animals that are a part of the scenery make for an attractive work location. While the temptation might be to feed the animals by placing bird feeders and food in areas outside the office, this can also attract bugs to the building. Not only does discarded food make for a messy appearance around window and doorways, but they can also lead to ant and roach infestations in the workspace.

    Avoid Eating At Your Desk

    The inclination is to eat at your desk, especially when work piles up, but eating at your desk also attracts unwanted attention from pests. Very few people can eat at their desk without spilling crumbs or leaving remains on the desk. If the office is shared, other people are affected by the food debris left on the table.

    Later on, though, when everyone has left the office, pests might find your desk and the remains of your lunch very attractive. The worst thing is to come into work the next morning to find a host of ants making their way around your desk. The best remedy is to get out of the office for lunch and a few moments to yourself, whether it is to go outside or to eat in a designated lounge.  

    Do Not Dump Rubbish In Workspace Bins

    Another way that pests can find their way into the office is when employees dump rubbish in bins that are a part of the workspace. Dry food can be swept up, but drinks and wet foods that have heavy sauces and gravies can be attractive to rodents. If there is a lounge or a dining area to dump food, use these rubbish bins because maintenance staff will come around a few times a day to change the rubbish while the food remains might stay in your office rubbish bin all day long.

    Keep The Lounge And Refrigerator Clean

    While the lounge is the designated place to eat, sometimes inconsiderate coworkers leave dirty dishes and rubbish in the sink. The refrigerator is another place that can attract bugs if not cleaned routinely, especially getting under the appliance where pests hide. Professionals only need to keep it simple and clean up after they have finished eating.

    Keep Walkways And Windows Clear

    If your business is a small one, consider keeping walkways and windows clear of debris and bushes. These areas are great hiding places for rodents and other pests, and while they might not necessarily create an infestation, they can be a nuisance. Potentially, they can be dangerous too if attracting poisonous pests.

    Consideration In The Workplace

    Everyone can do their part to pitch in to keep the workspace debris-free. Whether this means moving lunch to a more appropriate location and discarding rubbish in designated rubbish bins so as not to invite pests to lunch, your office can reduce the incidence of pest infestation through these simple tasks. Ultimately, you can reduce infestations by being considerate of your co-workers and remembering to clean up after eating and in general.

  • Is There an Ideal Time of Year to Get A Pest Inspection Done?

    Is There an Ideal Time of Year to Get A Pest Inspection Done?

    This really depends on the circumstances, if you have found active pests on your property in which case you would need to call a pest controller out immediately regardless of what time of year it was.If you have a regular pest control services you likely have the benefit of continuous protection and do not have the need to treat for any pests during the seasons when theyare typically most active.

    Today we’re speaking with Danny from Pest-Ex Pest Control who has been providing pest control services for more than 10 years right across South East Queensland.

    Based on many years of experience in completing thousands of pest control treatments you become familiar with seasonal pest patterns and trends, so we typically see an increase in pest activity when temperatures and humidity start to rise. Depending on where in Australia you live June through to August are cooler and pests will lay dormant over these months and be less active.

    So, while we cannot say there is an ideal time of year to conduct a pest inspection there is huge value in scheduling standard pest control treatment services throughout the year as part of a prevention and management plan.

    Protection throughout the Year Involves 3 Stages of Treatments

    Pest control treatments work in 3 stages and when they are implemented at certain times of the year it results in effective and long-lasting pest control results.

    Stage 1 -Protection during Peak Pest Season

    This is the most important stage for treatment to take place when pests are most active over the warmest months. The colony can be directly treated, and it is the fastest method of control of current and new infestations.

    This treatment is done during a pest control service and involves an internal perimeter spray treatment covering kitchens, bathrooms and skirting boards. This spray treatment is a fine spray containing a product called cislin 25 and has an active ingredient called deltamethrin, this treatment will eliminate 50 – 80% of pests in as little as 24 hours.

    This perimeter spray will eliminate pests in the house and be effective over the peak pest season but only lasts 2-4 months, so other control measures need to be put in place to keep pests out all year round.

    Stage 2- Cavity Protection Throughout the year

    This stage offers control of any new pests entering the home throughout the year and involves roof void and wall cavity dusting. The treatment concentrates on concealed and hard to reach areas of your home. It is done during a pest control service and a fine dusting application is applied using a dusting machine permeating the wall cavity, weep holes and roof void. This product lasts up to 12 months and treats any new pest that enters the home through the treated areas.

    Stage 3- Internal Protection Throughout the year

    This stage offers control of any new pests entering the home throughout the year and treatment involves a baiting gel technique that is applied in cupboards kitchens, under sinks and in any cracks throughout the house. This gel bait is effective for 12 months and provides control of pests before they are allowed to multiply throughout the year.

    Combing these 3 stages of pest control provides year-round pest control and when implemented at the right time of year there really is no need to call a pest control service for emergency treatments.

  • Clever ways for outdoor décor

    Clever ways for outdoor décor

    When decorating their homes, many people tend to leave the outdoors area for last, often forgetting about the importance it has on the whole image of the house. Think of it as your house’s business card, as it is the first thing people see when they come to visit. From the plants to furniture and interesting front door signs like the ones at https://www.signomatic.com.au/, everything needs to be in harmony with the interior of your house, to build a cohesive aesthetic.

    Décor experts say that your garden should be well-thought, but should not look like it’s been too groomed, to avoid losing the “home-sweet-home” feeling. Here are some things to keep in mind when planning the outdoors area:

    Theme

    The first thing to think about when starting to decorate is to pick a theme, to avoid making the space look too busy and to make sure every small piece of décor fits the area. When choosing a theme, pick one that suits your house best. It doesn’t have to be the typical Scandinavian or Bohemian look. Let your ideas come and play, to make your back yard or porch match your or your family’s personality. What you can do to make sure you don’t go into a décor-purchase frenzy is to establish a color scheme that you want to stick with. Some of the color schemes picked by top decorators when working with the outdoors are:

    • white + slate blue + cream
    • brown + olive + off white
    • light gray + copper + beige
    • neutrals + a bright color like yellow, orange or red
    • bold color combinations, for example pink + yellow + green
    • pastels

    Furniture

    When choosing the outdoor furniture, you have to think of something that will play well with the weather. Don’t choose too many textiles, when living in a rainy area, as you will have to move them in and out of the house when the rain gets heavy. If you are on a budget, try to stick to the essentials, like a coffee table, an outdoor sofa and some chairs and focus on small décor pieces to give a personal touch to the area.

    You can find lots of ideas online to DIY your back-yard furniture, like sofas and tables made out of pallets and crates or even repurposed indoor furniture. If you have a bit more to splurge and if the space allows, add a hammock or a swing bench, or even a dining area, for those summer barbecues with your friends. To give a twist to your dining area, choose a simple table and add some colored chairs and a big umbrella with some string lights attached. Add some patterned pillows on the sofa and you are good to move on to the next category.

    Plants

    What would a back-yard be without plants? If you have a large back-yard, design a whole area for flowers and trees and try to combine plants, to have a year-round bloomed garden. Plants like cornus, that have colorful stems in the winter are a good choice, to begin with, and in spring and summer add seasonal flowers, like daffodils and tulips. When choosing trees, keep in mind the size, as some of them can grow as large as your house and keep the light from going through the windows. If you have a smaller yard, pot plants work very well, as you can play with them and move them around to your desire. Another great idea is to build an herb garden, with plants like rosemary, basil, parsley, chives and cilantro, that you can grow in pots and use to add a fresh touch to your cooking. If you feel a little more daring, look online for fairy-garden tutorials, that you can build from old ceramic pots, succulents or tiny plants and small décor pieces, to add a whimsical touch to your back yard.

    Lights

    Lights are a nice touch to add warmth to your garden and there is so much you can do with some string lights, an old chandelier or some Chinese lanterns. There are so many ideas that you can choose from, like spray-painting an old chandelier that you can find at a yard sale or that you already have laying around in storage, to create a statement piece that you can hang above your porch, or picking up various light strings and hang them or tie them around trees and even DIY torches from old repurposed bottles. Another thing you can use are solar-charging light, to protect the environment and avoid the stress of buying batteries or tripping over cords. From string lights to torches, you can find a large variety of options at your local depot.

    Others

    Now that you have your basics covered up, you can focus on the small details that can make your back-yard one of a kind and the possibilities are infinite:

    1. Barbecue area: Build or buy a barbecue to surprise your friends with some gilled goods on those summer nights when you get together.
    2. Personalized doormat and house number: Your front door should be receiving the same attention, so add a DIY doormat, that you can make with a stencil and some spray paint or search your local store for an interesting one
    3. House number: Speaking about your front door, a nice touch would also be a personalized house number, but keep in mind to stick with a relatively simple font, as the fancier ones can be sometimes hard to read and you don’t want your mail to get lost on the way.
    4. Birdhouse: If you want to attract some fairytale friends, hang a bird house or a bird feeder in your tree or on the side of your porch and get ready to welcome the new neighbors. Keep the feeder filled at all time and leave the birdhouse decorating to their hands.
    5. Kid’s corner: Don’t forget about the little ones and try to fit in an area where they can play, like a sandbox or a tent made out of repurposed sheets and scarves.
  • How to Choose the Best Window Boxes and Planters

    How to Choose the Best Window Boxes and Planters

    Window flower boxes are trays lining the bottom of flowers or window boxes and planters before potting plants with soil inside.

    Coming along as a quick solution for  houses without gardens, window boxes and planters provide any passionate gardener a chance to show off their talent and passion.

    For a better overview of how to choose the best window flower boxes, keep reading!

    The design of your window flower boxes are very important

    Understanding what your house needs is very important, which determines the result of your effort to decorate your house with flowers.

    Here is in-depth information on 3 main ways to organize your flower boxes according to the design of windows.

    Small separate window flower boxes.

    Small boxes of flowers arranged on a classic big window. Source.  

    Small separate flower boxes would be a perfect decoration for windows with narrow gaps in between.

    Since the flowers would be placed in small planters, a combination between 2 or 3 types of plants is advised to utilize the effect of the flowers.

    Remember not to make the design too busy, or else, it would backfire and your house will messy and too vibrant.

    Big long window flower boxes

    One long big flower box on a classic big balcony. Source.

    This specific type of flower displayed is quite famous in American movies, in which a house with a big wide balcony is the main setting.

    Big long window flower boxes would make the house warmer as well as more nature-friendly.

    It would be very pleasing to the eye, especially when there is a good color combination between the flower boxes wall, the window and the curtains.

    Design the boxes as though they are one large window box in which the design continues from one box to another if many huge window flower boxes are not preferred.

    Big separate window flower boxes

    Big separate flower boxes on several identical windows. Source.

    Big separate window flower boxes would match big windows with considerable gaps in between.

    The boxes should be arranged separately and identically to each other so as to achieve harmonization.

    Make sure the flower box design will go well with the window design.

    And a quick note:

    Tall plants should be in the back, medium plants in the middle and cascading plants in the front.

    Understand well box and planters material for easier choosing

    Here is a sum up of 3 most common material for your window flower boxes.

    Wood

    Since wooden flower boxes can be painted and customized to any sizes and shapes, they are applicable for any architectural styles.

    In spite of their beauty, they are prone to rot and has a shorter lifespan than boxes of other materials.

    Cypress, cedar, redwood, and teak are highly recommended materials for this type of window flower box.

    A metal or plastic liner placed inside the box can also prevent rot and water damage.

    Metal

    Metal window flower boxes will not rot and they are not subject to insect damage.

    They are also very strong and durable, fitting the design of any modern houses.

    However, rusting can be a problem and rust proof and lightweight window boxes made of aluminum or copper can be very expensive.

    PVC

    PVC window boxes and planters are becoming more and more popular for their decent features.

    They are paintable and customizable with secure installation and pre-manufactured and custom sizes up to 16 feet long.

    With lifetime guarantee of rot-free and insect-resistant, this specific type of window flower box and planter does not warp or crack during winter freezes.

    They also provide with self-watering options for easy maintenance in case you are on  vacations.

    In a word, PVC window boxes and planters are a comparatively safe choice to go for when shopping for window flower boxes and planters.

    In summary

    That is our detailed two-step guidance on how to choose the best window box and planter for your beloved house.

    Hope that it would be useful on your gardening journey.

    Thanks for your reading and we will see you in our next topic.


  • How to clean a water pump (The definitive Guide)

    How to clean a water pump (The definitive Guide)

    Water pumps are essential tools for providing water supply both in residential and commercial settings. Besides supplying water, a water pump can be used to remove excess water in certain areas. Just like any other machine, proper maintenance is the key to keeping a water pump in good working order. Cleaning your pump is one critical maintenance practice you can’t ignore if you care about its welfare.

    Cleaning removes any residuals, debris or any dirt clogged in the pump. If you notice any abnormal performance of your pump, don’t rush to call a plumber, cleaning may get everything in order. So, how do you go about it? Read on to learn how to clean a water pump.

    • Requirements

    Ensure you have the following before you get started;

    • The water pump itself
    • Screwdriver
    • Pliers
    • A piece of washing material
    • Plenty of water
    • Steel wool
    • Procedure

    • 1. Disassembling the pump

    Remove the pump cover. This is the part that protects the impeller and internal components of the pump. Depending on your pump model, the cover may have screws hence the need for a screwdriver or other protective measures.

    Removing the cover exposes the impeller. To get it out, you need to remove the protective cap first using the pliers. Take down all the components of the impeller which include the blade, fastener, and a rotating metal bar.

    It is advisable to take pictures of how everything is held together before taking the pieces out. It will help you to fit everything back together once you are done with the cleaning. You should note the direction the impeller is facing before removing it because it is positioned that way to facilitate the flow of water.

    • 2. Washing All the Parts

    With everything laid out before you, clean them thoroughly while taking note of any debris or materials that could be clogged in the parts. A piece of washing material and water are enough to get the job done.

    Use the steel wool to polish the impeller rotating metal bar to facilitate smooth running. If your pump is for supplying clean drinking water, sanitize the pump. Avoid using soap because it can leave a residue which can affect the taste and color of the water afterwards.

    • 3. Putting back everything together

    When you are satisfied with the level of cleanliness of all the parts, start to assemble them back together. Start with the impeller. Put all its components (i.e. the blade, fastener, and metal bar) back and ensure they are tightly held to prevent them from coming loose during operation leading to damage.

    Refer to the pictures you took earlier to ensure everything is well-positioned before closing the cap fastening it strongly. Put back the covering and ensure it locks into place. If you have the model that requires screws to hold the cover, ensure they are all placed in their respective positions and are well tightened.

    • 4. Time to Test Your Pump

    Did you mess with anything during the cleaning process? Its time to tell this by testing the pump. Immerse the pump in a bucket of water and attach a hose. The hose is used to ascertain the water is flowing in the right direction.

    A flow of water in the wrong direction indicates the impeller was not correctly positioned. You will be required to disassemble the unit again and reverse the blade. However, if everything seems to work fine, you are good to go. Congratulations, you have just managed to clean your water.

     If the issue persists, you could refer to a guide on plumbing problems and solutions to fix them from HomeWarrantyReviews, to seek further help. Or, you could consider hiring a professional plumber to resolve the plumbing issue at the earliest.

    Conclusion

    How to clean a water pump is all that simple. No complicated procedures or tools are required to get the job done. All you need is patience and good observation skills. You will need to clean your pump regularly to avoid accumulation of dirt which can make hard to clean.

    If you don’t use the pump often, clean it immediately after use to ensure it remains in great working condition. Cleaning your water pump is a simple maintenance practice but can get your pump in service for a long time. Don’t wait until your water pump clogs or fails due to dirt – do the cleaning now by following the above simple steps.

  • Great Gifts to Say “Welcome to the Neighborhood”

    Great Gifts to Say “Welcome to the Neighborhood”

    Approximately 35.5 million people in the U.S. move each year. As a result, it’s not unlikely for you to know someone who has recently moved into the neighborhood.

    Do you want to purchase the perfect housewarming gift? If so, you may need some ideas. Keep reading for some great gifts that help you say “welcome to the neighborhood” to anyone who recently moved into the area.

    A Gift Card for Food

    If you were trying to get settled into a brand-new home, the last thing you want to have to think about is cooking for everyone in the house. You can help save your new neighbor a bit of hassle by gifting them a meal.

    Choose a gift card to a local restaurant, particularly a place that delivers. Keep in mind, pizza is almost always a great option. You can save a lot with Papa John coupon code if you plan to give to many. Your neighbors would surely be happy to receive one.

    A Pretty Frame

    Even if you don’t know the type of décor your new neighbor likes, you can’t go wrong with a pretty frame. This is a great gift for men and women alike, as everyone enjoys hanging up pictures of their family and friends in their home.

    Purchasing artwork for someone you don’t yet know well can be risky, but if you like to make people happy with art, you may urge them to try Instapainting by giving them a gift card – nothing like custom artwork to make their new place feel like home.

    Freshly Baked Treats

    If you think about it, there’s no situation that isn’t going to get better when baked goods are involved. You can go to the local bakery and purchase a box of these treats, or you can make a batch of something sweet at home and take them to your new neighbors.

    You can feel confident that if sugar and butter are involved, it’s a nice gift that’s going to be appreciated.

    Fresh Flowers

    Are you searching for a way to brighten up your neighbors’ new space? If so, purchase some beautiful and colorful blooms. Make sure to pick a coordinating vase that the person can use even after the flowers are gone.

    Fresh flowers can help to reduce stress related to moving, and even provide an instant feeling of having the space put together. Without flowers, the space may seem somewhat empty.

    Quality Storage Containers for Their Counter

    Getting organized is hard. But when someone is moving into a new space, it’s the perfect time to get things in order.

    You can help out your new neighbors with this otherwise tedious task by gifting them a set of high-quality storage containers for various types of food, that they can put in their cabinets or pantry.

    Not only will these types of storage containers add an appealing and chic look to the space, they are also practical and long-lasting. You don’t even have to worry if the new neighbor has a set already – you can never have too much storage.

    A Warm and Cozy Blanket

    It doesn’t matter where you live or what the climate is – everyone loves a warm and cozy blanket. Choosing a blanket that is made of cotton, fleece, wool or some type of polyester blend provides superior softness and is a reasonably priced gift.

    If you want something extremely nice, then go ahead and splurge on a blanket that is made out of cashmere, faux fur, or even mohair. If you aren’t sure what the color scheme is of their home, then choose a neutral color.

    Choosing a “welcome” gift for your new neighbors isn’t as difficult as it may seem. Use the ideas here to find something that is perfect and that conveys the message “welcome to the neighborhood.”