The moment your face turns gray and shadowy on a Zoom call, it has nothing to do with your camera — it is almost always one positioning mistake that costs you nothing to fix. Your colleagues aren’t seeing a hardware problem. They’re seeing a physics problem, and it’s entirely solvable before your next meeting if you understand what’s actually happening to the light in your room before it hits your lens.
Quick Answer
The moment your face turns gray and shadowy on a Zoom call, it has nothing to do with your camera — it is almost always one positioning mistake that costs you nothing to fix.
I spent eleven years rearranging how people lived in their spaces — kitchens, living rooms, home offices — and the single most common feedback I got from clients who worked from home was that their video calls looked terrible despite having “a nice room.” Every single time, the issue was light source position. Not the camera. Not the software. Not the lighting fixture itself. Where the light was coming from relative to their face.
This article is not a ring light buying guide. It’s a breakdown of what’s actually wrong and how to fix most of it for free.
Why Most Home Office Lighting Fails on Camera (Even When It Looks Fine in Person)
In This Article
- Why Most Home Office Lighting Fails on Camera (Even When It Looks Fine in Person)
- The Single Most Important Rule: Where You Place Light Relative to Your Face
- Natural Light Is Not Free — How to Actually Use a Window for Zoom
- Choosing the Right Bulb Color Temperature for a Home Office That Works on Camera
- How to Make Your Face Look Better on Zoom Without Buying Anything New
- The Best Lighting Setups for a Home Office by Room Constraint
- Background Lighting: Why What’s Behind You Matters as Much as What’s on Your Face
- Interior Design Choices That Double as Better Zoom Backgrounds
- A Practical Home Office Lighting Checklist Before Your Next Call
Human eyes are extraordinarily adaptive instruments. Walk from a dim hallway into a sunlit room and within seconds your pupils adjust, your brain compensates, and everything looks balanced. Cameras don’t have that ability — not even close. Camera sensors have a dynamic range of roughly 8–12 stops compared to the human eye’s 20+ stops, which means light that looks perfectly reasonable to you in your home office reads as harsh, blown out, or deeply shadowed on video.
That gap explains everything. Your overhead light fixture looks fine when you’re sitting beneath it. On camera, it creates shadows that fall directly downward — into your eye sockets, beneath your nose, under your chin. The result is something between “unflattering” and “vaguely sinister,” depending on how strong the fixture is. Neither is what you want in a client meeting.
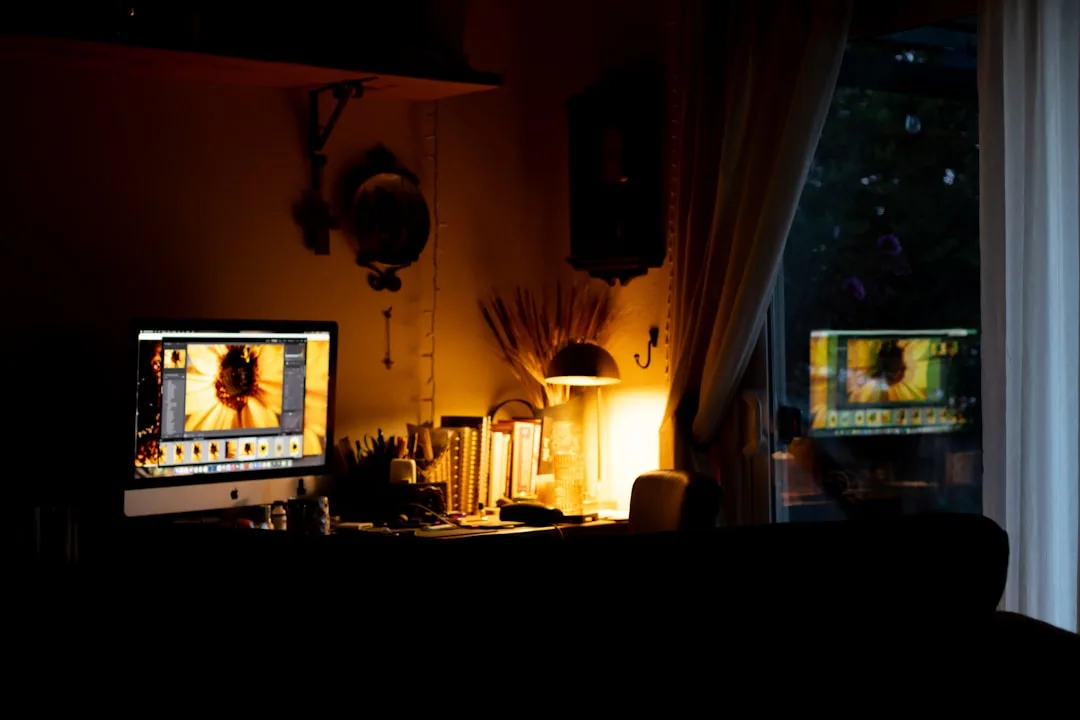
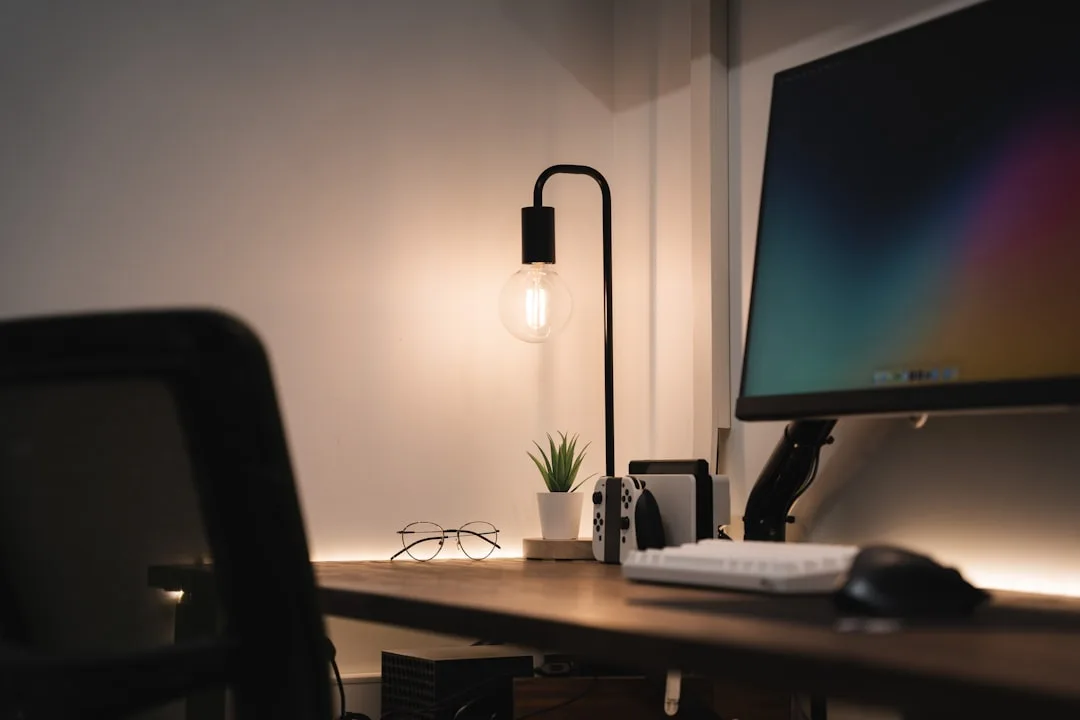
There’s another layer to this that nobody talks about: mixed light sources. Most home offices have some combination of a ceiling fixture, a desk lamp, and a window — often all running at different color temperatures simultaneously. Your ceiling fixture might be running warm at 2700K. Your window is pumping in daylight at 5500K. Your desk lamp is somewhere in between. Your camera’s auto white balance algorithm is trying to average all of that, and it’s failing, which is why your face sometimes looks slightly green, slightly orange, or slightly gray depending on which light source wins the calculation.
The pattern I kept seeing in clients’ spaces was that the room looked warm and inviting in person, exactly the atmosphere they’d worked hard to create. But on camera it was a disaster — because the camera cannot feel atmosphere. It can only read light values.
Takeaway: Before adjusting any fixture, sit at your desk, open your laptop camera, and take a 30-second recording. Watch it back. What you see is what your colleagues see — not what you see when you look in the mirror.
The Single Most Important Rule: Where You Place Light Relative to Your Face
Every other piece of advice in this article depends on this one. Get this wrong and nothing else matters. Get it right and you’ve solved 80% of your problem without spending a dollar.
Your primary light source must be in front of your face, at or slightly above eye level. That’s it. That’s the rule.
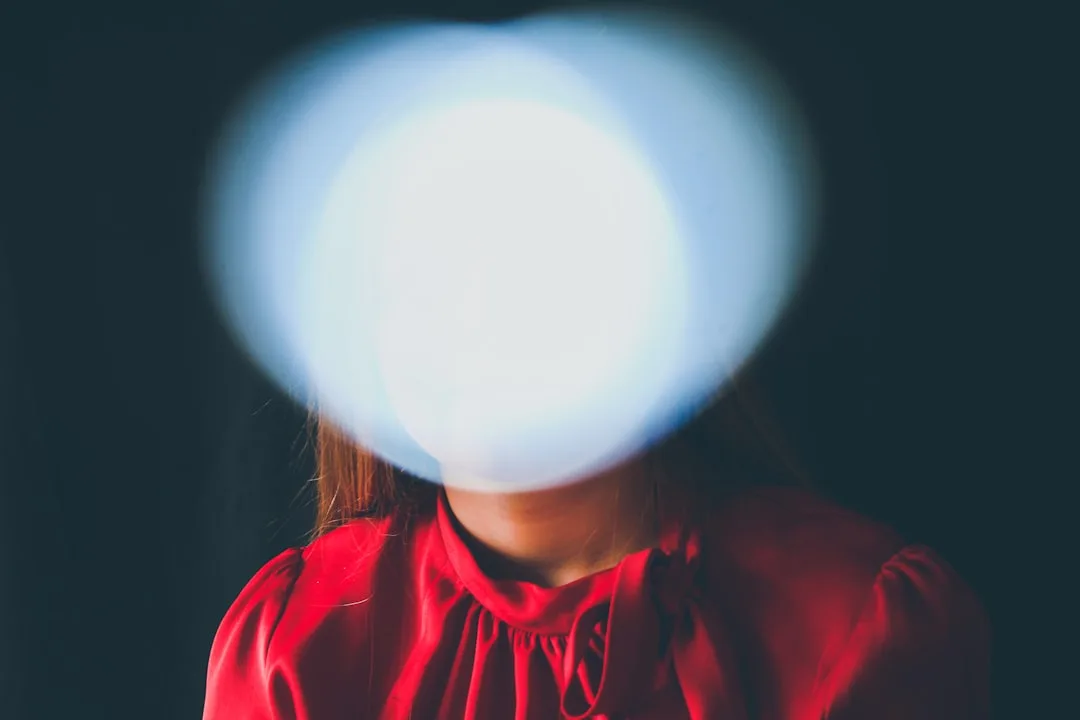
The reason behind it: light falling on your face from in front fills in shadows, reveals facial structure evenly, and gives the camera sensor something consistent to expose against. Light falling from behind turns you into a silhouette — literally. It doesn’t matter how bright your room is. If the brightest source of light is behind you, the camera will expose for the background and leave your face underexposed. This is not an opinion; it’s how automatic exposure algorithms work.
Professional broadcast studios have spent decades refining this. They position key lights — the primary source illuminating the subject’s face — at a 30–45 degree angle horizontally and 15–30 degrees above eye level. This creates dimension without harsh shadows. Slightly to the side. Slightly above. Not directly overhead, not directly to the side, and absolutely not behind.
The 45-degree horizontal rule is worth understanding practically:
- Imagine a clock face centered on your head. Twelve o’clock is directly in front of you.
- A light source at the 10 o’clock or 2 o’clock position — 45 degrees to either side — creates subtle facial modeling that reads as natural and three-dimensional on camera.
- A light source at the 9 or 3 o’clock position (directly to your side) creates a half-lit face that looks dramatic in film and unsettling in a quarterly review.
- A light source at 6 o’clock (directly below) is the horror movie setup. Avoid it at all costs.
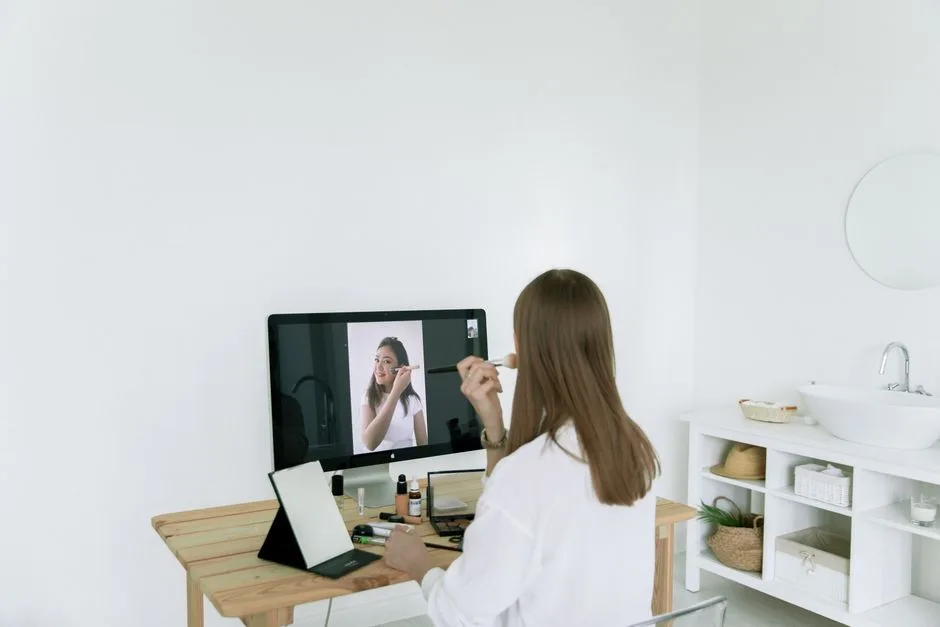
I once watched a client spend $300 on a ring light and then position it directly to her left while she faced the window. The ring light was doing nothing. The window behind her was destroying her exposure. She looked worse after the purchase than before it.
Takeaway: Turn your chair or your desk until your existing window or primary lamp is in front of you. Do this before considering any purchase.
Natural Light Is Not Free — How to Actually Use a Window for Zoom
“Sit near a window” is advice so vague it’s nearly useless. I’ve said it before and I regret it. Which window? What time? Facing which direction? Because the difference between a north-facing window at 11am and a south-facing window at 2pm is the difference between looking professional and looking like you’re being interrogated.
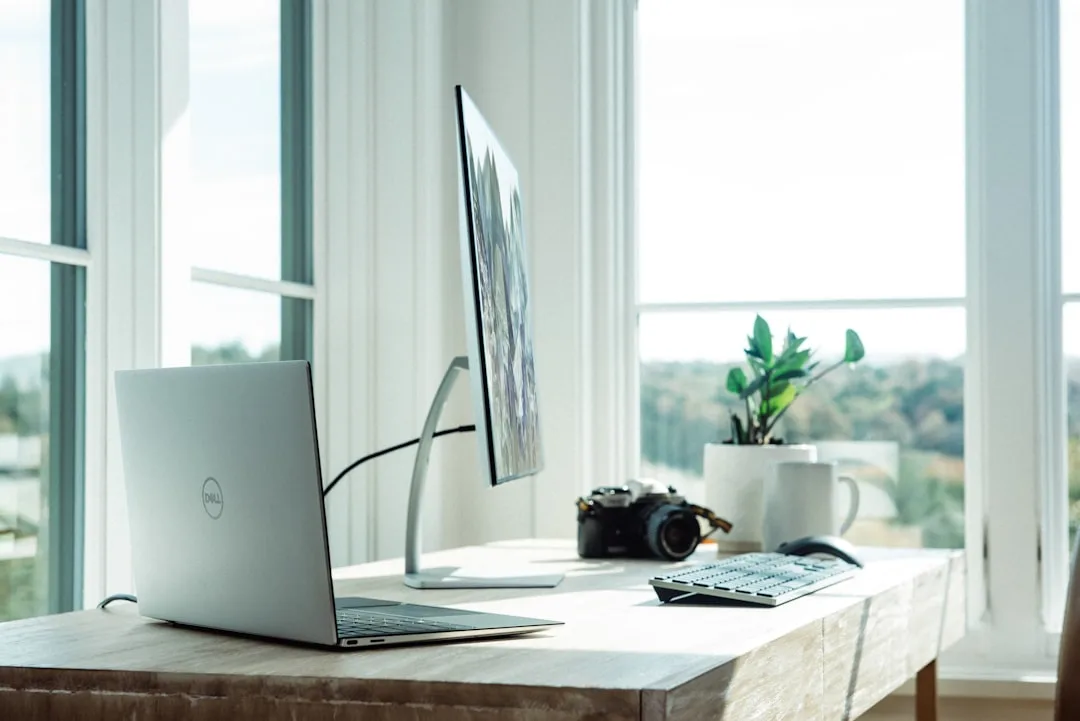
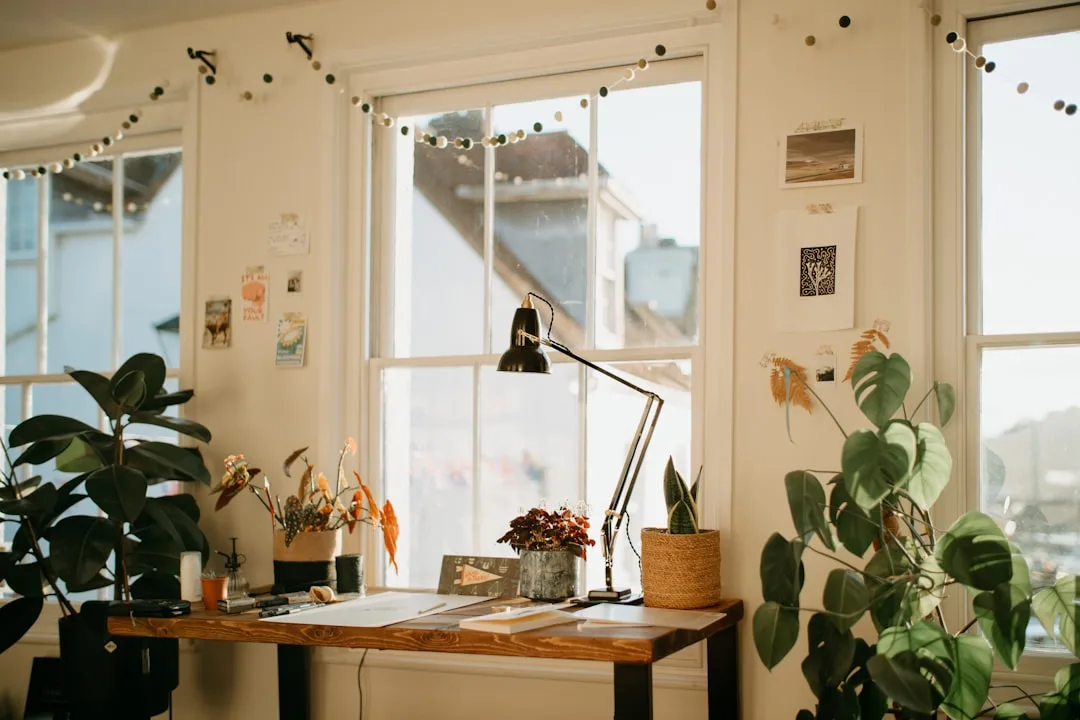
North-facing windows are the home office lottery ticket. They receive no direct sunlight at any point during the day in the northern hemisphere, which means the light they deliver is consistently diffused, even, and flattering throughout your working hours. If you have one, face it. Build your desk around it.
South-facing windows are a different story entirely. Direct sun pours in for most of the day, shifting in angle and intensity by the hour. What looked like workable light at 10am becomes a blown-out disaster by noon. For Zoom specifically, south-facing windows require intervention — either sheer curtains or frosted window film to diffuse the direct sunlight into something the camera can actually work with.
East and west-facing windows are time-dependent in ways that will catch you mid-call. Morning east-facing light is beautiful and relatively soft. By mid-morning it shifts. West-facing afternoon light in late spring or summer comes in at a low, aggressive angle that can wash out half your face without warning. If you’re on a call that runs from 3pm to 4pm and you’re facing west, check your camera feed partway through — it may have changed dramatically.
Color temperature adds another variable most people ignore. Natural daylight shifts from roughly 2000K at sunrise to around 5500–6500K at midday — a range significant enough to throw off your camera’s auto white balance during a long meeting. The warm golden light of early morning that looks gorgeous in your space reads as orange-tinted on camera. Midday light is far more camera-friendly. Late afternoon slides warm again.
Practical adjustments when natural light fails:
- Sheer white curtains over a south or west-facing window transform harsh direct sun into a large, diffuse light source — the equivalent of a professional softbox.
- Frosted window film costs around $15–30 for a standard window and permanently diffuses direct sun without blocking all light.
- A dimmable desk lamp at 4000K–5000K becomes your backup when the natural light is working against you.
Takeaway: Learn which direction your primary workspace window faces, then schedule important calls for the time of day when that window provides the most consistent light — and add a sheer layer if direct sunlight is a variable.
Choosing the Right Bulb Color Temperature for a Home Office That Works on Camera
Color temperature is measured in Kelvin, and most people never think about it when they’re buying bulbs. They grab whatever’s on sale or whatever matches the existing fixtures. That’s how you end up looking sallow on camera for two years without knowing why.
The Kelvin scale runs from warm (low numbers) to cool (high numbers). Here’s what each range does to your face on video:
- Below 3000K (warm amber, candlelight territory): feels cozy and residential in the room, reads as yellow and slightly jaundiced on camera. Skin tones flatten, fine details disappear, and the overall impression is that you’re unwell.
- 3000K–4000K (warm white): serviceable, and better than most people’s current situation, but still slightly warm for camera-accurate skin rendering.
- 4000K–5000K (neutral to cool white): the sweet spot for video calls. Warm enough to avoid the clinical fluorescent look, cool enough for the camera to render skin tones accurately without a color cast.
- Above 6500K (daylight or blue-white): overcorrects in the other direction. Skin reads as pale, washed out, or slightly bluish. This is the light that makes you look like you haven’t slept.
Beyond Kelvin, there’s a second number that matters even more for how your skin actually looks on camera: CRI, or Color Rendering Index. CRI measures how accurately a light source renders colors compared to natural sunlight, on a scale from 0 to 100. Standard LED bulbs often land at CRI 80 — adequate for general room lighting, mediocre for anything where accurate color matters.
A 2022 study from Waveform Lighting found that bulbs with a CRI of 90 or above render skin tones on camera significantly more accurately than bulbs at CRI 80 or below. The difference isn’t subtle. High-CRI bulbs at the right color temperature are the single most cost-effective upgrade you can make for better Zoom appearance — a pack of quality LED bulbs with CRI 90+ and 4500K color temperature often runs $20–40 total.
Takeaway: When you’re next buying bulbs for any fixture in your workspace, look for two numbers on the box: 4000K–5000K for color temperature, and CRI 90+ for color accuracy. If the box doesn’t list a CRI, put it back.
How to Make Your Face Look Better on Zoom Without Buying Anything New
Before you open a browser tab with “best Zoom lighting” in the search bar, try this. Move your chair so that the brightest light source in the room — window, floor lamp, whatever you have — is in front of your face. Then take a 30-second recording. That single repositioning move resolves the issue for a significant number of people without any purchase whatsoever.
Repositioning is free and it usually works. I’ve seen clients move a lamp from beside their desk to in front of it and transform their Zoom appearance completely in under two minutes.
If repositioning your light isn’t quite getting there, the next step is a reflector — and you don’t need to buy one. A piece of white foam board from any craft or office supply store, propped up on the desk in front of you and slightly to the side, bounces existing light back onto the shadow side of your face. Photographers pay hundreds of dollars for professional reflectors. A $3 foam board does the same job at your desk. The difference between one-sided lighting and lighting with a reflector fill is immediately visible.
Laptop position is the third free fix and it’s underused. Most built-in webcams sit just above the screen, which means when your laptop is flat on a desk, the camera is angled slightly upward from below your face. This is not a flattering angle for anyone. Raising your laptop camera to eye level eliminates the wide-angle lens distortion that makes faces look rounder and noses appear larger — and it changes the entire composition of your frame, typically showing more of your upper body and less of your ceiling, which is almost always an improvement.
A stack of hardcover books works fine. So does a laptop riser, which runs around $20–40 and also improves your posture incidentally. Plug in an external keyboard and mouse, and the whole setup costs under $50 while solving both the camera angle problem and the reflector problem if you add foam board.
Takeaway: Before purchasing anything, reposition your light to face you, prop up a white surface in front of you as a reflector, and raise your laptop to eye level. Run a test recording. You may have already solved the problem.
The Best Lighting Setups for a Home Office by Room Constraint

Not everyone has a dedicated office with a north-facing window and freedom to rearrange furniture. Here’s how to approach home office lighting for Zoom calls based on the actual space you’re working in.
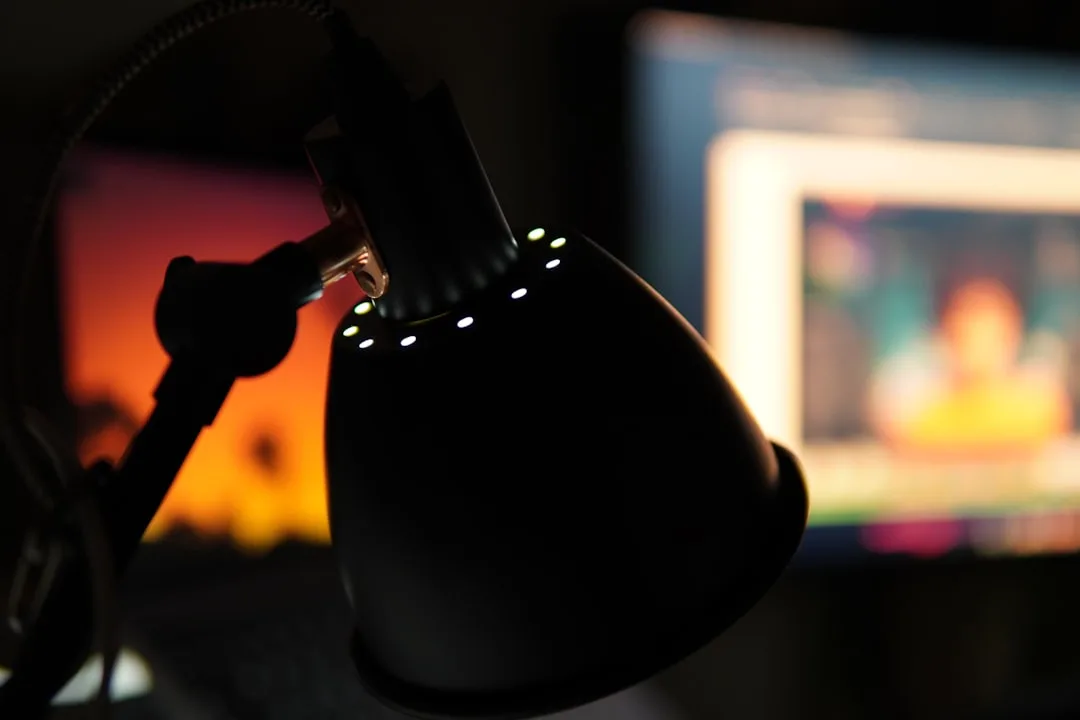
Dedicated home office with some natural light: This is the easiest situation. Position your desk facing the window, add a dimmable LED desk lamp at 4000K–5000K with a diffused shade on the opposite side to fill shadows when the natural light is insufficient, and consider adding a bias light — a soft LED strip behind your monitor, facing away from you — to reduce contrast fatigue and prevent the harsh brightness differential between your screen and the wall. The bias light doesn’t illuminate your face; it raises the ambient light level in the room, which reduces the demand on your camera’s exposure algorithm.
Windowless room or basement office: This is where you actually need to invest. Windowless rooms are completely controllable in terms of color temperature and brightness, which is an advantage — but only if you set them up intentionally. A full-spectrum LED panel on a lightweight stand positioned at face height in front of your desk, set to 4000K–4500K, is the most effective investment for this situation. Avoid cheap panels; look for ones that list both color temperature and CRI. Neewer, Elgato, and Lume Cube all make panels in the $60–150 range that are worth the money.
Shared living space or dining table setup: You need targeted, portable face lighting that doesn’t require a permanent installation. A clip-on ring light attached to your laptop screen works — but here’s what the ring light packaging won’t tell you: ring lights create a circular catchlight in the eye that is distinctly visible to other participants. It’s a telltale sign of the “I bought Zoom equipment” setup, which reads slightly staged. A small tabletop LED panel produces a rectangular or square catchlight that the camera reads as ambient window light. Less conspicuous. More natural.
Takeaway: Match your lighting solution to your actual room type rather than buying the most popular product — a ring light in a windowless room is better than nothing, but it’s not the best tool for that job.
Background Lighting: Why What’s Behind You Matters as Much as What’s on Your Face
This is the section most Zoom lighting guides skip entirely, which is a significant omission. Your background isn’t just an aesthetic concern — it directly affects how your face is exposed on camera.
Webcams use automatic exposure algorithms that average the light across the entire frame. If your background is significantly brighter than your face — a bright window, a white wall in direct sunlight, overhead fixtures behind you — the camera averages that brightness into its exposure calculation and underexposes your face accordingly. A bright window directly behind you can drop your face exposure by two or more stops. That’s the difference between looking like yourself and looking like a shadow puppet.
The target balance is specific: your background should be roughly one stop darker than your face. Bright enough that you don’t look like you’re sitting in a cave, dark enough that the camera’s exposure meter priorities you rather than the wall behind you.
Achieving this without moving your whole desk:
- A soft lamp placed just outside your frame — behind you and to the side — raises the ambient light level of your background without blowing it out. It separates you from the background visually, which portrait photographers call edge lighting.
- Turn off bright overhead fixtures behind you and rely on whatever you’ve positioned in front of you as your primary source.
- If a window is behind you and you can’t relocate, close the blinds or hang a light curtain across it to bring the background brightness down.
I had a client with a beautiful exposed-brick wall behind her desk that she was proud of and wanted on camera. The brick was being hit by a skylight directly above. On Zoom, she was a dark shape in front of a glowing orange rectangle. The solution was a sheer curtain over the skylight — five minutes and twelve dollars. She kept the brick wall, and you could actually see her face again.
Takeaway: Before your next call, check whether your background is competing with your face for exposure by running a test recording. If your background looks bright and detailed while your face looks dim, reduce the light behind you before adding light in front.
Interior Design Choices That Double as Better Zoom Backgrounds
Decor and Zoom performance are more connected than most people realize. The design choices you make about wall color, surface finish, and background objects all influence how the camera reads your space — not just how the space feels to be in.
Matte wall finishes in warm whites or soft grays are the most camera-friendly backdrop you can create. Matte finishes scatter light evenly, which means no hotspots, no visible glare, and consistent color rendering across the wall. High-gloss paint reflects light directionally, which creates bright spots and uneven color that cameras — especially the limited-dynamic-range sensors in most webcams — struggle with. If you’re choosing a paint finish for a wall that appears on camera, satin is the practical maximum; flat or matte is ideal.
Wall color matters more than most people account for. A deeply saturated wall — a rich red, a vivid green, a bold navy — bounces colored light back onto your face and creates a subtle color cast. A red wall behind you returns red light, and the camera’s white balance algorithm, already managing multiple light sources, reads that cast as part of the ambient light. The result is that your skin takes on a faint tinge of the wall color. It’s not always obvious but it accumulates.
Interior designers often reference the 60-30-10 rule when balancing color in a room — 60% dominant color, 30% secondary, 10% accent. Applied to Zoom backgrounds, this maps cleanly: keep the dominant background color neutral (warm white, soft gray, warm linen tones account for the 60%), use warm and muted accent tones for the 30%, and keep high-contrast or saturated elements — bold art, bright objects, vivid textiles — to 10% or push them outside the camera’s field of view entirely.
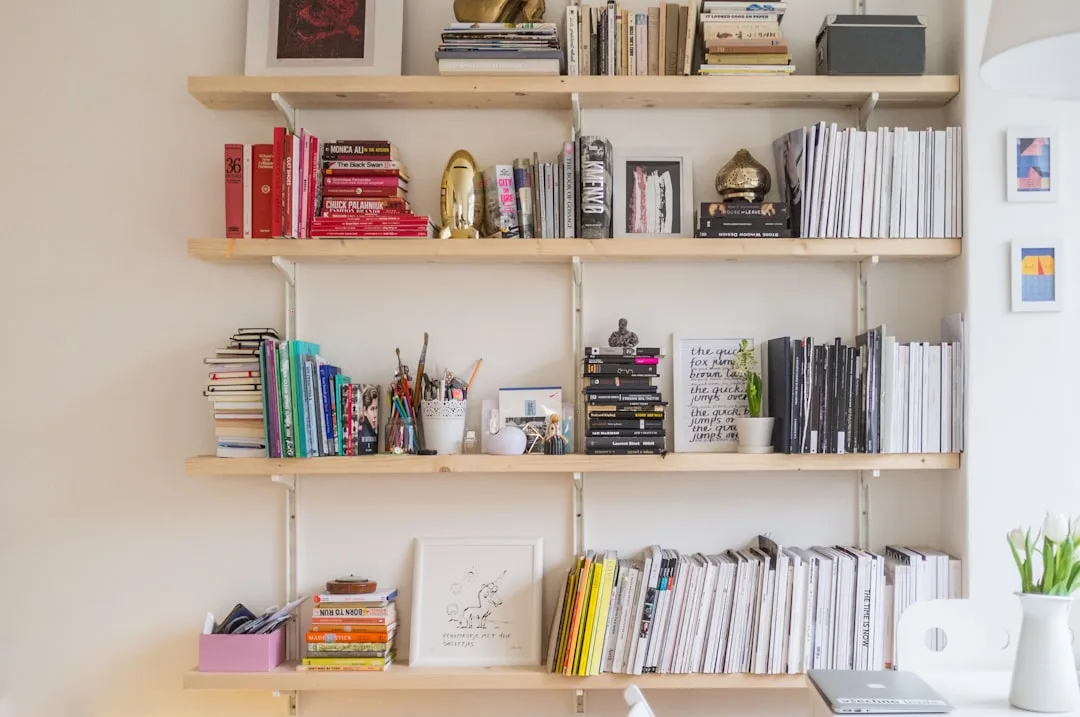
Bookshelves work exceptionally well on camera when they’re curated rather than stuffed. Books with spines in warm, varied neutral tones, plus a few objects of varying height, create visual depth and texture that reads as intentional and considered. The background looks like a real room rather than a staged set. Plants add organic shape, which the eye reads as natural and relaxed — but one or two plants in the background is different from a wall of foliage, which starts reading as chaotic.
Takeaway: If you’re making any wall or decor decision for your workspace, favor matte finishes, neutrals as the dominant tone, and backgrounds with visual depth — your Zoom call quality is part of the equation, not a separate concern.
A Practical Home Office Lighting Checklist Before Your Next Call
Run through these before any call where your appearance matters. It takes four minutes.
Light source position:
- [ ] Your primary light source — window, lamp, or panel — is in front of your face, not behind or beside you
- [ ] The light is at or slightly above eye level, not aimed downward from the ceiling
- [ ] No bright windows or fixtures are directly behind you within the camera’s frame
Background balance:
- [ ] Your background is not brighter than your face — check with a test recording
- [ ] If a window is behind you, blinds or curtains are partially or fully closed
- [ ] Any lamp or bias light behind you is soft and not competing with your face for exposure
Bulb and color accuracy:
- [ ] Lights you’re using for face illumination are 4000K–5000K color temperature
- [ ] If you know your bulb’s CRI, it’s 90 or above — if you don’t know, it’s worth checking the packaging or the manufacturer’s website
- [ ] You’re not mixing a warm lamp with cool daylight without at least closing the blinds to reduce the color temperature conflict
Camera position and test:
- [ ] Your laptop or webcam is at eye level, not angled upward from desk height
- [ ] Run a 30-second test recording and watch it back at arm’s length — this simulates how other participants actually see you, which is different from what you see in the live camera preview
- [ ] Check the recording for shadows under your eyes or chin (light is too high or behind you) and for a washed-out or gray face (your background is too bright relative to your face)
The test recording step matters more than most people realize. Your built-in webcam preview is processed and optimized to make you look better than the live feed your participants actually receive. Recording a clip and playing it back gives you an accurate read — not a flattering one. Better to find the problem in a four-minute pre-call check than to discover it two hours into a client presentation.
Frequently Asked Questions
What is the best lighting for Zoom calls?
The best lighting for Zoom calls is a diffused, front-facing light source at 4000K–5000K color temperature with a CRI of 90 or above, positioned at or slightly above eye level and roughly 45 degrees to one side. In practical terms, this means a north-facing window you’re sitting directly in front of during daylight hours, or a dimmable LED panel or desk lamp with a diffused shade when natural light isn’t available or reliable. Avoid single overhead fixtures as your only light source — they create downward shadows that cameras read harshly. The goal is a large, soft, front-facing light rather than a small, bright, directional one.
Should the light be in front or behind me for Zoom?
Always in front. Always. A light source behind you tells the camera’s auto exposure algorithm that the background is the brightest thing in the frame, and it exposes accordingly — which means your face goes dark. It doesn’t matter how much light is in the room overall. What matters is whether the dominant light source is hitting your face from in front or falling away from it from behind. If you can only make one change before a call, turn your chair or your desk until the nearest window or lamp is facing you rather than behind you. That single move resolves the most common Zoom appearance problem.
How can I make my face look better on Zoom meetings?
Start with three free adjustments before spending any money. First, reposition so your primary light source is in front of your face. Second, raise your laptop or webcam to eye level — the upward-angle shot from a laptop flat on a desk is unflattering for everyone, and fixing it also reduces the wide-angle distortion that makes facial features look disproportionate. Third, run a test recording and watch it back to see what’s actually wrong before guessing. If you want to go further without a significant purchase, a white foam board propped in front of you on the desk reflects existing light back onto the shadow side of your face. If you’re ready to buy something, a dimmable LED panel at 4000K–4500K with CRI 90+ is a better investment than a ring light for most home office situations.
What is the best lighting for a home office?
For a home office that functions well both for daily work and for video calls, the answer involves layering rather than relying on any single source. An ambient light source — ceiling fixture or floor lamp — provides general room illumination at around 4000K. A task light — dimmable desk lamp with a diffused shade — provides focused, adjustable light at face level for calls and focused work. A bias light behind your monitor reduces contrast fatigue during long screen sessions. If natural light is available, it becomes the primary source during daylight hours, supplemented by the desk lamp when the window light isn’t sufficient or is coming from the wrong angle. CRI 90+ bulbs throughout make a significant difference in how the space feels and how your face renders on camera — it’s the most underrated upgrade in most home offices.
Here is the one thing you can do right now, before you close this page: open your laptop camera, take a 30-second recording, and watch it back. Don’t look at yourself in the mirror. Don’t rely on the live preview. Watch the recording. Look at whether your face is darker than your background, whether there are shadows under your eyes, whether your skin tone has an odd cast. Then look at where your light is coming from. That’s your diagnosis. Everything in this article is the treatment — but you can’t treat a problem you haven’t correctly identified, and most people never actually look at what their colleagues see.
What is the best lighting for Zoom calls?
The best lighting for Zoom calls is a diffused, front-facing light source at 4000K–5000K color temperature with a CRI of 90 or above, positioned at or slightly above eye level and roughly 45 degrees to one side. In practical terms, this means a north-facing window you’re sitting directly in front of during daylight hours, or a dimmable LED panel or desk lamp with a diffused shade when natural light isn’t available or reliable. Avoid single overhead fixtures as your only light source — they create downward shadows that cameras read harshly. The goal is a large, soft, front-facing light rather than a small, bright, directional one.
Should the light be in front or behind me for Zoom?
Always in front. Always. A light source behind you tells the camera’s auto exposure algorithm that the background is the brightest thing in the frame, and it exposes accordingly — which means your face goes dark. It doesn’t matter how much light is in the room overall. What matters is whether the dominant light source is hitting your face from in front or falling away from it from behind. If you can only make one change before a call, turn your chair or your desk until the nearest window or lamp is facing you rather than behind you. That single move resolves the most common Zoom appearance problem.
How can I make my face look better on Zoom meetings?
Start with three free adjustments before spending any money. First, reposition so your primary light source is in front of your face. Second, raise your laptop or webcam to eye level — the upward-angle shot from a laptop flat on a desk is unflattering for everyone, and fixing it also reduces the wide-angle distortion that makes facial features look disproportionate. Third, run a test recording and watch it back to see what’s actually wrong before guessing. If you want to go further without a significant purchase, a white foam board propped in front of you on the desk reflects existing light back onto the shadow side of your face. If you’re ready to buy something, a dimmable LED panel at 4000K–4500K with CRI 90+ is a better investment than a ring light for most home office situations.
What is the best lighting for a home office?
For a home office that functions well both for daily work and for video calls, the answer involves layering rather than relying on any single source. An ambient light source — ceiling fixture or floor lamp — provides general room illumination at around 4000K. A task light — dimmable desk lamp with a diffused shade — provides focused, adjustable light at face level for calls and focused work. A bias light behind your monitor reduces contrast fatigue during long screen sessions. If natural light is available, it becomes the primary source during daylight hours, supplemented by the desk lamp when the window light isn’t sufficient or is coming from the wrong angle. CRI 90+ bulbs throughout make a significant difference in how the space feels and how your face renders on camera — it’s the most underrated upgrade in most home offices.