The kitchen renovations homeowners regret most aren’t the ones where they chose the wrong tile color — they’re the ones where a contractor poured the concrete, screwed in the cabinets, and left before anyone realized the oven door can’t fully open.
By then, you’ve spent $30,000. The permits are closed. And the fix involves either living with it or tearing out cabinetry that’s less than six months old.
These aren’t edge cases. They’re the dominant pattern in renovation regret — and almost all of them were preventable.
Why Kitchen Layout Mistakes Are So Costly to Fix After the Fact

Most home mistakes are recoverable. You can repaint a wall for $80. You can swap out a light fixture in an afternoon. You can even replace countertops without touching the bones of the room.
Layout errors are different. When a kitchen layout goes wrong, fixing it means moving plumbing, rerouting electrical, or demolishing cabinetry that cost $800 a linear foot to install. The average kitchen remodel runs between $25,000 and $50,000 — and a significant chunk of that budget is locked in place the moment your contractor walks out the door.
The financial pain is real, but the emotional sting is what catches people off guard. You spend months planning. You make hundreds of decisions. And then, about 30 to 90 days after moving back in, the problems surface. The trash can has nowhere logical to live. The refrigerator door swings into the island. The prep counter is on the opposite side of the kitchen from the stove.
According to S. Kitchen Trends Study, 35% of homeowners who remodeled their kitchens wished they had changed the layout — making it the single most common post-renovation regret category, ahead of appliance choices, cabinet finishes, and countertop materials combined.
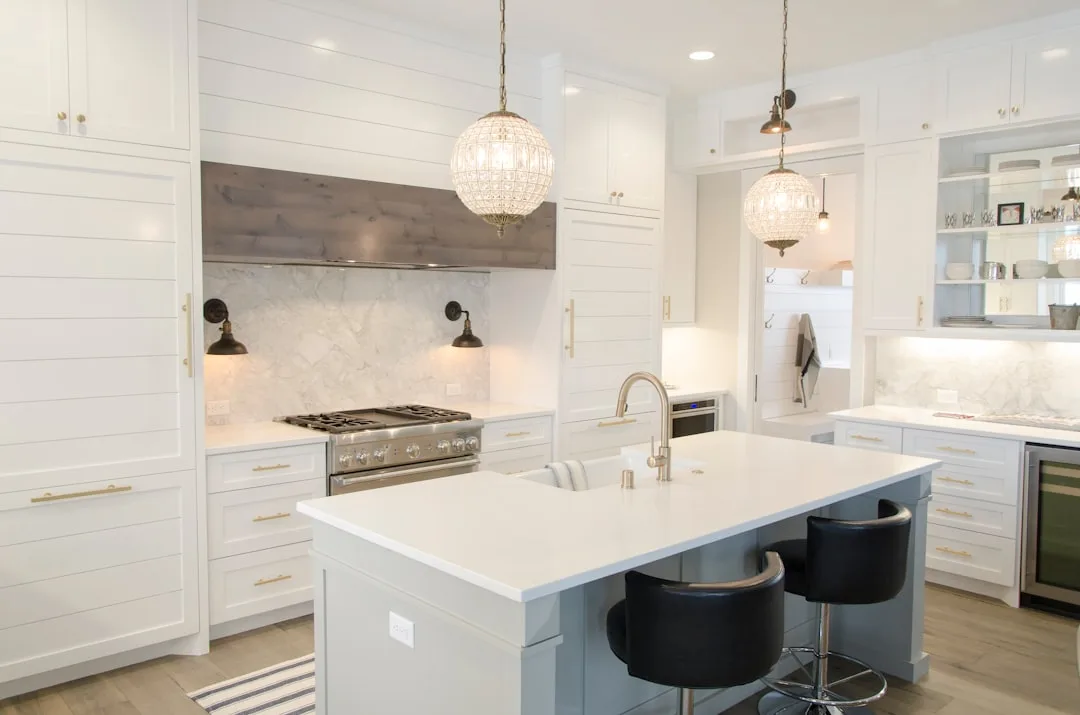
What makes this particularly frustrating is that layout decisions look invisible in renderings. A 3D design showing clean white cabinets and a gorgeous marble island won’t show you that you’ll take 47 steps just to plate a weeknight dinner. It won’t show you the shadow your own body casts across the cutting board because the lighting plan was never finished. It won’t show you the grease slowly yellowing the cabinet above your underpowered range hood.
Every section that follows covers a specific, avoidable mistake — with the measurements, products, and questions you need to catch it before the concrete is poured.
Actionable takeaway: Before signing any renovation contract, ask your designer or contractor to walk you through the layout as a process, not a picture. If they can’t describe what happens during a Tuesday night dinner — where you unload groceries, where wet dishes land, where the trash sits — the plan isn’t finished.
The Ventilation Blind Spot Designers Say Clients Almost Always Overlook
Most homeowners choose a range hood the same way they choose a faucet: they look at the finish, match it to the hardware, and move on. The CFM rating — cubic feet per minute, the actual measure of how much air the hood pulls out of your kitchen — barely registers as a consideration.
That’s a problem with real consequences.
An underpowered hood doesn’t just fail to exhaust smoke. It recirculates grease-laden air back into the kitchen, coating cabinet finishes above the range with a thin, sticky film that attracts dust and darkens over time. The cabinets that cost $1,200 each to install start looking dingy within 18 to 24 months. Multiple homeowners in r/interiordesign threads describe this exact sequence: installed a decorative flush-mount hood because it looked clean, repainted yellowed cabinets within two years, replaced the hood shortly after.
The fix that came too late would have cost $400–$1,200 upfront. The yellowed cabinets and retrofit work cost considerably more.
The professional baseline designers use: for any gas range wider than 30 inches, you need a minimum of 600 CFM with external ducting — not recirculating — as a starting point. The 400 CFM hoods prominently featured at big-box stores are technically functional for small electric cooktops. Put one over a 6-burner gas range and you’re essentially decorating your kitchen with a very expensive piece of steel.
The EPA has flagged cooking on a gas stove as a significant indoor air quality concern — studies show that cooking on a gas burner can raise indoor nitrogen dioxide levels above EPA outdoor air quality standards within minutes without adequate exhaust. This isn’t a minor aesthetic issue. It’s a health baseline.
Here are three range hood options across budget tiers that designers actually recommend:
- Broan-NuTone 634004 — insert-style, 400 CFM, $150–$200. Appropriate for electric cooktops in smaller kitchens.
- Zephyr AK9628AS — 600 CFM, external-duct compatible, $500–$700. The mid-range standard that matches most residential gas ranges.
- Fotile JQG9005 — 900 CFM wall-mount, under $1,200. Handles high-BTU professional-style ranges and exhausts at a rate that actually changes the air in the kitchen.
Note: any hood upgrade only works if the duct runs to the exterior. A recirculating setup at 900 CFM is still just blowing air through a filter and returning it to the room.
Actionable takeaway: Before finalizing your range selection, add the BTU rating of your cooktop’s highest burners and divide by 100 — that’s a rough minimum CFM target. Then add 20% for duct runs over 10 feet or with multiple elbows.
Prioritizing Cabinet Storage Volume Over Workflow Zone Logic

There’s a persistent instinct in kitchen planning to treat wall space as storage opportunity — every empty run of wall becomes a candidate for upper cabinets, every inch of floor space becomes a base cabinet. The result looks organized on paper. In practice, it creates a kitchen that works against the person cooking in it.
Experienced kitchen designers segment the space into four functional zones: prep, cook, clean, and consumables storage. Cabinet placement should serve each zone independently. A pantry cabinet belongs near the consumables zone — adjacent to the refrigerator, close to where groceries enter the kitchen. Putting it on the opposite wall because it looks symmetrical means you’re crossing the kitchen every time you reach for an ingredient.
The landing zone rule is non-negotiable in professionally designed kitchens: every major appliance — refrigerator, oven, microwave — requires a minimum 15-inch counter surface on at least one side. Cabinetry that interrupts these zones creates a kitchen where hot pans have nowhere to go, where pulling dishes from the oven requires a second person acting as a temporary table, where groceries pile on the floor because the refrigerator is flanked by cabinet towers with no counter break.
Reddit renovators consistently identify one cabinet regret above others: 24-inch deep base cabinets on every single run. The front foot of a 24-inch cabinet is accessible and useful. The back foot becomes a graveyard for appliances and serving dishes that get retrieved roughly once a year. Adding pull-out inserts after the fact — the kind that make the full depth usable — runs $150 to $400 per cabinet. Installed during the build, they’re a fraction of that cost.
A 2023 study published in Applied Ergonomics found that kitchen layouts optimized for task zoning reduced meal preparation time by an average of 18% compared to layouts organized around storage maximization. That’s not a small margin. Over the life of a kitchen used daily, it’s thousands of hours.
Here’s how to audit zone logic before finalizing a cabinet plan:
- Identify your primary prep zone — it should be within arm’s reach of the sink.
- Confirm that the cook zone (range and oven) has counter on at least one side with no cabinet interruption within 15 inches.
- Check that the clean zone (dishwasher, drying rack area, cleaning supplies) is positioned adjacent to the sink, not across the kitchen.
- Verify that consumables storage (pantry, spice drawers, dry goods) sits closer to the prep zone than to any exterior wall for visual symmetry reasons.
Free tools that make this visual: IKEA’s Kitchen Planner and RoomSketcher both allow zone-path mapping before any commitment is made.
Actionable takeaway: Ask your designer for a zone overlay drawing — a separate layer on the floor plan that shows the four functional zones and the walking paths between them. If they haven’t made one, request it before approving the cabinet layout.
Choosing the Wrong Flooring for a Kitchen’s Real Traffic and Spill Reality
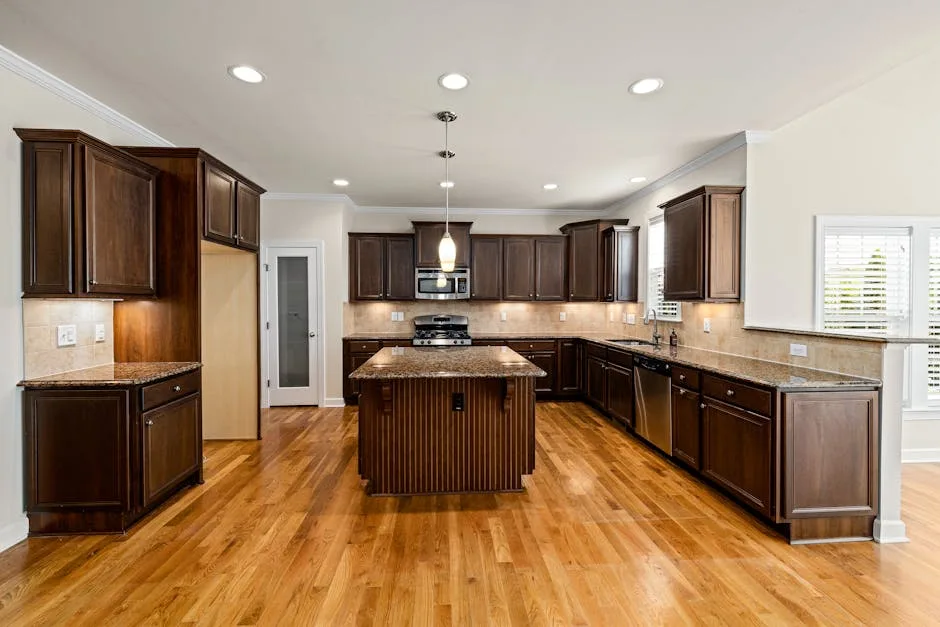
Walk into any high-end kitchen showroom and the floors are either polished marble or wide-plank hardwood. Both look extraordinary. Both are among the top materials that experienced designers steer clients away from for kitchens used daily by real humans with olive oil and cast iron.
The issue with polished marble is a combination of porosity, maintenance, and slip risk. Unsealed marble stains from acidic liquids — citrus, wine, tomato — within minutes of contact. Keeping it looking showroom-clean requires sealing every six to twelve months and an almost ceremonial level of spill response. The National Floor Safety Institute reports that kitchen floors account for approximately 12% of all home slip-and-fall accidents, with polished and wet-prone surfaces as the primary contributing factor. Many states now treat slip resistance ratings as a code-level consideration — DCOF (Dynamic Coefficient of Friction) above 0.42 is the wet-area threshold for compliant flooring, and polished marble rarely clears it.
Unsealed hardwood swells and warps from repeated water exposure. Sealed hardwood fares better but still shows dents from dropped pans and scratching from chair legs. Beautiful for a dining room. Punishing in a kitchen with a busy household.
One detail almost no competitor mentions: grout line width matters more than tile material. Narrow grout lines — anything under 1/8 inch — trap grease and food particles and require sealing every 12 months to stay clean. Large-format tiles (24×24 inches or bigger) with minimal grout lines are the designer-preferred solution because they dramatically reduce the surface area that needs maintenance.
Luxury vinyl plank is the material that r/interiordesign users who’ve lived through kitchen renovations recommend most consistently. Not because it’s the most beautiful option, but because it’s waterproof, forgiving underfoot during long cooking sessions, and genuinely difficult to destroy through normal use.
Three specific options across price points:
- Shaw Floorté Pro — LVP, $3–$5 per square foot. Waterproof core, scratch-resistant, available in realistic wood looks.
- Bedrosians Cement Tile — matte porcelain, $4–$7 per square foot. The designer choice for kitchens that need both aesthetics and practicality.
- Daltile Restore series — stone-look porcelain with published slip resistance ratings. Available at tile distributors nationwide, not just online.
Actionable takeaway: Before selecting any kitchen flooring, look up its published DCOF rating. If the manufacturer doesn’t list one, that’s your answer. Request matte or textured finishes in tile and always ask specifically about wet-area slip ratings.
Underestimating How Badly Recessed Lighting Alone Will Fail Your Kitchen
Here’s something that becomes immediately obvious the first time you cook under a recessed-only lighting plan: the light comes from above and behind you, which means your body blocks it precisely where you need it most. The cutting board sits in shadow. The stove surface is dim. The prep counter you spent $200 per linear foot on is lit just well enough to work in frustration.
Recessed ceiling cans are not a kitchen lighting plan. They’re the ambient layer of a three-layer system, and using them alone is like buying a subwoofer and calling it a speaker setup.
The three-layer framework that designers specify:
- Ambient — recessed cans or a flush ceiling fixture that establishes overall room brightness.
- Task — under-cabinet LED strips or hardwired fixtures mounted directly above counter surfaces, aimed at the work area.
- Accent — interior cabinet lighting, toe-kick LEDs, or pendant lights over an island that add depth and atmosphere.
Skipping the task layer is the most expensive mistake in this category. The Illuminating Engineering Society recommends a minimum of 50 foot-candles of task lighting on kitchen countertops — a standard that recessed ceiling cans positioned 18 to 24 inches from the wall typically cannot meet at counter level without supplemental under-cabinet sources.
The retrofit cost gap is significant. Under-cabinet lighting installed during the original build — with wiring run behind cabinets before the backsplash tile goes up — costs roughly $80 to $200 in materials and a few hours of an electrician’s time. Retrofitting after the backsplash is tiled means drilling through tile, fishing wire through finished walls, and patching around outlets. Homeowners in r/interiordesign threads describe this process repeatedly as “a nightmare” — the retrofit typically runs $400 to $900 once tile repair and additional labor are factored in.
Three under-cabinet options by commitment level:
- Legrand Adorne under-cabinet system — hardwired, fully dimmable, premium build. Best specified during the original renovation.
- Kichler Direct-Wire LED strips — mid-range, hardwired, available at most lighting distributors. The practical standard for renovations.
- Brilliant Evolution wireless puck lights — battery-powered, no wiring required. The legitimate solution for rentals or post-renovation fixes without the will or budget for tile demolition.
Actionable takeaway: When reviewing your electrical plan with your contractor, confirm that under-cabinet lighting rough-in wiring appears as a line item before the backsplash is scheduled. If it’s not on the plan, add it now. Adding it after costs five times more.
The Island Dimension Trap That Turns a Feature Into a Bottleneck
The “leave 42 to 48 inches of aisle space” advice is everywhere, and it’s not wrong — but it’s incomplete in a way that creates a very specific and common disaster.
The number you actually need isn’t about walking clearance. It’s about appliance door clearance with a person standing at the island simultaneously.
A standard dishwasher door is 24 inches deep when fully open. Add a person standing at the island across from it — roughly 18 to 20 inches of body depth — and you need 60+ inches of clear aisle just to load the dishwasher without asking someone to move. A 42-inch aisle passes code. It doesn’t pass the Tuesday-night-dinner test.
The same math applies to refrigerators. A standard 36-inch wide refrigerator door swings out to roughly 18 inches of clearance on the pull side. Position an island too close and the door partially opens, the refrigerator never fully ventilates, and you’re contorting to reach anything stored in the door rack.
NKBA guidelines specify 42 inches for single-cook kitchens and 48 inches for multi-cook households. More telling: NKBA’s internal designer research shows that 68% of kitchen layout complaints involve islands specifically — not the perimeter cabinets, not the appliance placement, not the storage. The island.
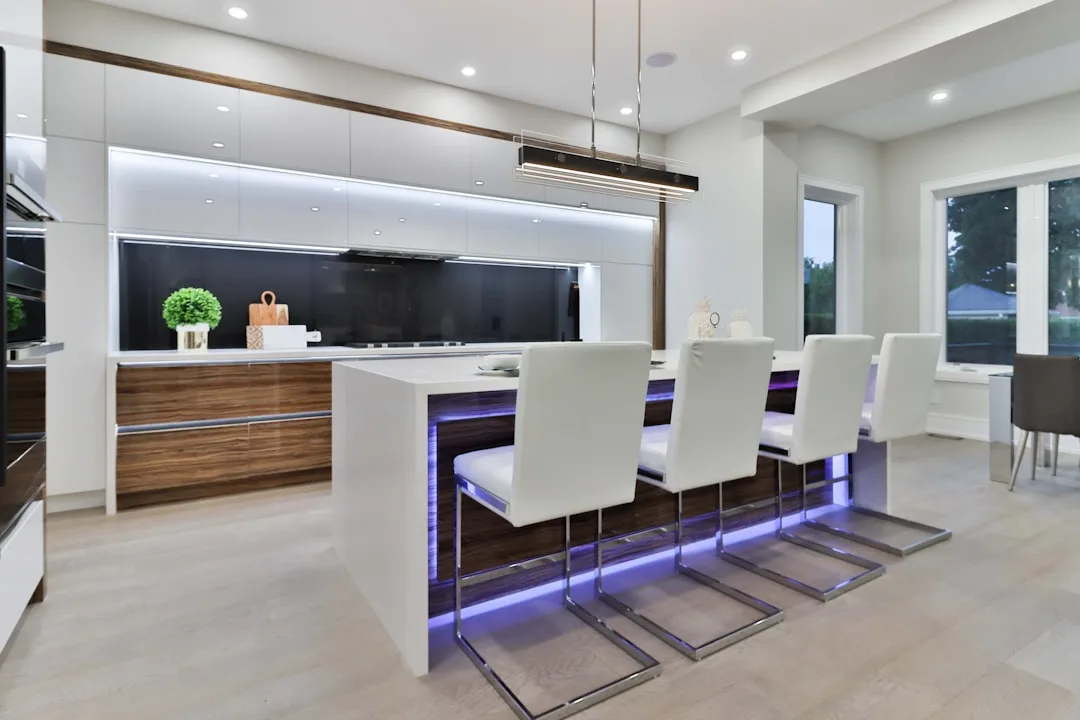
Seating overhangs are another precision detail that gets estimated and not measured. A 12-inch overhang technically fits a barstool seat. It leaves zero knee room, which means sitting at it is uncomfortable within ten minutes. Designers specify 15 to 18 inches of overhang for any island seating that’s meant to be used for meals, not just for a quick cup of coffee.
The appliance door overlay checklist before finalizing island position:
- Mark the island footprint on your existing floor with painter’s tape.
- Open your current refrigerator, oven, and dishwasher to full swing and measure the clearance remaining.
- Add 18 inches for a person standing at the island on the adjacent side.
- If any measurement falls under 42 inches, the island needs to move or shrink.
For kitchens under 150 square feet where a permanent island creates these clearance problems, a rolling butcher block cart — the Catskill Craftsmen 48-inch kitchen island or the expanded IKEA RÅSKOG setup — provides meaningful prep surface and storage with zero commitment and full flexibility.
Actionable takeaway: Get a tape measure and a roll of painter’s tape before approving any island plan. Simulate every appliance door opening fully. If it feels tight on the floor of your current kitchen, it will feel impossible in the finished one.
How to Audit Your Current Kitchen Plan Before You Commit: A Designer’s Pre-Sign-Off Checklist
All of the above becomes theoretical until you have a systematic way to check your specific plan against it. Here’s the process that NKBA-certified designers recommend — and that fewer than 20% of homeowners actually use before filing permits.
The ghost path simulation: Take painter’s tape and mark the proposed layout on your current kitchen floor at exact scale. Then simulate cooking a full dinner — not just standing at the counter, but actually opening every cabinet door, every appliance, every drawer. Walk from the refrigerator to the prep zone to the range to the sink. Do this with another person in the kitchen. Do it carrying something. The problems will announce themselves within ten minutes.
Five non-negotiable measurements to verify on the plan:
- Aisle clearance with every adjacent appliance door fully open simultaneously — not just empty aisle width.
- Counter landing zones of at least 15 inches on one side of every appliance: refrigerator, oven, microwave.
- Under-cabinet lighting rough-in wiring confirmed as a line item in the electrical plan.
- Range hood CFM matched to the BTU rating of the cooktop (cooktop BTUs ÷ 100 = minimum CFM baseline).
- Primary prep zone within arm’s reach of the sink — ideally the same counter run, not across an aisle.
Three questions to ask your designer or contractor before the permit is pulled:
- “Where does the trash go during cooking?” — A specific answer (inside the cabinet to the left of the sink, in the island base, in a pull-out behind the prep zone) indicates a finished plan. A vague answer doesn’t.
- “Where do wet dishes land after the dishwasher?” — There should be counter space immediately adjacent to the dishwasher’s open door. If there isn’t, add it.
- “Where do groceries get unpacked?” — The path from the door to the refrigerator to the pantry storage should involve the fewest possible steps and no obstacle negotiation.
Free planning tools that will change what you see:
- IKEA Kitchen Planner — free, web-based, surprisingly accurate for standard cabinet sizes. Best for getting a scaled floor plan fast.
- RoomSketcher — free tier available, allows overhead and walkthrough views. Better than IKEA’s tool for overall spatial reasoning.
- Planner 5D — 3D walkthrough capability on the free tier. The closest thing to a pre-construction VR tour without hiring a rendering firm.
If your renovation is already complete, prioritize retrofits in this order based on cost-to-impact ratio:
- Under-cabinet lighting first — highest daily impact, most accessible retrofit.
- Pull-out drawer inserts for deep base cabinets second — reclaims usable storage from inaccessible depth.
- A higher-CFM range hood third — the most expensive retrofit, but the one with the longest-term consequence if skipped.
Actionable takeaway: Print this checklist and bring it to your next contractor meeting. Ask for a written response to each of the five measurements. If the answers aren’t in the plan documents already, the plan isn’t ready to permit.
Frequently Asked Questions
What is the most common kitchen layout mistake homeowners make during a remodel?
How much aisle space do you actually need around a kitchen island?
NKBA guidelines set the minimum at 42 inches for single-cook kitchens and 48 inches for households where two people regularly cook together. But those numbers are for walking clearance only. When you account for a fully open dishwasher door (24 inches) plus a person standing at the island (roughly 18–20 inches of body depth), you need closer to 60 inches on that specific side of the island to function comfortably. For the refrigerator pull side, a standard door swings to 18 inches of clearance — map that against your island position specifically, not just as a general aisle measurement.
What kitchen design choices are hardest and most expensive to fix after construction?
In order of difficulty and cost:
- Plumbing relocation — moving a sink or adding a second one after floors and walls are closed costs $1,500–$5,000 minimum depending on how far the drain run needs to extend.
- Electrical rerouting — adding circuits, moving outlets behind tile backsplash, or running under-cabinet lighting wiring after tile work is complete involves tile demolition and wall repair.
- Cabinet removal and reconfiguration — custom cabinetry is typically built to the specific wall run; moving or resizing after installation often means replacing the entire run.
- Island repositioning — if the island includes plumbing or electrical, relocating it requires both trades and floor repair.
- Range hood upgrade requiring new ductwork — cutting a duct path through cabinets, walls, or a ceiling to reach an exterior termination point after the kitchen is finished is labor-intensive and disruptive.
Paint, hardware, lighting fixtures, and countertops are the changes that remain accessible and relatively affordable after construction — layout and utility infrastructure are not.
Do interior designers recommend open shelving or closed cabinets for most kitchens?
Most experienced designers recommend a hybrid approach rather than committing entirely to either. Open shelving works well in specific contexts: a single floating shelf above the counter for frequently used items, open display in a designated section of upper cabinets for ceramics or glassware, or a limited run in a butler’s pantry or coffee station area. What designers consistently steer clients away from is replacing all upper cabinets with open shelving — it looks clean in a staged photo and requires near-constant curation in real life. Grease and dust accumulate on open shelves faster in a kitchen than in any other room. For clients who love the look, the practical compromise is glass-front closed cabinets: the visual openness without the maintenance and without the need to keep everything perfectly styled at all times.
Start right now with the checklist in the final section. Get the painter’s tape, mark out the island on your floor, and open every appliance door. It takes 20 minutes. Fixing the mistake after construction takes $3,000 and three weeks of a contractor’s schedule.
The kitchen is the most-used room in the house and the hardest room to change after it’s built. The planning phase is the only time when every decision is still free.