The average living room contains at least two spaces that could function as a study nook — most homeowners just walk past them every day without noticing. If you’ve been searching for study nook living room ideas that actually work in real spaces, the answer is probably already inside your living room right now. That’s not a design failure. That’s a failure of framing. The problem isn’t that your living room lacks space for a study setup; it’s that you’ve been looking for a room-sized solution to what is actually a 4-square-foot problem.
Quick Answer
The average living room contains at least two spaces that could function as a study nook — most homeowners just walk past them every day without realizing it.
I spent eleven years rearranging other people’s living rooms before I started writing about them, and the pattern I kept seeing was this: homeowners either crammed a full desk into an already crowded corner and hated it within two weeks, or they decided their apartment was simply too small for a workspace and stopped trying entirely. Both responses are wrong. The spots exist. They are specific, they are underused, and most of them are already sitting inside your living room right now.
This article covers nine of them — not corners in general, not “near a window” in general, but nine actual architectural conditions that exist in real living rooms and that solve real problems when treated correctly.
The Awkward Nook Problem Most Homeowners Get Wrong
In This Article
- The Awkward Nook Problem Most Homeowners Get Wrong
- 1. Alcoves Behind Sofas: The Most Overlooked Study Nook Spot
- 2. Fireplace Flanks: Turning Dead Wall Space Into a Built-In Study Nook
- 3. Window Bays and Bump-Outs: Natural Light as a Study Tool
- 4. The Dead Zone Between the Bookcase and the Wall
- 5. Under the Stairs (When the Stairs Are In or Adjacent to the Living Room)
- 6. The Unused Corner Diagonal
- 7. The Space Beside (Not In Front Of) the TV Console
- 8. The Hallway Entrance That Opens Into the Living Room
- 9. The Reading Chair Zone Converted to a Dual-Purpose Nook

Most homeowners treat an awkward nook the way they treat a bad haircut — they try to cover it up. A plant goes in. A candle. Maybe a small console table with a basket underneath. The nook continues to do nothing except collect the anxiety of unfinished decorating decisions.
Here’s the reframe: an awkward nook is not a design problem. It is pre-built zone separation. Architecture already did the work of distinguishing that space from the rest of the room. All you have to do is assign it a purpose and outfit it accordingly. The nook doesn’t need to be disguised — it needs to be activated.
The reason corner desks and folding tables feel like a punishment is that they are installed without acknowledging what makes a workspace psychologically usable. A desk shoved into a corner with its back exposed to the main seating area doesn’t feel like a study zone; it feels like a penalty box. You sit there aware of the television behind you, aware of anyone walking through the room, aware that you are in the wrong place.
A properly set up nook solves this by using the architecture itself — the recessed wall, the angled ceiling, the narrowing space — to create a sense of enclosure. That enclosure is focus. Surveys consistently show that a large share of remote workers say they lack a dedicated workspace at home, yet the typical living room contains two or three underused recessed or alcove spaces that would qualify. The gap isn’t square footage. It’s intention.
The other mistake I see constantly: people treat the nook like a holding zone for the full desk setup they wish they had somewhere else. So they install a full-sized monitor on a 14-inch shelf, hang a calendar on the wall next to it, add a printer — and then wonder why the nook feels cluttered and wrong. A study nook has one job: give you a functional, focused surface for the work you actually do most. Start there.
Actionable takeaway: Walk through your living room and identify every wall section that recedes, angles, or sits lower than 7 feet overhead. Those are your nook candidates. Ignore furniture positions for now — you’re looking at architecture.
1. Alcoves Behind Sofas: The Most Overlooked Study Nook Spot
Nobody talks about this one. Every competitor article tells you to find a corner, and then the conversation is over. But the wall space directly behind a sofa — the stretch of wall the sofa back faces — is, in most living rooms, completely unused and already partially separated from the visual flow of the space.
A shallow wall-mounted desk shelf, 12 to 16 inches deep, installed at sofa-back height or just above it, creates a floating study zone that sits in the room without interrupting it. The sofa itself acts as a soft partition. You sit at the desk with your back to the room, which means your back is also to the television — distraction eliminated without a room divider, a curtain, or any architectural modification.
The desk depth question is the one I get asked most often in this configuration, and the answer is simpler than people expect. Twelve inches is sufficient for a laptop and a notebook — that is the functional minimum for most knowledge work. You don’t need 24 inches unless you’re running dual monitors or doing physical drafting. In narrow living rooms especially, the 12-to-16-inch wall-mounted shelf approach preserves floor space completely, since the chair tucks under the sofa when not in use.
Lighting for this zone is critical and specific:
- Swing-arm wall sconce mounted at eye height above the desk — not ceiling-mounted, not floor lamp — keeps the light focused without spilling into the main seating area
- Pendant lighting hung on a long cord directly above the desk surface works in rooms with high ceilings and adds visual weight that anchors the zone
- Avoid under-cabinet lighting strips here unless the shelf above the desk is enclosed; exposed strips create glare on laptop screens
The visual signal this sends is important. A dedicated light source says “this is a place” in a way that a bare shelf with a laptop does not. I’ve set up three of these sofa-back configurations for clients and the feedback was always the same: it felt like a separate room even though nothing was enclosed.
For seating, a backless stool or a slim task chair with a low profile keeps the zone visually open while still being ergonomically adequate for a two-to-three hour work session. Avoid full-height office chairs here — they visually compete with the sofa and break the illusion that the desk zone belongs to the room.
Storage in this configuration works best vertically. A pair of narrow floating shelves above the desk shelf — each one 8 inches deep and spaced 12 inches apart — gives you enough room for reference books, a small plant, and whatever small supplies you actually reach for without creating a wall of visual clutter.
Actionable takeaway: Measure the wall directly behind your sofa. If you have 40 or more inches of clear wall width and at least 12 inches of depth before hitting a window or doorframe, you have a sofa-back nook. Mount a shelf, add a swing-arm sconce, done.
2. Fireplace Flanks: Turning Dead Wall Space Into a Built-In Study Nook
Every fireplace in every living room I’ve ever walked into has the same problem on either side: wasted space that the homeowner either stuffed with a bookcase from a big-box store or left completely empty while complaining about lacking storage. The flanking wall panels beside a fireplace are, architecturally, the single most naturally proportioned spot in a living room for a built-in desk setup.
Here’s why. The recessed panels that flank most traditional fireplaces are typically 18 to 24 inches deep and 3 to 4 feet wide — which is, not coincidentally, exactly the profile of a functional desk nook. The fireplace already provides a visual anchor that draws the eye to the center of the wall, which means the desk built into the flank reads as part of a composed design rather than a random addition.
The material connection is everything. Matching the desk surround — the floating shelf edge, the side panels, the trim — to the fireplace mantle finish is the move that makes this look intentional rather than improvised. If the mantle is painted white with a simple ogee profile, the desk trim should be painted white with the same profile. If the mantle is stained oak, the desk surface should be stained oak. The symmetry doesn’t need to be perfect, but the material language does.
What to consider when setting up a fireplace-flank study nook:
- Heat proximity: If the fireplace is gas or wood-burning and in active use, avoid placing electronics within 18 inches of the firebox opening. The flank panel itself is fine; it’s the radiant heat projection you’re managing.
- Cord routing: Fireplace walls often have brick or stone behind the drywall, which makes in-wall cable routing difficult. Plan for surface-mounted cable channels painted to match the wall — they disappear when done correctly.
- Depth use: If the flank recess is 20 inches or deeper, you have room for a proper monitor setup, not just a laptop shelf. Use the full depth rather than floating a shallow shelf and leaving dead space behind it.
- Upper storage: Bookshelves built above the desk in the same flank panel are the classic move here, and they work. Limit them to two or three shelves with consistent, edited objects — not a dumping ground for everything that doesn’t have another home.
The fireplace-flank setup is the one configuration where spending money on a carpenter rather than doing it yourself usually pays off. The built-in look is what makes it feel like a design decision rather than a workaround, and that look requires tight tolerances. A floating shelf from a hardware store installed in a fireplace flank looks like a floating shelf from a hardware store. A built-in desk with side panels and a matching shelf above looks like the room was designed with a study nook in mind — because it was.
Actionable takeaway: Stand facing your fireplace and measure both flank panels. If either one is 36 inches or wider and 18 inches or deeper, you have the proportions for a built-in desk. Get one quote from a finish carpenter before deciding it’s out of budget — the scope is usually smaller than homeowners expect.
3. Window Bays and Bump-Outs: Natural Light as a Study Tool
Bay windows and bump-outs are the most underused architectural features in the American living room. Most homeowners fill them with a window seat, stuff the seat with throw pillows, and never actually sit there. The better use — especially for anyone serious about study nook living room ideas — is a desk surface built across the width of the bay, with the window seat functioning as the chair.
The logic is straightforward. Natural light from a north or east-facing window is the best possible lighting condition for extended focus work: consistent, non-glare, daylight-balanced. South and west exposures work too but require a sheer curtain to manage afternoon glare on screens. A desk positioned in a bay window faces the light source directly, which means your face is lit for video calls and your screen sits in shadow — the opposite of the common setup where the window is behind the desk and creates a silhouette on calls.
Bay window desk dimensions to know:
- Standard bay window seat height is 18 to 20 inches — slightly lower than a standard desk height of 29 to 30 inches, which means you’ll want either a purpose-built desk surface at the correct height or an adjustable-height cushion arrangement if using the seat as a chair
- Bay window widths typically run 48 to 72 inches — more than enough for a usable desk span, often enough for two people working side by side
- The corner sections of a bay (the angled side walls) are ideal for small shelving or monitor risers, using geometry that would otherwise go to waste
Actionable takeaway: If your living room has a bay window currently used only for a decorative seat, measure its interior width at desk height (29 to 30 inches from the floor). A custom or semi-custom desk surface cut to fit the span turns a decorative architectural feature into the best-lit workspace in the apartment.
4. The Dead Zone Between the Bookcase and the Wall
This one requires observation, not renovation. In most living rooms with a freestanding bookcase, there is a gap between the back of the bookcase and the nearest perpendicular wall — usually 6 to 18 inches, created by a doorframe, a baseboard heater, or just imprecise furniture placement. That gap is dead space. It collects dust and usually holds a single item the homeowner couldn’t find another place for.
A narrow writing desk — specifically one in the 16-to-20-inch depth range — slides into this gap and creates an enclosed three-sided study zone using existing furniture as the walls. The bookcase to your right, the wall behind you, the open room to your left — it’s a nook assembled from what’s already there.
Desks that work in this configuration:
- Scandinavian-style secretary desks with fold-down fronts — the fold-down surface extends into the room when in use, retracts flush when not, and the gap itself becomes a vertical storage column
- Narrow console desks in the 16-to-18-inch depth range — widely available, inexpensive, and purpose-built for exactly this use case
- Custom-cut butcher block or plywood shelf mounted at desk height between the bookcase side panel and the wall — the cheapest possible version and often the most seamless
Lighting in this configuration is the main challenge. The gap between bookcase and wall typically doesn’t have a ceiling fixture overhead. Solutions:
- Clip-on task lamp attached to the top shelf of the bookcase, angled down to the desk surface
- Battery-powered LED puck lights on the underside of the bookcase shelf directly above the desk — no cord management required
- Slim gooseneck lamp on the desk surface itself if depth allows
Actionable takeaway: Pull your largest freestanding bookcase 20 inches away from the wall perpendicular to it. See what the gap looks like. You may already have the nook; you just haven’t furnished it yet.
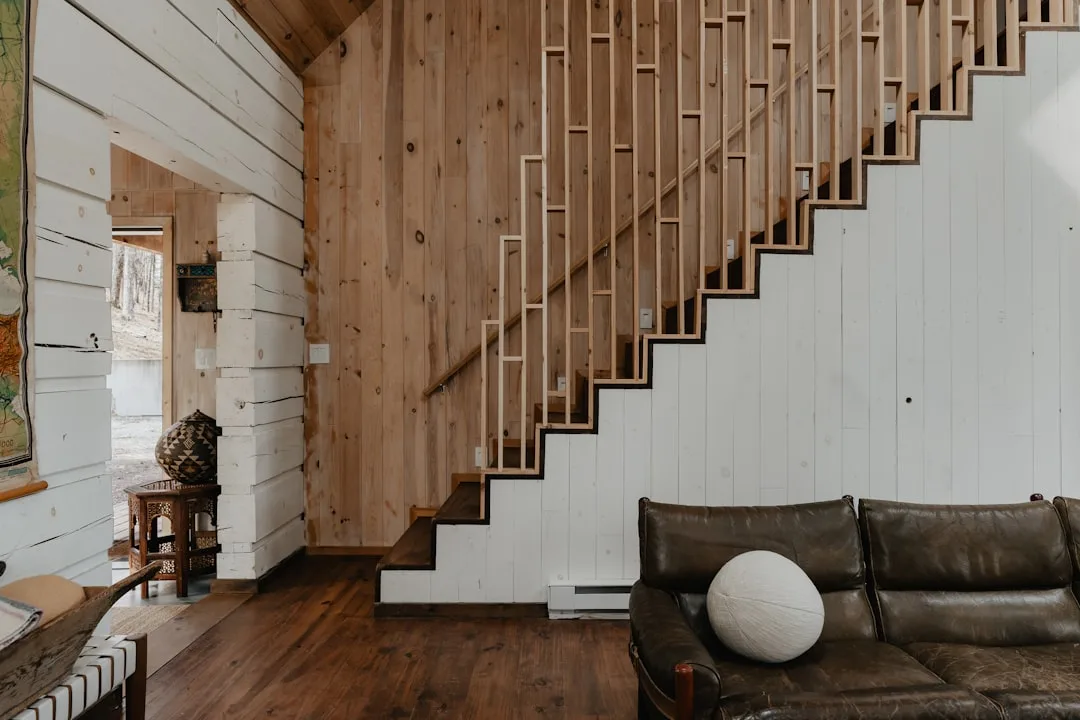
5. Under the Stairs (When the Stairs Are In or Adjacent to the Living Room)
Open-plan homes with stairs leading up from the living area almost always have a triangular void beneath the staircase that gets a coat closet on one side and a random storage zone on the other. The storage zone — the open triangle under the upper steps — is a natural study nook that requires almost no modification to function as one.
The ceiling height drops as you move further under the stair, which means positioning matters. The desk should sit at the tall end of the triangle — typically under the first three to five steps — where ceiling height is 6 feet or more. A built-in desk with a custom-cut top that follows the ceiling angle feels architectural. A freestanding desk pushed in feels temporary.
What makes the under-stair nook work:
- The angled ceiling creates automatic enclosure — you don’t need walls on three sides because the overhead geometry does the containment work
- The position is naturally semi-private from the main seating area without requiring any partition
- The structural elements of the stair (stringers, risers) can double as shelving brackets with minimal modification
What makes it fail:
- Inadequate lighting — the under-stair zone has no natural light and often no overhead fixture; a hardwired sconce or a well-placed floor lamp aimed at the desk surface is non-negotiable
- Choosing the wrong end — sitting at the low-ceiling end means crouching; always measure before placing furniture
Actionable takeaway: Measure the clear height at 29 inches from the floor (desk height) at the tall end of your under-stair space. If you have 60 inches or more of clearance there, you have a functional study nook footprint.
6. The Unused Corner Diagonal
Most living rooms have at least one corner that is never used because furniture doesn’t fit flush against a diagonal. Instead of fighting the diagonal, build with it. A triangular corner desk — custom-cut or assembled from two narrow shelves meeting at 90 degrees — uses the corner as the back of a workstation and opens toward the room at an angle.
The difference between a diagonal corner desk that works and one that doesn’t comes down to one factor: depth at the corner point. You need at least 24 inches of clear depth from the corner wall to the desk’s front edge to have a usable surface. Less than that and you’re sitting too close to the wall with no elbow room.
Corner diagonal desks work particularly well in:
- L-shaped living rooms where the interior corner is already somewhat separated from the main seating zone
- Living rooms with wainscoting or chair rail where the corner has built-in visual definition that makes a desk feel like it belongs in the zone
- Rental apartments where wall-mounting isn’t an option — a freestanding corner desk with legs is a non-permanent solution that still uses the architecture
Actionable takeaway: Stand in your least-used corner and measure 24 inches out from each wall face. If that triangle of floor space doesn’t conflict with foot traffic or door swing, you have a diagonal corner desk candidate.
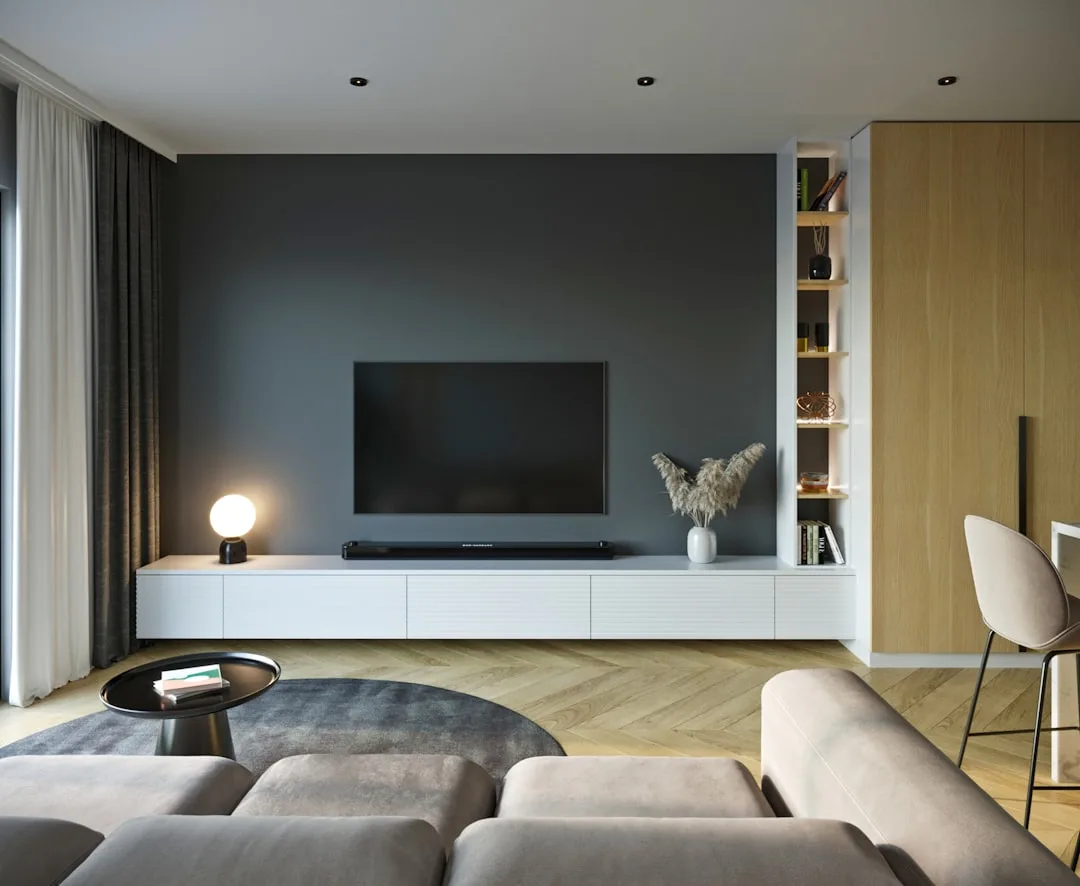
7. The Space Beside (Not In Front Of) the TV Console
The television console wall in most living rooms has 12 to 24 inches of clear floor space on one or both sides — space that exists because the TV console doesn’t span the full wall width but the wall art or gallery arrangement above it creates a visual anchor that discourages putting anything beside it. That instinct is correct for large furniture but wrong for a slim desk.
A writing desk or narrow secretary placed beside the TV console — not in front of it, but perpendicular to it or parallel with a few inches of clearance — sits in the room’s visual periphery. You work facing away from the TV. The TV wall behind you doesn’t create a distraction because you can’t see it. The console beside you creates a visual boundary that defines the zone without any additional partition.
This works best when:
- The desk’s finish references the TV console’s finish — same wood tone, same metal hardware, related color palette
- The desk is notably slimmer than the console — a 16-inch-deep desk next to a 20-inch console reads as a deliberate pairing; a 24-inch desk next to a 20-inch console reads as crowded
- The chair used at the desk is low-profile and pulls fully away from the desk when not in use — a chair left at the desk in this position creates a visual break in the TV wall composition
Actionable takeaway: Measure the clear floor space on each side of your TV console. If you have 30 inches or more of width on either side, a slim desk fits without crowding the console or the adjacent wall.
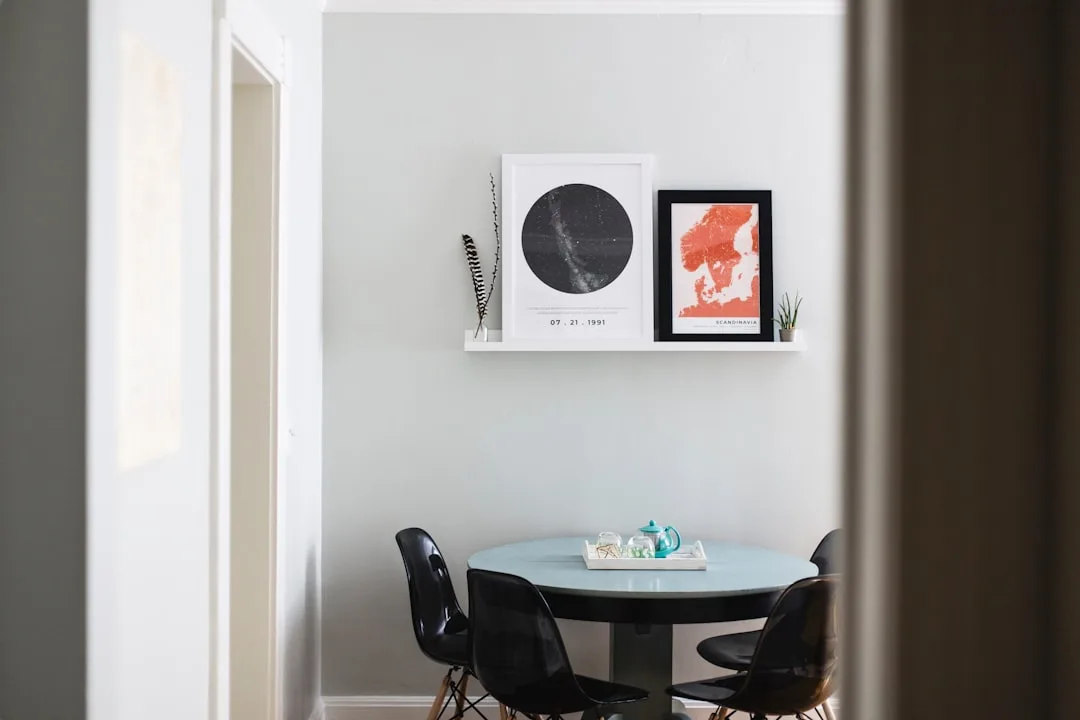
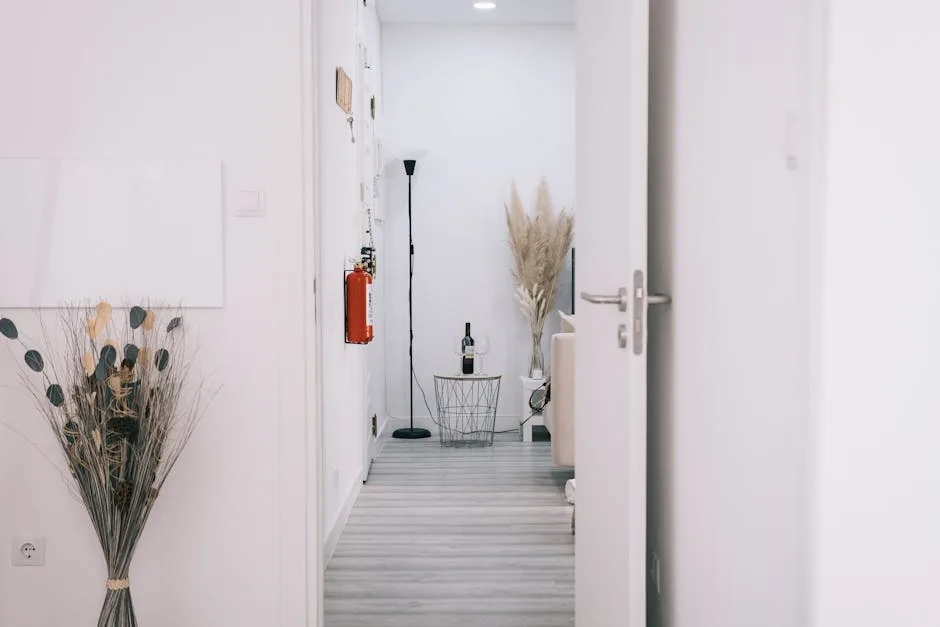
8. The Hallway Entrance That Opens Into the Living Room
In many apartments and older homes, the front door opens directly or nearly directly into the living room, with a short hallway section — 4 to 6 feet long — before the room proper begins. That hallway section has a wall on at least one side that most homeowners treat as a coat-and-key-bowl zone and nothing more.
A wall-mounted drop-leaf desk in this transition zone creates a study surface that folds completely flat when not in use. When closed, it’s a wall panel. When open, it projects 18 to 20 inches into the hallway and provides a focused, separated work surface that is technically in the living room zone but positioned at the edge of it — naturally separated from the main seating area by the transition itself.
The drop-leaf format is critical here because the hallway section cannot accommodate a permanent desk footprint without blocking circulation. The fold-flat format solves this without compromise.
What to look for in a wall-mounted drop-leaf desk for this use:
- Weight capacity: At least 50 lbs when open — lighter units flex under laptop and forearm pressure
- Bracket visibility: Recessed or fold-away brackets that don’t project visually when the desk is closed
- Surface depth: 18 inches minimum when open — 14-inch drop-leaf desks exist and are not functional for anything beyond a notepad
- Mounting height: 29 to 30 inches from floor — standard desk height, not console-table height
Actionable takeaway: Walk your entry hallway and measure the longest clear wall section that isn’t interrupted by a light switch, outlet, or door swing. If you have 30 inches of clear width, a drop-leaf desk mounts there and disappears when you’re done.
9. The Reading Chair Zone Converted to a Dual-Purpose Nook
Most living rooms have a reading chair — usually in a corner, usually with a floor lamp, usually with a small side table. It’s the most study-nook-adjacent setup that most homeowners already own, and yet almost nobody treats it as an actual work zone. The reason is the side table: a round 18-inch side table is too small and too low to function as a desk surface.
One furniture swap converts a reading chair zone into a genuine dual-purpose study nook: replace the round side table with a C-shaped side table that slides over the chair arm. C-tables — named for their bracket profile — position the surface directly over the chair’s armrest at a height you control. The laptop sits at arm height. The floor lamp already in place provides the lighting. The corner enclosure already separates you from the main room.
This is the lowest-cost, lowest-commitment study nook living room idea in this article: no mounting, no carpentry, no structural change. You’re replacing one side table with a different one. The total cost is typically under $80, and the zone converts from reading chair to work chair and back in seconds.
What makes the reading chair nook actually functional rather than just tolerable:
- The C-table surface needs to be at least 20 inches wide and 14 inches deep to hold a laptop without overhang
- The floor lamp should be positioned to light the work surface, not just the room — most floor lamps in reading zones are already positioned correctly for this
- A small tray or clipboard on the opposite armrest holds a notebook and pen without requiring another surface
- The chair itself needs to have some lumbar support — a fully enveloping lounge chair is comfortable for 20 minutes of reading but causes fatigue in a 90-minute work session
Actionable takeaway: Measure your reading chair’s armrest height. If it falls between 24 and 28 inches from the floor, a C-table will position your laptop at a usable height. Order one, try it for a week, and see whether your reading chair zone has been your study nook all along.
FAQ
Do I need to dedicate a specific room for a home study, or can a living room study nook actually work long-term?
A living room study nook works long-term when it has three things: a fixed surface you don’t have to set up and break down each day, a dedicated light source, and a clear visual boundary — even a partial one — that separates it from the main seating zone. The homeowners I’ve seen fail with living room nooks almost always skipped at least one of these. The ones who succeeded treated the nook as a permanent zone, not a temporary solution.
How do I keep the study nook from making the whole living room feel like an office?
The material choices matter more than the size. A desk that shares a finish or color with the other furniture in the room reads as part of the room, not an intrusion into it. Keep office supplies off the desk surface when you’re not working — a drawer, a box, or a shelf above the desk stores everything out of sight. The goal is a surface that reads as a design element when not in use, not a desk that reads as an office desk that happens to be in your living room.
What’s the minimum square footage needed to add a study nook to a living room?
The functional minimum is 4 square feet of floor space: roughly 2 feet wide by 2 feet deep for a wall-mounted desk setup with a stool that slides under the desk or sofa when not in use. In practice, 6 to 8 square feet is more comfortable and allows for a slim task chair. The wall-mounted drop-leaf and sofa-back shelf configurations in this article require zero permanent floor space — they exist only when you’re actively using them.
How do I manage noise and distraction when working in a living room study nook, especially with other people in the space?
Positioning is the primary answer — sitting with your back to the room and its television eliminates the most common visual distraction. For audio, noise-canceling headphones solve most problems that positioning doesn’t. For households with children or frequent background noise, a small white noise speaker on the desk surface reduces the cognitive load of filtering ambient sound. These are behavioral and equipment solutions; no amount of nook design eliminates the need for household norms around work time.
Can I set up a study nook in a living room I’m renting, without making permanent changes?
Yes, and several of the nine options in this article require no wall mounting at all: the reading chair C-table setup, the bookcase-gap secretary desk, the diagonal corner desk with legs, and the TV-console adjacent writing desk all work without any modification to the walls. For the wall-mounted configurations, removable adhesive mounting systems rated for 30 to 50 lbs have improved significantly and work on most painted drywall surfaces without damaging the wall when removed correctly. Check your lease for the specific terms — most standard residential leases prohibit permanent alterations but are silent on removable mounting systems.