Blog

  • 4 Reasons Why You Should Install Glass Doors inside Your House

    4 Reasons Why You Should Install Glass Doors inside Your House

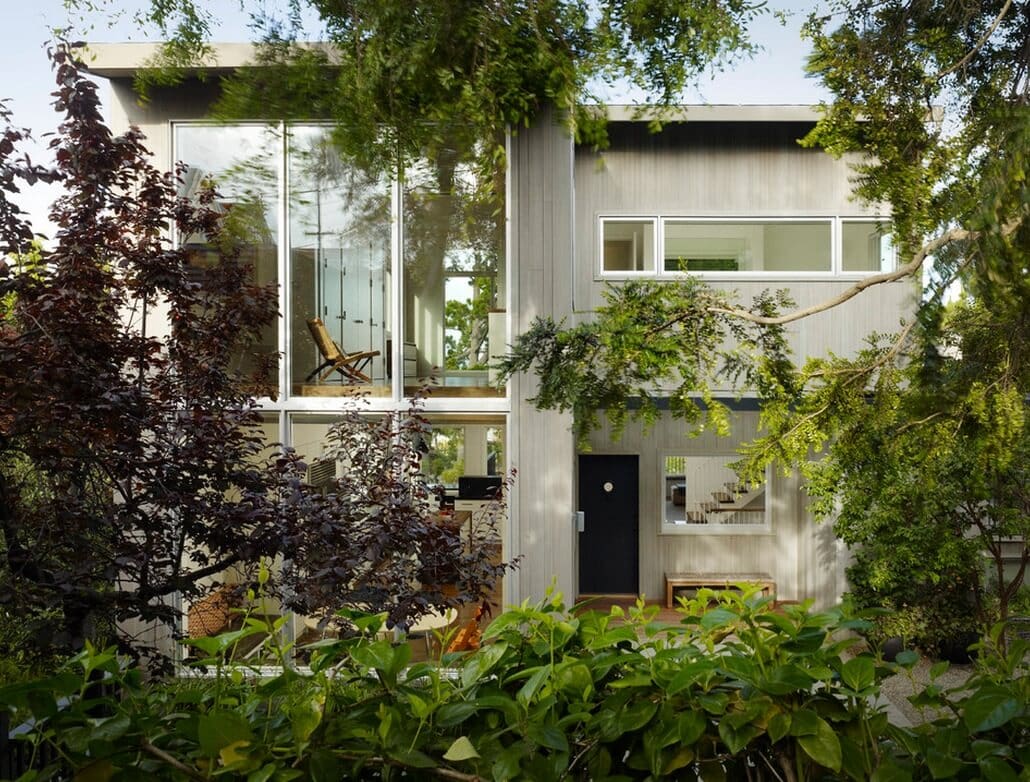
    Like every other thing, the trends in interior designing and architecture are also getting changed and perhaps these drifts are becoming faster with ever-increasing technological developments.  Earlier, people preferred to have heavy-wooden doors all inside their houses but now the trends are being shifted as now people prefer to choose glass doors for various reasons. Most of the modern house designs in Pakistan are prepared while keeping latest interior designing and architectural trends, where using glass doors is common.

    West Marina Block is another great opportunity for modern investors, where may customize the interior design of homes.

    Here are the following four reasons for which people are more inclined towards using glass doors inside their houses.9.001

    1. Maximum Natural Light Entrance

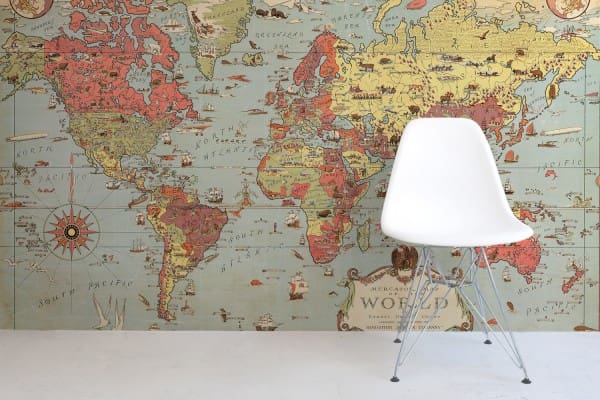
    The glass doors inside a house serve as best wall replacements as these gliding entrances allow maximum light to pass through ultimately making all the interior bright. The brighter is your house from inside, the lower are your utility bills because you don’t need to keep your lights on, all the time. You may not want to have light inside all your room, especially your bedroom all the time; therefore, hanging curtains can make your work easier. Spread the curtains, when you want to rest or sleep. The other major advantage of light entrance inside your house is healthy indoor environment. Light passage keeps the inside fresher and bright especially in the winters, when you really need the sunshine.
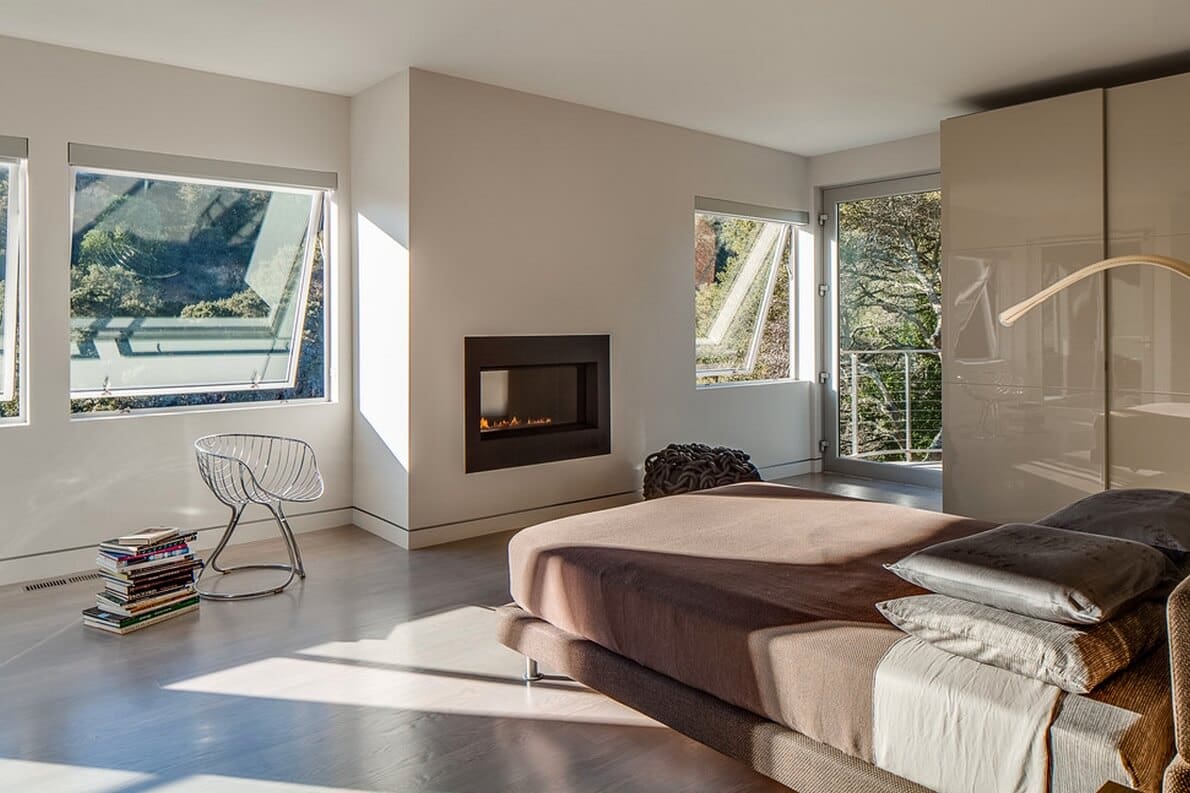
    1. Outside View

    Glass doors allow you to have a clear view of the outside, especially of your lawn, where you can keep an eye on your kids. Even sometimes to enjoy the outside weather while sitting inside becomes easier if the barrier between the two areas is transparent. Glass doors never disturb your privacy because these are best sound barriers allowing no sound in or outside of an area, provided it is not too high.

    1. Create More Spacious Feel

    Allowing natural light to pass through, glass doors help creating more spacious feel inside a house. A brighter area naturally gives a more spacious feel and another reason for which these doors help adding extra space in an area is their minimum thickness. As compared to traditional wooden doors, glass doors are far thinner, which cover minimum area and provide maximum space. Therefore, you can use mirror doors in the areas, where there are more concerns of space availability. Moreover, in a sunroom (a latest addition in residential building), using glass door is necessary to allow maximum light passage.
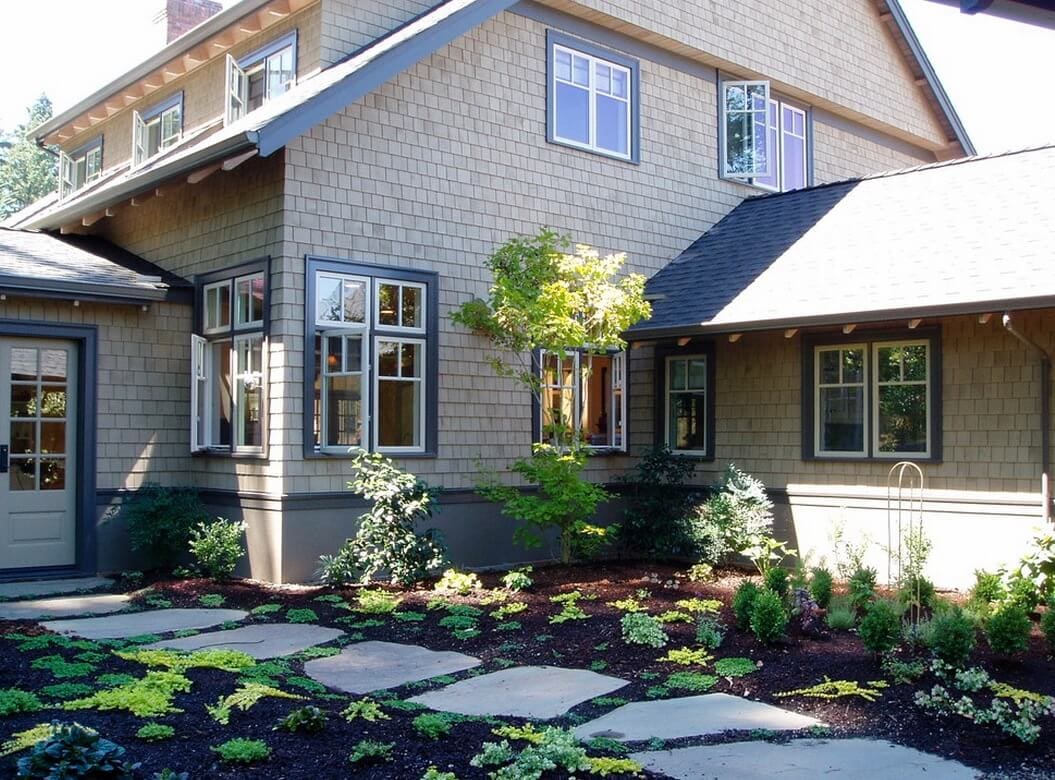
    1. Adds Style

    Undoubtedly, whatever we choose for our house construction or interior, is chosen while keeping the functionality above all but another factor which plays a significant role in making a final decision is the trend. The trend-savvy people like to adopt every new change just to make their life-style up-to-dated. For the past few years, there is seen a tremendous increase in the use of mirrored doors equally in residential and commercial buildings. A house or a building with a mirrored doors, gives a chic and luxurious feel and even mirror is also used as a separation wall in connected areas inside a house.

    Author Bio:

    Nabeel Abbas is an experienced author, having more than 9 years of experience under his belt, is currently contributing as a senior author for Amir Adnan Associates (http://www.ameradnan.com).

  • How to Build a Laundry Room

    How to Build a Laundry Room

    Many handymen and women have the knowledge and skill to complete home renovations with ease, a laundry room is no exception for those with expertise in plumbing and electrical work. The major projects include the plumbing for portable washing machine and sink components, and installing a vent for the dryer. The most important thing to note are the building codes and safety components associated with the job.

    This blog will walk you through the basics of laundry room installation and provide a list of needed materials to get started. Follow along before tackling it on your own!

    For a total list of tools and materials, click here!

    After getting up to speed on codes and regulations, some prep work is necessary prior to assembly. First, you want to ensure that the area is emptied out and cleaned up. Appropriate flooring should be installed or updated to ensure water resistance and load bearing. Next, inspect water lines and potential paths for electrical, plumbing, and ventilation. Once you know the space allowance and available pathways, measure your potential washer and dryer units to make sure they will fit. Check floor, wall, and ceiling clearance and mark necessary spaces for rough in.

    Next, map out and dry fit all pipe runs. Horizontal pipes should slope toward drain line of ¼” per running foot. You want to mark where the existing drain lines are, so you can make all necessary fittings for washer, sink drain, and vent lines prior to cutting. Afterwards, you will prime, glue, and assemble parts of the pipe run. Remember to include a p-trap for sink and washer!

    Before running the hot and cold water to the washer and sink, shut off the main supply. Choose the space that’s midway between your washer and sink and install tee fitting for each pipe. Additional hardware will be needed for finishing. Then, run your water supply to the washing machine box and shut off the valve.

    For the dryer, you will need to install a 120/240V 4 prong wall outlet. Make sure to identify the requirements of your specific model and determine the length of electrical cable you need. You can then begin forming the connection between the dryer and electrical panel. You will need to designate a new breaker for the machine as well. Ensure power is off during all wiring for safety.

    Your washer will require a GFCI receptacle for the electrical. The wiring is similar with the added benefit of a safety shut off in case the line shorts. Be sure to measure the length of the cord and wiring to install appropriately.

    To ensure the proper transport of heat and moisture to the outside, in-house designers and  consultants will suggest you install the dryer vent next. Plan your dryer ventilation path and select non-combustible, non-corrosive metals for use. Strive for a direct path to the exterior of your home. In addition, it will need to exit a foot from the ground to prevent obstruction. Don’t forget about the exterior flapper, which will allow for proper airflow and prevent anything from entering your home at the site.

    Now that your wiring, piping, and plumbing is complete, you can add the finishing touches like drywall, flooring, and a fresh coat of paint!

    Once the finishing have set, place the washing machine in its space and attach the drain hose to the stand pipe, hot and cold water lines to the stop valves, and check for water flow. Repeat the process by placing the dryer in its place, connect the dryer outlet via metal elbow, and attach it to the ventilation system.

    Finally, position your sink and any cabinets. Attach water lines and shut off valves.

    When you are finished, check to see that everything is functional. Make sure to do a test load of laundry while you are home to watch for any errors that could cause flooding or fires. Remember, if anything becomes too complex to call a professional! It’s better to do the job right the first time!

    Author Bio

    Margaret Perron is an appliance repair do-it-yourselfer, home solutions enthusiast and a home maker. With over 10 years experience in the home improvement business she is well suited to advise you on the best solution for identifying and locating the best home services in your area. You can follow her at Google+.

  • 4 Spring Updates for Your Home Decor

    4 Spring Updates for Your Home Decor

    The spring cleaning is not the only way, in which you can improve your home. With a couple of simple home improvements, you can completely transform your living space. After the tiring cleaning chores, it’s time for some re – decoration.

    4 Spring Updates For Your Home Decor1
    Add Accents
    The secret to every good design is the focal point. Details with a strong statement will add a bit of life to your living space. You have infinite amount of choice – from cheap printed wall artwork to paintings and accessories. It depends on your budget. You can also purchase a couple of colourful throw pillows for your couch. Consider using white accents. They will brighten the space immediately.
    If you don’t want to invest in new items or if your home is already cluttered with art, you can move around your possessions. With time you get used to the specific look. Spice up the interior by replacing or even removing some of the things. De – cluttering and spring cleaning will bring you sense of organization and freedom, without costing you nothing.

    4 Spring Updates For Your Home Decor2
    Get Crafty
    If you are a DIY enthusiast, then roll up your sleeves make some new additions to your decor. Open shelving is a chic way to creatively display some your gorgeous possessions. Cover the back section of the shelving with an interesting wall paper. It will not take a lot of time or effort.
    If you want something more challenging, you can breathe a new life into your old appliances. Get your antique furniture and apply a layer of white paint. For the kitchen cabinets, you can use pastel or creamy tones.
    Bring Some Spring Colours
    You don’t need to repaint your entire walls. If you still have in mind to do it, pick neutral or earthy tones such as white, grey and blue. Think what will work best for the particular area. If you don’t plan any major renovations, energize your home with some typical spring shades. Yellow is strongly associated with this season. Ply with this bright colour by placing couple of lemons in a plain white bowl. You can use them as both accessories and for your juice. Green is another classic spring colour. Fill the empty corners of your home with beautiful plants that will bring nature closer to you.
    Make It Airy and Light
    Say goodbye to the dull and dark winter days. Let the spring sun come to your home. Remove the heavy draperies and switch them with sheer fabrics such as lace. You don’t need to spend a lot of money on expensive materials. You can find interesting pieces in the local flea market. These vintage details will give a romantic sense into your interior in accordance with the lovely season.
    Don’t forget that apart from your eyes, you have other four senses. Make the interior enjoyable for all of them. Ventilate the indoors air by opening the windows. Set a soothing atmosphere with a pleasant aroma. You can invest in a candle or an air freshener, but simply adding a vase with sweet – scented flowers is enough. Check this site for more Tips for Carpet Cleaning in Fulham.

  • An educational, cool and stunning way to decorate your child’s room

    An educational, cool and stunning way to decorate your child’s room

    Choosing a decorating style for your child’s room can be tough but if you get it right incredibly rewarding for both you and your little loved one. In an ideal world, you want the room you design to be educational, fun and aesthetically stunning. You want to create a room that your child can live, love and learn in all under the same roof.CID 16.10.14 233

    One way to do this is to bring the world to your child’s fingertips using world map wallpaper. In these shots below of a blue political map, the aim was to create a ‘stunning feature wall that kept in with the existing colour scheme yet induced wonder and awe as well as being educational’. We think they have managed to achieve this superbly.

    CID 16.10.14 232

    The map in question here was of a more serious nature. As you can see by the other pictures in this article, other world map designs, while still educational, focus a lot more on fun. These more playful designs feature animals, patterns,  bold colours and world landmarks, all designed to appeal to a child’s eye.Kids-Map-Colourway-Two

    A great idea to consider

    If you do choose to use world map wallpaper to decorate your child’s room, the journey doesn’t have to stop there. You could even make the child’s wallpaper an ongoing project by attaching little cards to your world paper that highlight where your family has been on holiday, where you would like to go or places that have a special meaning to your family.Kids-Landmark-Light

    This way, you can use your world map wallpaper to breathe life into your little one’s room and create a design theme that not only educates to will involve your child, bring your family together and have them staring back at the world in wide eyed wonder.Kids-Vintage

    Also, the customisable nature of these maps means that if you supply your area code, whoever produces your wallpaper can make a customised map of the geographical area that suits. As well as being super cool for a kid, this means you could even customise your wallpaper with tags marking where your friends and loved ones live.


  • 2015’s Top 5 Furniture Trends: From Contrast to Minimalism

    2015’s Top 5 Furniture Trends: From Contrast to Minimalism

    If there’s one word that describes 2015’s top furniture trends, it’s “reinvention.” This year’s trends blend new looks with classic styles that have come back after decades in the shadows.

    From stylish classic armchairs and sofas, complete with floral and paisley patterns, to minimalistic bedroom furniture, 2015’s top styles are a mix of new and old looks with some serious doses of colour thrown in.

    jory-brigham-furniture-Trend

    To make sense of the year’s hottest styles and biggest furniture trends, we spoke to the experts at AHF Furniture. They’ve provided what they believe will be 2015’s top five furniture trends to help you decorate your home for the coming year.

    Contrast walls

    Contrast is always the key to a great looking interior. While most interior designers have aimed for contrast between a room’s flooring and its furniture, one of the best design trends of 2014 has been contrast walls.

    A contrast wall is a wall that’s painted a different colour from the rest of the room – a stylish point of visual contrast that adds style and depth to a space. Contrast walls look particularly eye-catching and effective in the bedroom.

    Paired with white furniture (or, alternatively, light natural wood furniture) there’s nothing that commands attention like a contrast wall. A must for modern bedrooms, home offices and living spaces.

    Floral furniture

    After several decades away from interior magazines, floral furniture is back. This time, it appears to be here to stay, with floral and paisley prints appearing on the year’s hottest sofas, armchairs and bench seats.

    Today’s floral furniture effortlessly blends the classic style of early 20th century floral prints with the sharp lines and simplicity of today’s sofas and other living room furniture.

    Equally suitable for a modern home as it is in a classic living environment, we see floral furniture hitting its stride in 2015. Bring a touch of this classic style to your living room with a floral print armchair – it will definitely start conversations.

    Solid colours

    After years of leather sofas catching people’s attention, solid-coloured fabric sofas and other living room furniture are on the way back in. Fabric sofas are back for a variety of reasons, but the biggest is their sheer versatility.

    Unlike leather furniture, which looks best in classic living areas with warm colour schemes, solid-coloured fabric furniture can blend in alongside classic furniture or in an ultra-modern living space.

    Solid-coloured sofas and armchairs are also amazingly easy to customise. With an upholstery modification, you can transform a classic sofa into an eye-catching item for your modern living room.

    Painted oak

    Just like versatility rules the living room, it’s also ruling the dining room. Unlike the glass tables and other ultra-modern dining room furniture that was at its peak over the last few years, 2015’s finest dining room furniture is 100% natural.

    Oak is the material of choice and, available in a wide range of different colours, it’s a great choice for any dining room. Painted oak tables, chairs, sideboards and cabinets are catching on due to their incredible aesthetic versatility.

    At home in modern, classic and mid-century dining rooms, painted oak fits into its surroundings like few other materials. This aesthetic versatility – in addition to the great durability of oak – makes it a wonderful choice for any home dining room.

     Minimalist bedrooms

    Has minimalism ever gone out of style? Lovers of all things simple yet stylish will be happy to see that minimalistic bedrooms, which have always been a favourite, are a major furniture trend for 2015.

    Our personal pick is white gloss furniture, which is ideal for furnishing both master and guest bedrooms. Bright white and perfectly matched with any colour scheme, it suits every type of bedroom environment, from cosy apartments to family homes.

    Match high gloss white furniture with a contrast wall – our first interior design and furniture trend of the year – for the ultimate master bedroom, children’s bedroom or home office.

    Which of 2015’s trends do you think have staying power?

    Trends come and go, especially in the world of interior design. From floral patterned sofas to minimalistic bedrooms, which of 2015’s interior design and furniture trends do you think have the most staying power?

  • Pros and Cons of Wooden Flooring in Your Bathroom

    Pros and Cons of Wooden Flooring in Your Bathroom

    Using wooden flooring throughout a home is a no-brainer for many homeowners.  The look and feel just add an element no other material can match, but issues can arise when wooden flooring is suggested for the bathroom.

    You’ll find arguments on both sides of the coin when it comes to wooden flooring in the bathroom.  Your job is to carefully weigh your options and go over the pros and cons so you can make an educated choice.

    Wooden_Flooring

    Wood Flooring Options

    If you are considering using wood for your bathroom flooring, it’s a good idea to get a handle on your options before you decide.  For the most part, using softer woods like pine and fir is frowned upon, because they have a tendency to absorb moisture, which bathrooms produce a lot of.  Some hardwood options you may want to consider include oak, cedar, teak, maple, cherry, walnut, hickory and ash.

    Wood Flooring Pros

    Some of the pros of having wooden flooring in your bathroom here are the same as having it in any other room of your house.  You’ll be barefoot a lot of the time in the bathroom, and a wood floor is usually warmer and more comforting than tile.  The colour of a wood floor is also more inviting than the relative coldness of tile.

    The look of wooden flooring in your bathroom can’t really be matched by any other material.  Just as wood floors look beautiful in the rest of the house, they also look beautiful in the bathroom.  Every plank of a hardwood floor tends to have its own personality, making you feel at one with nature.  Wood floors are also on their own when it comes to interior design, as they don’t follow the trends and whims of the industry.

    Wood Flooring Cons

    Most of the cons that are part of having wooden flooring in your bathroom deal with the moisture aspect.  Wood will expand and plump and warp, and if you don’t apply a quality coating or finish to it after installation, you may be in for trouble.

    If you nail your hardwood planks to the subfloor, there will be holes in the moisture barrier underneath, which will allow moisture to seep down inside when water inevitably splashes on the floor’s surface.  Using adhesives or click together wooden floors is a better way to go to prevent moisture issues.

    Mold and mildew are also one of the cons of wood flooring, and the likelihood is much higher because of the humidity level inside the standard bathroom.  As you probably know, mold creates odours that are unpleasant and can also create serious health issues for members of your household.

    Check Your Warranty

    If you’re intent on using wooden flooring in your bathroom, check the warranty to see if it still applies for a  bathroom installation that requires quality bathroom accessories.  With some brands and styles, the warrant is voided if you install it in an environment where high moisture and humidity exist, like a bathroom exhaust fans with light and heater.

    Make sure you use bath mats where possible, clean up spills as soon as possible and use a finish that repels water and keeps your floor safe.

    Author Bio

    Margaret Perron is an appliance repair do-it-yourselfer, home solutions enthusiast and a home maker. With over 10 years experience in the home improvement business she is well suited to advise you on the best solution for identifying and locating the best home services in your area. You can follow her at Google+.

  • DIY Stone Backsplash

    DIY Stone Backsplash

    It might only cover a narrow strip of your kitchen walls, but your backsplash can have a really big effect on the overall feel and character of your kitchen.

    DIY_Stone

    If you’re getting tired of plain old drywall, then there are a lot of great stone tile options that can really spruce up the feel of your kitchen. Plus, the installation might be easier than you think!

    1. Planning the Layout – Before you start sealing anything in place, you should plan how the stone tiles will be laid out. Depending on the size and shape of the stone tiles you chose, you might want to take extra care in ensuring level and symmetrical rows. This step envisages the need of good kitchen planning beforehand.

    This is more important with broad square tiles because any unevenness or asymmetry will be more noticeable. If your stone tiles are much smaller or don’t have uniform shape, then you probably don’t need to worry as much about maintaining strict symmetry.

    Start by holding one tile on the top of the counter against the wall. Using a level, trace a straight horizontal line from that point all along the wall above the counter. Some counters might not be completely level. If this is the case with yours, start at the lowest point.

    From that starting point, each successive tile will need to be trimmed on the bottom to maintain the level line on top.

    For finding symmetry, measure the lengths of the counters and mark the middle points on the wall. Test out different ways of arranging the tiles from this midpoint. You can either line up a seam on the middle or centre a tile on that point. It is a good idea to choose the arrangement that leaves you with larger or complete tiles on the ends, instead of narrowly cut ones.

    1. Applying the stone tiles – Roughen the surface of the wall with medium grit sandpaper. This will help the adhesive and stone tiles stick better. Start by applying stone tile adhesive to the wall with a notched trowel. Work from the centre outwards and work in sections. Each section should take about 10 minutes to finish tiling, so adjust the size as necessary. 

    As you start placing the tiles, don’t forget to use spacers in between them. If there are any electrical outlets in the area that will be tiled, you will need to cut out spaces in the corresponding tiles.

    Once in a while, take a step back or use your level to make sure that the rows and columns are staying level.

    1. Applying the grout – Wait for the adhesive to set before beginning the grout. If you are using a particularly porous or absorbent variety of stone, you should pre-wet the tiles before applying the grout. Otherwise, the stone will suck the moisture from the grout mixture too quickly and some grout may get stuck to the surfaces.

    Take out the spacers and carefully apply the grout along every seam, making sure that all the gaps are filled. Use a rubber grout float.

    After a few minutes, it is time to remove any excess grout. With a slightly damp sponge, wipe across the seams at a 45 degree angle. Wipe again about 20 minutes later to make sure no grout haze remains.

    Once everything has dried, you can apply your stone sealant. Some very porous stone varieties need repeat applications of sealant in the future to protect against stains.

    Author BioMargaret Perron

    Margaret Perron is an appliance repair do-it-yourselfer, home solutions enthusiast and a home maker. With over 10 years experience in the home improvement business she is well suited to advise you on the best solution for identifying and locating the best home services in your area. You can follow her at Google+.


  • Choosing the Right Window Style for your Home

    Choosing the Right Window Style for your Home

    The windows in our home help define its look and feel. Picking the right style of windows is one of the under appreciated decisions when it comes to home design or renovations. Not only are the right kind of windows the best way to bring in outside light and views into your home, one should also know how important they are when it comes to security and safety. So pick windows the right way using the following tips:

    style_your_home1

    The Windows’ Purpose

    Remember, windows do more than just simply let light in. They can also act as sliding glass doors, such as a porch window that opens up to the balcony, or serve more decorative purposes. So take stock of the room the windows are going to be placed in and what kind of result you’re looking for when it comes to light levels and access.

    Consider the Interior Appeal

    The look of our windows from outside the house is important, but how they appear from inside matters too. The interior style goes a long way to contributing to the experience inside your living space. In certain rooms such as bathrooms, you’ll want windows that draw in light but don’t offer views from the outdoors. While it comes to living room windows, you should consider if the room would work with large picture windows or ones of different shapes and sizes instead.

    Matching Styles Matching_Styles2

    IMAGE SOURCE

    Your home follows a certain architectural style and your windows should too. Step number one when it comes to picking windows is selecting those that are in line with your home’s architecture. If you live in a contemporary home, consider floor to ceiling windows- diamond shaped ones may be the most aesthetically pleasing for a modern look.

    Think Color Think_Color3

    IMAGE SOURCE

    Windows, of course, come in one colour – clear glass, but that doesn’t mean the window area can’t have some colour. Window frames and mullions come in a variety of colours these days, adding a pleasant flourish to the window and our homes. Some wood and metal frames come pre-painted, but you can also have a professional painter paint over exiting window frames and mullions.

    Ventilation Matters

    Windows also have a role in our home’s ventilation – letting in fresh air. Think about how much air you need to let in when choosing windows. You can go with operative windows, which can open or close, or fixed windows. Most people opt for a combination of the two.

    Sunlight choices Sunlight_choices4

    IMAGE SOURCE

    Windows let in light, so when you get new windows, you’ll want to think about how much light will be available at different times of the day in relation to the position of your home and the sun. Depending on the orientation of your home, there can be adverse results from ill-placed windows. These include the rising sun shining into your bedroom in the morning, or reflecting in your living room television late in the day. What’s more, ensuring the right window orientation can also help lower your utility bills. Deborah Salinas is my name and I am a contented homemaker who works from dawn to dusk for the well being of my family. I love everything which makes my home look elegant and stylish. I am an absolute family person and I try my best in bringing down heaven within the four walls of my home. I live with my husband and two handsome sons in Toronto.