Author: ION

  • Why 2018 Offices are Turning to the Demountable Wall System

    Why 2018 Offices are Turning to the Demountable Wall System

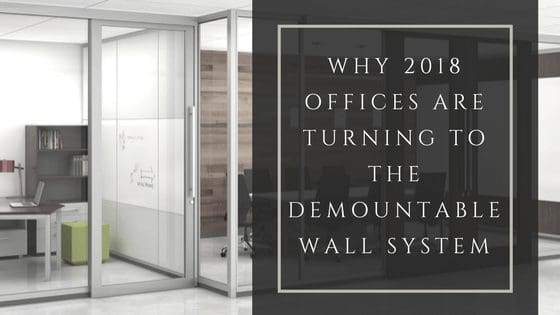
    We’ve seen some major leaps being made in recent office design and its trends. There’s the ongoing debate between the office cubicle vs. the open-plan office, the increasing desire to “modernize” your office space, modular office systems and furniture, and the growing variations of ergonomic solutions. Interior designers, architects, and business owners are searching for design concepts and layouts that offer more than just a visually appealing office space. Which is why an increasing number of businesses are introducing the demountable wall system to their work environments.

    glass_partitions

    Their obvious professional, modern, and clean appearance is just one advantage of this trending wall system. A few other benefits include:

    • Functionality and design
    • Modular flexibility
    • Visually stunning appearance
    • Durability
    • A quicker return on investment and tax breaks resulting from faster depreciation than drywall
    • Fast and easy installation and reconfiguration
    • Increased sustainability

    window

    Along with the modern and clean appearance that designers and business owners desire for an office space, the ability that glass possesses to make any space seem bigger, and the feel of an open office space and a connection between offices and the employees that work in them, the demountable wall system is also extremely flexible in its design capabilities. The use of this wall system allows complete modular flexibility for your office space.

    These versatile walls can be installed and reconfigured quickly and easily with no additional construction to create any office solution; including large private offices, conference rooms, huddle rooms, or it can be simply used as room dividers or office partitions. Unlike with drywall, your wall configurations are unlimited. Therefore, making the system an excellent cost-saving strategy because there’s no need to invest in new cubicle solutions or offices as your space grows, changes, or relocates.

    Speaking of being cost-effective, the use of glass partitions allows natural light to flow throughout your office, limiting the need for bright, fluorescent lights; resulting in a reduced electric bill as well. The options to add data and electric to the raceways for lighting, phone, internet, etc. is also available to add to your environmentally friendly system. Laminate or fabric panels may be added to your customizable height demountable wall panels giving you even more design freedom.

    lifestyle

    With the ability to add hinged, pivoting, sliding, or telescoping doors to your wall system, you can make any room a private and distraction-free space. A variety of finishes allows you to add unique and personal design elements to your space. Even add storage solutions to your wall, creating a complete office environment containing all the necessities with just one system.

    With office spaces becoming increasingly more difficult to acquire, and decreasing in size throughout the years, the demountable wall system is the ideal solution to making use of all possible floor space and arranging your workspaces for maximum functionality. Because each panel column is installed individually, you have the freedom to configure the walls in various shapes, without being limited to square or rectangular rooms.

    Besides the clear visually appealing, functional, and design flexibility advantages, the demountable wall system also provides cost-saving, tax, and other financial benefits as well. Making it the obvious solution for any office setting. This explains why the famous demountable wall system is one of the most popular office trends of 2018. Not only will you be able to create your perfect office space within your budget and time-frame, but you’ll have an office system that grows, alters, and travels with you and your company.

    Author Bio:

    Taylor Landis is the lead content marketing and cubicle specialist for Skutchi Designs, a national office cubicle manufacturer specializing in 2 unique cubicle systems and a proprietary demountable wall system that has been heralded by leading architects and designers all over the country. Taylor writes on everything from office interior design to cubicle installation to office decor. She regularly guest posts for major industries and websites, including sites like coworker.com and theeconomist.com.

  • Search Worthy Topics for Your Term Paper on Web

    Search Worthy Topics for Your Term Paper on Web

    A topic is the most important element when writing your term paper. If you get it right when choosing a topic, the other elements like drafting, formatting and editing are easier to work on. However, if the topic is wrong, you will have made an error that is irreversible. Experienced writers at term paper writing service recommend the use of the web to search for strong topics for term papers. However, a plain search will not deliver the credible results you might be looking for. Here are tested tips on how to use the internet to get strong and captivating topics for your paper.

    • Credible Websites

    laptop

    There are millions of websites claiming to offer writing services. However, their claim cannot be ascertained until you have received the work. It might be too late for you to order corrections or the act may lead to a poor grade. Ensure that you search for the topics from credible websites. Some of the reliable websites include

    typewriter

      • Libraries- they are set up to provide resources to students and faculty. This acts as a guarantee that you will get high quality and reliable resources from library websites.
      • Writing services- websites offering term paper writing services also provide tips on writing to students and other writers. The websites also offer resources like samples, journals, articles and e-books you can refer to in your writing. They provide lists of fresh topics for different subjects.
      • Scholars- academicians review their areas of scholarship to provide insights into topics that are yet to be explored. Check their websites for the latest topics to consider in your paper.
    • News items- emerging issues in education, medicine, science, sports and all other fields are covered as news items. This is a great source of insight when looking for captivating topics.
    • Referralsmockup

    Other than spend your time searching the internet for credible websites or topics, ask for a referral from a friend or classmate. This is a faster way of getting fresh custom term paper topics because it provides direct access. The referral should be of websites that they have used in their assignments and therefore verified that it provides quality services and topics.

    • Academic Resource Websitesstudent

    There are websites and portals known to provide quality academic materials. Others provide credible resources like statistics that will make your paper compelling to read. These websites include Google trends, official edu and official state statistic sites. Information from these websites ensures that your assertions are backed-up by credible data and can therefore stand academic scrutiny.

    • The Right Keywords

    Use the right keywords in your search for report writing services or any other assistance that you might require. Search engines will only give you results based on what you search for. For instance, if you need help with math, you must specify a topic like statistics, algebra, probability or any other you need help on. Assistants are specific on the areas they can help. Math solvers are also specific on topics. If the search is too generalized, it will be impossible to get the quality help you need.

    • Pay For The Services

    Some writing services provide free assistance while others charge for their services. Some help will also be free on one site on condition that you order other services. Be ready to pay in order to get quality services. While paying is not a guarantee that you will get quality, it gives you the authority to demand the quality you want.

    business-idea

    When looking for a website to help me write my essay check reviews to ensure that it provides quality. Review your search queries and make them as specific as possible. Since information from unreliable websites will compromise your work, get a recommendation from a friend to reduce chances of getting poor quality work online.

  • How to Replace a Range Hood

    How to Replace a Range Hood

    Range hoods are very important in any home’s kitchen. They help keep the kitchen free of excessive smoke and other unwanted dirt. However, as you continue to use your range hood, you might notice that it is starting to wear off even after a series of thorough cleaning. Personally, I specialize in fixing, repairing and replacing range hoods, so I have the experience needed to talk about these products. In the recent past, the question that I have received from most of my audiences is one concerning how to replace a range hood. In this article, I address that problem in particular.


    What you will need


    As is the case with any other home repair, you will need the following tools when replacing your kitchen range hood:


    • New range hood
    • Screwdriver
    • Wiring nuts
    • Screws
    • Circuit tester

    It is important to note that it is very difficult to replace your range hood alone. You will need a helping hand to help you mount the new range hood amongst other activities here and there. Also, keep in mind that you will be dealing with electricity so keep safe.

    1. Begin by shutting off electricity

    Even though your old range hood might be out of favor, it still runs on electricity. Before letting the joy of replacing it with a new one overwhelm you, switch off electricity and wait for about 20 minutes. Counter check to ensure that there is no other electricity supply to your old range hood. I insist on taking precautionary measure because the risk electrocution is always there if you are not careful.

    1. Carefully remove the old hood

    When you are sure that there is no other power supply to your range hood, proceed to remove your old hood carefully. Begin by removing the electrical cables then unscrew the screws while your friend holds the old hood safely. Slide the range hood off after removing the screws ready for the next step.

    1. Check the condition of the wires

    Check the condition of the old wires to see if you need to rewire or use the ones in place. The wires should be at least 12 inches to connect the hood and the wall efficiently. If your range hood does not have vents, skip step four and jump to step five.

    1. Get the ducts

    If you are using a range hood with vents, the ducts will be very important in sealing the openings to avoid leakages. Locate the fan or the vent duct and make an opening equal to the size of the vents of your range hood.

    1. Install the new range hood

    After opening up the wires, the next step is the actual installation of your new range hood. I recommend that you have a friend to help you at this stage because it is a bit technical. Take the new range hood and with the help of your friend, mark the places where you want the screws to fit. Put the range hood down and screw in the screws halfway. Take your range hood, slide it on the screws but do not tighten them yet.

    1. Finish up the wiring process

    Taking the wires that you opened up in the previous stages, connect them according to their respective colors. The black should connect with the black, the white with the White and the green wires should connect to the green ones. Again, I strongly recommend that you take utmost care in this stage because any blunder can lead to back electrical damages.

    1. Tighten the screws and test

    After connecting the electricity wires carefully, the next step is to tighten the screws in place so that they hold the hood tightly. Switch on the electricity to test that everything is working correctly.

    Conclusion

    Replacing your range good is not as hard. However, the process can be frustrating especially if you have to do it without the help of a friend. Also, you need to take care of all the precautionary measures especially when dealing with electricity. In my experience, changing range hoods can be a fun activity until something is not right. It is therefore important to be keen in all the stages for better results.

    I would appreciate it if you left a comment below stating whether this article was meaningful to you. I hope that these tips will help you replace your range hood successfully. More Link…


  • 5 Top Tips for Dust Extractor-Beginner guide

    5 Top Tips for Dust Extractor-Beginner guide

    Vacuum cleaners have always been used for cleaning purposes at homes. Most workshops that make use of heavy machinery or do some woodwork also have them handy. But, the dust produced by a workshop includes wood shavings, dust, etc. that could get trapped in the hose of the vacuum cleaner and damage the machine. If the dust itself is not taken care of, it could fly off into the machines and create a serious risk of fire. You could also inhale it, thus damaging your lungs.

    Therefore, dust Extractor must be used as it has a bigger hose and is able to collect all kinds of dust that may damage the vacuum cleaner.

    What is the difference between a vacuum cleaner and dust extractor?

    The simplest difference between a vacuum cleaner and a dust extractor is the ideology behind both tools. The vacuum cleaner is made to clean the area and the house by giving a tiny volume of air at high velocity.


    On the other hand, a dust extractor is used to extract large-sized dust from the ground and therefore, makes use of the high volume of air at low velocity. A dust Extractor is able to get rid of the kind of dirt that can be found in areas involving wood and metal machinery. Thus, a dust Extractor is always a better option than a vacuum cleaner.

    Top tips for Dust Extractor

    Here are top 5 tips that you must be aware of when planning to buy or use a dust extractor.

    1. Get the right dust extractor

    The choice of your dust extractor is the first step to maintaining the cleanliness and safety of your workshop. Just like every woodworking machinery is different from another, the waste we produce is also different.

    Therefore, it must be handled using the equipment that is suitable for them. So one must be clear of the kind of wood waste that is produced and buy a dust Extractor accordingly. The most commonly used extractors are chip, fine dust, and vacuum.

    1. Ground your system

    The dry Timber particles that every dust collector comes in touch with has a potential static charge. Static charge is usually developed when you run a plastic comb or a balloon through your hair. But an actual piece of machinery multiplies the charge, which can lead to a spark or worse, an explosion when combined with fine dust particles and air. Though these explosions are a rarity, it is always a good idea to be safe. Therefore, make sure to fit the Extractor with the grounding kit to minimize the effects of static charge.

    1. Replace the filters regularly

    All kinds of dust, dry Timber, and other savings collected in your dust Extractor must be removed on a regular basis. The fine dust is easier to get rid of by just hitting the bag or by blasting it with compressed air. However, using the same dust filter for a very long period of time can affect its performance. Therefore, one must regularly change the dust filter bags. There are many extended life cartridges available that can be used, so that you have to change the filter less frequently. Not only this will reduce your disposal cost but will also minimize the landfill impact.

    1. Get inline dust separators

    The sheer volume of your waste material can be very large when it comes to extraction. Therefore, you must make sure that you have a separate container where the dust is disposed from the Hopper. This container needs to be emptied regularly so that it doesn’t pile on in the Hopper. Remember, the longer the dust stays in The Hopper, the higher are the chances of a fire or an explosion.

    1. Get a safety monitoring filter

    The dust extractors come equipped with a high-efficiency filter that collects the fine dust. The safety filters are an extra layer of protection that does not allow the dust to enter into the workspace of the machinery in case there is a leak in the primary filter. This filter becomes extremely important if the dust collector recycles the air downstream. It helps in recirculating the air back into the plant, thus saving a lot of energy. This also reduces the amount of contaminated air that is exhausted out of the plant, reducing all the paperwork that you may have to go through for that. More links

    Meta – Looking to use a dust extractor but are unsure how to go about it? These few tips are sure to help!

  • 3 Common Drain Emergencies, And How To Handle Them

    3 Common Drain Emergencies, And How To Handle Them

    There are numerous ways in which your plumbing system makes life easier and more convenient, and it’s easy to take the fact that you have running water in your kitchen or bathroom for granted until you have an emergency. Without running water in the house, you will learn to appreciate the luxury of having a drainage system working properly. Here is a list of some common drain problems and how to handle them.

    fire

    1. Clogged drains

    Clogged drains are the most common drainage problem that you will encounter, and there are a number of reasons why your drains might be clogged. Some common household causes of clogged drains include: Hair build-up in the drain; washing food waste down the drain; mineral build-up; small objects that might’ve got caught in there; and toilet paper build up. Even though the causes of clogged drains are many, they are generally due to improper use and infrequent drain inspection.

    So, what do you do when your drains are clogged? The easiest and fastest way to unclog a drain is using a plunger, although it can be ineffective for bigger problems and can leave quite a mess. Keep towels close by to clean up the mess, and if you’ve poured drain cleaners in the sink do not use a plunger since the cleaner could splash on your skin causing irritation. Of course, if the job is outside of your comfort range, or seems too urgent, ask around for the best plumber Toronto has to offer and call them up – they’ll know how to help.

    1. Leaks

    Leaking drains are the second most common drain problems. If you are dealing with a small leak, the first thing to do is find the source, and if it’s the drainpipe under the sink that’s leaking, you need to simply tighten the nut. You can also make use of plumber’s tape and plumber’s putty to make the repair, however, if you cannot find the leak, it is better to call a professional plumber to avoid making it worse.

    1. Foul Odour

    Having foul odour in your house is not only unpleasant but it can also be embarrassing when you have guests over, and potentially dangerous. The odour from the pipes could be caused by a dry p-trap – the trap responsible for capturing water, which acts as a plug against sewer gasses. If the sink has not been used a lot, it could have a dry p-trap causing the sewer gasses to come up the pipe. The remedy for a dry p-trap is easy: you just have to pour water down the drain so as to restore the water plug. Odour can also be a sign of a bigger problem in the sewer lines – it might be a sign that the sewer line is blocked or it is broken, and if this is the case you need to find a 24/7 plumber in Toronto to help fix the problem.


    Those are the most common drain problems that homeowners in Toronto will face, and, as you can see, they’re not too difficult to mitigate. Remember that if you cannot handle a problem, avoid making it worse by calling a professional plumber in Toronto.

  • How to Arrange Your Living Room Furniture

    How to Arrange Your Living Room Furniture

    Finding the perfect living room furniture for your home is a great accomplishment, but it’s only one step towards the living room of your dreams.

    sofa


    No matter how incredible the furniture looks, it can only fulfill its true potential if you know how to properly arrange it. You don’t want a living room to appear smaller due to furniture arrangement or to limit the movement of your guests. In this article, we’ll give you some great tips on how to arrange your living room furniture.

    Determine Its Function

    room

    First of all, you need to know what you are going to be using each of the individual furniture pieces for. What activities are you going to engage in? Is it playing video games, chatting with your friends over a glass of wine, have guests over for a movie or something else entirely? When you decide on that, you’ll need to figure out how much seating space you need and have available. Remember that everybody has to feel comfortable. When you answer these questions you’ll be closer to picking the right number and type of furniture.

    Set the Focal Point

    living-room

    No matter how impressive each furniture piece is, every living room needs to have a focal point. It’s the piece of furniture that immediately draws the eye to it. The focal point, therefore, has a lot of influence over what type of the first impression your living room leaves. In most cases, the focal point of a room is a fireplace or the TV. When you determine the function of your room, you’ll be able to figure out what will work best as the focal point in your living room.

    Don’t Hinder the Traffic

    living-room

    Determine where your guests and family members will move the most to find the traffic paths in your living room. You can even use chalk to draw these patterns. Once you determine what they are, try to make sure your furniture doesn’t obstruct these paths and that movement through the room is free and easy.

    Don’t Stick Too Close to the Walls

    living-room

    The best way to create a cozy atmosphere is to group the furniture together as close as possible. This will make conversation easier and give your living room a friendly tone. Don’t be afraid to move the furniture towards the center of the room and away from the walls. This will create a much more intimate atmosphere.

    Plan for Electric Installations

    Every experienced interior designer knows that the best way to create a breathtaking living room is to play around with lighting. Apart from the main lighting, you can add ambient led lights that are going to create a cozy atmosphere or put an extra emphasis on your focal point.

    That is something you need to consider when arranging your furniture. Apart from making sure you leave enough room for ambient lights, try not to obstruct any electrical outlets.

    Anchor Your Design

    Finally, you should use an element that will anchor your sitting area and the furniture. For example, if you go for traditional furniture elements consider a rustic rug to bring it all together nicely.

    Contact Skylar’s Home & Patio Furniture San Diego at 9160 Kearny Villa Ct, San Diego, CA 92123, USA; 858-939-1360 or visit https://www.skylarshomeandpatio.com/

  • 5 Common Questions and Answers About Mice in the House

    5 Common Questions and Answers About Mice in the House

    Mice pose a pretty big threat to homes all around the globe, yet people often find themselves powerless when faced with such a dangerous horde. No one likes having mice invade their homes and there are plenty of questions that people ask in an effort to learn more about fighting mice.

    mouse

    These questions are completely fair and valid; after all, the more you know, the easier it will be for you to know what to do if an infestation manages to happen. Your job is to do all you can to stop them (or prevent them from coming in the first place) and what better way to do that than to educate yourself?

    So, we’re here to help you out by researching 5 of the most common questions and answers about mice in the house. Among these questions, you’ll learn how to catch a mouse, how to fight them, and what you can do to prevent these rodents from visiting your home.

    How to Catch a Mouse?

    The best way you can catch a mouse is by purchasing a couple of mice traps and placing them around your home. Do not use poison except as a last ditch effort as it is dangerous and can cause harm to you or those around you. This includes pets as well, so if you absolutely must use poison, make sure that no one can accidentally get close to the poison.

    Snap traps and catch & release traps should do just fine as one is a humane way of killing the mice, whilst the other doesn’t include the killing aspect.

    Why are Mice so Dangerous?

    Mice are dangerous for a number of reasons. One of these reasons is disease. Mice carry a plethora of diseases, many of which can end up with a fatal result. This is why timing is key; if you deal with the problem as soon as you can, then you’ll minimize the potential chance to catch a disease.

    Mice can also cause structural damage to your home and they chew on wires as well. Damaged wires are a fire hazard so take great care!

    What is the Best Mouse Trap?

    It all depends on what you’re looking for. Are you on a tight budget? Then grab a couple of snap traps and peanut butter (which you will use as bait) and hope for the best (just make sure you place at least 6 traps in your home).

    Do you want a humane way of getting rid of mice? Then catch & release traps are your best bet. But be mindful; check the traps often and release the mice as soon as you can to prevent unnecessary pain to the animal.

    Should I React if I have Seen Only One Mouse?

    Yes! Even one mouse is a major issue since there’s a high possibility that one mouse means plenty of mice. Add on top of that the fact that mice reproduce extremely quickly and you’ll be in a lot of trouble if you don’t react swiftly!

    What is the Best Prevention Method?

    The most successful prevention methods are peppermint oil and general care of hygiene and cleanliness. If you keep your house clean, there’s almost no way you’ll be the target of an infestation. Additionally, use peppermint oil just in case!

  • Tips for Using Your Pool During the Winter Months

    Tips for Using Your Pool During the Winter Months

    Having a pool in your backyard is great; you can swim laps, float around to relax, or use it as a venue for social events.

    Image by StockSnap from Pixabay

    However, many pool owners feel they don’t get to maximize their investment because they have to close their pool up in the winter. But it doesn’t have to be that way. There are several things you can do to keep your pool open and usable in winter.

    מתניה, CC BY-SA 3.0, via Wikimedia Commons

    Check out these tips if you’re interested in keeping your pool open during the long winter months.

    Install a Heater

    Your first step to using your pool in the winter is to install a pool heater. They’re the top choice to extend your pool season. The only caveat with a pool heater is you must be careful with how long and how hard you run it. It can add a significant amount to your energy bill.

    Buy Some Insulated Covers

    Image by GregoryButler from Pixabay

    Now, your pool heater will go to waste if you don’t figure out a way to keep as much heat in the pool as possible. One way you can do that is to cover your pool with an insulated blanket. This can help reduce the amount of heat loss and even help lower the energy bill you’d have with the heater alone. Just remember to have your pool covered whenever you’re not using it.

    Have Freeze Protection

    GrandHotel, CC BY-SA 3.0, через Викисклад

    In the winter, your pool faces one key danger – freezing temperatures. Freezing temperatures and ice can cause excessive wear and tear or even significant damage to key operating components like your pump. An easy way to protect your pool in the winter if you’re not going to use it is to install a freeze monitor. The monitor automatically turns your pump on when the temperature drops into the freezing range.

    Have a Power Outage Plan

    Image by Free-Photos from Pixabay

    If your power fails in the winter, you run the risk of significant damage being done to your pool’s parts. You have to do the following if your pool is open during the winter and your power goes out: 1) loosen the drain plugs in your heater and pump; 2) filter the drain plug; 3) turn the breaker off; 4) close the pool line valves and open the air filter; 5) replace the plugs, prime the pump, and turn it on once the power is restored.

    Perform Regular Maintenance

    Image by Allan Lau from Pixabay

    Even if you aren’t using your pool frequently in the winter, you can’t completely shirk your pool maintenance responsibilities. You should regularly clear your pool of dirt and debris so those bits of debris don’t clog up your filter and damage it.

    Visitor7, CC BY-SA 3.0, via Wikimedia Commons

    You should also continuously test your water throughout the winter. Doing so will ensure your pool isn’t becoming the perfect place for algae and bacteria to grow. While you don’t need to test the water as often in the winter, regularly testing your chlorine and pH levels can save you a headache later.

    Maximize Your Pool in Winter

    Midori, CC BY 3.0, via Wikimedia Commons

    Keeping your pool open in the winter keeps your regular exercise venue open and can even be relaxing if the water is warm enough. Whether you plan on using your pool regularly this winter or not, you can still benefit from trying to preserve the temperature and regularly checking the water.

    About the Author

    Scott Bland has been in the leisure industry for nearly 20 years.  As a sales manager in the leisure industry he knows hot tubs inside and out.  Right now he works sales while writing about consumer goods on the side. If you want to contact him, you can do so at his LinkedIn.