The corner of a room is structurally the furthest point from natural light, the hardest spot to run cables cleanly, and the zone where ergonomic mistakes compound — yet it remains the most popular location for a home workspace, almost always installed without a plan. A well-executed corner desk setup home office starts before any furniture gets ordered — it starts with understanding why the corner is spatially difficult in the first place. I’ve set up workspaces in probably sixty apartments over my career, and the corner desk is the single configuration I’ve had to rescue most often. Not because the concept is wrong. Because the execution treats the corner as a destination rather than a spatial problem that needs solving first.
Quick Answer
The corner of a room is structurally the furthest point from natural light, the hardest spot to run cables cleanly, and the zone where ergonomic mistakes compound — yet it remains the most popular location for a home workspace, almost always installed without a plan.
What follows isn’t a product roundup. It’s the actual decision sequence I run through before a single piece of furniture gets ordered.
Why Most Corner Desk Arrangements Underperform (And What Designers Look For Instead)
In This Article
- Why Most Corner Desk Arrangements Underperform (And What Designers Look For Instead)
- The Four Corner Configurations — Mapped to Room Size and Work Style
- Lighting a Corner Desk Without Overhead Fixtures — the Layered Approach
- Cable Management in a Corner — the Part That Destroys Otherwise Good Setups
- The Ergonomic Variables That Change in a Corner (And Don’t Change Anywhere Else)
Most people approach a corner workspace the same way they approach a corner in their closet — they assume that because there’s space, it’s usable. The geometry tells a different story.
The core problem is reach geometry. Ergonomics research establishes the comfortable horizontal reach for desk work at roughly 16 inches from the body’s center. Corner desk apex zones — that awkward triangle where the two desk surfaces meet — typically extend 20 to 24 inches into the corner itself. That means the apex of virtually every L-shaped desk you can buy is functionally unreachable during normal work. It’s dead zone, not desk. And yet people pile it with monitors, chargers, and stacks of paper and then wonder why the setup feels cramped and chaotic.
The second issue is light geometry. Corners sit at maximum distance from windows, which almost always run along exterior walls — not into the room’s furthest angles. Shadow behavior in corners is specific: you get wrap-around shadow from both adjacent walls simultaneously, which means standard overhead lighting (already inadequate for focused work) becomes even less effective. I once worked with a client in a Wicker Park studio who had a perfectly nice pendant fixture in the center of her ceiling and still registered under 100 lux at her desk because her corner was twelve feet from the lamp in two directions at once.
The third failure point — and this is the one nobody talks about — is traffic axis conflict. Where the door is relative to your seated sightline determines whether you feel surveilled, trapped, or in control of the room. A corner desk positioned with your back to a high-traffic path creates low-grade stress that accumulates over a workday, even if you never consciously register it.
Before you decide which desk to buy, you need to answer three questions:
- Where is the dominant natural light source in this room, and which wall does it hit?
- Where does foot traffic flow — from door to kitchen, bedroom to hallway?
- What is the actual usable reach diameter from your seated position, and does the desk configuration respect that?
- Does the corner you’re considering sit along an exterior wall (thermal and acoustic implications) or an interior wall?
- How many devices will need power, and where is the nearest outlet relative to the corner?
The real decision isn’t which desk — it’s how to orient the work axis relative to traffic flow and sightlines before you choose a single product.
Actionable takeaway: Stand in your corner with your arms extended at desk height. Mark the 16-inch radius with tape. Anything outside that radius should be storage, display, or empty — not your primary work surface.
The Four Corner Configurations — Mapped to Room Size and Work Style
Knowing that the corner is spatially complex is useful. Having four concrete configurations to choose between is better. These aren’t product categories — they’re spatial orientations, and each one solves a different room problem.
Configuration 1 — Anchor Out. The desk faces into the room, and the corner itself is used for storage, shelving, or display rather than active work surface. This is counterintuitive but often the most livable solution in rooms under 120 square feet, where the desk dominates visually and psychologically. Facing into the room lets you see the full space while you work, which reduces the claustrophobia that a corner-forward setup creates in small rooms.
Configuration 2 — Inset L. Classic L-shape, both surfaces flush against the two walls. This is the configuration 90% of people default to, and it works — but only in specific room geometries. The National Kitchen and Bath Association’s clearance guidelines, which interior designers routinely apply to home office planning, recommend a minimum 36-inch clearance behind any seated workstation for safe movement. That constraint eliminates Configuration 2 entirely in rooms narrower than 10 feet. Most people never measure this.
Configuration 3 — Floating Corner. The desk is pulled 4 to 6 inches away from both walls, creating a slim gap on each side. This sounds wasteful but it does several things at once: it allows cable routing behind the desk without gymnastics, it improves airflow around equipment, and it gives the setup a “placed” quality rather than a “shoved in” quality. Requires at least 180 square feet to avoid the desk eating the room.
Configuration 4 — Diagonal Placement. The desk is rotated 45 degrees into the corner, with the work surface facing the room. Visually dramatic. Maximizes sightline to the room entrance, which is psychologically significant for people who feel anxious with their backs fully exposed. Best for non-square rooms — oddly angled urban apartments where the walls aren’t 90 degrees to begin with.
When evaluating which configuration suits your situation, run through this checklist before committing:
- Measure both walls adjacent to the corner — are they equal length or asymmetric?
- Check the clearance behind your seated position (minimum 36 inches for safe movement)
- Identify all outlet and switch positions on both walls
- Note any baseboard heaters, vents, or radiators that would be blocked by flush-wall placement
- Confirm ceiling height — diagonal placement with tall shelving can feel oppressive under 8-foot ceilings
- Test the sightline to the room door from your planned seated position before ordering anything
Actionable takeaway: Measure your room. If it’s under 10 feet wide in either dimension adjacent to the corner, Configuration 2 is likely off the table. Start with Configuration 1 or 4.
Lighting a Corner Desk Without Overhead Fixtures — the Layered Approach
Here is the advice I still see everywhere: “Add a desk lamp.” Genuinely useless guidance. I’ve watched clients buy a $200 lamp, aim it at their desk, and still squint at their screen by 3pm because they addressed one of three lighting problems and left the other two untouched.
The Illuminating Engineering Society recommends 300 to 500 lux for sustained reading and computer work. A single overhead fixture in a typical room delivers under 150 lux at a corner desk surface — because the corner is at maximum distance from the fixture. You cannot solve that gap with one lamp. You need three distinct layers, and they need to work together.
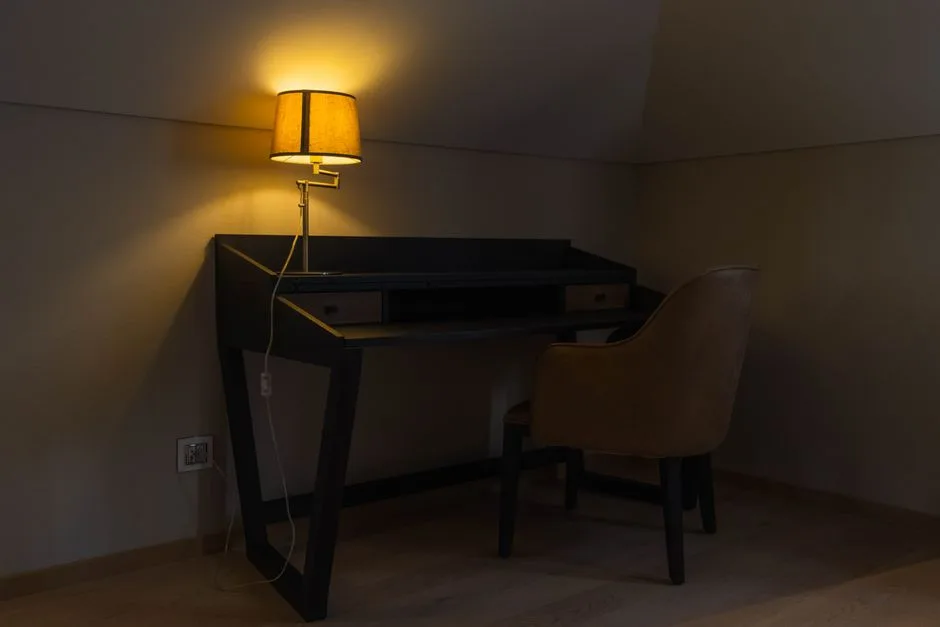
Layer 1 — Ambient fill. A floor lamp placed behind and to the non-dominant side of your chair — behind your left shoulder if you’re right-handed — lifts the ambient lux of the entire corner without creating direct glare into your eyes or onto the monitor. This is the layer most people skip because it doesn’t feel like “task” lighting, but it’s the one that determines whether the corner feels like a workspace or a cave.
Layer 2 — Task precision. A monitor bar light mounted on top of the screen, not a traditional adjustable arm lamp on the desk. Monitor bar lights are engineered to throw light downward onto the desk surface without casting reflection into the screen — a physics problem that traditional lamps solve poorly because they sit beside or below screen level. The BenQ ScreenBar and Elgato Key Light Bar are the two I’ve specified most, not because they’re premium but because their beam angles are well-documented and predictable.
Layer 3 — Bias lighting. A low-output LED strip mounted to the back of the monitor or along the wall behind the screen, set to approximately 10% of the monitor’s brightness. Bias lighting reduces the perceived contrast between the bright screen and the dark corner behind it, which is the specific mechanism behind digital eye strain in corner workspaces. Color temperature matters here: 6500K matches most monitor whites and prevents the amber-versus-blue color conflict that disrupts color-sensitive work.
Layered lighting implementation checklist:
- Confirm your floor lamp has a dimmer — ambient fill without dimming control is difficult to dial in
- Position the monitor bar so its beam hits the desk surface, not the keyboard or your face
- Use a lux meter app (most smartphones have adequate light sensors) to verify you’re hitting 300 lux minimum at keyboard level
- Set bias lighting to match your monitor’s color temperature, not your ambient preference
- If you’re on video calls, add a small ring light or panel facing you — the three layers above light the workspace, not your face
Actionable takeaway: Don’t buy a single lamp and call it done. Layer ambient, task, and bias lighting independently. Each one solves a different problem.
Cable Management in a Corner — the Part That Destroys Otherwise Good Setups
A well-planned corner desk setup home office can be entirely undermined by cable chaos. The corner amplifies cable problems because you’re routing power from outlets on two separate walls to a convergence point in the middle — and those paths don’t naturally want to meet cleanly.
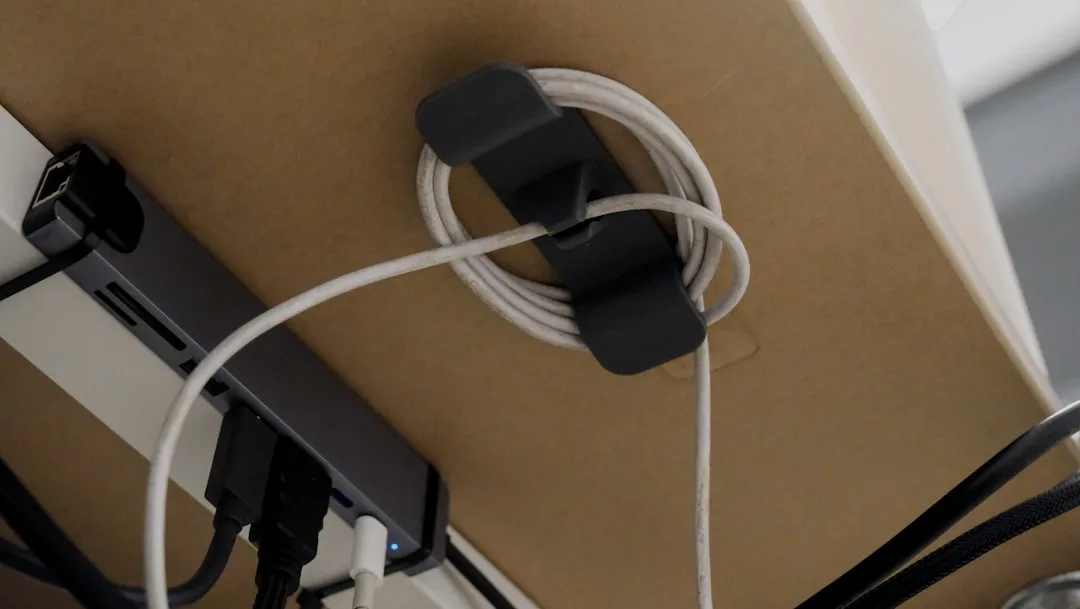
The principle I use: establish one cable spine, not two. Rather than running cables from each wall independently, consolidate all power to a single outlet using one heavy-duty surge protector with at least eight outlets, then route all device cables to that single point. This transforms a web of routes into one manageable trunk.
Cable management by configuration:
- Inset L (Configuration 2): Mount a cable tray under the desk surface at the apex — this is the natural low point where cables from both sides converge. Use adhesive-mount clips along both wall runs to keep cables at consistent height before they drop into the tray.
- Floating Corner (Configuration 3): The gap behind the desk is your cable highway. Run everything through cable sleeves along the floor behind the desk, invisible from the front, accessible from either side without moving furniture.
- Diagonal Placement (Configuration 4): This is the hardest configuration for cables. Use a floor cord cover in a color that matches your flooring to bridge from the nearest outlet to the desk — don’t try to hide it, just make it intentional.
- Anchor Out (Configuration 1): Outlet access is typically cleanest here since the desk isn’t flush against both walls simultaneously. A single cable management box on the desk surface handles most scenarios.
Products worth specifying by name: The Uplift Cable Management Spine works well for standing desk corners. The J-Channel cable raceway in white or black (readily available from any electrical supplier) is the most versatile solution for wall-mounted cable runs and costs a fraction of branded alternatives.
The Ergonomic Variables That Change in a Corner (And Don’t Change Anywhere Else)
Ergonomics guidance for home offices is almost always written for straight-run desks — one surface, one monitor, straightforward adjustments. A corner desk setup home office introduces variables that standard ergonomic checklists don’t address.
Monitor position in a corner is not the same as monitor position at a straight desk. When two monitors or one ultrawide is placed in the apex of an L-shaped desk, the center of the screen is physically further from the seated user than it would be against a flat wall. The standard recommendation is to position the top of the monitor at eye level with the screen at arm’s length. In a corner, “arm’s length” from the apex is often 28 to 32 inches rather than the standard 20 to 24 — which means either the monitor needs to come forward on an arm, or the text size needs to increase to compensate.
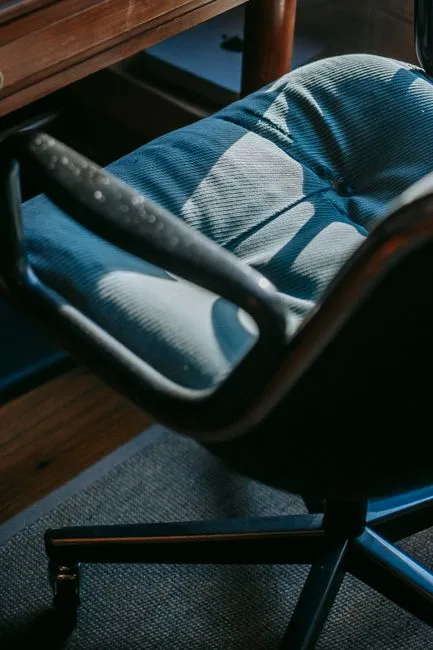
Chair clearance behaves differently. At a straight desk, you push back and stand. At an inset L, pushing back puts you equidistant between the two desk surfaces with limited lateral movement. Specify a chair with armrests that fit under both desk surfaces — armrest height matters here in a way it doesn’t at a straight desk, because you’ll be rotating between surfaces regularly.
Key ergonomic adjustments specific to corner configurations:
- Use a monitor arm (not a stand) to bring the screen 6 to 8 inches forward from the apex — this closes the reach distance to the standard 20 to 24 inches
- Keep your primary input devices (keyboard, mouse) on the surface you face most directly — not split across the corner
- If you rotate between surfaces frequently, invest in a chair with smooth-rolling casters rated for your floor type — friction-heavy chair movement is a cumulative fatigue factor
- Position the secondary surface (typically used for reference materials or a second screen) at a slight angle toward you rather than fully perpendicular — 10 to 15 degrees of rotation dramatically reduces neck rotation
- Check that your chair’s lumbar support position doesn’t change when you rotate — if it does, the chair isn’t suited for a multi-surface corner setup
Actionable takeaway: Treat the primary surface and secondary surface as separate ergonomic zones and configure each one independently, rather than trying to find a single seated position that serves both.
FAQ
What size room do I actually need for a corner desk setup home office?
The minimum practical room size depends on which configuration you choose. Configuration 1 (Anchor Out) can work in a room as small as 100 square feet if the desk is appropriately scaled — look for desks no wider than 48 inches per surface. Configuration 2 (Inset L) needs at least 10 feet of clear width on both adjacent dimensions to meet the 36-inch clearance standard behind the chair. Configuration 3 (Floating Corner) requires a minimum of 180 square feet. Don’t estimate — measure the room and lay out the footprint in tape before ordering anything.
Is an L-shaped desk better than a straight desk for a home office corner?
Not automatically. An L-shaped desk placed in a corner gives you more surface area on paper, but roughly 30 to 40% of that surface — the apex zone — is ergonomically unreachable during normal seated work. A well-placed straight desk with dedicated storage flanking it often delivers more usable work surface than an L-shaped desk installed without planning. The L-shape is the right answer when you genuinely need two distinct work zones — say, a screen zone and a physical document zone — that you use sequentially, not simultaneously.
How do I handle video call backgrounds in a corner desk setup?
This is underrated as a planning consideration. In a corner setup, your camera almost always captures both walls behind you — which means clutter on either wall is visible. The cleanest solution is to treat the wall directly behind your primary monitor (the one the camera sits on) as the visual background and style only that section intentionally. A simple floating shelf with a few deliberate objects at camera height costs almost nothing and eliminates the background problem entirely. Alternatively, diagonal placement (Configuration 4) puts a room view behind you rather than walls, which reads neutrally on camera.
What’s the best way to add storage to a corner desk without making the space feel smaller?
Vertical storage — shelving that runs up the wall rather than spreading across the floor — is the answer in almost every corner setup. Wall-mounted shelves that start at desk height and run to ceiling level use the dead vertical space above the desk without consuming floor area or encroaching on clearance zones. Avoid under-desk pedestals in corner configurations unless they’re on casters — fixed pedestals in a corner restrict chair movement more than they do at a straight desk. Open shelving reads lighter than closed cabinetry in a corner; if you use closed storage, keep it to one wall and leave the adjacent wall open.
Does a standing desk converter work in a corner setup?
It works, with caveats. A full standing desk frame built as an L-shape is the cleanest solution but expensive. A standing desk converter — the platform that sits on top of an existing desk and raises — works well on the primary surface only; don’t try to span it across the apex. The practical limitation is that when the converter is raised, it often blocks sightlines to the secondary surface, which defeats the purpose of the L-configuration. If standing capability matters to you, consider Configuration 1 (Anchor Out) with a full-height adjustable frame, which is cheaper to specify as a single-surface sit-stand than as a corner unit.