Your furniture could be brand new, your walls freshly painted, and your home could still look ten years behind — because the one design element most homeowners never critically evaluate is the lighting.
Not the bulbs. Not the dimmers. The entire system — how fixtures relate to each other, how they interact with your materials, how they change with the hour. Most people treat lighting as the last box to check after every other decision is made. Designers treat it as the decision that makes every other choice either work or fall flat.
Here’s what’s actually aging your home, and what professionals do differently.
Why Lighting Ages a Home Faster Than Outdated Furniture
Most people blame a dated sofa or a tired paint color when a room feels stuck in time. But a sofa from 2015 just looks slightly behind the trends. A light fixture from 2005 broadcasts its era with startling precision — the brushed nickel bathroom sconce, the bronze-tinted ceiling medallion kit, the boob-light globe cover that still haunts so many builder-grade homes.
Lighting ages a home more aggressively than almost any other design element because it doesn’t just sit in the room — it determines how everything else in the room looks. The wrong fixture can make Calacatta marble look like a laminate imitation. The wrong bulb temperature can turn a freshly painted warm white wall into something that looks vaguely yellow and unwashed.
There’s also the functional perception issue. Lighting affects how tall your ceilings feel, how wide your rooms read, and whether your finishes look rich or flat. A single ceiling-mounted fixture centered in a room — especially a low-wattage one — creates a kind of visual gravity that pulls everything inward and downward. It’s the lighting equivalent of a bad haircut. Nobody puts their finger on why the room looks off, but it does.
The investment mismatch makes this worse. The American Lighting Association reports that lighting accounts for up to 20% of a home’s total energy bill, yet most homeowners spend less than two hours per year actually evaluating their lighting choices. People will spend an entire weekend selecting tile grout but replace a dead bulb with whatever’s in the junk drawer without a second thought.
Lighting is also uniquely hard to evaluate in stores. Showrooms are designed to make everything look good. You’re making a decision about how a fixture will perform in your specific room, under your specific ceiling height, against your specific wall color — and you’re making it under artificially flattering display conditions.
Actionable takeaway: Walk through your home tonight and photograph each room under its normal evening lighting. Look at the photos rather than the rooms themselves. Distance reveals what familiarity hides.
Treating Every Room Like It Has One Job to Do
The standard lighting advice you’ll find everywhere online is “layer your lighting” — ambient, task, accent. That formula isn’t wrong, but it’s incomplete in a way that matters. The real mistake isn’t missing a layer. It’s designing lighting for what a room is called rather than what it actually does across a full day.
A kitchen at 7am needs to feel energizing and bright for making coffee and packing lunches. That same kitchen at 8pm during a dinner party needs to feel warm, recessive in the work zones, and flattering at the island where people are standing with wine glasses. Those two scenarios need different lighting configurations — not just different intensities of the same configuration.
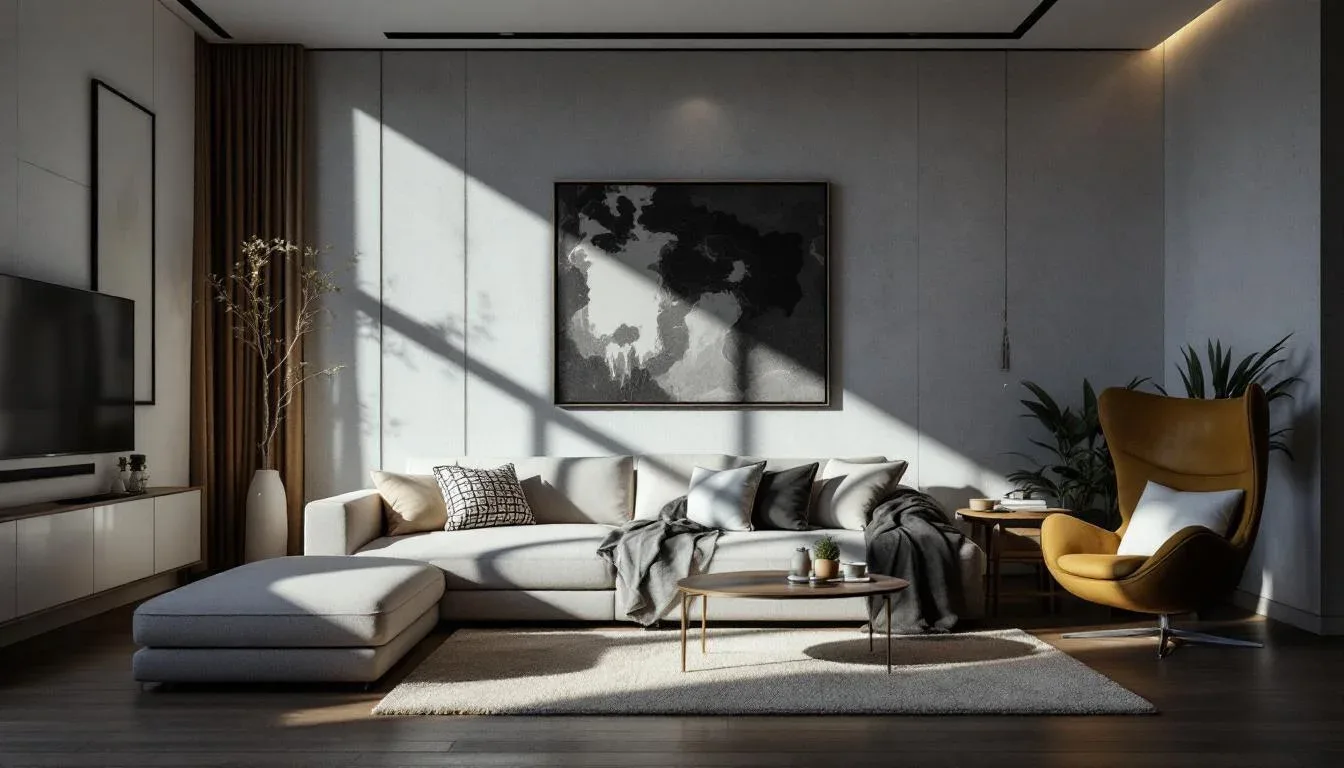
The same problem plays out in living rooms, which now routinely serve as home offices, film-watching spaces, and social gathering areas — sometimes within the same evening. A single overhead fixture on a dimmer doesn’t solve this. You need:
- Ambient light at ceiling level (recessed or indirect) for general illumination
- Task light at desk or reading height that can be switched independently
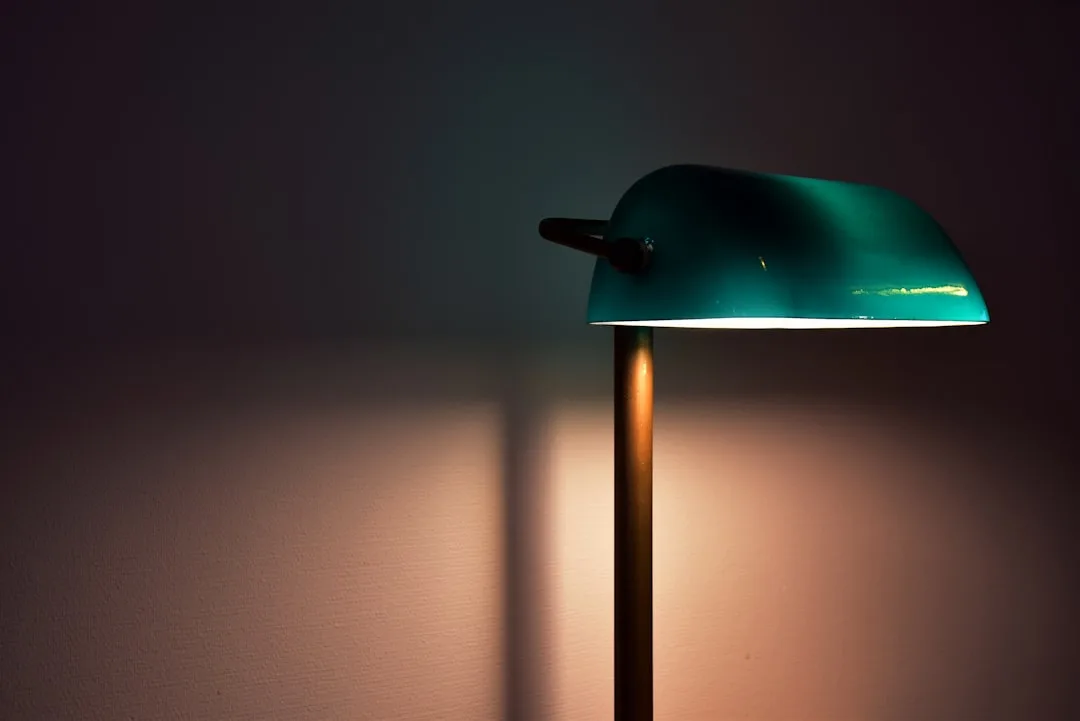
- Accent light on artwork or architectural features to create depth and visual interest
- Atmosphere light — table lamps, floor lamps, candle-height sources — that humanizes the scale of the room when overhead lights are dimmed or off
The fix isn’t adding more fixtures randomly. It’s mapping your actual time-of-day use cases before selecting a single piece of hardware. Ask how the room is used at 7am, at noon, at 6pm, and at 10pm. The answers should drive every circuit, switch, and fixture decision.
Actionable takeaway: Identify one room in your home that serves multiple functions and write down how you use it at three different times of day. That list is your lighting brief — and it probably doesn’t match what’s currently installed.
The Scale Miscalculation That Makes Ceilings Feel Low and Rooms Feel Cramped
Walk into almost any spec-built home from the last twenty years and you’ll find the same thing: a dining room with a ten-foot ceiling and a pendant that belongs over a breakfast nook. It looks timid. It looks like someone ran out of budget and grabbed whatever was left at the lighting store.
Scale errors work in both directions. A fixture that’s too small for a space doesn’t just look underwhelming — it actually makes the ceiling feel lower by failing to draw the eye upward. A fixture that’s too large in a room with an 8-foot ceiling creates a sense of visual compression that makes people uncomfortable without knowing why.
There’s a practical calculation most residential designers use, and it’s simple enough to apply yourself. Add your room’s length and width in feet, and that sum in inches gives you a reasonable target diameter for a central fixture. A 12 x 14-foot room translates to roughly a 26-inch diameter fixture. Most homeowners in that same room install something in the 16–18-inch range, because that’s what looks proportionate when photographed for a product listing — not what looks right in context.
Hanging height compounds the problem. Industry guidelines for dining pendants recommend the bottom of the fixture hang 30 to 36 inches above the tabletop. Yet renovation audits consistently find that fixtures are hung 12 to 18 inches too high — close to ceiling height, which defeats the purpose entirely. A pendant hung too high becomes a ceiling light with an expensive shade. You lose the intimacy, the focus, and the sense of enclosure that makes a dining space feel intentional.
The hanging height mistake usually happens for a predictable reason: someone hung the fixture to maximize headroom clearance, or they guessed at a height before the furniture was in place. Both are avoidable.
- For dining tables: 30–36 inches from tabletop to fixture bottom
- For kitchen islands: 32–36 inches from countertop to fixture bottom
- For entryways with double-height ceilings: bottom of fixture at 7 feet from the floor minimum, scale up dramatically from standard diameter
Actionable takeaway: Measure the hanging height of your dining or kitchen fixture tonight. If it’s more than 36 inches from the surface below it, lower it. This is a 20-minute adjustment that changes the entire visual register of the room.
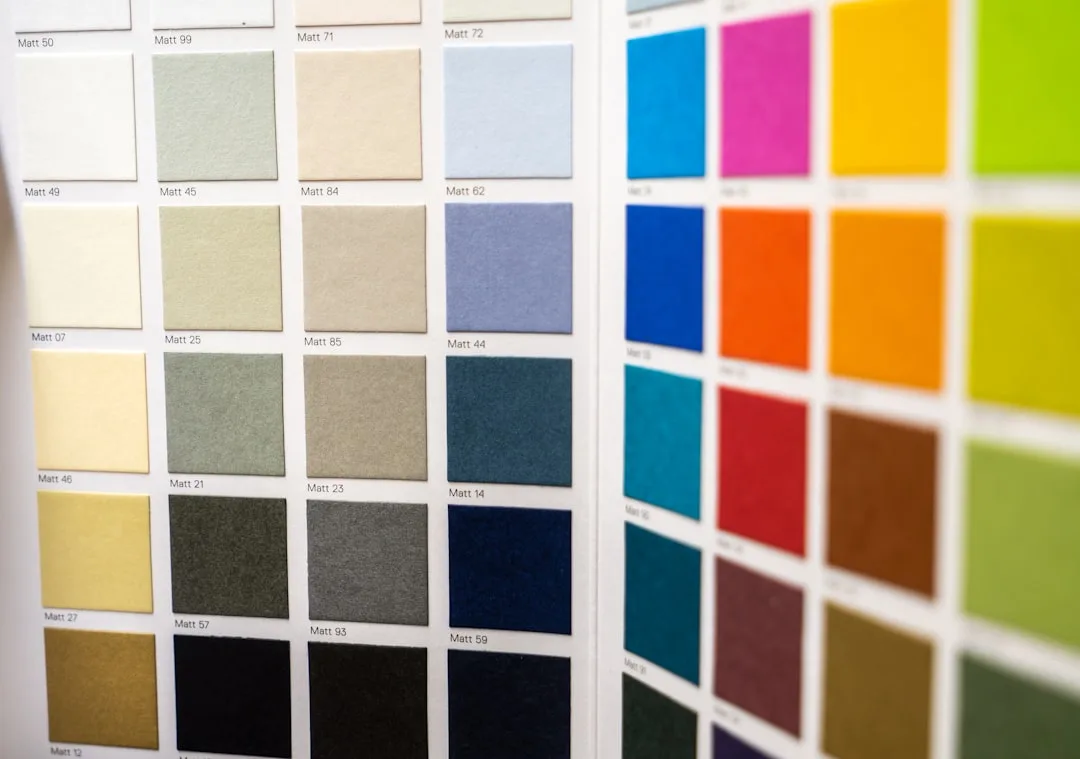
Color Temperature Mismatches That Make New Materials Look Cheap
Most lighting advice reduces color temperature to a single sentence: warm light is cozy, cool light is clinical. That’s not wrong, but it skips the part that actually causes problems — specific mismatches between bulb temperature and material finish that make expensive choices look inexpensive.
Warm white bulbs at 2700K are generally right for living rooms and bedrooms, and designers default to them for good reason. But 2700K light casts a yellowish tone that can be actively unflattering to certain materials. Cool-toned marble — think Carrara or Statuario with its blue-gray veining — photographed beautifully in the showroom under controlled lighting looks muddied and wan under 2700K residential bulbs. The same goes for sage greens, slate blues, and any finish in the gray-white family. The warmth that feels cozy on wood tones fights actively with cool-toned materials.
The other end of the spectrum causes different damage. Using 5000K daylight-spectrum bulbs in living spaces because they appear brighter is one of the most aging mistakes in residential lighting. Those bulbs make rooms feel like they belong in a dental office. They also expose every imperfection in wall texture and paint application, which looks harsh rather than crisp.
Then there’s the mixed-temperature problem in open-plan spaces. If your kitchen recessed lights are running 3000K and your dining pendant is using a vintage Edison at 2200K and your living room lamps have 2700K bulbs, the visual transition across connected spaces reads as unfinished. It’s not layered — it’s just inconsistent.
The Color Rendering Index matters as much as Kelvin temperature, and most homeowners have never heard of it. CRI measures how accurately a light source renders colors compared to natural daylight, on a scale of 0 to 100. A CRI below 80 makes premium finishes like marble, hardwood, and natural stone appear flat and dimensionless regardless of how warm or cool the light is. Most discount bulbs and cheap smart bulbs fall in the 70–80 CRI range. Specify 90+ CRI anywhere material quality matters.
- Wood tones and warm neutrals: 2700–3000K, CRI 90+
- Cool-toned stone, blues, greens: 3000K, CRI 92+
- Art and detailed surfaces: 3000K with directional lighting, CRI 95+
- Bathrooms and vanities: 3000K front-facing (never overhead-only), CRI 90+
Actionable takeaway: Check the CRI rating on your current bulbs — it’s on the packaging or in the product listing online. If it’s below 90 in any room with stone, wood, or fine finishes, replacing them is a $30–$60 fix that changes how every material in the room looks.
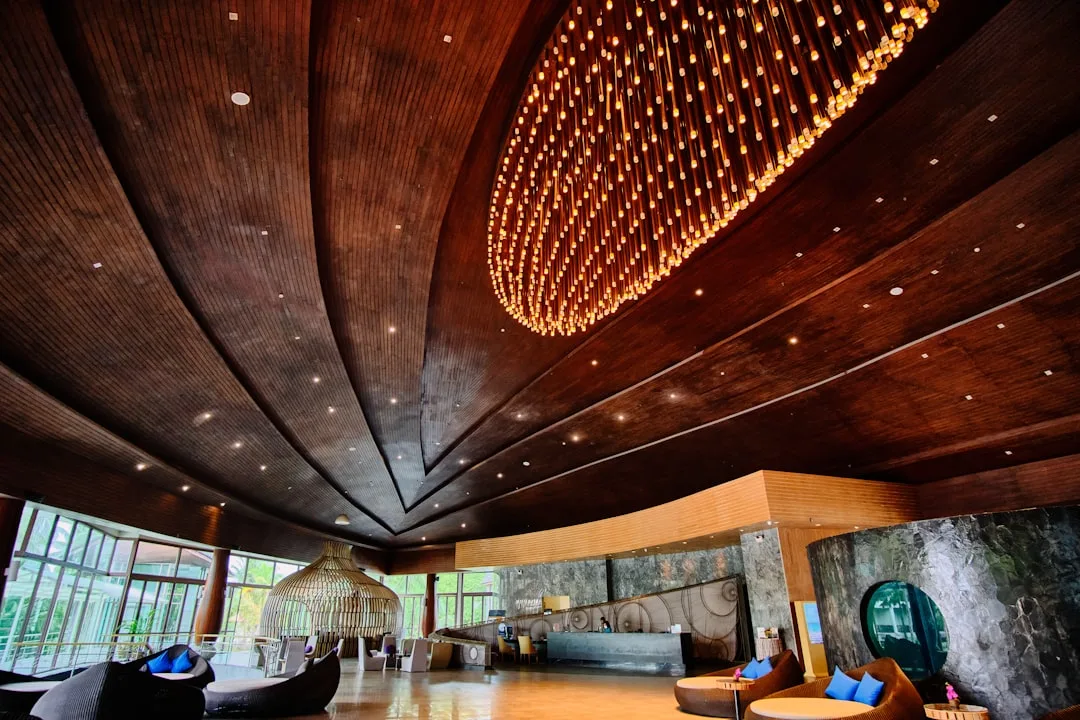
Ignoring the Ceiling as a Lighting Design Surface
There’s a default assumption baked into most residential lighting plans: the ceiling is where you put fixtures so light can travel downward. That’s not wrong. It’s just profoundly limited.
The most immediately recognizable sign of builder-grade lighting is a grid of evenly spaced recessed can lights across an entire ceiling. Every 4 feet, another can. Functional, yes. But it creates what lighting designers call the “conference room effect” — a flat, even wash of downward light that removes shadow, removes depth, and makes a room feel like it was lit by someone who was trying to avoid complaints rather than create an environment.
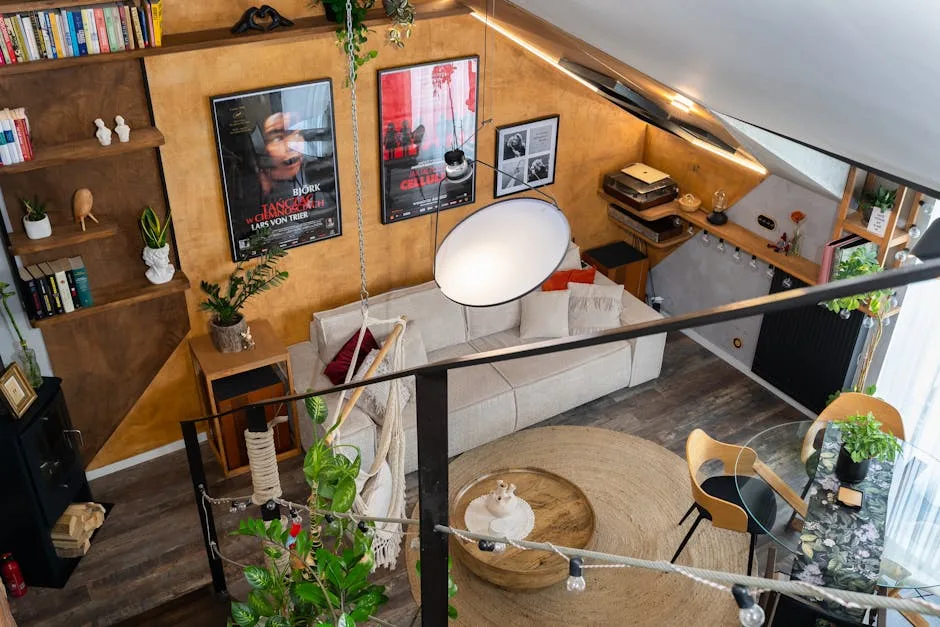
Treating the ceiling as a reflective surface rather than a light delivery mechanism is one of the most significant shifts between amateur and professional lighting design. Cove lighting — where LED strips are recessed into a ledge or crown molding detail and light washes upward — uses the ceiling itself as a diffusion surface. The result is soft, indirect illumination that feels sourceless and makes rooms feel taller. It’s not expensive to install during a renovation. It’s essentially impossible to retrofit without some construction work, which is why it needs to be planned early.
Wall-washing produces a related effect. A single linear wall-wash fixture or a row of adjustable recessed heads aimed at a vertical surface increases perceived ceiling height by 20 to 30% compared to a centrally mounted ceiling fixture of equivalent lumen output, according to lighting designers who have measured the effect across residential projects. The eye reads the bright vertical plane, traces it upward, and perceives the ceiling as higher than it is.
The beam angle mistake deserves specific attention. Recessed fixtures with narrow spot beams (around 15–25 degrees) create visible scalloping on walls — those half-moon shadows you see on the walls below can lights in commercial spaces. In a home, scalloping reads as institutional. Fixtures aimed at walls should use flood or wide-flood distributions (40–60 degrees) to avoid it.
- Evenly spaced can lights across the entire ceiling = conference room effect
- Cove lighting = soft, tall-feeling indirect ambient
- Wall-washing = perceived height gain, dimensional depth
- Narrow spot beams on walls = scalloping = institutional
Actionable takeaway: Before your next renovation conversation, specifically ask about cove lighting and wall-wash placement. If your lighting plan is all downlights on a grid, push back.
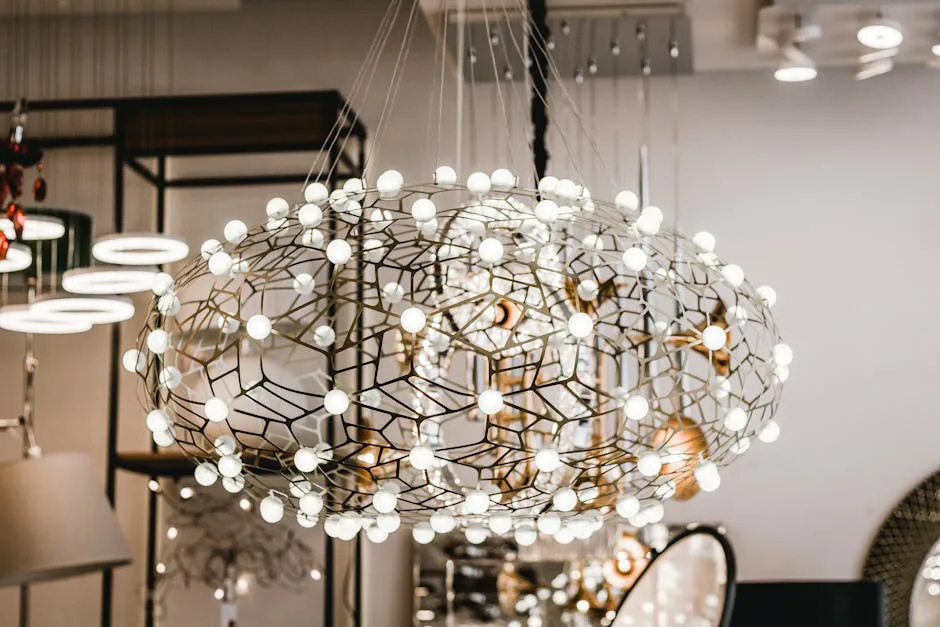
Decorative Fixtures That Perform Beautifully in Showrooms — and Fail at Home
You’ve seen the pendant. The one that looks incredible in a design magazine — hand-blown amber glass, or a dramatic cluster of exposed Edison bulbs, or a sculptural paper shade that filters light like something from a film set. You buy it. You hang it. And your kitchen island is somehow darker than it was before.
This is the showroom trap, and it catches experienced shoppers as often as first-timers. The mistake is evaluating a fixture purely as an object rather than as a light delivery system. The most visually stunning fixtures are often the worst performers — and that gap between appearance and function is what ages a space.
Lighting professionals distinguish between luminaires — fixtures engineered around light output, beam distribution, and efficiency — and decorative fixtures designed primarily around aesthetic impact. Only about 30% of consumer-grade statement fixtures are optimized for both. The other 70% look beautiful in product photography and deliver disappointing, poorly directed light in real rooms.
Some specific failure patterns to watch for:
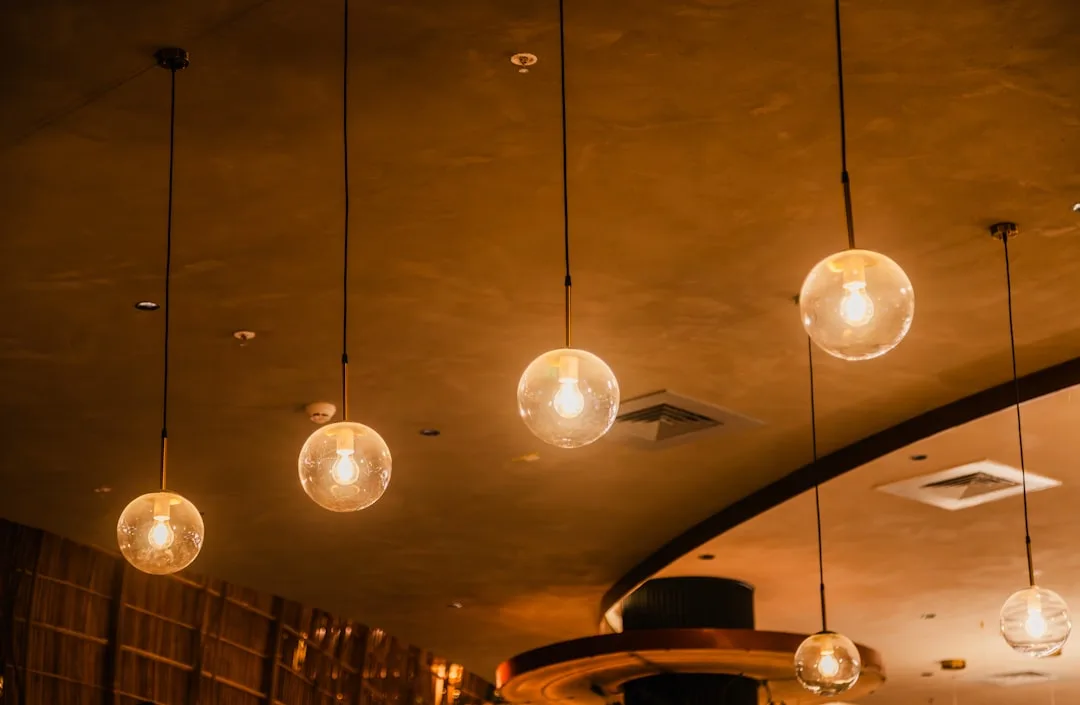
- Upward-only pendants (dome shades that close at the bottom) send all their light toward the ceiling. Beautiful glow effect. Useless for task lighting directly below. If your island pendant is this style, you’ll need under-cabinet or integrated counter lighting to compensate.
- Open filament and cage fixtures are editorially interesting but deliver bare-bulb glare at eye level. In a dining room, you’re looking directly into the light source during every meal. Within months, the editorial appeal gives way to daily annoyance.
- Oversized paper or fabric shades diffuse light so broadly that they feel warm but provide almost no directional illumination. Great as a supplemental source, not adequate as a primary one.
Before purchasing any statement fixture, look up its photometric data — most reputable manufacturers publish IES files or at minimum a light distribution diagram. What you want to know: where does the light actually go, and how much of it exits in a usable direction?
Actionable takeaway: For any statement fixture you’re considering, search the brand name plus “photometric data” or “light distribution.” If you can’t find it, ask the retailer. A fixture with no published data is telling you something.
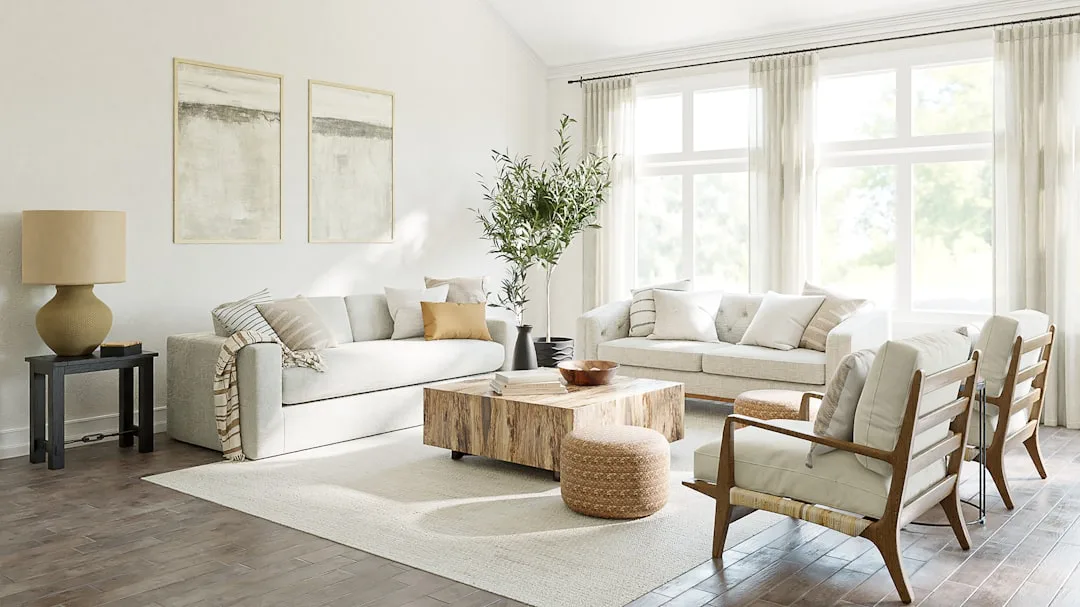
Natural Light Mistakes That Undermine Everything Else

Here’s what almost no lighting article talks about: your artificial lighting strategy is only half the equation. The other half is what you’re doing — or not doing — with the natural light that enters your home every day.
The most common natural light mistake is binary window treatment thinking. Heavy blackout curtains, fully open or fully closed. This creates two modes: daylight flooding in without control, or daylight blocked entirely with artificial lights compensating. Neither is particularly good for how a room feels over time. Research published in the journal Building and Environment found that occupants consistently rate rooms with well-integrated natural and artificial light as significantly more timeless and high-quality than rooms relying on artificial light alone. The key word is integrated — not just both present, but working together.
The direction of natural light in your rooms should inform where you place artificial sources. North-facing rooms receive cool, even, shadowless daylight all day — they benefit from warmer artificial sources (2700–2800K) to compensate for the cool cast. South-facing rooms get warm, raking light that shifts dramatically through the day — artificial lighting there should be flexible enough to supplement without fighting the dominant natural tone.
Seasonal change is almost never factored into residential lighting plans. A room that feels perfectly lit in July — when natural light fills it from 6am to 8pm — can feel dim and flat by November when the sun angle drops and the days shorten. Artificial lighting that’s adequate as a supplement may be inadequate as a primary source, and many homeowners discover this every October as if for the first time.
Competing light sources are their own problem. Placing a bright artificial light source directly opposite a window creates visual confusion — the eye doesn’t know where to settle, shadows run in multiple directions, and the room loses all sense of depth and hierarchy.
- Face artificial sources in the same general direction as your dominant natural light source
- Use sheer or translucent panels rather than full blackout treatments in living areas
- Add supplemental artificial lighting capacity to north-facing rooms to compensate for cool, flat natural light
- Revisit your lighting in October and March, when seasonal shifts are most dramatic
Actionable takeaway: Stand in your main living space in the middle of a weekday and notice where the natural light is coming from. Then check whether your lamps and fixtures are positioned to work with that direction or against it.
The Control System Gap: Why Smart Bulbs Alone Don’t Solve the Problem
Smart lighting gets sold as a solution to every lighting problem, and the market has grown to match those expectations. Grand View Research projected the smart lighting market at $38.68 billion globally by 2030. But industry installers consistently report that over 60% of smart lighting retrofits fail to meaningfully improve lighting quality — because the homeowners installing them are trying to automate their way out of a placement problem that no software can fix.
The most basic version of this mistake: installing smart bulbs in sockets wired to a standard on/off switch. When someone hits that switch, the power to the bulb cuts entirely. The smart features — dimming, color temperature adjustment, scene control — require the bulb to have continuous power. You end up with expensive bulbs that behave exactly like the $4 ones they replaced, because the circuit wasn’t designed to support them.
Smart lighting is a control layer, not a design layer. It cannot compensate for a fixture hung at the wrong height, a color temperature chosen without reference to the room’s materials, or a recessed grid that makes your living room look like a corporate lobby. Automation can make a well-designed lighting scheme more convenient. It cannot make a poorly designed scheme look good.
Scene programming is genuinely powerful when the underlying fixtures are positioned correctly. A “dinner mode” that dims overhead lights, warms color temperature slightly, and activates accent lighting can transform how a kitchen feels in the evening — but only if there are accent lights to activate and overhead lights that were placed to be dimmable without creating flat, insufficient illumination at half-brightness.
The right sequence for lighting control decisions:
- Map use cases — how the room functions at different times of day
- Design fixture placement — types, heights, directions based on those use cases
- Specify circuits — which fixtures need independent control
- Choose control hardware — dimmers, smart switches, smart hubs
- Add smart bulbs or fixtures — as the last decision, not the first
Actionable takeaway: Check every smart bulb in your home right now. If any of them are on a switch that fully cuts power, replace that switch with a smart dimmer switch (Lutron Caseta and Leviton Decora are both well-regarded at the $40–$60 range). You’ll immediately gain actual control over the full dimming range.
How to Audit Your Home’s Lighting Without Starting From Scratch
You don’t need to rip out fixtures or hire a lighting designer to start making meaningful changes. Design consultants estimate that 70% of common residential lighting mistakes can be corrected without rewiring — through bulb swaps, fixture repositioning, and adding plug-in or battery-operated supplemental sources. What you need first is an honest read of what you’re actually working with.
Use this four-question room audit for every significant room in your home:
- Does this room have light sources at multiple heights? If every light source is at ceiling level, you’re creating a flat, shadowless environment. Add a floor lamp or table lamp to create depth and warmth at human scale.
- Can I adjust the intensity independently in different zones? If every light in the room is on one switch, you have zero flexibility. Plug-in dimmers ($15–$25 at any hardware store) for floor and table lamps can give you two independently controllable circuits without any electrical work.
- Does the color temperature match the materials and the room’s purpose? Check your bulb packaging. If your living room is running anything above 3000K, swap to 2700K. If your CRI is below 90 anywhere with stone, wood, or art, upgrade the bulbs.
- Does any fixture create glare at eye level? Sit down in the room and look around at seated eye height. If you can see a bare bulb or the interior of a fixture, it’s creating glare that will fatigue anyone in that space over time.
Quick wins that require no electrician:
- Replace high-Kelvin or low-CRI bulbs with 2700–3000K, 90+ CRI equivalents
- Add plug-in sconces or floor lamps to rooms with ceiling-only lighting
- Lower pendant fixture hanging height (if there’s enough cable slack — often there is)
- Add under-cabinet LED strip lighting to kitchens for independent task lighting
Structural changes that require a professional:
- Adding new circuits or switch locations
- Installing recessed lighting or cove lighting
- Replacing fixtures that are hardwired without accessible junction boxes
- Installing dimmer switches (accessible and straightforward for most electricians, but requires proper circuit capacity)
Prioritize rooms in this order: the kitchen, the main living area, and the primary bedroom. These are the three spaces where lighting mistakes have the highest daily impact on how your home feels and how you function in it.
Start today: Pick one room. Run the four-question audit. Identify the single most obvious problem — scale, temperature, missing layer, glare — and address that one thing first. Improving lighting doesn’t require a renovation. It requires paying attention.
Frequently Asked Questions
What type of lighting makes a home look the most dated?
The single most aging lighting element in residential homes is the flush-mount ceiling fixture — specifically the semi-flush or close-to-ceiling globe style commonly installed in builder-grade construction through the 1990s and 2000s. These fixtures spread flat, diffuse light downward with no directionality, no drama, and no relationship to the architecture of the room. Brushed nickel finishes from that same era read as strongly dated as a specific font choice in a logo. Close behind: brass-finished fixtures with clear glass globes from the 1980s and early 1990s, visible in so many unchanged dining rooms and entry foyers. Interestingly, true antique brass (with an unlacquered, aged patina) has returned to favor — it’s the specific yellow-gold lacquered brass that signals that era. If your home still has boob-light globe fixtures in any room, that’s the first priority.
How do I know if my lighting fixtures are the wrong scale for my room?
Start with the room dimension calculation: add your room’s length and width in feet. That number, converted to inches, gives you a target diameter for a centrally placed ceiling fixture. So a 12 x 16-foot room (28 total) calls for roughly a 28-inch diameter fixture. Most people underestimate by 30–40%. For dining pendants and kitchen island pendants, the hanging height is equally important as the diameter. Photograph the fixture from across the room rather than looking up at it — photos reveal scale relationships that proximity hides. If the fixture disappears visually, it’s too small. If it dominates the room to the point where you notice it before anything else, it’s likely too large (though oversizing is far less common a mistake than undersizing in most residential contexts).
What color temperature is best for living spaces to avoid an aged or clinical look?
For most living rooms and primary bedrooms, 2700K is the target — warm white that reads as incandescent and feels genuinely residential. Pair it with a CRI of 90 or higher for the best rendering of materials and finishes. In kitchens where you want slightly more visual energy and clarity for food preparation, 3000K is the right balance between warmth and brightness without crossing into clinical territory. Avoid anything above 3500K in any living space unless it’s specifically for a task area that benefits from high visual acuity (a detailed craft workspace, for example). The 5000K daylight bulbs marketed as “natural” or “bright” are appropriate for workshops and garages. In a bedroom or living room, they make the space feel aggressive and expose every texture imperfection in your walls.
Can I fix lighting mistakes in my home without rewiring or hiring an electrician?
For most homes, yes — significantly. Design consultants consistently find that roughly 70% of residential lighting problems don’t require new wiring. The most impactful no-electrician fixes are bulb replacements (upgrading to the right Kelvin temperature and CRI rating), adding plug-in floor and table lamps to rooms with ceiling-only lighting, lowering pendant fixtures by adjusting their cable length, replacing standard switches with plug-in dimmers for lamps, and adding battery-operated or rechargeable LED puck lights inside cabinets or on open shelves for accent and task lighting. Where you do need an electrician: adding new circuits, converting a non-dimmer switch to a dimmer (straightforward and usually inexpensive), installing new recessed fixtures, and running power to locations that currently have none. If you’re prioritizing, the bulb swaps and lamp additions alone can shift how your home feels substantially before you commit to any construction work.