Category: Industrial Design

  • Essential Tips for Timber Floor Sanding and Polishing

    Essential Tips for Timber Floor Sanding and Polishing

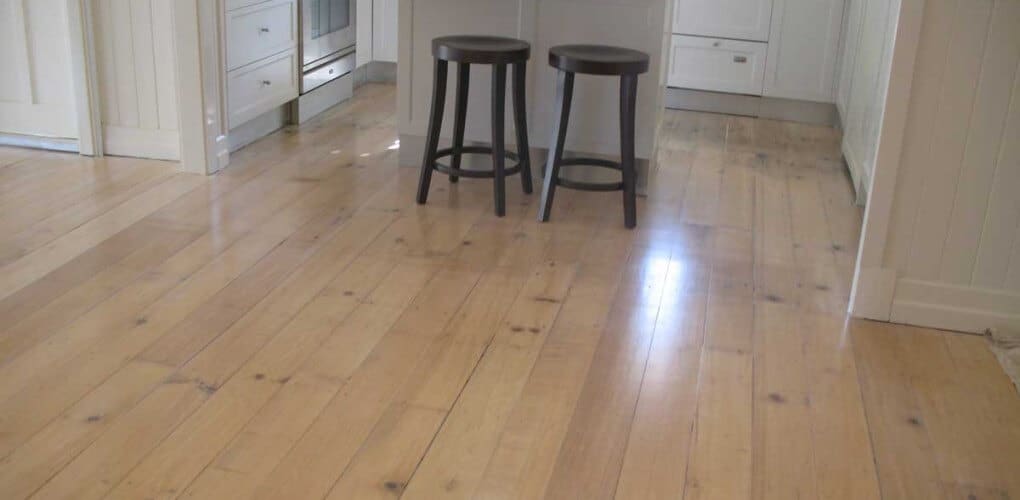
    A beautifully polished floor can potentially enhance the value and breathe new life into a home. Whilst using do-it-yourself methods may appear like a fairly straight forward exercise, DIY floor sanding and polishing can be extremely challenging. In the event that the process is not tackled in a carefully managed manner, costly mistakes can easily occur. It is, therefore, imperative to properly prepare the timber floor before polishing, including thoroughly sanding the floor. Below are some essential tips for timber floor polishing in Brisbane:

    floorSanding

    floor-Sanding

    • At the beginning of the DIY timber floor processing procedure, it is crucial to remove all the roughness in the floor, as well as any previous coatings. This can be achieved using a drum sander or a belt sander. Floor sanding and polishing also involves the use of a range of sand papers.
    •  One should measure the coarseness of the sandpaper by grit; the lower the grit, the courser the sand paper. Most floors will essentially require the use of a 40-grit sandpaper, moving up to a smoother 80-grit. In the event that the floor is really rough, supposedly made of reconditioned or recycled timber, it is advisable to use something like 24-grit sandpaper.floorSanding-01
    • floorSanding-01a
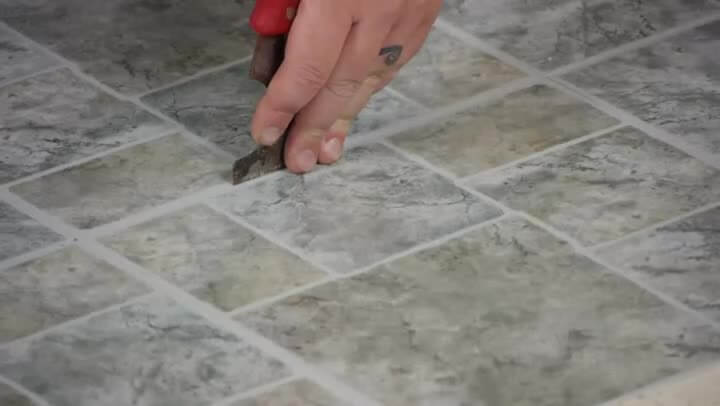
    • The next step is smoothing out all the areas that a belt sander cannot reach using a circular sanding disk of approximately 18 centimeters diameter, called a floor edger. However, this polishing machine is often incapable of reaching the corners, for which one will require using a triangular sanding machine or scraper. This is followed by going over the floor with an orbital sander, while using 120-grit sandpaper. This will serve to remove the linearity of the sanding marks. Subsequently, the floor should be vacuumed to get rid of the dust.
    • At this point, the floor is ready for coating. It is important to seal the edges using a brush, followed by evening out the coating with a roller. The initial coat should be applied out of the roll tray, whilst working along the grain as much as possible. It is important to note that the initial coat will often appear very ordinary. This is attributable to the fact that it’s the one causing any grain raising.
    • The next step involves employing an orbital sander, with a 120-150 grit paper to eliminate all the roughness occurring during the coating. Normally, one is required to wait for at least 8 hours before applying 2 more coats. These 2 coats must be applied in a timely fashion, subsequent to which the floor is left for about 24 hours before walking on it.
    • When polishing a timber floors, it is extremely vital to wear safety gear, including ear muffs, dust mask and breathing mask. These serve to prevent the person polishing the floor from inhaling fumes and dusts. Moreover, if they are working with solvent-based polishes, they will want to ensure that there are no pilot lights on anywhere in the house, lest the evaporating solvent ignites. It is also essential to read the instructions on the products and equipment before embarking on timber floor polishing in Brisbane.

    From the foregoing, it is apparent that timber floor sanding and polishing is not an easy task. For people who are still unsure of what to do, they should consider contacting a professional floor polisher in their area to learn how to polish timber boards. Those seeking to have their floors looking amazing may contact Apex FloorsfloorSanding-1

    floorSanding-03

    They are extremely knowledgeable on matters to do with sanding and polishing, repair and resurfacing and installation of new floors among other services. More information can be found on http://www.apexfloors.com.au/.floorSanding-14a

    floorSanding-04

  • Essential Living Room Pieces through the Years

    Essential Living Room Pieces through the Years

    Author Mark Brandon loves the company of family and friends when it comes to home renovation and improvements. He constantly shares his viewpoints at Safe and Sound Property Inspections to help others who need tips and tricks to improve their homes. This article highlights some of the best living room pieces that have shown importance through the years.

    Living-Room-Pieces

    Through the years, more and more home design aspects have changed but despite the constant shifting of ideas there are living room essentials that could never be replaced. Taking a close look at some of the best designed homes from around the world will show the best pieces that must be present in every living room space (to also help increase your home’s value).Living-Room-Pieces1

    Sofa

    Considered to be the most essential piece for every living room, sofas over the years have developed to more elaborate designs. There are some that comes as one entire piece while others are made to several sections and can be detached from one another. Another great improvement for sofa pieces would be the additional functionality as some are made to accommodate fold in or slide out beds.Living-Room-Pieces-6

    Extra Chair

    Meant as an additional space to sit on for guests or an additional focal point for design, living rooms are arranged to have an extra chair or seat placed near the sofa. For more precise design trends and decorations some are exactly matched to the sofa set or are bought to contrast the color and design of the sofa. Current improvements to living room design have turned the extra chair from one to two or even three pieces in a space and are flexible to move around to informally increase space or bring a change of scenery for guests.

    Table

    Mostly positioned in the middle, a living room is never complete without that table that is often populated with either reading materials, a vase filled with flowers or even a fresh plant. As part of the designing aspect it accentuates the rest of the pieces in the room and can cut through the detail of entire area when repositioned in a different angle. What is great about living room tables is it can come in any shape or size yet it ensures that the entire room styling is complete.Livin-Room-Pieces-2

    Lighting

    Whether an elaborate chandelier or a corner lamp, living room lighting is an essential piece that can never be left out of any home. Despite some home designs that capture a large amount of natural light in the day time, lighting pieces are still considered must-purchase pieces that are never forgotten.

    Television or Art Work

    Somehow living rooms would turn out bare and incomplete without the popular television set or if need be several pieces of art work like paintings or sculptures well placed throughout the entire room. Common to the custom of guests brought straight to the living room, the possibility of making them feel at home is what these essential pieces work to build for the guests, but design-wise these are pieces that pop out to add a holistic design trend that captures the eye of the beholder.

    Time Piece

    It can be classic as a grandfather clock or silly as a wall cuckoo clock, living room areas have surpassed time and design styles without having to do without a time piece. Somehow the chance of time flying by when guests arrive has become the real essence of a time piece being present in the room, but truthfully the authentic living room design can never really be considered complete without the accent of a proper time piece.

    Image Sources: [1] [2] [3] [4] [5]

    Author: Mark Brandon

    Mark is a regular contributor to Safe and Sound Property Inspections blog and other home improvement sites. He is family-oriented and loves being in the shed or helping mates with their houses. If you would like to catch him and pick his brain, you can via Google+ or Twitter: @DIYMarkBrandon


  • Rustic Industrial Bathrooms

    Rustic Industrial Bathrooms

    If you watch a lot of home renovation shows on TV or enjoy flipping through design magazines, you’re well aware that “industrial rustic” is trending in the interior design world these days.

    Not sure what we’re talking about? Industrial rustic might sound like a bit of a style conflict and it kind of is—but it’s a conflict that totally works! Think contrasting elements, like vintage patterns, alongside hard edges and cold metal textures alongside warm wood finish. The effect is certainly eclectic, but it can be truly stunning! Best of all, since industrial rustic is all about “unfinished” finishes and mixing and matching, it can be one of the most affordable interior design themes!

    If you’re ready to incorporate an industrial rustic theme into your home, the bathroom is a great place to start! Let us share a few ideas with you about how to design the industrial rustic bathroom of your dreams.

    1. Connecticut Barn Refurbished by New York Practice S. Russell Groves

    The streamlined bathroom and white walls in this bathroom would be sterile on their own, but the natural wood rafters and rustic stone tiling on the floor warm up the space. A perfect example of how two clashing styles can complement each other perfectly!Rustic-Industrial-Bathrooms

    Found on onekinddesign.com

    1. Lodge Style Bathroom

    Between the antique dressing table and exposed wood paneling, this bathroom incorporates more rustic design elements than industrial. That said, the distinctly modern sink and features add a nice industrial contrast and gives the whole room a lot more texture.Rustic-Industrial-Bathrooms-1

    Found on refeathered.com.

    1. Masculine and Edgy Rustic/Industrial Bathroom by Carla Aston

    Nothing is more rustic than natural wood finish and beaming, but that’s about the only rustic thing in this bathroom. The hard edges, slate accent wall, and straight lines in this design give off an industrial vibe that’s masculine and edgy. You can add more character to your bathroom with metal decorations.Rustic-Industrial-Bathrooms-2

    Found on CarlaAston.com

    1. Hillside Retreat Modern Bathroom by Witt Construction

    This bathroom is about as minimalist and industrial as it gets, but the cobblestone-like tiling and natural wood sink base complements the space with a beautifully warm and rustic vibe. We love the contrast of the worn and tattered white washcloth with the modern art style of the hanging light fixture! This is a true example of how completely opposing styles can play off one another to bring out the best of both elements!Rustic-Industrial-Bathrooms-3

    Found on Houzz.com.

    1. Transitional Master Bathroom with Skylight

    Industrial rustic is most commonly associated with bohemian and masculine designs, but this isn’t always the case. Below is a perfect example of how rustic and industrial styles can be mixed with classic elements for an eclectic yet luxurious look.

    The matte wainscoting and natural marble countertop give off a rustic vibe. The glossy black finishes, hard glass lines of the shower, and skylight give a distinctly modern and industrial impression. Also the feminine bathroom accessories used in here like the classic hanging chandelier, crystal knobs on the cupboards, and floral elements pull the whole room together for a stunning effect! Rustic-Industrial-Bathrooms-4

    Found on photos.hgtv.com

    Author Bio:

    Anne Flemings loves interior designing and is always in pursuit of the latest changes and trends in home improvement. Her other interests lies in cooking, painting and blogging. She is an enthusiast homemaker who lives in Toronto with her husband and two kids. She can be followed on twitter.

  • How to Remove Glue from Flooring After Tile Removal

    How to Remove Glue from Flooring After Tile Removal

    Removal of tiles is a process involving two parts. Firstly, the tiles have to be removed – by cutting them with the right tool, you can find out more by reading tile saw reviews. Secondly, the adhesive, which was holding the tiles, has to be removed. Based on the adhesive type and the tile type, you can use different methods to remove the glue. It is important to clear away the adhesive well, prior to installing new flooring.

    How-to-Remove-Glue-from-Flooring-After-Tile-Removal

    Here is a guide on removing different types of adhesives that you may come across after tile removal:

    Removal of Tile Mastic:

    Mastic, an organic compound, is employed for adhering wall tiles that are put in dry areas. Older floors and counters also may have mastic used on them. Mastic is not resistant to water. It disintegrates and dissolves if water comes in contact with it. So, water is an effective adhesive remover for it. For removing excessive mastic after removal of tiles, soak many clothes in water, and then lay these clothes over the mastic. Allow the mastic to absorb the water, until you find it as soft. The remaining adhesive should then be scraped off using a putty knife. This strategy, unfortunately, can’t be used for removing paint from tile.

    Removal of Thin Set Mortar:

    Thin set mortar is one of the products of Portland cement. It is used in wall tiles and on floor in many areas. After drying, thin set mortar becomes resistant to water, durable and tough, but also brittle. Large amounts of thin set mortar often come up along with the tiles, and leave behind random amounts along with an uneven layer. If you think you can’t afford a professional tile remover or the home lead-test kit, you might have to find a way to get funding. To help cover the expenses, see if LoanMart can help.

    The random amounts should be pried and chiseled to prevent the substrate below from getting damaged. Fit a pry bar’s one end under the larger amounts of thin set mortar, and apply pressure on its other end for pulling up the larger amounts. You can remove the smaller pieces by aiming a chisel at the smaller pieces’ base. The chisel should be held at an angle of 45 degree to the substrate. Hit the chisel’s end using a hammer to clear away the mortar slowly.

    Removal of Vinyl Tile Adhesive:

    Vinyl Tile Adhesive is one of the flexible adhesives, and becomes stronger with time. So, vinyl tiles that you laid down before 1 year, can be removed more easily than those laid down before 20 years. Based on the time passed after laying of the tiles, you may scrape up the glue quickly, or you may need to have some patience.

    Start with scraping the maximum possible amount of the adhesive using a putty knife. If you find it unyielding and hard, apply some heat to soften it. To apply heat, a heat gun can be aimed at the adhesive, or an iron can be held a few inches above the adhesive. Remember that you should never place any hot object on the adhesive directly. Wait for a few minutes to let the glue start softening, and then scrape up the remaining glue, you can use the tools from the https://toolaim.com/ company.

    Using Solvents:

    There are times when water and heat are not enough for softening vinyl tile adhesive and mastic that are very old. In such cases, you will need an adhesive remover solvent for breaking down the adhesive, so that you can scrape it up. Get a solvent designed for the adhesive type you wish to remove. Ventilate the area well and apply the solvent on the glue liberally. Wait at least an hour for the solvent to start breaking down the glue, and then scrape up the remaining glue. You may require a combination of several solvents along with other methods for clearing away all the adhesive.

    Warning:

    In case, your tile flooring was installed before 1984, and/or the glue beneath it appears tar-like or black, your glue may consist of asbestos fibers. Asbestos was used quite often during the 1970s and 1960s, and during the early 1980s in some jobs, for attaching linoleum and vinyl flooring tiles.

    If you suspect that your floor adhesive or tile floor contains asbestos, never try to remove the tiles or the adhesive on your own. Doing such may release the asbestos fibers into the air, which may pose a risk for health. Seek the assistance of a professional tile remover or installer. You can find a home lead-test kit in many hardware stores.

    This guide will help you remove different types of glues that are left behind after the removal of floor tiles. However, be cautious while doing such jobs and keep in mind the warning given here.

    Mia Jones lives in California. She is working as Content Developer in Advanced Die Supplies, Inc. She loves to pen down her expertise in her blogs. In this article, she is talking about step by step guide for removing adhesive from concrete.

  • Jam Furniture: Making reclaimed timber contemporary

    Jam Furniture: Making reclaimed timber contemporary

    They are inspired by reclaimed materials and minimalist design. The team at Jam have a passion for working with timber that tells a story, timber that has had a life long before it was carried through the workshop doors. Each piece is considered ensuring they can retain all of the character that you just can’t recreate without the passage of time. Components are designed around the timber that frame it and celebrate it. Locally sourced folded and powder coated steel is their complementary material of choice. The confident clean geometry of the steel has an appealing contrast against the unpredictable surfaces of the reclaimed timbers.

    001-Jam-Table-Hero-1-900

    This table is made from the last of their absolutely stunning 70 year old Australian reclaimed cypress pine. The timber still hints at its past life with exposed nail holes along both edges and is finished in their own (secret) recipe Beeswax polish which gives a beautiful satin sheen and extenuates the character of the grain. The polish is 100% natural, even edible. The table top sits on extremely sturdy and almost industrial folded steel legs. Black rivets subtly accentuate the folds in the steel. The gleaming white powder-coated legs contrast beautifully with the deep red knotted timber.

    001-Jam-Table-Hero-2-900

    Jam was established by Ben Cramp in 2013 and is located on the rugged West Coast of Wales in the UK. A devoted designer who genuinely cares about the environment, Ben delivers furniture that is bound to enhance any space. They have some exciting new products all using reclaimed timber due to be released before the end of the year. Watch this space.

    DSC_0890-900

    DSC_0862-900

    DSC_0485-900

    001-Jam-Table-Side-Detail-2-900

    001-Jam-Table-Side-Detail-1-900

    001 Jam Table Top Detail 1 900

    001 Jam Table Leg Detail 2 900

    001 Jam Table End Detail 1 900

    “We believe in quality. We’re proud of everything Jam stands for and everything we make.”

  • Handcrafted Customizable Workspace for Creative People by Wiktoria Lenart

    Handcrafted Customizable Workspace for Creative People by Wiktoria Lenart

    Everyone has its own way of organizing his home work desk and it’s no longer a secret that we like to be as original as possible, to add a little bit of personal touch to the work environment as well. There are hundred of innovative design ideas on the furniture market nowadays, that you don’t know where to look first and what to choose.

    What we know for sure is that aesthetics and functionality are two main elements that goes hand in hand when we talk about home workspace. In this post, we’re presenting you an awesome project discovered on behance.net that draw immediately our attention. It’s called “WorkNest” and is envisioned by young Polish designer Wiktoria Lenart for those of you who are extremely creative and tend to become disorganized as they are more involved in everyday tasks.

    Wood-work-table-by-Wiktoria-Lenart

    Designed to improve working conditions, “WorkNest” is a handcrafted customizable desk system that allows you to be messy in an organized way. The idea was to create very simple elements that give the users the ability to control the seeming chaos that marks your desks,  but where everything still remains in its own place. The clean, modular design is made to echo the personality of its user, leaving you to choose between a minimalist desk and several storage structures.

    WorkNest consists of a base unit, a handmade ashwood surface, whose top is carved along the edges with long grooves. Plastic buckets and bent metal panels can be fitted into these to form book and supply containers, writing surfaces, and display boards. Best of all, the containers can be filled with potting soil to hold plants that will brighten up your work environment.  By moving these 15 different accessoires, you can easily addapt the workplace on your creative way, according to your needs. Whatever shape it takes, it will definitely become a great place to work from home, very appealing too. Amazing concept, don’t you agree?

    According to designer, WorkNest will be soon for sale, but it isn’t very sure yet if in a limited or permanent edition.

    WorkNest-detail
    WorkNest-with-accessories
    WorkNest-system-by-Wiktoria-Lenart-01
    Creative-WorkNest
    Modular-work-system
    Table-with-accessories
    Space-divider
    WorkNest-system-by-Wiktoria-Lenart
    Photos © Wiktoria Lenart

    WorkNest by Wiktoria Lenart


  • Beautiful Lighting Collection Reinterpreting Scandinavian Style

    Beautiful Lighting Collection Reinterpreting Scandinavian Style

    Stylish and very appealing, this lighting collection we’re presenting you today is designed by Christophe Mathieu for Spanish brand Marset. It’s called “Maranga” the name of a fruit, an imaginary fruit: exquisite, tempting, succulent. With a decorative, yet restrained visual approach, “Maranga” lighting collection takes inspiration from Scandinavian design style showcasing meaningful simplicity and attractive shape.

    Maranga-suspention-lamp

    The designer wanted to accomplish a lightness feeling, to create a light and dynamic object that generate a warm and cosy atmosphere. So the interesting feature of the collection is that 32 slice-like pieces are fitted together to form each shade, idea that enables chinks of light to escape. Therefore, the result is a direct light with a diffuser, but also a non-direct light from the segments. This interplay of light and dark generates an extremely wonderful effect which is rich in shades of light and prevents glare, and doesn’t disturb us. In this lamps the important part is the empty one, where the light comes from.

    “Maranga” collection is available in two diameters – 32cm and 50cm – which can combine to form 2 floor lamps, 2 table versions, 2 hanging and one ceiling lamp. It comes in 3 colours: white, sand and dark grey.

    Beautiful-suspension-lamp

    Maranga-floor-lamp

    Maranga-table-lamp

    Photos @marset.com

  • Mango Smartphone Case for iPhone 5 and Samsung Galaxy S3

    Mango Smartphone Case for iPhone 5 and Samsung Galaxy S3

    Do you own an iPhone 5 or a Samsung Galaxy S3 and you are looking for a case with a simple yet smart design to protect your device? We find Mango by Korean firm id:iP, a versatile and ingenious smartphone case made of silicon that not only make your phone look nice, but also make things easier when you’ll use it. With a patented stand and grip function, Mango case features a functional design designed to allow users to view their smartphone through the most advantageous viewing angles, especially when only one hand placed on the desk is available.

    iPhone5-case

    On the backside, it has a large orifice which serves as a stable finger grip for phone call, game, web surfing and texting. The case is actually comfortable to use and in this way, the users will no longer be stressed that they would drop the phone. Mango allow users to mount it both vertically and horizontally, so it’s perfect for watching videos when your hands are occupied with something else. It can be used as well as a stand for your iPad. Simple and easy! Place the smarphone horizontally and rest the iPad on it. Available in 6 trendy colors.

    iPhone5-silicon-case

    Galaxy-S3-case

    Samsung-Galaxy-S3-case

    Photos © id:iP